![[Top 5] Dead By Daylight Best Jill Valentine Builds dbd, dead by daylight, jill, resident evil](/sites/default/files/styles/responsive_image_600xauto/public/2021-09/top_5_dead_by_daylight_best_jill_valentine_builds_-_main.jpg.webp?itok=OtmSsp75)
[Top 5] Dead By Daylight Best Jill Valentine Builds
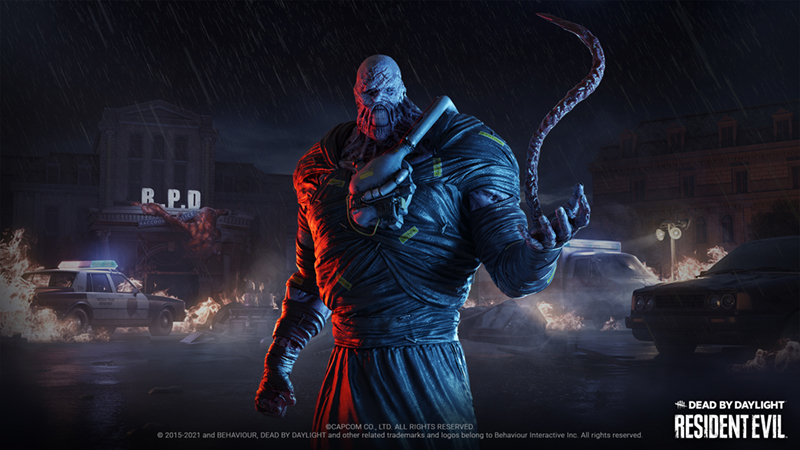
Jill Valentine was introduced to Dead by Daylight in the Chapter 20: Resident Evil DLC alongside the killer The Nemesis, and the other survivor, Leon Kennedy. The Resident Evil DLC is something players have been wanting and looking forward to, and the teachable perks that Jill brought with her brings some interesting new ways to build our characters. Let’s look at the best builds we can use with Jill’s teachable perks.
5. Blast Away
JILL VALENTINE.EXE
For our first build, we have Blast Away, which uses Jill’s teachable perk Blast Mine.
Blast Mine allows you to trap a generator after you have been repairing it for at least 3 seconds. When you have installed the trap, and the killer kicks the gen, the trap explodes, stunning and blinding anyone nearby. This is mostly used as a way to buy some extra time for you to getaway.
Next, we have Dead Hard, which is a strong exhaustion perk that will allow you to extend your chases for an extra loop or two. While you are injured and press the active ability button you can dash forward to get some extra distance towards a pallet or window that you wouldn’t have made it to previously.
Then we have Resilience, which gives you 9% extra action speed towards nearly all actions. This includes vaulting, which will help you out in chases when vaulting windows.
Lastly, we have Self Care which will allow you to heal yourself at half the speed of someone else healing you.
What Blast Away Excels In:
- Annoying the killer.
- Strong exhaustion perk.
- Good chase perks.
- Self healing.
Perks Used:
Blast Mine: After repairing Generators for a total of 66%, Blast Mine activates:
- After repairing a Generator for at least 3 seconds, press the Ability button to install a Trap, which stays active for 35/40/45 seconds.
- The Aura of Trapped Generators are revealed in yellow to all Survivors.
- A Generator can only be affected by one instance of Blast Mine at a time.
- When the Killer damages a Trapped Generator, the Trap explodes, stunning them and blinding anyone nearby.
- Blast Mine deactivates after triggering successfully.
Dead Hard: Press the Active Ability button while running to dash forward.
- Avoid any damage during the Dash.
- Dead Hard causes the Exhausted Status Effect for 60/50/40 seconds.
- Dead Hard cannot be used when Exhausted.
Resilience: When injured, your Action speeds in Repairing, Healing, Sabotaging, Unhooking, Vaulting, Cleansing, Opening, and Unlocking are increased by 3/6/9%.
Self Care: Unlocks the ability to heal yourself without needing a Med-Kit at 50% of the normal Healing speed.
- When using a Med-Kit, its Depletion rate is decreased by 10/15/20%.
4. Healing Totems
This NEW Perk Combo Is BROKEN - Dead by Daylight
For our next build, we have Healing Totems, which revolves around getting totems cleansed, and then giving yourself a quick heal by jumping into lockers.
To do this we have Jill’s teachable perk Counterforce. Counterforce allows you to cleanse totems 20% faster, and get a stackable 20% cleansing speed for every other totem you cleanse. This also shows you the aura of the totem furthest from you for 4 seconds.
After you have cleansed a totem, Inner Strength will be active, meaning that when you are injured you can jump into a locker, and heal 1 health state after you have been inside for 8 seconds.
Our last two perks are unrelated, but help us while we are injured. We have Resilience which gives you a 9% action speed increase towards vaulting, as well as cleansing, so you can cleanse totems even faster.
Lastly, we have Dead Hard which will help you extend chases by getting you to a pallet or window that you otherwise wouldn’t have been able to get to.
What Healing Totems Excels In:
- Fast totem cleansing speeds.
- Easy to find totems.
- Fast self healing.
- Strong exhaustion perk.
Perks Used:
Counterforce: You cleanse Totems 20% faster.
- Gain another, stack-able 20% Cleansing Speed bonus per cleansed Totem.
- After cleansing a Totem, the Aura of the Totem farthest from you is revealed to you for 2/3/4 seconds.
Inner Strength: Each time you cleanse a Totem, Inner Strength activates:
- You are automatically healed 1 Health State when hiding inside a Locker for 10/9/8 seconds while injured or suffering from the Deep Wound Status Effect.
- Inner Strength does not activate if you currently suffer from the Broken Status Effect.
Resilience: When injured, your Action speeds in Repairing, Healing, Sabotaging, Unhooking, Vaulting, Cleansing, Opening, and Unlocking are increased by 3/6/9%.
Dead Hard: Press the Active Ability button while running to dash forward.
- Avoid any damage during the Dash.
- Dead Hard causes the Exhausted Status Effect for 60/50/40 seconds.
- Dead Hard cannot be used when Exhausted.
3. BOGO Heals
BEING IMMORTAL IN SOLO QUEUE | Dead By Daylight
BOGO Heals is all about killing two birds with one stone. Meaning we will get to heal two people by only healing once. This is possible thanks to Jill’s teachable perk, Resurgence.
With Resurgence, when you are unhooked, you are automatically healed to 50% of your healing progress.
Now since we are 50% healed, how do we heal ourselves and one other person completely? Well if the person that unhooked you is injured, you can heal them completely and with Solidarity, it will convert 50% of the healing you have done to somebody else, back to you. Meaning they are completely healed, and with your original 50% from Resurgence, you will be fully healed as well.
Next, we have Botany Knowledge, which will give you faster healing speeds by 33%.
Lastly, we have Adrenaline, which will completely heal you 1 health state after the exit gates are powered, as well as giving you a 150% sprint speed for 5 seconds.
What BOGO Heals Excels In:
- Great healing efficiency.
- Faster heals.
- Strong end game perk.
Perks Used:
Resurgence: After being unhooked or unhooking yourself, instantly gain 40/45/50% to your Healing progress.
Solidarity: When injured, healing another Survivor without using a Med-Kit also heals you with a Conversion rate of 40/45/50%.
Botany Knowledge: Healing speeds, as well as the efficiency of Med-Kits, are increased by 11/22/33%.
Adrenaline: When the Exit Gates are powered, instantly heal one Health State and sprint at 150% of your normal Running speed for 5 seconds.
- Adrenaline is on hold if you are disabled at the moment it triggers and will instead activate upon being freed.
- If playing against The Nightmare, Adrenaline will wake you from the Dream World upon activation.
- Adrenaline ignores an existing Exhaustion timer, but causes the Exhausted Status Effect for 60/50/40 seconds.
2. Hex Huntress
The "Hex Huntress" Jill Valentine STRIKES AGAIN!! | NEW PERK BUILD | Dead By Daylight
Hex Huntress is all about finding and cleansing all of the totems on the map. To do this we have Jill’s teachable perk Counterforce.
Counterforce allows you to cleanse totems 20% faster, and an extra 20% for each totem you have cleansed yourself. After you have cleansed a totem you also see the aura of the furthest totem from you for 4 seconds.
Next, to help with totem hunting we have Small Game, which will give you an auditory warning when you are facing the direction of a totem within 12 meters of you. With these 2 perks, it should be very easy for you to find all of the totems on the map relatively quickly.
After that, we have two perks that don’t necessarily help with totems. Fixated allows you to walk 20% faster and see your own scratch marks.
Lastly, we have Sprint Burst which will allow you to have 150% sprint speed for 3 seconds when you start your sprint. You can either use this to try to run to the next totem or to try to get some more distance from the killer when they spot you.
What Hex Huntress Excels In:
- Finding and cleansing totems very quickly.
- Faster walk speed.
- Good exhaustion perk.
Perks Used:
Counterforce: You cleanse Totems 20% faster.
- Gain another, stack-able 20% Cleansing Speed bonus per cleansed Totem.
- After cleansing a Totem, the Aura of the Totem farthest from you is revealed to you for 2/3/4 seconds.
Small Game: Get an auditory warning when looking in the direction of Totems in a 45 ° cone within 8/10/12 meters.
- Small Game has a cool-down of 14/12/10 seconds each time it activates.
- For each Dull or Hex Totem cleansed by any Player, Small Game gains 1 Token:
- Each Token decreases the Detection cone's angle by 5 °, down to a minimum of 20 °.
Fixated: You walk 10/15/20% faster and can see your own Scratch Marks.
Sprint Burst: When starting to run, break into a sprint at 150% of your normal running speed for a maximum of 3 seconds.
- Sprint Burst causes the Exhausted Status Effect for 60/50/40 seconds.
- Sprint Burst cannot be used when Exhausted.
1. Flash Trolling
Dead By Daylight Flashbang/Blast Mine Build - Survivor Builds 2021
For our final build, we have Flash Trolling, which is mostly a for fun build, and it is a lot of fun.
First, we have Jill’s perk Blast Mine, which allows you to trap a generator after you have worked on it for at least 3 seconds. You can then install a trap onto the generator and when the killer comes to kick it, anyone near the generator will be stunned and blinded for 3 seconds.
Then we have Flashbang. When you have repaired at least 50% of a generator, Flashbang activates, and you can run inside of a locker and craft a Flashbang. With the Flashbang you can drop it and it will blind anyone near it, as long as they aren’t looking up.
Then we have Head On, which will allow you to quickly burst out of a locker and stun the killer if they happen to be in front of it.
Lastly, we have Red Herring. After you have worked on a generator for at least 3 seconds, you can run into a locker, and when you do, it will create a loud noise notification at the generator you marked.
The big combo with this build is to ideally find a generator next to a locker, get it to 50% progress so you can craft a Flashbang, run to the locker and enter it, which activates Red Herring, creating a noise notification at the generator. While you are waiting for the killer to come by, you can craft your flash grenade in the locker. Hopefully, the killer comes by, kicks the generator and gets blinded by your Blast Mine trap. After this, they will hopefully come near the locker, and you can burst out with Head On and stun them again. After you have stunned them, drop your flash grenade and blind them one last time.
Is this the best build to escape, no of course not, but it is a good build to have some fun.
What Flash Trolling Excels In:
- Lots of fun.
- Lots of stuns.
- Lots of blinds.
Perks Used:
Flashbang: After repairing Generators for a total of 70/60/50%, Flashbang activates:
- Enter a Locker while empty-handed and press the Ability button to craft a Flash Grenade.
- The Flash Grenade is left behind when escaping the Trial.
Blast Mine: After repairing Generators for a total of 66%, Blast Mine activates:
- After repairing a Generator for at least 3 seconds, press the Ability button to install a Trap, which stays active for 35/40/45 seconds.
- The Aura of Trapped Generators are revealed in yellow to all Survivors.
- A Generator can only be affected by one instance of Blast Mine at a time.
- When the Killer damages a Trapped Generator, the Trap explodes, stunning them and blinding anyone nearby.
- Blast Mine deactivates after triggering successfully.
Red Herring: After repairing a Generator for at least 3 seconds, its Aura is highlighted to you in yellow.
- The Generator stays highlighted until it is either fully repaired, you start repairing another Generator, or enter a Locker.
- Entering a Locker will trigger a Loud Noise notification for the Killer at the highlighted Generator's location.
- Red Herring has a cool-down of 60/50/40 seconds.
Head On: While standing in a Locker for 3 seconds, Head On activates.
- When performing a rushed action to leave a Locker, stun the Killer for 3 seconds if they are within range.
- Head On causes the Exhausted Status Effect for 60/50/40 seconds.
- Head On cannot be used when Exhausted or when you have accrued Stillness Crows.
You May Also Be Interested In:
- Dead by Daylight Survivor Guide: Top 25 Tips
- Dead by Daylight Killers Guide: Top 25 Tips
- [Top 10] DbD Best Killer Builds That Are Great!
- [Top 100] Dead By Daylight Best Names
- [Top 10] DbD Best Survivor Builds That Are OP!
- [Top 10] DbD Best Killers And Why They're Good
- [Top 15] DbD Best Killer Perks And Why They're Good
- [Top 15] DbD Best Survivor Perks And Why They're Good
- [Top 10] DbD Best Survivors And Why They're Good
- [Top 10] DbD Best Survivor Builds That Are Great
- [Top 15] Ghost Games To Play Today
- [Top 15] Horror Movies That Were Books
- [Top 15] Best Horror Movies That Were Banned
- [Top 5] Dead By Daylight Most Fun Survivors
- [Top 5] Dead By Daylight Best Jane Romero Builds
- [Top 5] Dead By Daylight Best Meg Thomas Builds
- [Top 5] Dead By Daylight Best Claudette Morel Builds
- [Top 5] Dead by Daylight Best Jake Park Builds
- [Top 5] Dead By Daylight Best Nea Karlsson Builds
- [Top 5] Dead By Daylight Best Laurie Strode Builds
- [Top 5] Dead By Daylight Best Bill Overbeck Builds
- [Top 5] Dead By Daylight Best Feng Min Builds
- [Top 5] Dead By Daylight Best David King Builds


