10 Best Dead By Daylight Settings That Give You An Advantage
What’s the best way to give yourself the edge over opponents?
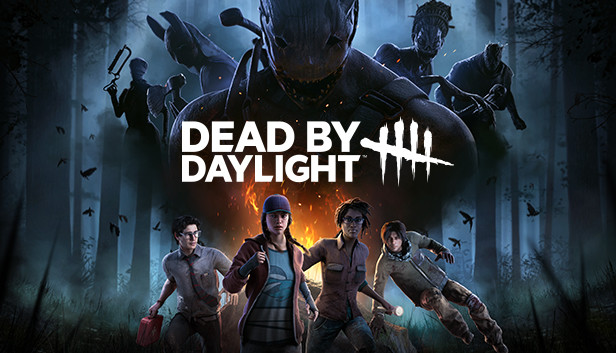
In Dead By Daylight, there’s already a lot going on that you need to worry about. You either have to hunt survivors down and hook them to be sacrificed to some Entity that brought you there or repair five generators as one of four people in a squad to temporarily escape. As one of the characters in the game, you are stuck in the Entity’s realm, cursed to forever kill or be killed. So, you’ll want to use any advantage you can to succeed, right? Here are the ten best settings to give you an advantage over your opponents in Dead By Daylight. We’re going to be talking about various settings across different platforms, but some of these tips should help you regardless of which role you choose to play.
10. Brightness And Other Advanced Video Settings
Dead By Daylight is a grim game. Each match usually takes place at night, with only one map that occurs during a rising or setting sun. It’s no wonder that the game is sometimes extremely dark. As a survivor, you at least have a third-person view, able to see around corners, but even then it can be difficult to make out certain structures or elements when they’re shadowed. The first thing you should do is adjust not only your brightness but some advanced features depending on the type of monitor or television you use.
How Adjusting Your Video Settings Can Solve This Problem:
- As the killer, it can sometimes be extremely difficult to see sneaky survivors hiding in corners or other dark spaces. Changing some video settings will help you spot them easier
- As a survivor, seeing your surroundings more clearly can help you get away when you need it most
- Certain elements are small and can be easily missed if you’re not paying attention. Changing your video settings will give you an edge to be able to spot traps set by the killer
How To Apply And Change Video Settings:
- Firstly, you’ll want to check to see if your monitor or television has a Gaming Mode. This will sometimes increase the brightness by default and also add some other settings to help Dead By Daylight look a lot better
- If Gaming Mode is not an option, there are still settings you can change manually. Brightness should be increased along with contrast and backlight. Every device is unique so adjust them accordingly with the game open to see the differences it makes for you
- You’ll want to look at any advanced settings your device has. Adaptive Contrast can help when the screen gets dark but can react differently depending on what kind of device you have. DCR, or Dynamic Contrast Ratio, is a setting that automatically adjusts the backlight. While this sounds like a nice feature, it can make your game darker, so sometimes it’s better to turn this off
9. Sound Settings And Devices
A lot of people that play video games use headphones these days. If you don’t and you’re relying purely on your TV’s speakers, it can be a huge detriment to your performance in Dead By Daylight. There are a lot of sound cues given to you, from people being injured, downed, or hooked to objectives and traps being worked on and completed. Even with the volume turned way up, it can be difficult to discern where sounds are coming from. Mistakes can easily be made and it can cost you the game. Here are a few things you can do to help.
How Sound Settings And Devices Can Solve This Problem:
- Headphones and other surround sound devices can give you in-depth information on what you should do next. They offer you information that lets you know in which direction the killer or survivors are relevant to you and the direction you’re facing
- Higher quality audio can also help catch those minute sounds that you may have otherwise never heard, like someone trying to sneak away in the tall grass or a killer’s power triggering
- Certain settings can also automatically turn down the volume making it harder to hear certain things when the going gets tough
How To Apply These Settings And Get What You Need To Improve Your Audio:
- Make sure that your in-game “Main Volume” setting is turned up so that you can hear everything going on
- We recommend getting at least a relatively inexpensive set of surround sound headphones. Certain brands have some available for a little as $30 and should be able to plug directly into your controller or PC. A full surround sound system can work extremely well also
- If you aren’t able to buy any new products, check the audio settings on your device. Some advanced options like AVL, or Audio Volume Leveler, can help with making sounds consistent regardless of their volume
- Check to see if there is a setting that caps the volume level if sounds get too loud. Sometimes it’s called Dynamic Range Compression, Dynamic Range Control, or simply, Reduce Loud Sounds. This can help lower the volume of louder noises in the game while still allowing you to turn the volume up to hear those little noises you need to hear. Again, this depends on the device and your preference, so adjust them accordingly
8. Controller Layout
Whether you play on PC or console, a lot of players prefer to use a controller. If you are one of these people, some would say that you’re already at a disadvantage. Something as simple as having to hold down one button and tap another can throw off your game. There are many instances where you’ll have to vault, hit skill checks, or simply turn your camera while running all while trying not to get maimed by a relentless killer. Even on the Entity’s side, killers have a lot to do. Don’t worry though, there are a few things you can do to even the playing field a bit.
How Changing Your Button Layout Can Give You An Advantage:
- A big thing to note here is that sometimes controllers wear out and stop working properly. At the very least, you can make sure that you change key bindings to a functioning button to keep you alive or help you kill more efficiently
- Remember your comfort. Especially after playing video games for extended periods, your hands can get cramped or even start developing pains. Other than resting and stretching, you can give those joints a break by switching it up and putting the responsibility on other digits
- Sometimes convenience is most important. Changing certain bindings can be a simple solution to the problem. If something doesn’t seem like the most efficient layout to you, change it! Experiment with different things to suit your personal preference
- It’s all about you. Customize your layout to whatever you feel more comfortable with. There are even some cases where you can change certain action keys to something that will free up another finger, as in for movement or camera control. The possibilities are almost endless
- Remember that you can also use the same button for multiple actions. It sounds awkward, but this can simplify certain aspects of gameplay
How To Change Your Key Bindings:
- Go to the Options menu and scroll over to the Controls tab
- From here you can toggle between both the Killer and Survivor Control pages
- You’ll want to select the action that you want to change and simply input the key that you wish to use
7. Keyboard And Mouse Key Bindings
While similar to changing the layout of buttons on a controller, keyboard and mouse key bindings can be quite different. There are certain commands you have to continuously press or tap, so the default settings can seem a bit basic or even janky. There are a few different solutions to this in the options menu of Dead By Daylight, however.
How changing your keyboard and mouse settings can give you an advantage:
- Just like for the controller button layout we mentioned before, you can change key bindings to suit your needs and wants almost however you’d like
- One of the main issues with the commands for keyboard and mouse users is the Hook Struggle command. You have to repeatedly tap the spacebar for up to two minutes while in this hook state. If you change this binding to something like the mouse scroll wheel, it can be quite a bit less frustrating and repetitive to do
- Another common issue is more of an ease-of-access subject. To make things more convenient, certain mouse devices have additional buttons that can be programmed to work for commands that normally would have to be used by your movement hand. Changing these bindings can free up your fingers and let you continue to run away or chase to your heart’s content
How To Change Your Key Bindings:
- Just like with a controller, go to the Options menu and scroll over to the Controls tab
- From here you can toggle between both the Killer and Survivor Control pages
- You’ll want to select the action that you want to change and simply input the key that you wish to use
6. Killer Camera Sensitivity
There’s no one right answer to this, but you’ll sometimes want to change your camera sensitivity to suit your preference. It can also depend on which character you choose to play as. There are many different killers in Dead By Daylight. Some set traps, some go through walls, and others even throw items at survivors. Your sensitivity can give you the edge over other players, forcing them to play their best to try and make it through the trial alive.
How Changing The Killer’s Camera Sensitivity Can Give You An Advantage:
- Turning your sensitivity up can help you, especially if you’re playing using a controller. It can help you turn quickly and look back and forth at different things. You already have four survivors to worry about, you don’t want to have the concern of missing some of the action because you couldn’t see it happening in the first place.
- Players are going to try and avoid your hits at all costs. While there are mechanics in the game made so that you can and will eventually catch up with them, they have resources and techniques at their disposal to stay alive. Survivors will usually spin or try to dodge your attacks in some way. Customizing your camera sensitivity can help you keep track of them and land those hits consistently
- Again, it’s all about your preference. If you feel like you can’t play properly with the sensitivity maxed out, turn it down a bit at a time. Find that sweet spot to help you turn quickly but efficiently
How To Change The Killer Camera Sensitivity:
- In the options menu, there is a dedicated option just for the killer’s camera. Simply click the arrows to make the value go up or down to your preference
5. Survivor Camera Sensitivity
There’s a reason we had to split these two options up. It’s important to customize the survivor’s camera sensitivity as well, but for different reasons. As a survivor, you’re in third-person mode. You already have an advantage over the killer in that regard, but there are things you can do to improve that advantage. Sure, you can already look around corners when sneaking around, but what about when you’re already spotted and start getting chased? You’ll need to do your best to survive.
How Changing The Survivor’s Camera Sensitivity Can Give You An Advantage:
- Even if you’re focusing on your objective and getting it done, you’ll want to keep your head on a swivel. Some killers can suppress their Terror Radius or even completely hide their physical form from your sight, so you’ll want to be able to check your surroundings quickly and often for clues
- One thing you’ll learn as a survivor is that you must keep your spatial awareness during a chase. It’s not enough to run away. You’ll have to look at the killer to try and counter their movement and avoid them. That being said, you also have to look at where you’re going. Looking back and forth is something that will come more naturally over time, but it’ll be a bit easier if you’re able to swing your camera around faster
- Customize this setting to what you’re comfortable with. As most items on this list go, you’ll always want to find that magic number. Some players are fine with their sensitivity maxed out, while others will turn theirs down just a bit. Find your best setting for yourself
How To Change The Survivor Camera Sensitivity:
- Similar to the killer, the survivor also has a dedicated camera sensitivity option in the menu. Remember to find which value works best for you personally
4. HUD Scaling
A new feature added to Dead By Daylight, you can now change the size of your HUD in the game. While it’s more of an aesthetic option for when you’re in the menus, the in-game HUD can get in the way a bit at times. You can also increase the size back to the default setting if you’re having trouble making out any words.
How Changing Your HUD Scaling Can Give You An Advantage:
- As the killer, having less of the HUD in your field of view can help you to spot sneaky survivors as they crouch around
- As a survivor, it can help you spot hard-to-see traps laid out by the killer. Totems and other clues in the game can sometimes be easier to make out as well
How To Change Your HUD Scale:
- In the Option’s Settings section, the In-Game HUD scaling value should be near the top. Change them how you see fit! You can also change the size of your Skill Check prompts, however, these are already quite small in-game
3. Cross-Play
While Cross-Play doesn’t change anything about inputs or the way that you play, some newcomers to Dead By Daylight may be intimidated about versing certain types of players. If you play on any console, a lot of people would say that you’re at a disadvantage when compared to PC players. Not only are the mouse and keyboard devices seen as more precise and accurate, but PC players usually have a high-quality machine that is dedicated to gaming. Pair that with the fact that some PC players have thousands of hours in Dead By Daylight alone, it can feel like you’re an amateur going up against professionals.
How Changing The Cross-Play Setting Can Give You An Advantage:
- Put very simply, you can turn Cross-Play off if you’re playing on console. This will restrict you to playing only with people on the same type of device that you are currently using
- Alternatively, if you’re on PC, you can leave Cross-Play on to play with people on consoles. While this isn’t inherently giving you a clear-cut advantage on its own, it can help to be matched up with new players if you’re a beginner also. A wider player-base means that you’ll have an easier time finding players that are around your rank
How To Change The Cross-Play Setting:
- Cross-Play is normally active by default. If you wish to change this, go to the Settings in the Options menu again. Simply select the option to change it and you should be good to go
2. Re-shading
This is an exclusive modification that you can make only on a PC. While we’ve already covered video settings, re-shading the game covers changing the game files with modifications to make the game appear brighter or more well colored. This can be a bit labor-intensive to some, but many people can help walk you through different methods and the various steps you can take. There’s no one right way to re-shade Dead By Daylight, and you’ll also need to make sure that you’re not breaking any rules that could get you in trouble. If you feel like the video settings on your device aren’t enough and you’re up to the challenge, re-shading can be a valid option.
How Re-shading Can Give You An Advantage:
- Aside from standard video settings in Dead By Daylight or on your monitor, re-shading can help change the look of textures to appear brighter and more vibrant. From spotting survivors to killer traps, these types of settings can give you a real advantage over someone who isn’t using them
- Since re-shading takes a lot of computer science to pull off, the methods can be quite complicated. Also, altering game files can damage or corrupt the software, causing issues for your computer. Because of this, we recommend that you look up tutorials on your own to see what you’re comfortable with and confident enough to do on your own. Here’s a link to get you started:
Reshade Tutorial w/ My Settings (Easy) - Dead by Daylight
1. Colorblind Modes
Possibly one of the most important and most requested changes to the game since launch, the addition of a Colorblind setting to Dead By Daylight is a welcome feature. Gaming should be inclusive, and anyone who has color blindness should be able to enjoy the game as well. This is amazing for anyone who wanted to play before but had too much trouble seeing certain elements of gameplay.
How Colorblind Settings Can Give You An Advantage:
- The Colorblind setting can help users see things they may not have been able to see before, like survivor’s scratch marks or killer powers and items
- One word: Inclusion. Many players have made their voices heard about this type of setting not being in the game, and the developers have thankfully answered their call. This will give a huge advantage back to players that felt like they just couldn’t effectively play Dead By Daylight
How To Change Colorblind Modes:
- In the Options menu under Settings, Colorblind Mode should come up right away under the UI/HUD options. You have the choice between activating modes for Deuteranopia, Protanopia, and Tritanopia. You can also change the intensity directly below that
This covers the main settings that we think can help you out in Dead By Daylight. What did you think? Did you learn something new? Was there something you started changing for yourself? Let us know!


