15. Haunted Mines
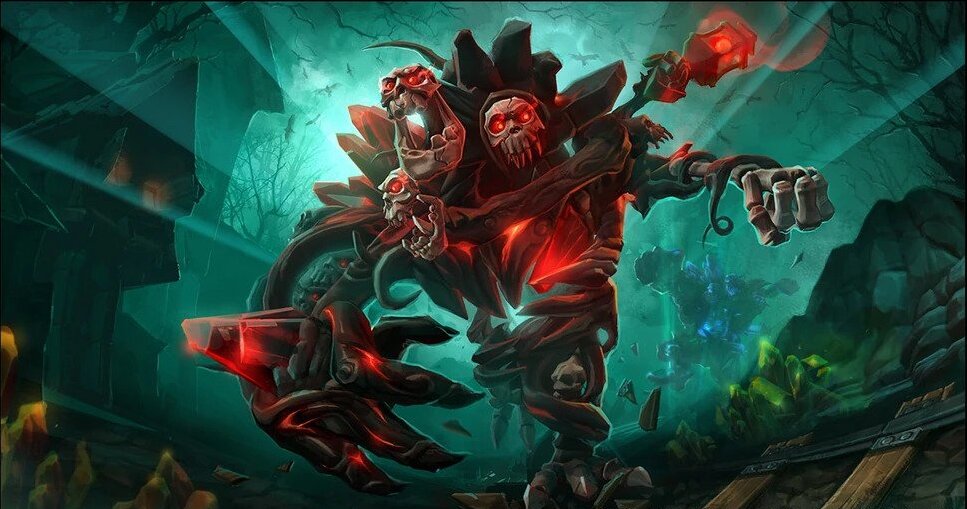
The doors to the depths of the earth are open to all to enter, slayers, victims, and heroes. The clanging of swords shall sing its song again, and all will listen.
Haunted Mines is a two-lane battleground set in the realm of Raven Court, split into two parts. The first one is the surface that is filled with regular play. The second part is the mines, which make this map unique. Unfortunately, this map though deemed fine has been out of the rotation for a while now.
The main objective:
- Venture Underground - The Haunted Mines will periodically open with small groupings of the undead creatures!
- Collect the Skulls - Destroy the Undead and collect their Skulls to power your Golems!
- Unleash the Golems - After the Army has been defeated, the Golems will arise for both teams! The more Skulls your team collects, the stronger your Golem!
Map rating: 50/100
14. Blackheart's Bay
The remnants of an old dock lie on the shores of a sea, empty and silent. Only the dark waters surrounding it may make a noise, for those who reside there do not speak.
Blackheart’s Bay is a three-lane map that has an unusual objective, which includes bribing the pirate ship to fire at enemies. Firstly the players have to acquire golden coins, either from killing mercenaries or looting two chests on the map. A really fun map, that gives an advantage to auto-attack playthroughs and any hero with rapid or consistent attacks.
The main objective:
- Collect Doubloons - Attack Treasure Chests and Mercenaries to collect Doubloons.
- Turn in Doubloons - Hand your Doubloons over to Blackheart or you will drop them all when you die!
- Bombard your Enemies - After receiving enough Doubloons from your Team, Blackheart will bombard your Enemy's forts!
Map rating: 55/100
13. Warhead Junction
An irradiated wasteland filled with mutated abominations is all that is left from once a nuclear testing facility. Abandoned because of leakages, the place is packed with those who wish for their nuclear arsenal.
Warhead Junction is an interesting map consisting of three lanes and a lot of space between them. It possesses many objects of interest, two Watchtowers, two Sewage Tunnels, and 6 nuclear warhead spawns and is packed with mercenaries. A lot is going out there and players do need to be more alert when playing this map.
The main objective:
- Warhead Deployment - Multiple Warheads spawn periodically across the battleground.
- Collect Warheads - Pick up a Warhead to activate your Nuke. Use it or you will drop it when you die!
- Call Down the Thunder - Launch Nukes to devastate the enemy team's fortifications.
Map rating: 60/100
12. Garden of Terror
Heaven to all senses is to witness this garden. Is it the beauty or the smell of the tamed wilderness, that conquers the human? Or is it something more sinister, something that hides behind the bushes and up in trees? What secrets come out in royal gardens? What becomes when the moon shines full?
Garden of Terror is a battleground featuring seeds that can be collected to summon Garden Terrors. It consists of three lanes and is between where the seeds are. Acquiring the objective to summon the Terror, is the main cause of team fights. Players should heavily adapt to the objective because of the power it holds. Globality and poke are amazing on this map.
The main objective:
- Seeds Spawn - Queen Nightshade will periodically summon a Seed. Defeat its Shambler Defenders and gather it for your team!
- Collect Seeds - Upon gathering three Seeds, Garden Terrors will immediately burrow into each lane.
- Garden Terrors - Garden Terrors disable enemy towers and forts, so fight alongside them!
Map rating: 70/100
11. Volskaya Foundry
When the storms of the Nexus surrounded the secret facility - Volskaya foundry, unleashed havoc of its own the Triglav protector. A machine devastating almost as corporate backstabbing.
Volskaya Foundry is a 3-lane Map that requires heroes to withstand prolonged team fights and sustain healing. This comes from the nature of the objective. Mercenaries are another decent advantage on this map. It should be noted that the machine Triglav itself is not as strong to replace the two heroes it requires. So targeting enemy heroes that do not control the machine is recommended, at least in the late game.
The main objective:
- Capture Points - Control points activate occasionally. Stand within them to capture them. Fully capturing a point grants you control of a giant mech.
- Control the Protector - The Triglav Protector mech is controlled by two players: one pilot and one gunner. Work together!
- Destroy Everything - The Protector's abilities deal incredible damage to structures and Heroes alike. Use it to lay waste to your enemy.
Map rating: 70/100
10. Braxis Holdout
Braxis Holdout held many beasts inside its gates. Terrans experimented and researched them. Now when the Nexus lurks over the horizon, the doors of Tartarus that once held the beasts, fall open, unleashing them one by one. The final test of the Braxis Holdout will now be performed.
Braxis Holdout is a 2-lane Map that emphasizes wave-clear and self-reliability of solo-laners. Globality can be very advantageous so that bottom-lane victory can quickly be passed onto the top. Because of the nature of the objective, it is superior to take sustain healing instead of burst healing. An important notice is that late-game heroes are of less value here.
The main objective:
- Capture the Beacons - Periodically two beacons will activate. Capture both to fill your Holding Cell with Zerg.
- Fill Holding Cells - Once either Holding Cell fills, both open and unleash waves of Zerg at each team’s base.
- Zerg Rush - Hold out against the enemy’s Zerg while helping yours. The Zerg will attack Heroes, so engage cautiously.
Map rating: 75/100
9. Battlefield of Eternity
From the times before old, only two were present. Light and darkness, good and evil. For eons and more, their battle raged, and one could not have won against the other. But now in the Nexus forces of hell or heaven will be victorious.
Battlefield of Eternity is a 2-lane Map that forces the players on a 1:4 formation. Unlike on most maps globality gives an edge only when the enemy team is keen on ganking and rotating. The most important is auto-attack assassins and bruisers.
The main objective:
- Battling Immortals - The angel lieutenant Ilarian and the demon lord Beleth are locked in an endless war.
- Defeat the Enemy - Aid your immortal ally against his foe to claim victory.
- Devastate Forts - Rally to your immortal as he wreaks havoc on the enemy's forts!
Map rating: 75/100
8. Hanamura Temple
Outside the Shimada castle, lay open quiet, and ordinary streets of authentic Japan. Nothing seems to have the power to disrupt the harmony that engulfs them. But lately, dark clouds have conquered the skies, and strange figures roam the land. The wind now carries unearthly words with whom it welcomes the Nexus.
Hanamura Temple is a 2-lane Map that forces teams to play in 1:4 formation. The map emphasizes mercenary camps, so a hero that excels at that point is more than valuable. There are two Sentinel Camps, Fortification Camps, and Recon Camps.
The main objective:
- Single Payload - At regular intervals, a payload spawns at the center of the battleground that can be contested by both teams.
- Escort Payload - Stand next to the payload and move it to its destination. Prevent the enemy from trying to do the same.
- Bombard your Enemy - Once a team escorts the payload to its destination, it will fire upon the enemy’s forts!
Map rating: 76/100
7. Alterac Pass
Has the world known, how many have died there? That the red blood bloomed over the white snow, sharp and cold. In the night every rose was covered by snow once more. Yet, another army marches, many will fall and many have fallen, but never Alterac.
Alterac Pass is a 3-lane Map that allows for double-soaking and is extremely advantageous for heroes that can poke through unpassable terrain. Mercenaries do have a role but not a decisive one.
The main objective:
- Prison Camps - Capture the enemy Prison Camp to summon your Cavalry. Camps can be retaken by Heroes and Minions, so guard them well!
- Cavalry - Cavalry soldiers charge down each lane when summoned granting increased damage and movement speed to nearby Allied Heroes.
- Generals - Each team’s Core has been replaced by a General who fights against attacking enemies. Destroying a Keep reduces the General’s Armor.
Map rating: 80/100
6. Sky Temple
Upon the unforgivable vastness of the sands of Luxoria, floats the temple of the snake god, Ka. Unimaginable power resides in his oasis; unimaginable and almost unattainable. Reach out your palm and take it for yourself.
Sky Temple is a 3-lane Map that does not allow double-soak but requires 1:4 formation, one being on the top lane. Globality is extremely useful on this map. Damaging the structures is beneficial for the Objective targets them, and in the late game, it can decide a winner.
The main objective:
- Capture the Temples - Temples will periodically activate. Stand within their grounds to capture their power!
- Hold the Temples - Stand firm and the Temple will unleash a blistering onslaught on your enemy's forts!
- Defend the Temples - Guardians will try to wrest control of their Temples from your team. Hold them off to keep the Temple's power for yourselves!
Map rating: 81/100
5. Infernal Shrines
The shrines of hell flicker once more; the shrines of hell call the monsters out again. To destroy mankind and heaven; to build a new world.
Infernal Shrines is a 3-lane Map on which double-soak is a preferable option. Globality and wave-clear are useful, with the latter giving more advantages. Mercenaries can be quite useful, especially when the objective is secured, of course, if you can take them fast enough.
The main objective:
- Activate the Shrines - The Infernal Shrines periodically gather power. Activate them and prepare for a fight.
- Defeat Guardians - Slay 40 Guardians before the enemy team to bring forth a mighty Punisher.
- Beware the Punisher - Punishers have one of three devastating powers. Be careful, they focus on attacking Heroes above all else.
Map rating: 90/100
4. Towers of Doom
Two symbols of evil fight tirelessly for the realm called Towers of Doom. Although it seems so trivial and so ordinary, the village holds much importance to the two. Raven Lord and the Graves Keeper, are more than willing to sacrifice anyone for it, the old; the young; the weak. All will shed the last drop of blood for the ultimate victory.
Towers of Doom is a 3-lane Map that can be played with a double-soak, or letting one player soak two lanes, while four push bottom. Globality and poking are extremely valuable, because of the objectives. Mercenaries are relatively easy to do, so there is no need for certain dedication to them.
The main objective:
- Protected Cores - Both Cores are protected by a barrier that cannot be attacked by Heroes. To be victorious, you must activate Altars.
- Activate Altars - Periodically Altars will rise across the battlefield. Activate them to have your Bell Towers fire upon the enemy's Core.
- Claim Bell Towers - Destroy your enemy's Towers to bring them under your team's control. The more Towers you have, the more damage an altar will do.
Map rating: 95/100
3. Tomb of The Spider Queen
Somewhere in the depths of the Luxoria desert, the tombs of many kings and queens lie asleep. Made for the rulers of the old, they now have a new master to serve. The Spider Queen Neithis creeps through these ancient halls, seeking crystals of power. Better find them now.
Tomb of the Spider Queen is a 3-lane Map that aims for the players to move as a group of four, while one member is a solo-laner on the bottom. It requires decent wave-clear from most of the heroes because the objective depends on crystals that minions drop. Mercenaries are not a priority here but can be useful.
The main objective:
- Collect Gems - Enemy spider minions and Heroes drop magical Gems upon death. Gather as many as you can.
- Turn in Gems - Relinquish your Gems at one of the Spider Queen's Altars or you will drop them all when you die!
- Summon Web weavers - Whichever team turns in enough Gems first will unleash the Web weavers to destroy their enemy's defenses.
Map rating: 96/100
2. Cursed Hollow
Many realms have seen battles, but none has seen as many as the Cursed Hollow. The first to be taken by the Nexus, the first to judge the heroes.
Cursed Hollow is a 3 - lane Map that does not allow double-soak, and gives an advantage to global heroes. Mercenaries can play quite a big role on this map, so they should be taken care of. Another important notice is poking, which can prolong the objective time. A decent trade-off can be made between pushing the enemy lines and securing the objective.
The main objective:
- Collect Tributes - The Raven Lord will create Tributes periodically. Gather them for your team!
- Curse Your Enemies - Upon capturing three Tributes, the Raven Lord will curse your enemies!
- Cursed Forts and Minions - Cursed Forts will not attack, and cursed Minions are reduced to 1 Health.
Map rating: 98/100
1. Dragon Shire
"The gardens of Dragon Shire. Radiant, are they not? And yet, they are founded on a lie. Activate the sun and the moon shrines, and the magic that seals away my Dragon Knight will weaken. I shall lend you its power. Burn your enemies. Shatter their fortifications. Remind this world of its true heritage. The dragon will be reborn. Control its power, or be destroyed by it."
Dragon Shire is a relatively large three-lane map, which revolves around the usage of Dragon Knight. The map has many mercenaries camps, although it lacks a boss camp. It requires a strong-laner for the top, so you can secure the top shrine, as well as another self-reliable hero that can secure the bottom shrine. Being able to roam as a 3-man to gank enemy Heroes in any lane is a scary strategy for the enemy team.
The main objective:
- Control the Shrines - There are two Shrines your team needs to control to activate the Dragon Knight's statue!
- Free the Dragon Knight - While activated, bring a Hero to the statue to free him from his prison!
- Devastate Enemy Forts - Use the Dragon's immense power to level enemy Forts!
Map rating: 100/100
You may also be interested in:
- 5 Reasons Why Heroes of the Storm Failed To Become A Popular Moba
- 10 Reasons Why Heroes of the Storm Is Bad And How To Make It Better
- [Top 10] Heroes of the Storm Best Pushers That Are Powerful (Ranked)
- [Top 15] Heroes of the Storm Best Beginner Heroes for Every Role
- [Top 10] Heroes of the Storm Best Carry That Are Powerful (Ranked)
- Heroes of The Storm Best Announcers
- [Top 5] Heroes of the Storm Best Bruisers That Are Powerful (Latest Patch)
- [Top 10] Heroes of the Storm Best Assassins That Are Powerful (Ranked)
- Heroes of the Storm Tier List [Best And Worst Heroes Revealed]

