25. Her M870 is Very Powerful
https://youtu.be/ymR2F7dBN_8?t=126
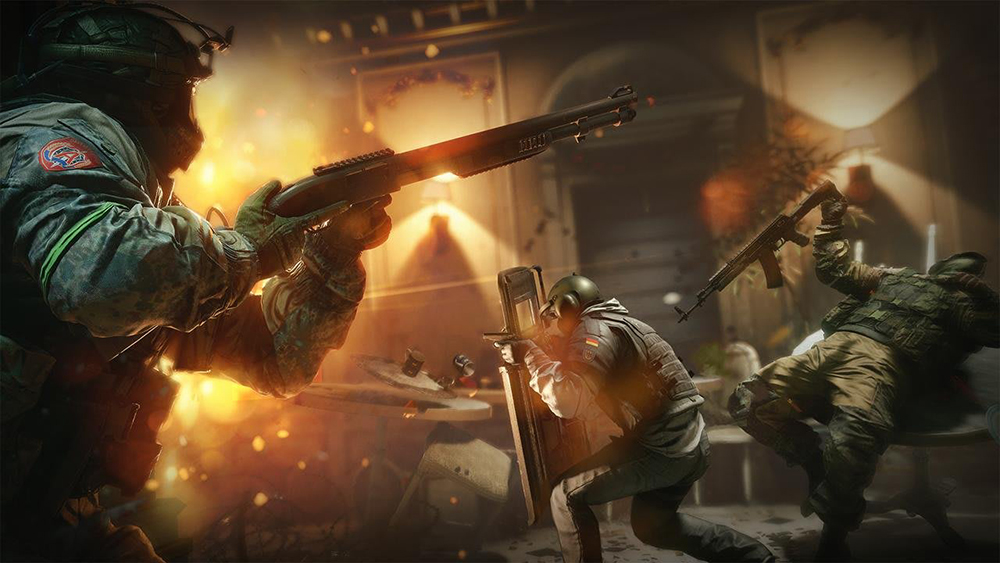
Most Siege players when using Thorn would almost always go with her UZK50GI, and that’s quite understandable because it’s fully automatic, and therefore, easier to use. It’s also very easy to control due to its relatively low rate of fire, so it’s easy to hit enemies with it. However, players shouldn’t really sleep on her M870 shotgun because it’s one of the most powerful shotguns in the game, and she can use it as a utility.
The M870 pump action shotgun is perhaps the most popular pump action shotgun in the game. That’s because it really packs a heavy punch per shot and can take an enemy down with just one shot even at medium range as shown in the video. It does feel like the M870 shotgun has a longer effective range than most typical shotguns in the game, and as I said, if you go for the M870 as your primary for Thorn, she would have the ability to create more lines of sights and rotation holes.
24. Go with the Deployable Shield
https://youtu.be/30QTDq5b2VQ?t=183
The deployable shield is a really great secondary gadget especially when the devs reworked it and put slits on them so that you’ll be able to see enemies on the other side while you’re hiding behind it. Its weakness really is that you only get one per round. However, the deployable shield is the best secondary gadget for Thorn in most cases, because if you block an entrance with it, unless the enemies destroy it using their utilities, they would have to vault over it to enter the area.
And that vault action can easily be their downfall because Thorn’s special gadget, the Razorbloom Shell has a great combo with the deployable shield. All Thorn has to do is put one Razorbloom near the deployable shield and once an enemy vaults over the deployable shield to enter the room, the Razorbloom Shell will activate, and it would most likely kill the enemy unless he’s able to vault back fast enough, which is rare.
23. Playing Thorn as a Roamer
https://youtu.be/30QTDq5b2VQ?t=215
Thorn is a lot similar to Ela because they can use their gadgets both defensively and offensively. And by offensively, I mean through roaming. As said in the video above, Thorn is one of those operators that you can play effectively both as a roamer and an anchor. She is an effective roamer because her Razorbloom Shells are great early warning devices, so when Thorn is roaming, she can put her special gadgets on flanking spots and they would warn her if an enemy passes though those spots.
Normally, I would bring only one Razorbloom Shell with me when I roam and leave two of them to help protect the objective spot from attackers who are pushing. But it’s definitely also okay to carry two of them and leave one on the default plant spot. Thorn is a 2-speed 2-health operator so she can really move well when roaming and she won’t be as easy to take down as 1-armored ones.
22. Always Hide your Razorbloom Shells
https://youtu.be/30QTDq5b2VQ?t=306
The beauty of the Razorbloom Shells is that they pack so much power while being so small. They’re smaller than Ela’s grzmot mines and they’re a lot easier to hide. That’s because you can really tuck it inside tight spaces and angles like under a table as shown in the video above. Luckily for you, when playing Thorn, Siege has so many objects in its maps where you can hide your Razorbloom Shells well and greatly lessen the chance of enemies finding and shooting them.
And it is very important to hide them or deploy them on spots where they won’t be visible on the enemies’ line of sight. That’s because they emit a loud blue light and they can easily be seen because of that. So, for example, if you just put it above the table in the CEO office of the Consulate, enemies who are rappelling can easily see it and all they have to do is shoot it to disable it. This is why you should remember to place them in inconspicuous spots so that you won’t end up wasting them.
21. Razorbloom Shells as Early Warning Devices
https://youtu.be/30QTDq5b2VQ?t=351
The countdown from the razorbloom shells when they get triggered by enemy presence is pretty hard to miss because it’s quite loud. Not to mention the explosion itself produces a very distinct sound. And this is why the razorbloom shells are great as early warning devices. You can basically think of them as exploding proximity alarms.
So, while it is great to carry one or two with you while you’re roaming, or leave one at the default plant site, sometimes, especially when you’re going to anchor, it’s okay to not do anything fancy or cheeky with it and just leave them on spots that attackers usually take for pushing. That will be a great help to your whole team because it will greatly lessen the chances of any of you being caught off guard by a sneaking attacker.
20. Leave One for Plant Denial
https://youtu.be/30QTDq5b2VQ?t=487
Thorn is one of the best area denial operators in the game. With her razorbloom shells, she can actually serve as an alternative to Smoke in some areas. Although she cannot block an area as long as Smoke can with his gas grenades, Thorn can easily inflict fatalities whenever she’s holding an area with her razorbloom shells. That’s because each of her razorbloom shells have the same explosion power as nitro cells.
So, she basically has three nitro cells in her arsenal, and that’s really great for denying area to enemies. Leaving one hidden at a default defuser plant site can easily make the attacker’s plant attempt fail or even kill the attacker that attempts to plant the defuser. In most cases, attackers will run as soon as they hear the razorbloom shell countdown, and when they turn their back and run, they leave themselves vulnerable to defender fire.
19. Place a Razorbloom Shell Near a Grzmot Mine
https://youtu.be/30QTDq5b2VQ?t=527
One of the best combos to Thorn’s razorbloom shell is Ela’s grzmot mine. Normally, when an attacker sees and hears the countdown of Thorn’s razorbloom shell, he will be able to escape its explosion as long as he’s able to sprint back in time. However, if there’s also an Ela grzmot mine in the perimeter and it’s detonated before the Thorn razorbloom shell is, it will inflict a concussion effect on the attacker, so great that said attacker won’t be able to sprint.
And that inability to sprint alone is usually enough for him or her to get killed by the explosion effect of the Thorn’s razorbloom shell. However, in addition to being unable to sprint, an attacker that triggers Ela’s grzmot mine would also experience very blurry vision and screen shake. So much so that this disorientation can affect his or her ability to run in the proper direction. Of course, the hearing will be greatly affected too, and all of these effects will make the attacker more susceptible to the razorbloom shell.
18. When to Run with the Barbed Wires
https://youtu.be/30QTDq5b2VQ?t=188
Generally, the best secondary gadget for Thorn is the deployable shield especially when her player decides to anchor. It just allows Thorn to more effectively anchor an area and hold down an angle. However, as discussed in one of the entries above, Thorn can also perform the role of a roamer, and for roaming, the best secondary gadget for her to bring are the barbed wires. That's because the barbed wires can act as additional early warning devices to her.
The greatest danger when it comes to roaming are enemies who are able to flank or get behind you. And that’s why the barbed wires will be great assets for roaming as Thorn. With the barbed wires, you’ll be able to leave one on a path behind you, and another to a flanking area. Generally, attackers would try to walk over a barbed wire when it’s not placed near an objective site because it’s quieter than destroying it with melee, and that makes those spots with your barbed wires prime placements for your razorbloom shells.
17. Place it Near Frost’s Welcome Mat
https://youtu.be/ymR2F7dBN_8?t=205
If Thorn’s combo with Ela is great and the grzmot mine will almost always enable a kill with the razorbloom shell, Thorn’s combo with Frost is even better. That’s because when an opponent gets trapped in one of Frost’s welcome mats and one of Thorn’s razorbloom shells is deployed near it, it will be impossible for the trapped attacker to escape death. In some cases, the razorbloom shell can even snag two kills.
That’s because another attacker might get in as well in an attempt to revive his trapped teammate, and that will only cause the two of them to get killed by the explosion from the razorbloom shell. Even when an attacker manages to shoot Frost’s welcome mat by shooting down while vaulting through a window, chances are that he will still be killed by the razorbloom shell. Because that shooting action can cause a delay for him to vault back out through the window or the gunshot sound could mask the sound cue from the razorbloom shell.
16. Suppress the C75 Auto
This is now a no-brainer thing to do because the devs have removed the damage reduction penalty from using the suppressor and the change dropped with the current season which is Operation Brutal Swarm. The C75 Auto only has the suppressor as its barrel attachment choice, and before the most recent rework on the suppressor, a lot of players elect not to equip it on the gun because it reduces the damage of the weapon. However, there’s really no more reason to not equip it now that it doesn’t have the damage reduction penalty anymore. And since it’s the only barrel attachment option for the C75 Auto, there’s basically no downside at all to equipping it.
15. Don’t Sleep on Her 1911 Tacops
https://youtu.be/ymR2F7dBN_8?t=456
Most Thorn players would almost always go for the C75 Auto when playing her, and it’s also the secondary weapon that I would recommend for most cases. However, I encourage players to be more like BikiniBodhi and try out all of the guns on most operators. That’s because the 1911 Tacops is also a really viable secondary weapon for Thorn.
It inflicts heavy damage per shot, and what I love most about it is that despite its heavy damage per shot, its weapon kick is very manageable. So, you can even attach a suppressor to its barrel instead of the muzzle brake and you’ll still be able to fire it accurately. With the suppressor, it becomes an even deadlier weapon because you can hit enemies accurately with it due to its great iron sights while also not providing them with any directional threat indicator that would tell them where you’re shooting them from.
14. Play Her with Lesion
https://youtu.be/ymR2F7dBN_8?t=325
Another great operator combo with Thorn is Lesion. That’s because Lesion’s gu mines, when triggered by an enemy, will prevent that enemy from sprinting. And when one of Thorn’s razorbloom shells is also triggered on the spot where the enemy stepped on a gu mine, it will be really hard for him to escape the explosion effect of the razorbloom shell.
The great thing about Lesion is that he can deploy a total of eight gu mines in one round, so when there’s a Lesion in your team, just ask him to deploy a gu mine around the spots where you deployed your razorbloom shells. That will really increase the chances of getting easy kills from the razorbloom shells, and this is even more importantly done on the default plant sites.
13. Razorbloom Placement on Skyscrapper
https://youtu.be/ymR2F7dBN_8?t=361
The Skyscrapper map is really perfect for Thorn’s razorbloom shells because it has a lot of tight angles in its objective spots. The tight angles increase the likelihood of scoring kills from the razorbloom shells because they limit the direction on which an enemy can run when they trigger one of the razorbloom shells. And one of the best spots in Skyscrapper for deploying a razorbloom shell is right above the window of the display area.
It’s a really tight spot and it’s one of the default push spots for attackers. There’s always high traffic of attackers there and in almost every round defending the office and expo objective spots, attackers will always use that spot. Now it’s important to deploy it above the window because that will make it harder for the attacker who enters the window to shoot it.
12. Throw One into the Smoke
This is one of the best ways to counter a smoke and defuser plant attempt. A lot of attackers, especially in the lower elos, would usually throw a smoke grenade on the default plant site and attempt to plant a defuser thinking that they would be safe behind the cover of smoke. However, there are many defender gadgets that can counter this, and one of the best when it comes to that is Thorn’s razorbloom shell. Simply throw one right on the smoke and when you hear the defuser being planted, chances are you’ll be able to kill the one who’s planting the defuser, or at the very least, you’ll be able to stop the defuser plant attempt.
11. She Has a Great Combo with Clash
https://youtu.be/ymR2F7dBN_8?t=179
Another great operator combo for Thorn is Clash, and this is actually even better than her combo with Ela or Lesion in my opinion. That's because Clash’s special gadget, the CCE Shield, can electrocute attackers and slow them down by a lot. And the slow effects from Clash’s special gadget, especially when the enemy is near Clash, is really great. It almost holds the attacker in one place.
And when a razorbloom shell gets triggered on the spot where Clash is slowing down an opponent, it would be almost impossible for that attacker to escape death. You can also try throwing one of your razorbloom shells behind the opponent that’s being slowed by Clash but keep in mind that that could be risky because you might get fragged instead. Generally, it’s best to pre-place a razorbloom shell on a spot and have Clash slow down an enemy there.
10. Same Explosion Power as a Nitro Cell
https://youtu.be/ymR2F7dBN_8?t=45
Keep in mind that the explosion from a razorbloom shell has the same power as the explosion from a nitro cell. And that says a lot. Many attackers, especially the ones with shield like Blitz or Osa, underestimate the explosion power of a razorbloom shell. Maybe because its explosion sound isn’t as loud as a nitro cell, even though it’s as powerful as one. And this tends to damage Blitz or Osa a lot especially because not all their body parts can be covered by their shields.
It’s even worse for Osa because she can’t sprint while she’s holding her Clear shield, and that would make her slower to get outside the effect of the razorbloom shell’s blast which is actually pretty wide. So, do not hesitate to deploy all your razorbloom shells during the prep phase, because more likely than not, all of them will be helpful. And it would be a waste if you die while you’re still carrying one or two razorbloom shells in your pocket.
9. Suppress the UZK50GI
Do not be intimidated by the UZK50GI’s recoil pattern. If you just look at it, you might think that the weapon has a pretty powerful vertical kick, however, that’s far from the truth. That is because the UZK50GI’s biggest weakness is its slow rate of fire. The thing is, that slow rate of fire kind of turns into one of its strengths, because it’s basically the reason why the weapon’s recoil is so easy to control.
And since the UZK50GI’s recoil is easy to control, especially when you equip a vertical grip to it, it is perfect for a suppressor. Since you really do not need further recoil control benefits for this gun, you’re free to attach a suppressor to its barrel, and that will allow you to strafe opponents without them immediately realizing where you’re shooting them from, thus, preventing an effective and immediate counter fire.
8. Anchor the Tunnel in Bank
https://youtu.be/30QTDq5b2VQ?t=612
One of the default paths of attack in Bank when the objective spot is on the basement is the dirt tunnel. A lot of attackers simply love to use that tunnel to push the server area and take control of it. That’s because once they’ve taken control of the servers, they’d be able to perform a hard breach on the default plant site and that’ll increase their chances of winning, especially when they’ve cleared out the defenders’ roamer.
This is why it’s very important to prevent them from taking control of the server area. And one of the best ways to do that is to anchor the server area with Thorn. With her razorbloom shell, she can really deny the server area to the attackers for a long time. Note that when doing this, especially in ranked, you should ask one of your teammates to support you with anti-projectile gadgets because the attackers will definitely throw grenades at you.
7. Use the Vertical Grip
https://youtu.be/30QTDq5b2VQ?t=140
Since the meta right now is attaching a suppressor on weapons that have very manageable recoil like the UZK50GI, and you should really do so because the benefits from the suppressor are great, it should also be important to attach the vertical grip as the suppressor’s partner. That’s because with the removal of its damage reduction penalty on weapons, the only drawback left from using the suppressor is its lack of recoil control benefits.
And with the recent overhaul on the recoil progression of weapons making it harder to control long and continuous sprays, it would just be rough to control a weapon with no recoil-benefit providing attachment on it. That is why it’s important to partner up the suppressor with the vertical grip. That way, you’ll be sure to hold the recoil of the UZK50GI really well while strafing your opponents with suppressed gunshots.
6. She’s Great at Denying Area
https://youtu.be/30QTDq5b2VQ?t=418
This is one of the reasons why whenever I play Thorn, I mostly stick with anchoring even though she can be a really effective roamer as well. That is because with her razorbloom shells, she can really prevent attackers from pushing or taking control of an area for a long time. As long as she’s supported by anti-grenade gadgets such as Wamai Mag-NETS or Jager ADS, Thorn will have no problem holding an area for a long time even when outnumbered.
That’s because when entering an area that has a pre-placed razorbloom shell on the entryway, there’s a high chance that the attackers will get heavily damaged or even killed. And if Thorn is carrying all three of her razorbloom shells with her in one area, once one of them gets detonated, she can just deploy another one on the entryway. This tactic works really well on tunnels like the one in the Bank’s basement, especially because most attackers wouldn’t go back out of the tunnel and try another path of attack.
5. Kanal Razorbloom Shell Placements
https://youtu.be/30QTDq5b2VQ?t=450
Kanal is another map where Thorn really excels because it’s a relatively small map and it has a lot of tight angles. The tight angles will limit the enemy’s movement when they’re trying to escape from a triggered razorbloom shell and that will increase the chance of badly damaging them or even killing them. When defending the top floor, the default defuser plant site is the spot behind the radar tables, and that is why you should deploy one of your razorbloom shells under them.
Emphasis on one, because in the video above, the player deployed two razorbloom shells and personally I disagree with that. That is because when one of them explodes, it will also destroy the other one and that will be a waste of razorbloom shell in my opinion. It could be that the player’s intent is to make a more powerful explosion by having two razorbloom shells in one spot and that could work, but in my opinion, one is powerful enough.
4. Playing Her as an Anchor
https://youtu.be/30QTDq5b2VQ?t=302
While Thorn can also effectively play the role of a roamer, most of the time she will be able to contribute more to the team by anchoring, especially when there are already other operators in the defending team that can roam like Vigil, Caveira, or Oryx. The objective area whose pathways have Thorn’s razorbloom shells deployed on them would be very hard for attackers to penetrate.
That is because aside from acting as great early warning devices, they also have a high chance of inflicting heavy damage, even death, to attackers who are attempting to push. What’s great about anchoring with Thorn is that if you noticed that the attackers wouldn’t use one of the pathways where one of your razorbloom shells is deployed at, you can retrieve that razorbloom shell and redeploy it on the area where the attackers are pushing.
3. Important Placement in Coastline
https://youtu.be/30QTDq5b2VQ?t=283
Coastline is another map that has a lot of tight angles, and as discussed in one of the entries above, tight angles are perfect for Thorn’s razorbloom shells, because it limits the spaces where an attacker that triggered a razorbloom shell can escape to. And in Coastline, one of the default spots for planting the defuser is the area behind the couches. That is because the couches usually will be enough to provide cover for the attacker that is planting.
Which is why it is important for you as the Thorn player to deploy one of your razorbloom shells on the couches as demonstrated in the video above. With that placement, it is very unlikely to be shot by defenders who are pushing from the doorway, and it’s also unlikely to be shot by an attacker who is rappelling by the window. The razorbloom shell deployed there would get triggered when enemies attempt to plant behind the couches, and usually the explosion from the razorbloom shell would be enough to kill them.
2. The C75 Auto is her Best Secondary
https://youtu.be/30QTDq5b2VQ?t=641
The 1911 Tacops is also a great secondary weapon for Thorn especially for players who are great with precision shooting using single-firing guns. Its iron sight is much better than the iron sight of the C75 Auto and that’s definitely one of its advantages over the latter. However, it cannot be denied that in general, the C75 Auto is the best secondary weapon for Thorn, especially when she’s anchoring.
That is because the usual primary weapon that players choose when playing Thorn is the UZK50GI and its main weakness is its small magazine capacity. That means there’s a high chance for it to reload while in the middle of a gun fight. And when that happens, it’s just a lot handier to have another fully automatic weapon in the C75 Auto. Its recoil is also very easy to manage despite its very fast rate of fire. Its only weakness really is its horrible iron sights which takes up a lot of screen space.
1. Run with the UZK50GI
https://youtu.be/ymR2F7dBN_8?t=430
While the M870 shotgun is also a very powerful weapon, I urge players to not sleep on it. The UZK50GI is an amazing submachine gun and Thorn is the only one who can use it. Its damage is higher compared to most submachine guns and its recoil is really easy to control even with the recent overhaul on recoil progression of weapons across the board. Well, that is if you followed the advice in one of the entries above and attached a vertical grip to it.
The main drawback of the UZK50GI is its relatively slow rate of fire and its small magazine size. That is why it is best to fire short bursts when using the UZK50GI so that you wouldn’t have to reload fast while engaging enemies. Sadly, it doesn’t have any scopes that can provide higher levels of zoom, but since Thorn would mostly have to engage enemies at close to medium range, that drawback wouldn’t really have much of an effect.
Attention operator, please be advised. There is a new directive from Six. Read up on these related articles, and prepare for deployment:
You May Also Be Interested In:
- Rainbow 6 Siege Tier List 2021 [Rainbow 6 Siege Best Operators]
- [Top 10] Rainbow 6 Siege Best Weapons
- [Top 7] Rainbow 6 Siege Best Attackers
- Rainbow 6 Siege Attachment Guide (R6 Best Attachments For Every Weapon)
- [Top 25] Best R6 Settings That Give You An Advantage
- [Top 15] Rainbow 6 Siege Best Graphic Settings
- Rainbow 6 Siege Best Weapon Attachments
- Rainbow 6 Siege Best Operators 2021
- [Top 7] Rainbow 6 Siege Best Defenders
- Rainbow 6 Siege Roles Explained And How To Play Each One
- [Top 10] Rainbow 6 Siege Best Players
- [Top 5] Rainbow 6 Siege Best Nomad Loadouts
- [Top 5] Rainbow 6 Siege Best Jackal Loadouts
- [Top 5] Rainbow 6 Siege Best Glaz Loadouts: From Worst to Best
- [Top 5] Rainbow 6 Siege Best Finka Loadouts
- [Top 5] Rainbow 6 Siege Best Lion Loadouts
- [Top 5] Rainbow 6 Siege Best Castle Loadouts
- [Top 5] Rainbow 6 Siege Best Dokkaebi Loadouts

