25. Counter Shield Operators
https://youtu.be/JtWvz77LMPM?t=62
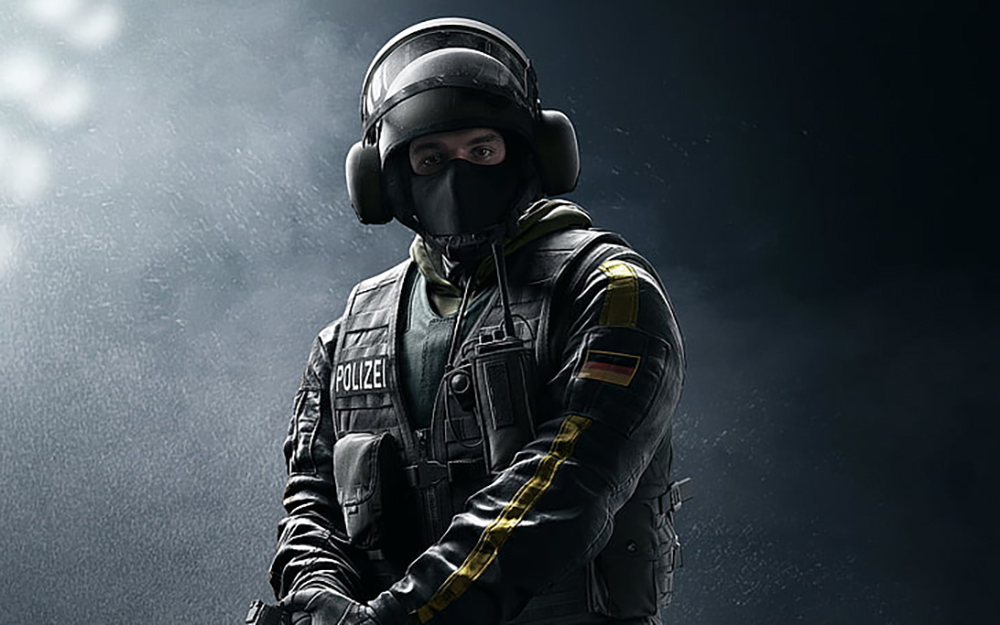
Oryx is one of the most underrated operators because his pick rate is on the low end even though he’s pretty much the most versatile defender in the game and certainly an S-tier roamer. One of the abilities that only he possesses is his ability to knock down shield operators, even Siege’s famous big boy, Montagne. Whenever he hits a shield operator with his body while using his Remah dash ability, that shield operator will get knocked down for a second.
To this day, Oryx’s Remah dash ability is the best counter for shield operators, especially Montagne and Blitz. Be mindful though, that when you’re playing Oryx and you’re about to use your Remah dash ability on Blitz, he might be able to blind you as you’re speeding towards him. When that happens, just try to keep your orientation straight and hit the melee button or fire your weapon to the ground. That will normally kill the down Blitz.
24. Oryx is One of the Best Roamers
https://youtu.be/JtWvz77LMPM?t=99
As mentioned above, Oryx is an S-tier roamer. He may not be as silent as Caveira, in fact, he’s quite noisy especially when he’s breaking down walls with his Remah Dash. He also cannot turn invisible to enemy cameras like Vigil. However, despite being a 2-speed 2-health operator, he’s faster than Caveira, and he can disappear from the enemy’s sight easier than Vigil. That’s because his Remah dash ability allows him a sudden burst of speed.
The Remah dash ability also allows him to bash unreinforced walls using his own body and it allows him to go through them. The Remah dash ability basically allows Oryx to go to one spot from another with great speed, and this is great for a roamer because sometimes, roamers can help the team a lot just by escaping attackers. Another deadly ability that makes Oryx a top tier roamer is his ability to climb broken hatches, and he is the only defender to this day that can do this.
23. Waste A Lot of Time
https://youtu.be/JtWvz77LMPM?t=158
What I mean when I said that roamers can help the team a lot by simply escaping attackers is that they can really waste a lot of the Attackers’ precious time. This is even more so the case for Oryx who can get to another room quickly through his Remah dash ability that can break down walls. As I said above, he can also climb up broken hatches which is a great way for escaping attackers that are hunting him on the lower floors.
The thing about his ability to climb hatches is that he latches on the hatch first and he has the option whether to get up or fall back down. Because of this, Oryx can actually fake climbing up a hatch and very quickly drop down again to counter his pursuers. If he really wants to, he can waste so much time for the Attackers that they’ll be forced to make a final push in the last thiry seconds of the round, and that doesn’t usually end well for them.
22. Run with the Proximity Alarms
https://youtu.be/JtWvz77LMPM?t=191
Operators like Oryx that have proximity alarms as one of their choices for their secondary gadgets can carry two of them, and they’re very underrated. They’re not just great early warning devices. They’re great deterrents too. For example, a Nokk that is attempting a sneak rush on the objective spot would definitely hesitate and second guess if she triggers a proximity alarm. That’s because she knows that most of the defenders probably heard the proximity alarm and they will be ready for her.
This is why for most cases; the proximity alarms are the best secondary gadget for Oryx. It also works hand in hand with his Remah dash ability because when attackers trigger a proximity alarm on the other side of an unreinforced wall, Oryx can use his Remah dash ability to suddenly burst through that wall and surprise the attackers that trigger the proximity alarm. Intel is very important for roamers like Oryx, and that’s why the proximity alarms are a very powerful utility for him.
21. Use the Scope 1.5x
https://youtu.be/JtWvz77LMPM?t=322
Because of his Remah dash ability, there would be a lot of times when Oryx would have to engage enemies at close range. Because of this, a lot of players who are trying Oryx, especially the ones that are new to the game would be hesitant to use the scope 1.5x and instead opt for any of the 1.0x sights. However, I really do recommend the scope 1.5x for Oryx’s T-5 SMG. That’s because the scope 1.5x is a really balanced sight and it’s in the best interest of new players to get used to it early on.
It is a very balanced sight because it can provide the player with a healthy amount of zoom level that will make Oryx’s targets appear bigger, and therefore, easier to hit. But because its zoom level is only 1.5x, it doesn’t really sacrifice a lot of peripheral view. And that is why it’s really far from a bad scope when it comes to close quarters engagements. In fact, it is perfect for dealing with enemies at close distances.
20. Take Advantage of his Remah Dash’s Speed
https://youtu.be/JtWvz77LMPM?t=440
The Remah dash ability will give you a sudden burst of speed which lasts for a full second and it can cover five meters of ground. When playing Oryx, you can fully utilize this ability to get from one place to the next much quicker than most operators. Oryx can have a maximum of three charges of Remah dash, and each individual charge will be regained after a cooldown of eight seconds. That means Oryx basically has an unlimited Remah dash and it’s only really limited by cooldown.
So, whenever you’re just trying to get to somewhere fast, do not hesitate to use the Remah dash ability. Be mindful, however, that it produces heavy footstep sounds whenever it’s used, and that could alert the enemies to your presence. And as I said before, this ability has a cooldown of eight seconds, so be sure not to use up all your charges just for sprinting, because you’ll never really know when you’ll have to use it on an enemy.
19. He Can Also Break Castle’s Armor Panels
https://youtu.be/qucPbi_B1fM?t=123
Whenever Oryx uses his Remah dash to break down an unreinforced wall, he sacrifices five healthpoints. However, this drawback doesn’t apply when he’s using it to break down barricaded doors or Castle’s armor Panels. This is great because it means that Oryx can freely use his Remah dash ability to ram down a Castle armor panel on an entryway and surprise the attackers on the other side. This is also a great way to perform run outs because most of the time, attackers won’t be expecting a defender suddenly bursting out of a Castle armor panel.
18. Don’t Sleep on his Shotgun
https://youtu.be/Kb-6YvLQkwQ?t=350
The SPAS-12 shotgun is unique to Oryx and Valkyrie and that’s why it’s kind of rare to see it being used in Siege. On top of being unique to only two operators, most players usually opt out of it whenever they’re playing said operators. However, the SPAS-12 is a really underrated shotgun, and is easily one of the most powerful and easy to use shotguns in the game.
Its rate of fire is faster than most of your typical shotguns in the game and its recoil is very manageable. Its hipfire spread is also tight even without a laser equipped to it, but of course, it would be good to attach a laser to this shotgun. It’s also a great weapon for Oryx’s gameplay of suddenly bursting through a soft wall and surprising enemies. That is because a lot of times, Oryx will be engaging enemies at close range, and the shotgun will have superiority in close distances.
17. You Can Hang on the Ledge of a Hatch
https://youtu.be/Kb-6YvLQkwQ?t=74
Whenever Oryx uses his ability to climb up a hatch, it doesn’t automatically make Oryx ascend to the higher floor. After holding on to the ledge, Oryx will have choices between dropping back down, continue climbing up, or just keep hanging onto the ledge. Now you may ask, why would any Oryx player want to just keep hanging on the ledge of a broken hatch? Well, that is because while doing that, he will be able to observe the surroundings of that higher floor.
And most of the time, attackers do not really pay attention to the ledges of a broken hatch. Unless of course they’re really aware of Oryx’s presence and are trying to hunt him down. The point is, before ascending a higher floor through a broken hatch, hang on the ledge for a few seconds and gather intel first, because simply going up without casing the area first can be really dangerous.
16. When to Run with his Barbed Wires
Most Oryx players would run him with the proximity alarms, and I agree that it’s the best secondary gadget for him in most cases. However, it doesn’t mean that players should just sleep on the barbed wires, because there are also situations where it would be better for Oryx to run with them. Obviously, one of the situations is when many in the defending team are already carrying proximity alarms into the round.
Well, having too many early warning devices isn’t that bad either, but the barbed wires are also great early warning devices. That’s because they produce noise when enemies walk over them, and they also produce loud noises when enemies are trying to destroy them with melee attacks. What’s great about the barbed wires when playing Oryx is you can use them to cover a portion of a broken hatch, and you can use that to make you appear inconspicuous while you’re hanging on the hatch’s ledge.
15. Use the Vertical Grip
Because of the recoil progression overhaul that came with the latest season which is Operation Brutal Swarm, the T-5 SMG has become a lot harder to control especially when it comes to longer sprays. However, since its recoil pattern mostly only goes on a straight vertical line, it’s still very manageable. With that said, I still recommend equipping it with a vertical grip because that will really help the user hold down its recoil. The vertical grip will also allow the user to attach a suppressor, which is now the new meta to the T-5 SMG.
14. Cover the Hatch with Barbed Wires
https://youtu.be/Kb-6YvLQkwQ?t=193
This is honestly one of the cheekiest ways to play Oryx but it’s also very effective. Most of the time, even without barbed wires, attackers don’t really pay attention to hatches, but with barbed wires covering a broken hatch, an Oryx hanging to its ledge almost feels invisible to the attackers. And of course, this allows Oryx to suddenly ascend from the hatch and surprise the unsuspecting attackers.
This trick is one of the reasons why Oryx players shouldn’t really sleep on his barbed wires. If you’re playing Oryx, especially in solo queue, it may be hard for you to get your teammates to use their barbed wires to cover a broken hatch. But obviously, if you run with the barbed wires, you can do the trick yourself.
13. Attach the Suppressor
As mentioned in one of the entries above, the T-5 SMG’s recoil has become harder to control since Operation Brutal Swarm arrived, however, if you equip it with a vertical grip, it would become manageable even without a barrel attachment that provides additional recoil control benefits. That makes the T-5 SMG a great weapon for a suppressor, and a suppressed weapon is a great help to roamers like Oryx.
Even though Oryx is quite a noisy operator, the stealth benefits from the suppressor would still be a great help to him. With a suppressed T-5 SMG, he would be able to strafe his opponents without them immediately knowing where they’re being shot from. That’s because the suppressor will hide the directional threat indicator that gunshots normally make. It will also silence the weapon’s gunshots, and this will allow Oryx to really confuse the attackers while he’s roaming and performing a hit and run tactic on them.
12. Don’t Hesitate to Kill with the Bailiff 410
https://youtu.be/Kb-6YvLQkwQ?t=541
The bailiff 410 shotgun revolver is one of the most popular secondary weapons in the game because it’s a great utility for opening up rotation holes and creating foot holes or head-high holes. However, its value for fragging enemies is very underestimated. And don’t get me wrong, I do not recommend players to really use it for hunting down enemies, but it can and it will kill your enemies effectively in its optimal range.
The point is, do not hesitate to switch to it whenever your primary needs to reload in the middle of a gun fight. Especially if you attach a laser to it, its hip fire spread will be quite tight so most of its pellets will go to the opponent’s body. It is a shotgun after all, just in the form of a revolver, and of course, shotguns are great for close quarters combat. Just be mindful of its small magazine size though.
11. The Fake Climb
https://youtu.be/Kb-6YvLQkwQ?t=151
This is one of the most fun ways to use Oryx because it takes advantage of his athleticism and versatility. As explained in one of the above entries, Oryx is the only defender that has the ability to climb up a broken hatch, but whenever he uses this ability, he doesn’t automatically ascend to the higher floor. The ability gives him an option to latch on the ledge and watch the higher floor surrounding first and then the player can decide whether he will ascend or go back down.
As you can see from the clip above, BikiniBodhi used this ability and it made the attacker pursuing him think that he was about to ascend to the higher level of the building. However, he quickly dropped again and fragged the pursuing attacker. This is one of the cheekiest ways to use Oryx and it’s definitely fun and effective, especially because with this ability, you can really make your enemies confused.
10. Surprise Opponents on the Other Side
https://youtu.be/qucPbi_B1fM?t=192
Oftentimes it is recommended for players to carry impact grenades whenever they can and other weapons that they can use as utilities for creating rotation holes and making lines of sight. That’s because having the ability to rework the map to your advantage gives you a lot more versatility. And this is why Oryx is definitely one of the most versatile operators in the game, because he can rework the map by breaking down objects or walls with his Remah dash.
And since he can easily and quickly break down walls with his Remah dash ability, he can use it to surprise enemies on the other side of an unreinforced wall. Obviously, this will only really be effective if Oryx has intel on the enemy positions on the other side of the wall. So, it’s good practice for Oryx players to watch cameras, partner up with Valkyrie, or listen attentively for early warning devices like his proximity alarm.
9. Avoid Bullets with the Remah Dash
https://youtu.be/Kb-6YvLQkwQ?t=308
While Oryx will still get damaged or even killed from getting hit by bullets and even a melee attack during his Remah dash, it is always better to use the Remah dash ability when you want to get from one point to the next and you’ll know that by doing so, you’ll have an enemy firing at you. Obviously, that’s because of the fast sprint action that the Remah dash provides so it will be much harder for your opponents to hit you.
This will always be better than using the normal sprint to get from point A to point B, because the Remah dash will always be faster than the normal sprint. Of course, what you need to be careful about really is making sure that the spot you’re going to wouldn’t just leave you more vulnerable because an enemy is actually waiting there. So, whenever possible, always check for intel first before using the Remah dash to get to another place.
8. Burst Through Walls
https://youtu.be/2ra_BjVUUu8?t=456
This is one of Oryx’s specialties and oddly enough, despite the 5hp damage whenever he does this, many players find it satisfying. Many players use the Remah dash ability for early setups like creating rotation holes inside the objective spot, and most experienced Oryx players use his ability to burst through walls in order to surprise his enemies on the other side.
However, one of the most overlooked uses of this ability is for escaping. Like Macie Jay demonstrated in this video, once you’ve killed one attacker, the tendency is that that attacker will tell his teammates where you are, so it’s always best to change positions after picking off one enemy. And that’s why Macie Jay burst through the wall behind him in order to set himself up in another room.
7. Knock Down your Enemies
https://youtu.be/2ra_BjVUUu8?t=280
This is one of the most fun ways to use Oryx and definitely belongs to your highlight reel if you’re recording your gameplay or steaming. Basically, any opponent that gets hit by Oryx’s Remah dash will get thrown two meters backwards and get knocked down for a second. This allows Oryx ample time to shoot or melee the downed attacker.
And because Oryx can reserve up to three Remah dashes at a time, if the player decides to play with his prey a little bit, he can knock down an opponent again two more times. But obviously, I wouldn’t recommend anyone to do this during ranked games because there are times that the opponent that gets knocked down by the Remah dash manages to sneak in a melee on Oryx. And of course, he or she could call in their teammates for help.
6. Take Advantage of his Special Ability to Climb a Hatch
https://youtu.be/ktAIIlCINJs?t=28
Similar to how Oryx can break through walls using his own body with the Remah dash ability and use it to quickly escape enemies or flank them, Oryx can also escape or flank enemies fast and easy with his ability to climb broken hatches. This is one of the reasons why you’d want the bailiff 410 as your secondary weapon, because there may come a time when you’re being hunted and you’d have to open up a hatch so that you can climb through it.
And as discussed above, you can even do a fake climb by latching onto the ledge of a broken hatch. This is risky of course so you must carefully assess the situation before doing it, but if successful, you could do a fake out to your enemies and have them give up on chasing you because they believe you’ve already climbed up to a higher level, only for you to climb back down and get them from behind.
5. Destroy Objects with your Remah Dash
https://youtu.be/JtWvz77LMPM?t=277
Unlike going through walls with the Remah dash that reduces your health points by five per dash, destroying objects that are found throughout the map won’t damage your health. One of the maps where it’s important for Oryx to use his Remah dash on objects is Kafe Dostoyevsky, particularly when defending the second-floor. With his Remah dash, he can destroy the wooden tables on b1 and b2.
Using this method, he should also be able to do it with the wooden parts of the bar. That way, when opponents are using those areas as a defuser plant site, the defenders would be able to see and counter them easily. On pixel, as shown in the video, he can also use the Remah dash to destroy the drawer and chair, and this will give the defender that is anchoring that spot more room to move and for deploying their gadgets.
4. Avoid Using Your Body
https://youtu.be/JtWvz77LMPM?t=214
More specifically, for creating rotation holes during the prep phase. Especially in the lower elos, you’ll see a lot of Oryx players use the Remah dash to smash their bodies through walls so that a rotation hole will be created. However, as discussed in some of the entries above, whenever you bash a wall with the Remah dash, it damages your health points by five per dash. Now, five might be small, but you’ll never really know when those five extra health points might have come in handy.
Especially since there would be times that you’d have to sacrifice some of your health points to smash through walls when escaping enemies or when attempting to flank them. So, especially when you’ve equipped the bailiff 410 revolver shotgun as your secondary weapon, there’s really no reason for you to sacrifice five health points during prep phase. Either create a rotation hole using your bailiff 410, or let your other teammates do it.
3. Help with the Setup
https://youtu.be/JtWvz77LMPM?t=186
Oryx is among the very best roamers in Siege, but unlike Caveira who should hide from attacker drones during the prep phase, there’s really no need for Oryx to do the same. That’s because due to his large build and the noisy Remah dash, it will be very easy for attackers to find out that he’s present in the enemy team. Besides, his presence alone can be a great deterrent to attackers because they know that he could burst through a wall or climb up a hatch anytime.
And since there’s really no need for Oryx to hide from attacker drones during the start of the round, he can stay for a while and help in reworking the objective spot. That is by using his bailiff 410 or SPAS-12 shotgun to create rotation holes, foot holes, or head-high holes around the objective spot. As discussed in one of the entries above, he can also use his Remah dash to break objects that wouldn’t normally break from gunshots.
2. Go with his Bailiff 410
https://youtu.be/JtWvz77LMPM?t=117
Despite the USP40 handgun being a really good weapon for fragging enemies due to its good amount of damage per shot and very manageable recoil, it’s almost a no brainer that the bailiff 410 should be Oryx’s secondary weapon. That is because the bailiff 410 being a shotgun in the form of a revolver just gives Oryx a lot more versatility since he can use it to make rotation holes, create more lines of sight, and destroy hatches.
The only time that an Oryx player should really run with the USP40 handgun is when he chooses the SPAS-12 shotgun as his primary. That’s because he will be able to do what the bailiff 410 can do with the SPAS-12 shotgun, and he’ll be needing the USP40 for strafing enemies at medium to long range. However, in most cases, the Oryx players should go for the bailiff 410 because it’s just a lot more useful as a utility and most players go for the T-5 SMG anyway instead of the SPAS-12 shotgun.
1. Open all the Hatches in the Map
https://youtu.be/JtWvz77LMPM?t=135
Obviously, you shouldn’t do this with the hatches that are above the objective spot that you’re defending, in fact, as the roamer of the team, it should fall on you to reinforce those hatches. However, if you’re defending the top floor, it would be ideal for you to just destroy all the hatches that lead to lower levels as quickly as you can during the prep phase. Destroying those hatches will really help you later on in the round.
That’s because through those hatches, you’ll be able to quickly flank enemies or you can use them to escape to a higher level when the enemies begin hunting you. And by destroying the hatches early on during the prep phase, you wouldn’t need to use your bailiff 410 anymore to destroy them before you flank enemies or escape from them. That would prevent any delay for you when you want to climb up a hatch, and it would also prevent enemies from expecting you through a hatch because they heard you destroy it.
Attention operator, please be advised. There is a new directive from Six. Read up on these related articles, and prepare for deployment:
You May Also Be Interested In:
- Rainbow 6 Siege Tier List 2021 [Rainbow 6 Siege Best Operators]
- [Top 10] Rainbow 6 Siege Best Weapons
- [Top 7] Rainbow 6 Siege Best Attackers
- Rainbow 6 Siege Attachment Guide (R6 Best Attachments For Every Weapon)
- [Top 25] Best R6 Settings That Give You An Advantage
- [Top 15] Rainbow 6 Siege Best Graphic Settings
- Rainbow 6 Siege Best Weapon Attachments
- Rainbow 6 Siege Best Operators 2021
- [Top 7] Rainbow 6 Siege Best Defenders
- Rainbow 6 Siege Roles Explained And How To Play Each One
- [Top 10] Rainbow 6 Siege Best Players
- [Top 5] Rainbow 6 Siege Best Nomad Loadouts
- [Top 5] Rainbow 6 Siege Best Jackal Loadouts
- [Top 5] Rainbow 6 Siege Best Glaz Loadouts: From Worst to Best
- [Top 5] Rainbow 6 Siege Best Finka Loadouts
- [Top 5] Rainbow 6 Siege Best Lion Loadouts
- [Top 5] Rainbow 6 Siege Best Castle Loadouts
- [Top 5] Rainbow 6 Siege Best Dokkaebi Loadouts

