Deck 10: Execute Those Enemies
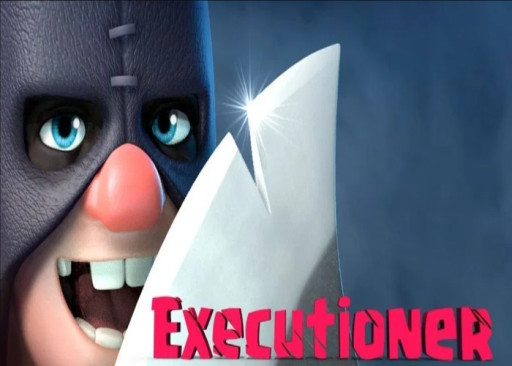
The Executioner's favorite historical event is the French Revolution.
When you reach Arena 12, Clash Royale introduces seven new cards. Among them is the Executioner. He costs 5 elixir and provides a long-range attack that does area damage to both air and ground units. The unique thing about the Executioner is that his weapon of choice, his axe, functions like a boomerang, meaning that it damages to the enemy both when the Executioner throws the axe and when he catches it.
What’s Great about this Deck
- You get to utilize the Executioner.
- Relatively low cost.
- Agglomerate of air units, offensive units, buildings, and spells.
How the Execute Those Enemies deck is Played
- Half of the cards in this deck have splash damage (Baby Dragon, Executioner, Firecracker, and Snowball). Splash damage units pair well with Tornado. This combo is effective for offense and defense. When there are multiple enemy units spread out, you will use the Tornado to bring them all together. Then you will utilize a splash damage unit (or multiple splash damage units) to deal damage to all the enemy units at once.
- Save up the max amount of elixir and then deploy the Giant at the rear of the board, near your King tower. This gives you enough time to replenish your elixir by the time the Giant reaches the bridge.
- When the Giant crosses the bridge, wait until the archers on the enemy tower lock in on the Giant. Then you will deploy the other units. The Giant works as a meat shield so the other units can make it to the enemy tower with most or all of their HP intact.
- Usually by now the enemy will have deployed a lot of enemy units. This is when you will want to use the Tornado and splash damage combo. You have already deployed your splash damage units, so they can immediately inflict damage on the horde of enemy units.
- The Firecracker works similarly to the Magic Archer in that she inflicts damage not only on the enemy unit but what is behind it. So when you use the Tornado, try to get the center to be directly in front of the enemy tower so the Firecracker can attack both at the same time.
Cards
- Baby Dragon
- Executioner
- Firecracker
- Giant
- Mega Minion
- Snowball
- Tesla
- Tornado
Deck 9: Caged Rage
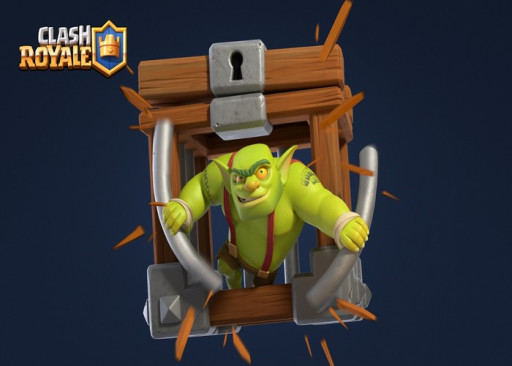
The Goblin Brawler is literally so angry he could burst.
Another card that is unlocked in Arena 12 is the Goblin Cage. The Goblin Cage is a building unit and, therefore, you can only deploy it on your side of the board. Once the Goblin Cage has taken enough damage or enough time has passed, it spawns a single Goblin Brawler. The Goblin Cage is a defensive card that is especially effective against an enemy Ram Rider or Hog Rider. If used right, the Goblin Cage can also take down an enemy Mega Knight.
What’s Great about this Deck
- You get to utilize the Goblin Cage.
- Requires the use of strategy (instead of straight spamming).
- Gives you a taste of that bougie life because this deck is quite expensive.
How the Caged Rage deck is Played
- Because this deck uses many expensive cards, strategy is necessary for success.
- Offensively, Golem is the major player. You will want to save up all your elixir and then deploy Golem near the back of your board (near your towers). This allows your elixir to build back up by the time Golem gets to the bridge.
- Golem has a lot of HP, so it is a great meat shield. Once the tower(s) have locked onto Golem and the enemy has put down additional units to attack you will deploy Baby Dragon, Executioner, and Night Witch in whatever order that will be most effective against the enemy troops.
- If the enemy puts down Skeletons or Goblins to attack Golem, the Barbarian Barrel will kill them. Similarly, if the enemy puts down Bats or Minions, Baby Dragon and Executioner provide area damage that will kill them quickly.
- Using Tornado to gather all the enemy units is effective when Baby Dragon and the Executioner are in play because of their area damage abilities.
- On defense, Goblin Cage will shine. This unit is effective against many popular offensive units such as Ram Rider and Hog Rider. Using the Tornado in tandem with area damage units is also effective on defense.
- The Lightning spell can finish off enemy towers or if a massive enemy unit is attacking.
Cards
- Baby Dragon
- Barbarian Barrel
- Executioner
- Goblin Cage
- Golem
- Lighting
- Knight Witch
- Tornado
Deck 8: Long Con
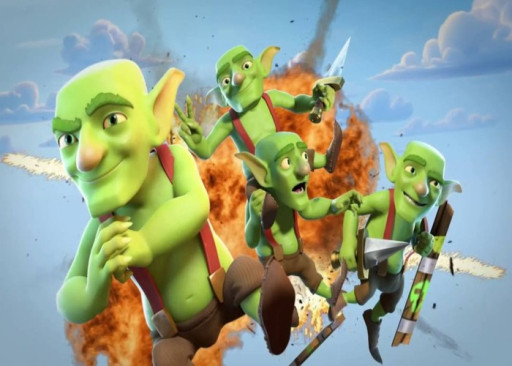
These scheming thieves are on their way to steal your money.
The attack units in this deck cost a minimal amount of elixir and this is used to your advantage. When deploying these low-cost cards, your opponent is reluctant to spend their elixir to kill them, and they usually just let your units run their course. That line of thinking works if it is just once or twice, but if you are sending a constant stream of units that your opponent lets slide, those damage points add up.
What is Great about this Deck
- Fairly cheap deck.
- Provides a failsafe for when your opponent’s tower has a small number of HP, but you just can’t seem to get any units through (Rocket, anyone?).
- This deck has dedicated defensive units.
How the Long Con deck is Played
- The goal is to carve away at your opponent’s tower little by little until you can finish it with the Rocket.
- Planning the optimal time to get the Goblin Barrel to hit the tower is vital to success. To do this, use the Princess as bait. Place the Princess down and your opponent will usually use their arrows, fireball, or zap to kill her. Once you know that those cards are now out of your opponent’s hand for the time being, send in the Goblin Barrel.
- If your opponent doesn’t fall for the bait, then your Princess will tick down the enemy tower’s HP instead of the Goblin Barrel. It is a win-win.
- To help the Goblin Barrel do even more damage, use the Zap spell. If you can get your Goblin Barrel to land and then summon the Zap spell to hit the tower, your Goblins will do maximum damage.
- For defense your Log, Knight, Archers, and Spear Goblins will be your go to units.
Cards
- Knight
- Princess
- Zap
- Spear Goblins
- Rocket
- Goblin Barrel
- Log
- Archers
Deck 7: Healthcare Hero

Nothing can stop her, not even a pandemic.
The Battle Hero becomes available to unlock in Arena 12. She has fairly high HP but does little damage. Her true strength comes in her healing abilities. You would be tempted to put her behind your troops in an attack, but her healing abilities only work when she is attacking. Therefore, it is usually best to put her on the front lines. When she is not attacking, however, she heals herself.
What’s Great about this Deck
- You get to utilize the Battle Healer.
- All the units are effective on offense.
- It contains five legendaries.
How the Healthcare Hero deck is Played
- There are many variants in which you could mobilize an offensive attack.
- One such way would be to deploy the Ram Rider near the back of the board. This will allow you to build up more elixir.
- When the Ram Rider crosses the bridge deploy two of the following cards: Bandit, Magic Archer, Night Witch, or Electro Wizard. Be aware of what enemy units your opponent has deployed and counter accordingly.
- The next unit that you will want to deploy will be the Battle Healer. Make sure you can deploy her quickly enough so she can begin attacking enemy units or buildings because that is when her healing powers can come into play.
- The arrows are used to protect the Battle Healer primarily. She cannot attack air units so Bats and Minion Horde will kill her quickly. The Barbarian Barrel functions like The Log, killing units like Skeletons and Goblins.
- As your elixir replenishes, replenish your units.
- For defense, Electro Wizard is perfect for slowing down enemy units. Barbarian Barrel also does a decent job at this. These two cards can also deflect units that have already locked onto your tower.
- You can use the Battle Healer for defense when she is paired with units that it can heal.
Cards
- Bandit
- Barbarian Barrel
- Battle Healer
- Arrows
- Magic Archer
- Knight Witch
- Ram Rider
- Electro Wizard
Deck 6: Halloween Haunting
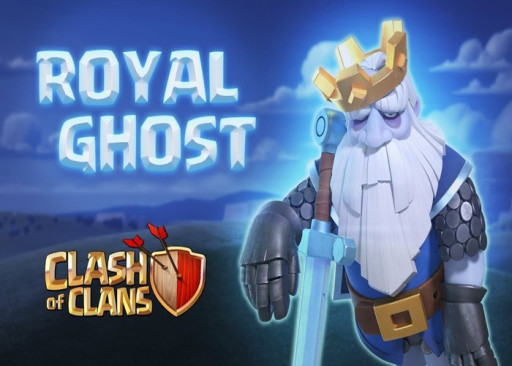
Wouldn't you be tired if you had to live forever?
With a ghost, witch, and armored skeletons that have risen from the dead, this deck gives off a seriously spooky vibe. Two spells are also included, making sure that nobody will question your loyalty to the Halloween spirit.
What’s Great about this Deck
- Utilizes the Royal Ghost, which you can be unlock in Arena 12.
- This deck has a great mix of troops and spells.
- This deck has three legendary cards.
How the Halloween Haunting deck is Played
- Use the Ice Golem as a meat shield, deploying it first so enemy units/towers lock onto it.
- Deploy the Royal Ghost and Night Witch. The Royal Ghost has a cloaking ability that will allow it to avoid detection from enemy units. The Night Witch will allow you to attack enemy air units.
- You use the Guards and the Battle Ram as supporting units on offense.
- Drop the Poison spell when there are enemy units near the enemy tower so the spell can deal damage to both simultaneously. This works best when you have units near the enemy tower as well. This keeps the enemy units within the spell radius and gives your units additional protection.
- You can use zap for offense and defense.
- You can use the Inferno Dragon primarily for defense, especially against big ticket units like Giant or Golem.
Cards
- Royal Ghost
- Guards
- Ice Golem
- Inferno Dragon
- Knight Witch
- Poison
- Battle Ram
- Zap
Deck 5: Miner Central
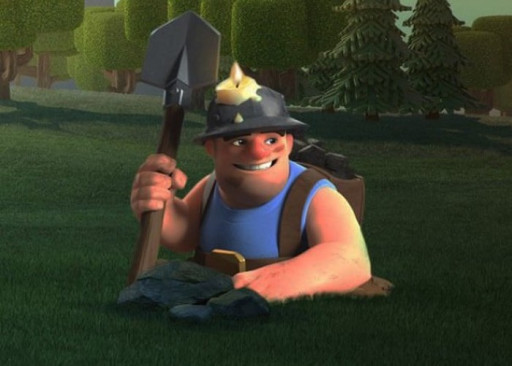
Gophers have claimed him as one of their own.
We can all probably relate to the Miner right now. With the current pandemic, many of us are also huddling in enclosed spaces, often without sunlight, with little to no company. Unlike us, however, the Miner chose this lifestyle, and he is thriving. Can the same be said for you?
What’s Great about this Deck
- Cheap - 2.9 average elixir cost.
- Miner is the central unit.
- Uses classic cards, meaning that you have had plenty of time to upgrade them.
How the Miner Central deck is Played
- The Miner is the MVP card in this deck. Your entire offense revolves around him.
- Because of the low cost of the deck, it is perfect for a spamming strategy.
- Use the Miner and Valkyrie as front line units. Both have relatively high HP. The other units (specifically Bats and Skeletons) do not. Making sure that enemy units/towers lock onto the Miner and Valkyrie will allow the Bats and Skeletons to do maximum damage.
- You can use all the cards in this deck for defense, the Bomb Tower and Valkyrie being the most effective.
Cards
- Skeletons
- Valkyrie
- Miner
- Bats
- Magic Archer
- Bomb Tower
- Arrows
- Wall Breakers
Deck 4: Mirror, Mirror on the Wall

What question would you ask an all-knowing mirror?
The Mirror is one of the seven cards that you can unlock in Arena 12. You can use this spell card many ways. When you use this spell, it allows you to deploy whichever card you most recently used right away, costing one more elixir than the original card. For example, if you just put down a Hog Rider (which cost 4 elixir) you can use the Mirror spell and another Hog Rider will be deployed (this will cost you 5 elixir). You rarely see this card used because without a strategy in place, it will most likely result in lost elixir on your part.
What’s Great about this Deck
- Utilizes the Mirror.
- Gives you a chance to develop your strategy skills.
- Can give you the ability to catch your opponent by surprise.
How the Mirror, Mirror on the Wall deck is Played
- It is not a good idea to use the Mirror on the Skeletons or Minion Horde because you will usually not get a positive elixir trade.
- Hog and Goblin Barrel will be your go to offensive combo attack.
- Use the Arrows and Zap to protect the Hog and Goblin Barrel.
- Refrain from using the Mirror early in the match. Watch carefully to how your opponent responds to your attacks and pick out the patterns. For example, do they have Arrows and do they always use those to kill your Goblin Barrel?
- Once you have figured out the pattern, you can use the Mirror to surprise your opponent, leaving them defenseless against your additional attack. Using the previous example, if they usually counter your Goblin Barrel with Arrows, wait until they have deployed the Arrows and then send another Goblin Barrel using Mirror. They will most likely have nothing to counter with or, at least, their reaction time will be minimal.
- The Mirror becomes even more valuable during the end of the game when elixir production speeds up. This allows you to deploy more and more units and gives you more opportunities to use the Mirror. A great example of this would be to put down two Mega Knights right after each other. That would be difficult for your opponent to defend.
Cards
- Arrows
- Skeletons
- Goblin Barrel
- Minion Horde
- Hog Rider
- Zap
- Mirror
- Mega Knight
Deck 3: Natural Disasters
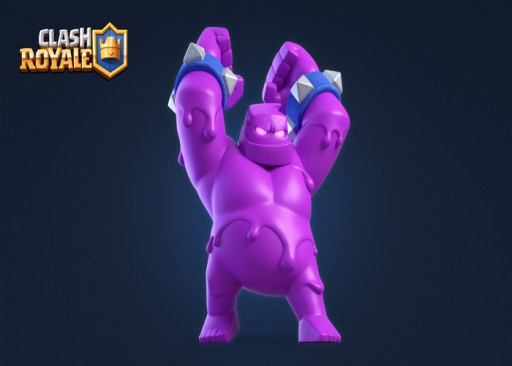
While a great houseguest, he does make a big mess.
Trying to wrangle Mother Nature is risky business. Be careful when using this deck, especially in regards to the Elixir Golem. At its death, the Elixir Golem can potentially give 4 elixir to your opponent, allowing them to create a strong counter-attack. But, if used correctly, this deck can lead you to many wins.
What’s Great about this Deck
- Get to utilize the Battle Healer --which is a new card available in Arena 12.
- Allows for powerful offensive attacks.
- The Battle Healer combined with the Elixir Golem can give your units a significantly longer lifespan.
How the Natural Disasters deck is Played
- You can use the Elixir Golem as a tank in offense. When combining its various offsprings’ HPs together the Elixir Golem has the highest health-to-cost-ratio.
- Deploy the Battle Healer immediately after the Elixir Golem. This will protect the Battle Healer while also allowing her to get close enough to attack. This is necessary because the Battle Healer cannot heal other units unless she herself is attacking.
- You can use the rest of the units as supporting units.
- Use the Tornado to gather all the enemy units together so the Magic Archer can use his area damage against them all.
- Use Earthquake against enemy buildings in offense.
- You can use all the cards except for Earthquake in defense. Electro-dragon is especially effective.
Cards
- Barbarian Barrel
- Battle Healer
- Earthquake
- Electro-dragon
- Elixir Golem
- Magic Archer
- Night Witch
- Tornado
Deck 2: Ice Ice Baby
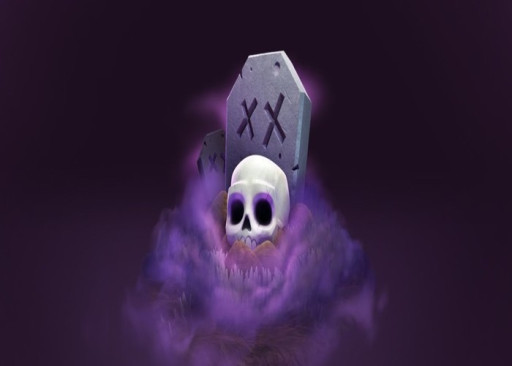
The Skeleton War is alive and well in Clash Royale.
This deck is one of the most popular in Arena 12, and it is popular for a reason. It incorporates Graveyard (a card that you can unlock in Arena 12). Graveyard is a spell that you can cast anywhere on the board. Once youcast it, it summons skeletons, raising them from the grave (hence the name Graveyard). It also relies heavily on units that can deal splash damage (specifically Baby Dragon and Ice Wizard).
What’s Great about this Deck
- Uses Graveyard which is one of the seven new cards that you can access in Arena 12.
- This deck really emphasises the effectiveness of area damage.
- This deck has a good balance of cards that can attack air and ground units.
How the Ice Ice Baby deck is Played
- This deck focuses on an effective defense. The foundation of your defense then leads to a strong counter-attack.
- The Bomb Tower is the center of your defense. It will draw enemy attacks and deals area damage to ground units. It is vulnerable to air units so you will have to keep your Baby Dragon, Ice Wizard, or Poison ready to go. You can even use the Tornado to pull units away from your Bomb Tower as a last resort.
- You can also use the Tornado to pull enemy units to the King Tower, activating it and giving you extra defensive strength.
- The Tornado also works well when paired with Baby Dragon or Ice Wizard. The Tornado will pull all enemy units together and then the Baby Dragon or Ice Wizard will attack them all at once with their area damage.
- In your counter attack, wait until your troops (Knight is a good unit to send over first because of its high HP) go over the bridge and the enemy tower locks onto them before setting down your Graveyard on the enemy tower.
- Many times the other player will try to defend against the Graveyard using Minions or Goblins. If this is the case, place the Poison spell right over the Graveyard.
- You can use the Tornado and Baby Dragon/Ice Wizard combination on offense when trying to cut through masses of enemy units to get to the enemy tower.
Cards
- Baby Dragon
- Barbarian Barrel
- Bomb Tower
- Graveyard
- Ice Wizard
- Knight
- Tornado
- Poison
Deck 1: Royal Pain
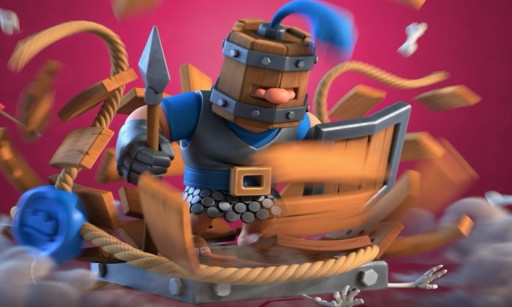
This guy knows how to make an entrance.
Royal Delivery is one of the seven new cards introduced in Arena 12. This card is a spell that can only be played on your side of the board (similar to buildings). The Royal Delivery deals splash damage when it first hits the ground. This splash damage is dealt to air and ground units alike. Once the Royal Delivery arrives, it spawns one Royal Recruit.
What’s Great about this Deck
- Get to use the Royal Delivery card in your deck.
- The Earthquake combined with the Royal Hogs makes it easier to get troops to the enemy's tower.
- Mixes classic cards with new cards making for familiar yet exciting gameplay.
How the Royal Pain deck is Played
- Your main offensive card is the Royal Hogs. These, like Giant and Hog Rider, zero in on enemy buildings, ignoring other troops.
- The primary defense against cards like Royal Hogs is to put buildings in front of your tower. Having the Earthquake spell in your deck helps to clear a path for the Royal Hogs to the enemy tower. The Earthquake spell does extreme damage to enemy buildings, making it a great pairing with the Royal Hogs.
- The Magic Archer is a great supporting unit for the Royal Hogs/Earthquake combination because it does area damage to both air and ground units. The Magic Archer’s attack also goes through the enemy and continues behind it. This means that if enemy units are positioned in front of the enemy tower, the Magic Archer can deal damage to these units and the tower at the same time.
- The Hunter and Mini P.E.K.K.A. are your primary defensive troops. Mini P.E.K.K.A. is effective against enemy tank units.
- Use the Royal Delivery for your defensive strategy as well.
Cards
- Earthquake
- Hunter
- Ice Golem
- Magic Archer
- Mini Pekka
- Royal Delivery
- Royal Hogs
- Skeletons
You May Also Be Interested In:
- [Top 10] Clash Royale Best Arena 12 Decks
- [Top 10] Clash Royale Best Arena 8 Decks
- [Top 10] Clash Royale Best Arena 6 Decks
- [Top 10] Clash Royale Best Arena 5 Decks
- [Top 10] Clash Royale Best Arena 4 Decks
- Top 7 Clash Royale Best Legendary
- Top 10 Clash Royale Best Arena 7 Decks
- Top 10 Clash Royale Best Decks
- Top 15 Clash Royale Best Cards
- Clash Royale Best Way To Spend Gems

