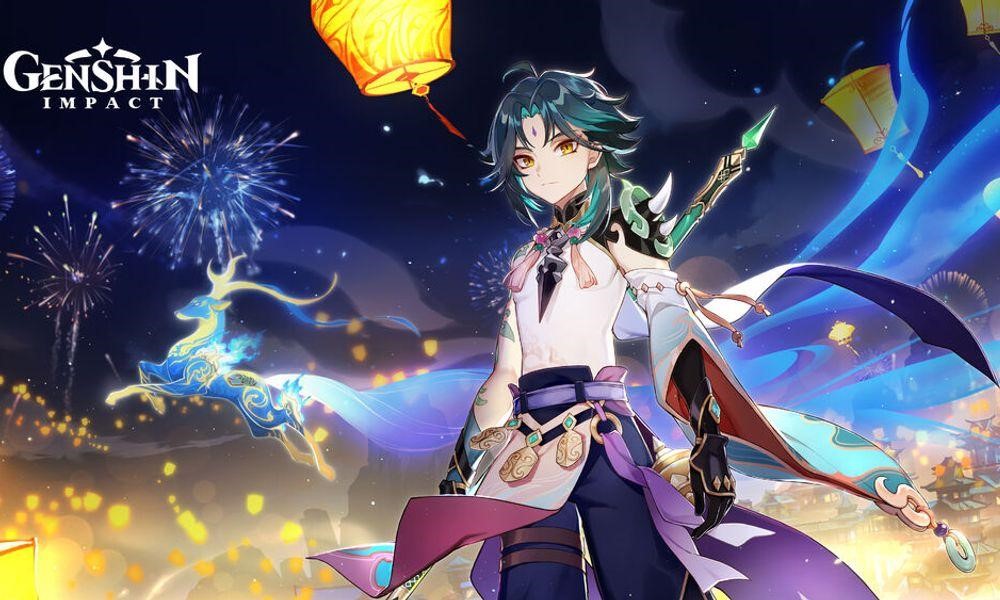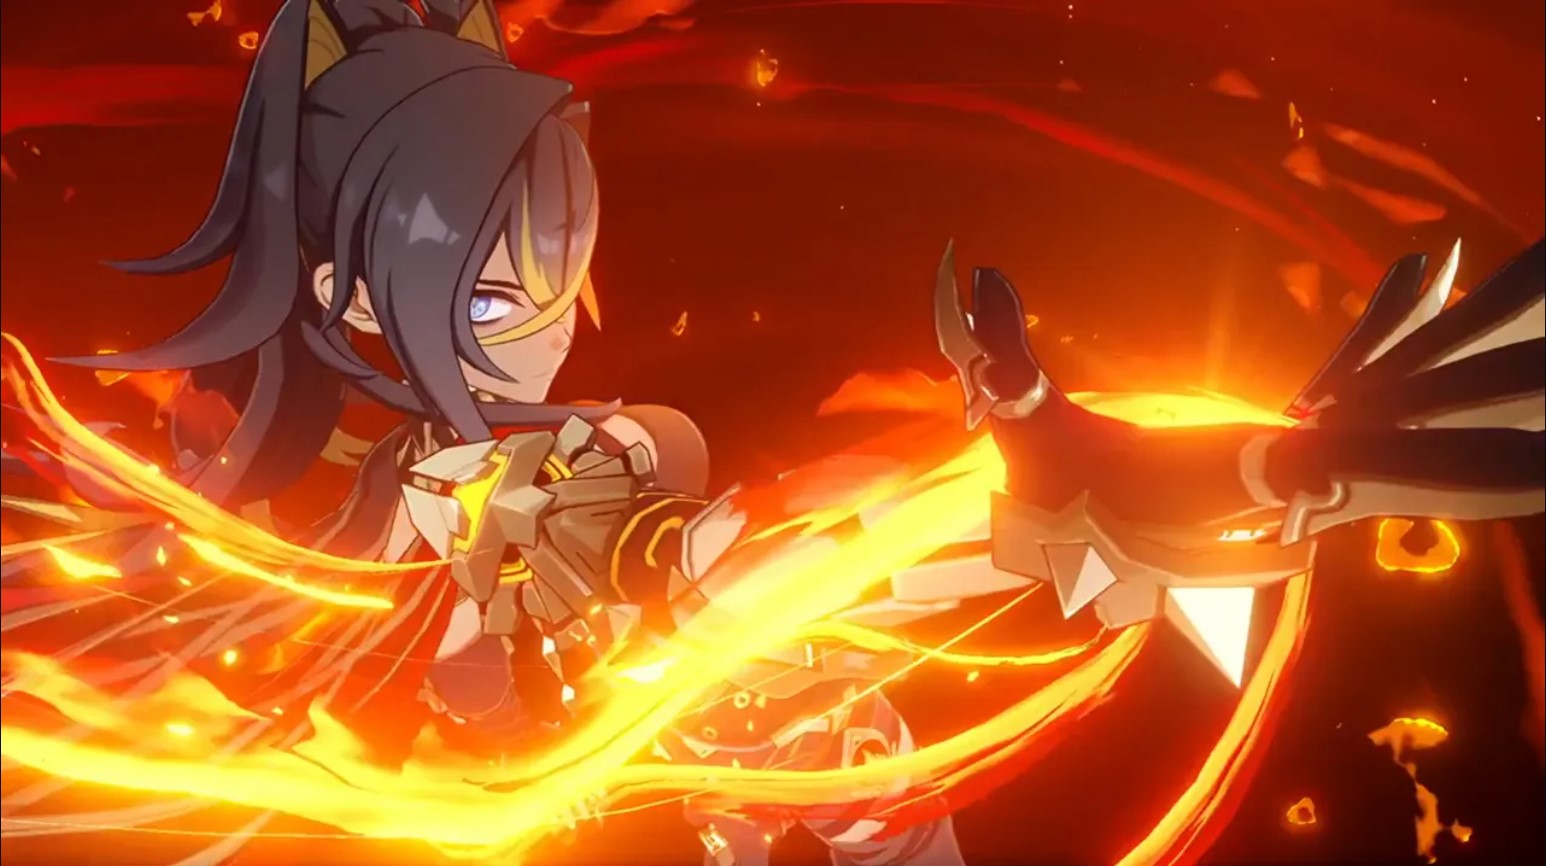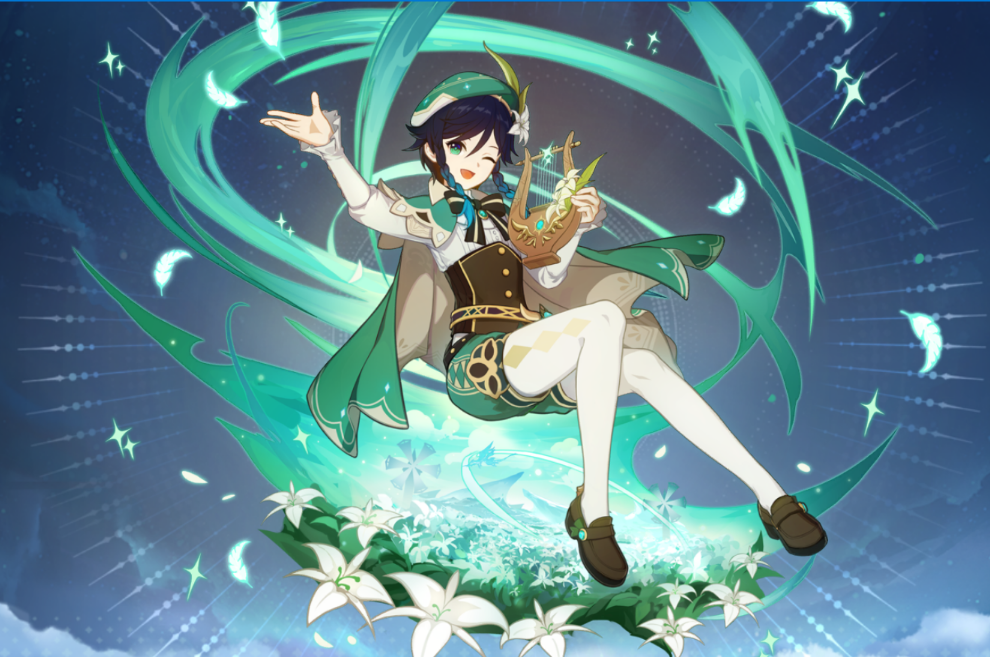
When it comes to Genshin Impact, one of its top selling points is its characters—particularly their unique skills and potential as units. There are many different types of said units that fulfill certain roles; the most obvious being damage dealing characters, but support characters are just as—if not more—important.
If it’s hitting big numbers you’re after, then look no further, as this article will help you find the best supports for your characters. From niche to all-rounders, you’re certain to find the perfect unit (or units) to support your DPS characters and boost their damage.
10. Nilou (Strong)

Let’s be real here, the Dance of Sabzeruz cutscene made us all shed a tear or two.
With the release of the Sumeru region and Dendro characters came supports that centered around Dendro related Elemental Reactions, namely Nilou. It’s true that she’s insanely strong with her special Bloom Cores, however that’s pretty much her only strong suit, making her a very niche character.
Of course, Nilou can be used on other Dendro teams like Hyperbloom and Burgeon, but because she only generates her special Bloom Cores if your team is composed of strictly Dendro and Hydro units, much of her potential is lost on other teams. But when placed on a Bloom team, her Bloom Cores dominate the field.
Considering she scales on HP, plus the fact that her kit revolves around the Bloom reaction, Nilou is easy to build, as you really only need to focus on HP and Elemental Mastery stats. When playing her, you’ll focus primarily on using her Elemental Skill, which will create a Hydro aura that surrounds your character and applies enemies with Hydro, perfect for triggering Bloom. Her Elemental Skill can also provide Nilou with a Hydro infusion if you use her Normal Attack on the last activation of her skill, however unless you’re using her on-field, it isn’t particularly useful.
Overall, if you want to build a goated Bloom team, Nilou is the perfect fit.
Support Abilities
- Dance of Haftkarsvar (Elemental Skill) – Enters the Pirouette state, dealing Hydro DMG to nearby opponents based on Nilou's Max HP.
While she is in the Pirouette state, Nilou's Normal Attacks and Elemental Skill will cause her to enter the Sword Dance and Whirling Steps stances respectively, causing DMG she deals to be converted to Hydro DMG that cannot be overridden and that is considered Elemental Skill DMG.
In these stances, Nilou's third dance step will end Pirouette, and has the following effects:- Sword Dance: unleashes a Luminous Illusion that deals Hydro DMG to opponents it touches and grants Nilou the Lunar Prayer effect. This effect converts Nilou’s Normal Attacks into Sword Dance techniques, and her final hit will unleash a Luminous Illusion.
- Whirling Steps: Nilou unleashes a Whirling Water Wheel that deals AoE Hydro DMG and creates a Tranquility Aura that follows your active character around and applies Wet to opponents within its AoE.
Nilou is unable to perform Charged Attacks when under the effect of Pirouette or Lunar Prayer. These effects will be removed once she leaves the field.
- Court of Dancing Petals (1st Ascension Passive) – When all characters in the party are all Dendro or Hydro, and there are at least one Dendro character and one Hydro character:
The completion of the third dance step of Nilou's Dance of Haftkarsvar will grant all nearby characters the Golden Chalice's Bounty for 30s.
Characters under the effect of Golden Chalice's Bounty will increase the Elemental Mastery of all nearby characters by 100 for 10s whenever they are hit by Dendro attacks. Also, triggering the Bloom reaction will create Bountiful Cores instead of Dendro Cores.
Such Cores will burst very quickly after being created, and they have larger AoEs.
Bountiful Cores cannot trigger Hyperbloom or Burgeon, and they share an upper numerical limit with Dendro Cores. Bountiful Core DMG is considered DMG dealt by Dendro Cores produced by Bloom.
Should the party not meet the conditions for this Passive Talent, any existing Golden Chalice's Bounty effects will be canceled. - Dreamy Dance of Aeons (4th Ascension Passive) – Every 1,000 points of Nilou's Max HP above 30,000 will cause the DMG dealt by Bountiful Cores created by characters affected by Golden Chalice's Bounty to increase by 9%.
- The maximum increase in Bountiful Core DMG that can be achieved this way is 400%.
- The Starry Skies Their Flowers Rain (Constellation 2) – After characters affected by the Golden Chalice's Bounty deal Hydro DMG to an opponent, that opponent's Hydro RES will be decreased by 35% for 10s. After a triggered Bloom reaction deals DAMAGE to opponents, their Dendro RES will be decreased by 35% for 10s.
You need to have unlocked the "Court of Dancing Petals" Talent. - Frostbreaker’s Melody (Constellation 6) – For every 1,000 points of Max HP, Nilou's CRIT Rate and CRIT DMG will increase by 0.6% and 1.2% respectively.
- The maximum increase in CRIT Rate and CRIT DMG via this method is 30% and 60% respectively.
9. Faruzan (Strong)
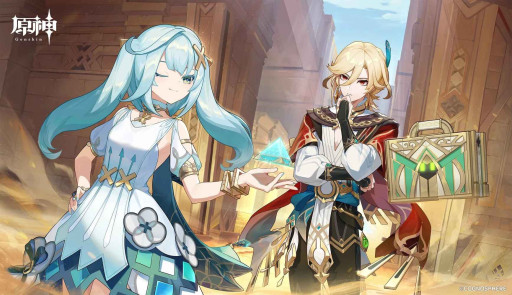
Let’s hope Madam Faruzan doesn’t get trapped in desert ruins for another century.
Another niche character, Faruzan, was made to excel at supporting her fellow Anemo characters. This elderly madam is a valuable unit with the ability to boost your characters’s Anemo DMG and shred enemy Anemo RES, allowing party members’ Anemo DMG capabilities to massively increase.
Faruzan’s kit as a support character is pretty straightforward, providing a set percentage Anemo DMG Bonus and enemy Anemo RES decrease with her Elemental Burst, and with her 4th Ascension Passive, she adds an additional DMG boost based on 32% of her Base ATK. Furthermore, when unlocking her C2, the duration of her Elemental Burst is increased by a whopping 6s, greatly extending the buffs provided.
Unfortunately, however, Faruzan does have her drawbacks. For one, her Elemental Burst cost is extremely high, so you’ll need to stack up Energy Recharge stats in order to consistently use her Elemental Burst for its buffs. Plus, since her DMG boost scales off of her Base ATK, she’ll need to be equipped with a weapon that has a high Base ATK in order to make the most use of the buff.
Lastly, her full potential as an Anemo support is, sadly, Constellation locked. With Faruzan’s C6, she’ll provide your characters with 40% CRIT DMG when dealing Anemo DMG while her Elemental Burst is active. Talk about an absolutely cracked unit.
Support Abilities
- The Wind’s Secret Ways (Elemental Burst) – Faruzan deploys a Dazzling Polyhedron that unleashes a Whirlwind Pulse and deals AoE Anemo DMG.
While the Dazzling Polyhedron persists, it will continuously move along a triangular path. Once it reaches each corner of that triangular path, it will unleash 1 more Whirlwind Pulse.
Whirlwind Pulse
When the Whirlwind Pulse is unleashed, it will apply Perfidious Wind’s Bale to nearby opponents, decreasing their Anemo RES.
The Whirlwind Pulse will also apply Prayerful Wind’s Benefit to all nearby party members when it is unleashed, granting them an Anemo DMG Bonus. - Lost Wisdom of the Seven Caverns (4th Ascension Passive) – When characters affected by The Wind's Secret Ways' Prayerful Wind's Gift deal Anemo DMG using Normal, Charged, Plunging Attacks, Elemental Skills, or Elemental Bursts to opponents, they will gain the Hurricane Guard effect: This DMG will be increased based on 32% of Faruzan's Base ATK. 1 instance of Hurricane Guard can occur once every 0.8s. This DMG Bonus will be cleared after Prayerful Wind's Benefit expires or after the effect is triggered once.
- The Wondrous Path of Truth (Constellation 6) – Characters affected by The Wind's Secret Ways' Prayerful Wind's Benefit have 40% increased CRIT DMG when they deal Anemo DMG. When the active character deals DMG while affected by Prayerful Wind's Benefit, they will apply Pressurized Collapse to the opponent damaged. This effect can be triggered once every 3s. This CD is shared between all party members.
8. Shenhe (Strong)
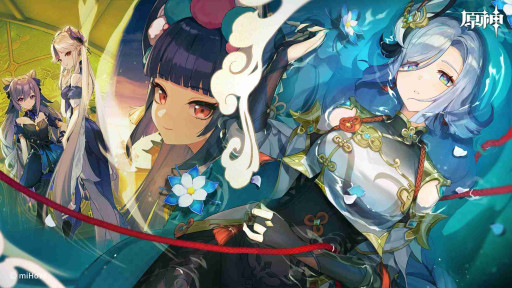
She really tried to solo fight a god’s wife.
Yet again, we have another niche—yet useful when placed on the right team—character. Shenhe is a Cryo Vision wielding character who mainly serves as a Cryo support, but is also capable of helping out Physical characters.
With her Elemental Skill, Shenhe increases the DMG dealt by your party members when they deal Cryo DMG to opponents, the duration of which depends on whether you use her tap or hold skill. Additionally, with her 4th Ascension Passive, her tap/hold skill provides a 15% Elemental Skill/Elemental Burst DMG increase and a 15% Normal, Charged, and Plunging Attack DMG increase respectively.
As for her Elemental Burst, Shenhe creates a field that decreases the Cryo and Physical RES of enemies within said field. On top of that, after unlocking her 1st Ascension Passive, active characters within the field will gain a 15% Cryo DMG Boost. Super cracked, right?
For having so many crazy good support abilities, Shenhe is pretty easy to build given that the buff provided by her Elemental Skill scales off of her ATK. When it comes to her Elemental Burst, however, its energy cost is quite high, so you’ll need to aim for Energy Recharge substats alongside ATK.
Support Abilities
- Spring Spirit Summoning (Elemental Skill) – The frosted dew, silvery and dense, shall exorcise all demons.
Grants all nearby party members the Icy Quill effect and deals Cryo DMG in different ways based on whether it is (pressed/tapped) or held.
(Press/Tap)
Rushes forward together with a Talisman Spirit, dealing Cryo DMG to opponents along the path.
Hold
Commands the Talisman Spirit to deal AoE Cryo DMG.
Icy Quill
When Normal, Charged, and Plunging Attacks, Elemental Skills, and Elemental Bursts deal Cryo DMG to opponents, the DMG dealt is increased based on Shenhe's current ATK.
The Icy Quill's effects will be cleared once its duration ends or after being triggered a certain number of times.
When held rather than (pressed/tapped), the Icy Quill's effect lasts longer and can be triggered more times.
When one Cryo DMG instance strikes multiple opponents, the effect is triggered multiple times based on the number of opponents hit. The number of times the effect is triggered is calculated independently for each party member with the Icy Quill. - Divine Maiden’s Deliverance (Elemental Burst) – Unleashes the power of the Talisman Spirit, allowing it to roam free in this plane, dealing AoE Cryo DMG.
The Talisman Spirit then creates a field that decreases the Cryo RES and Physical RES of opponents within it. It also deals periodic Cryo DMG to opponents within the field. - Deific Embrace (1st Ascension Passive) – An active character within the field created by Divine Maiden's Deliverance gains 15% Cryo DMG Bonus.
- Spirit Communion Seal (4th Ascension Passive) – After Shenhe uses Spring Spirit Summoning, she will grant all nearby party members the following effects:
- (Press/Tap): Elemental Skill and Elemental Burst DMG increased by 15% for 10s.
- Hold: Normal, Charged, and Plunging Attack DMG increased by 15% for 15s.
7. Kuki Shinobu (Strong)

Someone give this girl a vacation—she needs it.
Being a Jack of all trades, the Arataki Gang’s Deputy Leader works primarily as a healer, but since the release of Dendro units has doubled as a catalyst to trigger the element’s busted reactions.
One thing to note about Kuki Shinobu is that she does have split scaling, making her a bit more difficult to build optimally. Her damage has normal scaling—though it’s not too important as she’s there to support—while her healing scales on her Max HP. After unlocking her 4th Ascension Passive, both her healing and damage are increased by 75%/25% of her Elemental Mastery respectively.
With her Elemental Skill, Kuki Shinobu creates a ring that follows your active character around and periodically heals any characters within its AoE; this is where she becomes highly valuable. Along with healing, the ring also deals damage to opponents within its AoE and applies them with Electro—and because you’ll want to give her plenty of Elemental Mastery, the Dendro-Electro reactions triggered will deal even more damage.
Another plus is that her Elemental Skill has almost 100% uptime unless her C2 is active, in which case its duration is increased to exactly 100% uptime. Given that the duration is 12s/15s depending on her Constellation, your other characters have ample time to trigger reactions while Kuki Shinobu works off-field.
If you’re playing her on a Dendro team, she’s especially valuable on Bloom/Burgeon teams, as the reactions will deal damage to your own active character, making a healer ideal.
Support Abilities
- Sanctifying Ring (Elemental Skill) – Creates a Grass Ring of Sanctification at the cost of part of her HP, dealing Electro DMG to nearby opponents.
Grass Ring of Sanctification
Follows your current active character around. Deals Electro DMG to nearby opponents every 1.5s and restores HP for the active character(s) within the ring's AoE based on Kuki Shinobu's Max HP.
The HP consumption from using this skill can only bring her to 20% HP. - Breaking Free (1st Ascension Passive) – When Shinobu's HP is not higher than 50%, her Healing Bonus is increased by 15%.
- Heart’s Repose (4th Ascension Passive) – Sanctifying Ring's abilities will be boosted based on Shinobu's Elemental Mastery:
- Healing amount will be increased by 75% of Elemental Mastery.
- DMG dealt is increased by 25% of Elemental Mastery.
6. Xingqiu (Strong)

Xingqiu walked so Yelan could run.
Ah, our old friend Xingqiu, an og support who has remained top tier for over 3 years—what a feat! This 4 star support is not only a highly versatile unit with a lot to offer, but is also F2P friendly.
Primarily known for being able to spam his Elemental Burst to proc reactions, Xingqiu can dish out consecutive Hydro DMG when your active character deals Normal Attacks with said skill that lasts for a whopping 15s (18s with his C2).
With his Elemental Skill, on the other hand, he’ll create Rain Swords that orbit around your active character and increase their resistance to interruption as well as provide damage reduction; with his 1st Ascension Passive, he’ll even heal your current active character whenever a Rain Sword is broken or the duration expires. The healing itself is not all that great, scaling on only 6% of Xingqiu’s Max HP, but hey, it’s a nice little bonus.
On the downside, Xingqiu’s Elemental Burst has a high energy cost, and his Elemental Skill has a long cooldown. Because of these factors, Sacrificial Sword is his most optimal weapon, which has an Energy Recharge substat and has a chance (80% at R5) to reset his Elemental Skill’s CD with its passive. Of course, other Energy Recharge weapons like Favonius Sword work as well, but aren’t as good as his best in slot.
Even with the Energy Recharge from the weapon, however, you’ll still want to try and give him Energy Recharge substats alongside a CRIT build. Swapping out an ATK Sands for Energy Recharge and/or equipping him with the Emblem of Severed Fate artifact set is also a viable option.
Support Abilities
- Guhua Sword: Fatal Rainscreen (Elemental Skill) – Xingqiu performs twin strikes with his sword, dealing Hydro DMG. At the same time, this ability creates the maximum number of Rain Swords, which will orbit your active character.
The Rain Swords have the following properties:- When a character takes DMG, the Rain Sword will shatter, reducing the amount of DMG taken.
- Increases the character’s resistance to interruption.
20% of Xingqiu's Hydro DMG Bonus will be converted to additional DMG Reduction for the Rain Swords.
The maximum amount of additional DMG Reduction that can be gained this way is 24%.
The initial maximum number of Rain Swords is 3.
Using this ability applies the Wet status onto the character.
- Guhua Sword: Raincutter (Elemental Burst) – Initiate Rainbow Bladework and fight using an illusory sword rain, while creating the maximum number of Rain Swords.
Rainbow Bladework
Your active character’s Normal Attacks will trigger consecutive sword rain attacks, dealing Hydro DMG.
Rain Swords will remain at the maximum number throughout the ability’s duration. - Hydropathic (1st Ascension Passive) – When a Rain Sword is shattered or when its duration expires, it regenerates the current character's HP based on 6% of Xingqiu's Max HP.
- Rainbow Upon the Azure Sky (Constellation 2) – Extends the duration of Guhua Sword: Raincutter by 3s.
Decreases the Hydro RES of opponents hit by sword rain attacks by 15% for 4s.
5. Xianyun (Powerful)

It took over 2 years for us to finally see her human form, and another year for her to become playable—what a ride.
One of the newest supports, Xianyun, has taken the meta by storm since her release, opening a door of possibilities with her ability to essentially allow any character to make use of Plunge Attacks. Though quite versatile (but also a little bit niche), she primarily works well with Xiao and Gaming, another new character who made his debut alongside the female Adeptus during this year’s Lantern Rite.
Xianyun’s kit is rather unique, as she doubles as both a Plunge Attack buffer and a healer. Not only that, but she’s among the three characters who can use their Elemental Skills mid-air—all three being Anemo characters, naturally.
Aside from her Elemental Burst, which heals your entire party as well as deal Anemo DMG and boost the active character’s jump height, Xianyun’s Ascension Passives are especially important. With her 1st Ascension Passive, each enemy hit with her Elemental Skill will grant all party members a CRIT Rate increase for their Plunge Attacks. Her 4th Ascension Passive is just as cracked, as it increases your active character’s Plunging Attack shockwave DMG.
Due to the fact that both her healing and 4th Ascension Passive scale off of her ATK, Xianyun is pretty easy to build. Though her Elemental Burst cost is a little on the higher side, so having some Energy Recharge substats is ideal.
Support Abilities
- Stars Gather at Dusk (Elemental Burst) – Brings forth a sacred breeze that deals AoE Anemo DMG and heals all nearby characters based on Xianyun's ATK. It will also summon the "Starwicker" mechanism.
Starwicker- Continuously follows the active character and periodically heals all nearby party members based on Xianyun’s ATK.
- Starts with 8 stacks of Adeptal Assistance. While Adeptal Assistance is active, nearby active characters in the party will have their jump height increased.
- When the active character completes a Plunging Attack, Starwicker will consume 1 stack of Adeptal Assistance and deal AoE Anemo DMG.
Only 1 Starwicker can exist simultaneously.
- Galefeather Pursuit (1st Ascension Passive) – Each opponent hit by Driftcloud Waves from White Clouds at Dawn will grant all nearby party members 1 stack of Storm Pinion for 20s. Max 4 stacks. These will cause the characters' Plunging Attack CRIT Rate to increase by 4%/6%/8%/10% respectively.
Each Storm Pinion created by hitting an opponent has an independent duration. - Consider, the Adeptus in Her Realm (4th Ascension Passive) – When the Starwicker created by Stars Gather at Dusk has Adeptal Assistance stacks, nearby active characters' Plunging Attack shockwave DMG will be increased by 200% of Xianyun's ATK. The maximum DMG increase that can be achieved this way is 9,000.
Each Plunging Attack shockwave DMG instance can only apply this increased DMG effect to a single opponent. Each character can trigger this effect once every 0.4s. - Aloof From the World (Constellation 2) – After using a Skyladder from White Clouds at Dawn, Xianyun's ATK will be increased by 20% for 15s.
Additionally, the effects of the Passive Talent "Consider, the Adeptus in Her Realm" will be enhanced: When the Starwicker created by Stars Gather at Dusk has Adeptal Assistance stacks, nearby active characters' Plunging Attack shockwave DMG will be increased by 400% of Xianyun's ATK. The maximum DMG increase that can be achieved this way is 18,000.
Each Plunging Attack shockwave DMG instance can only apply this increased DMG effect to a single opponent. Each character can trigger this effect once every 0.4s.
You must first unlock the Passive Talent "Consider, the Adeptus in Her Realm." - Mystery Millet Gourmet (Constellation 4) – After using Skyladder 1/2/3 times during one White Clouds at Dawn Cloud Transmogrification state, when a Driftcloud Wave unleashed during that instance hits an opponent, it will heal all nearby party members for 50%/80%/150% of Xianyun's ATK. This effect can be triggered once every 5s.
4. Bennett (Powerful)

An adventure with Bennett is like a dance with Death…
Another old friend of ours, the unlucky leader of Benny’s Adventure Team. Despite his spot as best support being taken over by other, better characters over the years, Bennett still remains within the top 5 best supports, providing both healing and an ATK buff.
With his relatively low Elemental Burst cost and HP scaling, Bennett’s an easy character to build, and seeing as his ATK buff scales on his Base ATK, you needn’t worry about aiming for ATK stats in your build. It is, however, recommended that you equip Bennett with a weapon that has a high Base ATK to get the most out of the boost. It’s also optimal to equip him with the 4 piece Noblesse Oblige set for an additional team buff.
Luckily, the cons to using Bennett are minimal. For one, his healing, unfortunately, will not heal your active character if they are above 70% HP. And then there’s his C6, which is the biggest (and pretty much the only) complaint people have about his character.
With his C6, Bennett will grant melee characters within the AoE of his Elemental Burst a Pyro infusion that can be overridden. However, this means your characters can no longer do Physical DMG unless they are a bow user, and characters like Ayaka will have their own infusions overridden, which can mess things up, hence why many simply keep him at C5.
Support Abilities
- Fantastic Voyage (Elemental Burst) – Bennett performs a jumping attack that deals Pyro DMG, creating an Inspiration Field.
Inspiration Field- If the health of a character within the AoE is equal to or falls below 70%, their health will continuously regenerate. The amount of HP restored scales off Bennett’s Max HP.
- If the health of a character within the AoE is higher than 70%, they gain an ATK Bonus that is based on Bennett’s Base ATK.
- Imbues characters within the AoE with Pyro.
- Grand Expectation (Constellation 1) – Fantastic Voyage's ATK increase no longer has an HP restriction, and gains an additional 20% of Bennett's Base ATK.
- Fire Ventures With Me (Constellation 6) – Sword, Claymore, or Polearm-wielding characters inside Fantastic Voyage's radius gain a 15% Pyro DMG Bonus and their weapons are infused with Pyro.
3. Kazuha (Powerful)

Canadian Aether.
Initially, Kazuha’s release was not the most well received, but those who skipped or called him trash soon came to regret it when they realized how cracked he really was. With his ability to provide Elemental DMG buffs through the Swirl reaction, this wandering samurai is a perfect fit for any team that focuses on dealing Elemental DMG and triggering Elemental Reactions.
With his Elemental Skill, Kazuha can group up enemies and launch them within the AoE—excellent for crowd control. His Elemental Burst, meanwhile, creates an AoE field that deals Anemo DMG periodically, and when Swirled with another element, will also deal damage of the respective element.
But this is not Kazuha’s main selling point; after unlocking his 4th Ascension Passive, when Kazuha triggers the Swirl reaction, he will grant all party members a 0.04% Elemental DMG Bonus to the element Swirled for every point of Elemental Mastery he has. The buff lasts for 8s, and Elemental DMG Bonuses for different elements can even exist at the same time!
With his buff in mind, the ideal build is to go full Elemental Mastery, which, in theory, seems easy to achieve, but is actually somewhat difficult considering the drop rates of Elemental Mastery pieces. As far as artifacts go, the 4 piece Viridescent Venerer set is the best choice, as the set bonus will allow Kazuha to decrease enemies’s Elemental RES against the element he Swirls when triggering said reaction.
Support Abilities
- Chihayaburu (Elemental Skill) – Unleashes a secret technique as fierce as the rushing wind that pulls objects and opponents towards Kazuha's current position before launching opponents within the AoE, dealing Anemo DMG and lifting Kazuha into the air on a rushing gust of wind.
Within 10s of remaining airborne after casting Chihayaburu, Kazuha can unleash a powerful Plunging Attack known as Midare Ranzan.
(Press/Tap)
Can be used in mid-air.
Hold
Charges up before unleashing greater Anemo DMG over a larger AoE than (Press/Tap) Mode.
Plunging Attack: Midare Ranzan
When a Plunging Attack is performed using the effects of the Elemental Skill Chihayaburu, Plunging Attack DMG is converted to Anemo DMG. On landing, Kazuha creates a small wind tunnel via a secret blade technique that pulls in nearby objects and opponents.
Midare Ranzan's DMG is considered Plunging Attack DMG. - Kazuha Slash (Elemental Burst) – The signature technique of Kazuha's self-styled bladework — a single slash that strikes with the force of the first winds of autumn, dealing AoE Anemo DMG.
The blade's passage will leave behind a field named "Autumn Whirlwind" that periodically deals AoE Anemo DMG to opponents within its range.
Elemental Absorption
If Autumn Whirlwind comes into contact with Hydro/Pyro/Cryo/Electro, it will deal additional elemental DMG of that type.
Elemental Absorption may only occur once per use. - Poetics of Fuubutsu (4th Ascension Passive) – Upon triggering a Swirl reaction, Kaedehara Kazuha will grant all party members a 0.04% Elemental DMG Bonus to the element absorbed by Swirl for every point of Elemental Mastery he has for 8s. Bonuses for different elements obtained through this method can co-exist.
- Yamaarashi Tailwind (Constellation 2) – The Autumn Whirlwind field created by Kazuha Slash has the following effects:
- Increases Kaedehara Kazuha’s own Elemental Mastery by 200 for its duration.
- Increases the Elemental Mastery of characters within the field by 200.
The Elemental Mastery-increasing effects of this Constellation do not stack.
2. Nahida (Very Powerful)

Everybody loves Nahida.
Our favorite little Radish Archon, here to take the No. 2 spot on the best support list. Lore wise, she claims to be the weakest Archon (take that, Venti), but when it comes to gameplay, she might just be the strongest.
As a Dendro character, Nahida automatically has a leg up when it comes to Elemental Reactions, since Dendro related reactions are easily the most broken in the game. The fact that she also has insane Elemental Mastery scaling basically gives her a medal for being one of the most cracked support/sub DPS units.
Using her Elemental Skill, Nahida will mark opponents with the Seed of Skandha, which will deal DMG based on her ATK and Elemental Mastery whenever an Elemental Reaction is triggered. She can also pick up certain nearby collectibles as well as read the minds of NPCs in Sumeru with her Elemental Skill, which are some fun little bonuses.
Her Elemental Burst will summon the Shrine of Maya, creating a massive AoE that will provide various buffs depending on the elements of the characters in your party. Luckily, her Elemental Burst has a low Energy cost, and both her Elemental Skill and Elemental Burst have a long uptime—the latter even longer if you have Hydro characters on your team.
Support Abilities
- All Schemes to Know (Elemental Skill) – Sends forth karmic bonds of wood and tree from her side, dealing AoE Dendro DMG and marking up to 8 opponents hit with the Seed of Skandha.
When held, this skill will trigger differently.
Hold
Enters Aiming Mode, which will allow you to select a limited number of opponents within a limited area. During this time, Nahida's resistance to interruption will be increased.
When released, this skill deals Dendro DMG to these opponents and marks them with the Seed of Skandha.
Aiming Mode will last up to 5s and can select a maximum of 8 opponents.
Seed of Skandha
Opponents who have been marked by the Seed of Skandha will be linked to one another up till a certain distance.
After you trigger Elemental Reactions on opponents who are affected by the Seeds of Skandha or when they take DMG from Dendro Cores (including Burgeon and Hyperbloom DMG), Nahida will unleash Tri-Karma Purification on the opponents and all connected opponents, dealing Dendro DMG based on her ATK and Elemental Mastery.
You can trigger at most 1 Tri-Karma Purification within a short period of time. - Illusory Heart (Elemental Burst) – Manifests the Court of Dreams and expands the Shrine of Maya.
When the Shrine of Maya field is unleashed, the following effects will be separately unleashed based on the Elemental Types present within the party.- Pyro: While Nahida remains within the Shrine of Maya, the DMG dealt by Tri-Karma Purification from “All Schemes to Know” is increased.
- Electro: While Nahida remains within the Shrine of Maya, the interval between each Tri-Karma Purification from “All Schemes to Know” is decreased.
- Hydro: The Shrine of Maya’s duration is increased.
If there are at least 2 party members of the aforementioned Elemental Types present when the field is deployed, the aforementioned effects will be increased further.
Even if Nahida is not on the field, these bonuses will still take effect so long as party members are within the Shrine of Maya.
- Compassion Illuminated (1st Ascension Passive) – When unleashing Illusory Heart, the Shrine of Maya will gain the following effects:
The Elemental Mastery of the active character within the field will be increased by 25% of the Elemental Mastery of the party member with the highest Elemental Mastery.
You can gain a maximum of 250 Elemental Mastery in this manner. - Awakening Elucidated (4th Ascension Passive) – Each point of Nahida's Elemental Mastery beyond 200 will grant 0.1% Bonus DMG and 0.03% CRIT Rate to Tri-Karma Purification from All Schemes to Know.
A maximum of 80% Bonus DMG and 24% CRIT Rate can be granted to Tri-Karma Purification in this manner. - The Root of All Fullness (Constellation 2) – Opponents that are marked by Seeds of Skandha applied by Nahida herself will be affected by the following effects:
- Burning, Bloom, Hyperbloom, and Burgeon Reaction DMG can score CRIT Hits. CRIT Rate and CRIT DMG are fixed at 20% and 100% respectively.
- Within 8s of being affected by Quicken, Aggravate, Spread, DEF is decreased by 30%.
- The Stem of Manifest Inference (Constellation 4) – When 1/2/3/(4 or more) nearby opponents are affected by All Schemes to Know's Seeds of Skandha, Nahida's Elemental Mastery will be increased by 100/120/140/160.
- The Fruit of Reason’s Culmination (Constellation 6) – When Nahida hits an opponent affected by All Schemes to Know's Seeds of Skandha with Normal or Charged Attacks after unleashing Illusory Heart, she will use Tri-Karma Purification: Karmic Oblivion on this opponent and all connected opponents, dealing Dendro DMG based on 200% of Nahida's ATK and 400% of her Elemental Mastery.
DMG dealt by Tri-Karma Purification: Karmic Oblivion is considered Elemental Skill DMG and can be triggered once every 0.2s.
This effect can last up to 10s and will be removed after Nahida has unleashed 6 instances of Tri-Karma Purification: Karmic Oblivion.
1. Furina (Very Powerful)

She takes center stage in both the Court of Fontaine and our hearts.
Finally, to conclude the ranking, we have the icon herself at no. 1, the renowned Furina de Fontaine. The Nation of Hydro has continued to go above and beyond expectations in both its story and its characters, bringing players a multitude of amazing new units each unique in their own way.
Furina in particular is extremely unique with a kit unlike any players have ever seen before. When aligned with Ousia, her Elemental Skill summons 3 cute little Hydro critters that drain the entire party’s HP when they attack; when Furina is Pneuma aligned, her Elemental Skill will heal your active character, meaning she is able to take on the role of a healer as well as a support/sub DPS depending on her current alignment.
When it comes to providing buffs, Furina’s Elemental Burst does just that. Once used, every time a nearby party members’ HP increases or decreases, she gains Fanfare points, which will increase their DMG as well as their Incoming Healing Bonus.
Aside from being easy to build due to the fact that all of her abilities scale on her HP, Furina can quite literally be used on pretty much any team. She’s a highly flexible unit, and can even be useful for exploration, as her Elemental Skill allows her to walk on water. And since her Elemental Skill has over 100% uptime, she can essentially walk on water forever—no more ice bridging with Kaeya!
Support Abilities
- Salon Solitaire (Elemental Skill) – Invites the guests of the Salon Solitaire to come forth and aid in Furina's performance. Will summon either the Salon Members or the Singer of Many Waters based on Furina's current Arkhe alignment.
Ousia
Foaming bubbles like celebrants shall dance, dealing AoE Hydro DMG based on Furina's Max HP and summoning 3 Salon Members: the Ball Octopus-shaped Gentilhomme Usher, the Bubbly Seahorse-shaped Surintendante Chevalmarin, and the Armored Crab-shaped Mademoiselle Crabaletta.
They will attack nearby opponents at intervals, prioritizing the target of the active character, dealing Hydro DMG based on Max HP.
When they attack, if character(s) with more than 50% HP are nearby, the Members will increase their current attack's power based on the number of such characters, and consume said characters' HP. If the characters who meet these requirements are 1/2/3/4 (or more), the Members' attacks will deal 110%/120%/130%/140% of their original DMG.
Pneuma
Summons the Singer of Many Waters, who will heal nearby active character(s) based on Max HP at intervals.
The Salon Members and Singer of Many Waters share a duration, and when Furina uses her Charged Attack to change the guest type, the new guests will inherit the initial duration.
While the Salon Members and the Singer of Many Waters are on the field, Furina can move on the water's surface. - Let the People Rejoice (Elemental Burst) – Rouses the impulse to revel, creating a stage of foam that will deal AoE Hydro DMG based on Furina's Max HP and cause nearby party members to enter the Universal Revelry state: During this time, when nearby party members' HP increases or decreases, 1 Fanfare point will be granted to Furina for each percentage point of their Max HP by which their HP changes.
At the same time, Furina will increase the DMG dealt by and Incoming Healing Bonus of all nearby party members based on the amount of Fanfare she has.
When the duration ends, Furina's Fanfare points will be cleared. - Endless Waltz (1st Ascension Passive) – When the active character in your party receives healing, if the source of the healing is not Furina herself and the healing overflows, then Furina will heal nearby party members for 2% of their Max HP once every 2s within the next 4s.
- Unheard Confession (4th Ascension Passive) – Every 1,000 points of Furina's Max HP can buff the different Arkhe-aligned Salon Solitaire in the following ways:
Will increase Salon Member DMG dealt by 0.7%, up to a maximum of 28%.
Will decrease active character healing interval of the Singer of Many Waters by 0.4%, up to a maximum of 16%.
You May Also Be Interested In:
- [Guide] Genshin Impact Best Ways To Get Characters (Top 10 Ways) https://www.gamersdecide.com/articles/genshin-impact-best-way-to-get-characters
- [Top 10] Genshin Impact Best Healers (Ranked) https://www.gamersdecide.com/articles/genshin-impact-best-healers
- Genshin Impact Best Ways To Get Primogems (Top 10 Ways) https://www.gamersdecide.com/articles/genshin-impact-best-ways-to-get-primogems
