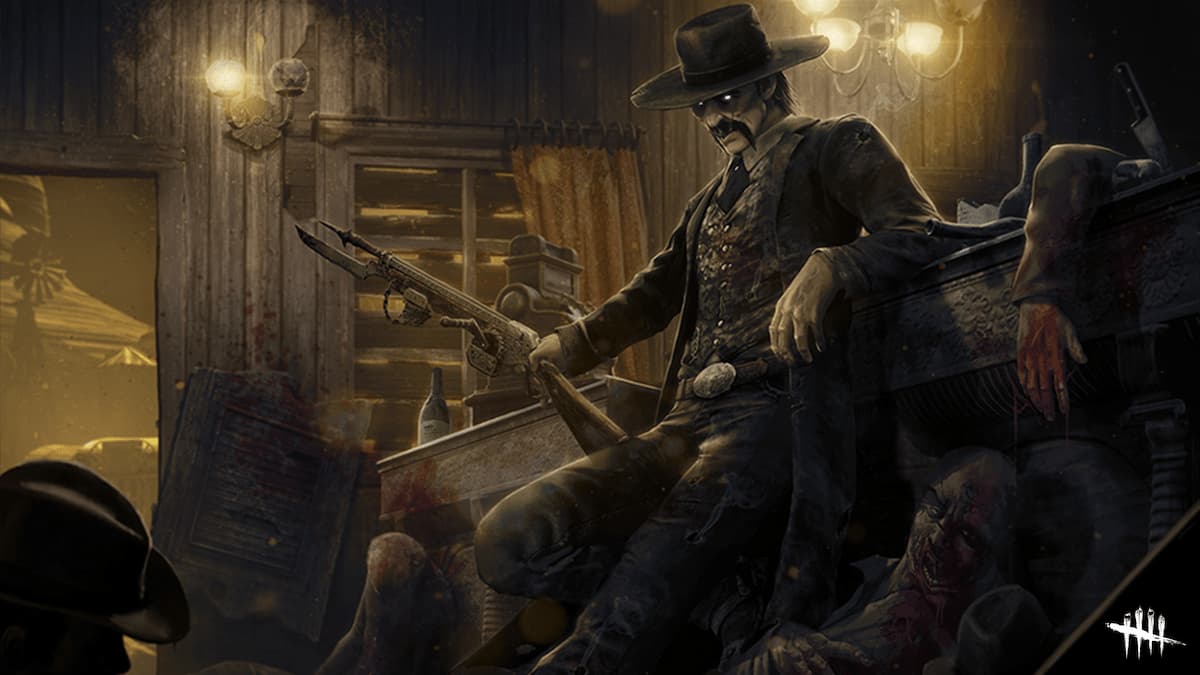
Albert Wesker is one of the most memorable villains of the Resident Evil franchise. This ruthless megalomaniac seeks to unleash a virus upon the world so that the weak die and only the strong remain. Naturally, it wasn’t long before he decided to take over the universe of Dead by Daylight too.
And he did. When he was released, you’d play almost exclusively against this Killer. But it’s not just because of his lore that he is so popular – it’s his power that makes him so much fun to play. After all, slamming a Survivor against a wall is something we’ve all wanted to do for quite some time now. And thanks to his mobility and chase potential, he’s a solid A-tier Killer.
To maximize your lethality, you’ll need a decent build. In this article, I’m going to showcase Wesker’s top 5 builds that are excellent in various scenarios.
5. The Wall-hack Build
YOU CAN'T HIDE from this BROKEN BUILD!!! - Albert Wesker - The Mastermind | Dead By Daylight RE DLC
As you enter the Trial grounds and don your sunglasses, you’re excited at the prospect of hunting down the Survivors. All will fall before Uroboros. But your fantasy quickly crumbles. Minutes and minutes pass and you’re yet to spot a Survivor.
While hiding might merely be postponing the inevitable, it’s not fun to play against ratty Survivors. And we all know that most of them love to hide. Especially if you play the Mastermind. Since your Terror Radius is gigantic, they will abandon generators the moment they hear it.
Luckily, the Wall-hack build provides the much-needed antidote to this kind of behavior. With its four aura-reading Perks, the little rats will have nowhere to hide.
What the Wall-hack Build Excels In:
- Incredibly Interactive: Since this build renders hiding useless, you’ll always be chasing a Survivor. Chases are arguably the most fun aspect of Dead by Daylight. If you wish to stay on top of a Survivor all game long, then this build is for you.
- Helps you end chases faster: One of the Perks in this build counters mind-games. At times, a Survivor can get away with ridiculous plays at a bad pallet just because of luck. The Wall-hack build ensures that this won’t happen.
- Easy to use: Every single Perk in the Wall-hack Build is straightforward and self-explanatory. Find a target and chase them down. Rinse and repeat.
- Keeps up the pressure throughout the game: Because you’ll know where to almost all the time, can maintain pressure on Survivors consistently.
Build details:
- Awakened Awareness: While carrying a Survivor, you can see the auras of every other Survivor within 16/18/20 meters from you. Whenever you chase a target, the nearby Survivors will likely attempt to hide. But thanks to this Perk, you’ll be able to spot them and surprise them right after you get to your hook. Because of Lethal Pursuer, the aura reading will linger for extra 2 seconds. This will help you find your next target and maintain pressure.
- Lethal Pursuer: All of your aura reading is extended by 2 seconds. At the beginning of the match, you can see everyone’s aura for 7/8/9 seconds. Lethal Pursuer is among the most popular Perks in the game right now. It’s easy to see why – once you spawn in, you can immediately lock onto a target and get your first hook. Without Lethal Pursuer, you’d have no idea where to go. As a Killer, time efficiency is vital for you. A great early game can easily translate into an unstoppable snowball.
- Barbecue & Chilli: Whenever you hook a Survivor, you can see the aura of every other Survivor farther than 60/50/40 meters from that hook for 4 seconds. Barbecue & Chilli synergizes well with Lethal Pursuer. Once you unleash Uroboros upon your first victim, you’ll immediately know where to go next. Since you have great mobility as Wesker, you can make effective use of this information. As long as you can end your chases quickly, you’ll be able to keep your momentum going until your inevitable victory.
- I’m All Ears: Whenever a Survivor performs a rushed action within 48 meters from you, that Survivor has their aura revealed to you for 6 seconds. This Perk has a cooldown of 60/50/40 seconds. Unlike the previous Perks, I’m All Ears help you during a chase. With Lethal Pursuer, it will last up to 8 seconds. Thus, it counters mind games at most weak and mediocre pallets. Ending your chases quickly is crucial in this gen-rushing meta and this Perk helps you achieve just that.
4. The Anti-Healing Build
ABUSING WESKERS ANTI HEAL BUILD... | Dead By Daylight Mastermind Gameplay
With the arrival of the Boon: Circle of Healing, injuries don’t mean anything anymore. If you can’t win the chase in one go, then you’re just wasting your time. The hit-and-run playstyle just isn’t viable anymore. Or is it?
Fortunately, the Mastermind has a build available that can give pause even to Boons. His naturally large Terror Radius makes him work exceptionally well with anti-healing Perks. If you somehow end up on the Midwich map, your Terror Radius will cover the entire map.
As its name suggests, the Anti-Healing build counters most forms of healing in the game. Survivors will have to waste precious time attempting to heal. The good ones will know it’s a waste of time and thus won’t even bother. But that just makes them much easier to catch.
What the Anti-Healing Build Excels In:
- Slows the game down: Despite not focusing on generators, the Anti-Healing Build will make your game last longer. Since Survivors can’t heal in your Terror Radius, they’ll have to first attempt to leave it. All these wasted seconds accumulate fast and bring you one step closer to your victory.
- Counters Boons and Med-kits: The Boon: Circle of Healing is one of the strongest Survivor Perks in the game right now. It makes healing so fast and accessible that even Solo Queue players might give you a hard time. Med-kits can also be a menace. This build counters both.
- Consistent: Healing is a basic aspect of the game. Every Survivor wants to heal to prevent being picked off. Thus, you’ll always get value from this build.
Build details:
- Distressing: Increases your Terror Radius by 22/24/26 %. You gain 100% bonus bloodpoints for the Deviousness category. The Mastermind already has a large Terror Radius of 40 meters. This is why players started to create builds around it. With this build, it will grow up to 50 meters. Distressing is the bread-and-butter Perk for every build revolving around Terror Radius and doesn’t have any other special use.
- Unnerving Presence: Unnerving Presence affects every Survivor within your Terror Radius. It increases the odds of triggering a skillcheck by 10%. Additionally, it decreases skillcheck success zones by 40/50/60 %. This applies to both healing and repairing a generator. Unnerving Presence is the bane of every inexperienced Survivor. Since Wesker’s Terror Radius is enormous, you’ll be able to affect multiple Survivors on most maps. However, veteran players won’t have much trouble dealing with Unnerving Presence alone. Luckily, that’s where your other Perks step in.
- Coulrophobia: Coulrophobia affects all Survivors in your Terror Radius. It reduces the healing speed by 30/40/50 % and increases the rotation speed of skillchecks by 50%. Coulrophobia makes healing virtually impossible for every Survivor in your Terror Radius. And because it is so large, they can’t leave it without wasting a lot of time. It also counters Boon totems to a degree.
- Sloppy Butcher: When you injure a Survivor with a basic attack, you increase their bleeding frequency by 50/75/100 %. Additionally, you apply Mangled and Haemorrhage status effects to them. Mangled makes it take longer for them to heal while Haemorrhage depletes their healing bar when they’re not healing. Sloppy Butcher further increases the effects of Haemorrhage by 15/20/25 %. Sloppy Butcher complements the Anti-Healing build well. If the Survivors decide to stop healing, they will lose all their progress. This makes them waste time. But if they attempt to push through, they’ll be assaulted by a constant barrage of difficult skillchecks. Since they’re likely to miss, they waste time either way. If they decide to not heal at all, it just means they’re easy pickings for you.
3. The ‘Toxic’ Build
THIS WESKER BUILD ALWAYS WINS!!
What exactly defines toxic behavior in Dead by Daylight? Well, there’s a topic worthy of a dissertation. But maybe some other time. Suffice it to say that many Survivors describe slow-down Perks as ‘toxic’. That doesn’t mean it’s anything more than an opinion.
Indeed, slow-down Perks can make the game a pain for Survivors. But when you’re learning a Killer with a difficult Power, you need to play the game – you won’t learn anything by sitting in a lobby. And Albert Wesker does require a lot of practice.
This build will make your mistakes less punishing. By prolonging the games, you’ll have enough time to master your Virulent Bound and get the hang of the Mastermind’s mechanics. I recommend this build to newer players in particular since it couldn’t be easier to use.
What the ‘Toxic’ Build Excels In:
- Great for beginners: This build relies on Perks that are either easy to activate or activate on their own. You don’t need to have any special knowledge to learn how to use them. This will allow you to focus instead on improving at chasing and adjusting to your Power.
- High kill potential: By drawing the game out, the ‘Toxic’ build gives you plenty of opportunities to hunt down those obnoxious Survivors. Even if they do manage to finish all the generators, they’ll be stuck and Exposed for a while. You’re likely to get at least two kills in most of your games with this build.
- Consistent on every map: Slow-down Perks are the most OP Killer Perks in the game. They always work regardless of what playstyle you choose. This build is no exception.
Build details:
- Corrupt Intervention: At the start of the match, the three generators farthest from you become blocked for 80/100/120 seconds. The effect ends early if you put a Survivor into the dying state. Since Survivors are likely to spawn far away from you, Corrupt Intervention prevents them from working on these far-away generators. Moreover, it pushes them right into your clutches and allows you to start snowballing.
- Scourge Hook: Pain Resonance: At the start of the match, 4 random hooks become Scourge hooks highlighted by a white aura. Whenever you hook a Survivor one of these hooks, the generator with the most progress will lose 9/12/15 % of its progression. It then beings to regress. Pain Resonance is arguably the strongest slow-down Perk in the game right now. It affects any generator regardless of the distance and thus saves you the trouble of walking over to it.
- No Way Out: When you hook a Survivor for the first time, No Way Out gains a token for up to 4 tokens. Once a Survivor tries to open the Exit Gates, both Gates will become blocked for 12 seconds. Each token extends this duration by 6/9/12 seconds up to the maximum of 36/48/60 seconds. Even if the Survivors manage to get all 5 generators done, this Perk will entomb them within the match for another minute. This gives you plenty of time to round up the rest of them and secure your victory. Especially combined with the next Perk.
- Hex: No One Escapes Death: When the Exit Gates are powered and at least one Dull Totem remains in the match, it transforms into a Hex Totem. As long as it is active, you move 2/3/4 % faster and every Survivor suffers from the Exposed status effect. Exposed Survivors go down when hit by a single basic attack. Once the effect is revealed to the Survivors, the Totem’s aura is shown to them in a gradually expanding area. Hex: No One Escapes Death (affectionately NOED) is an extremely powerful Perks capable of turning the tide of the match. I’ve had many games that went from would-be 0k to a total 4k thanks to this Perk (yes, I’m spineless enough to use it). Since No Way Out locks the Survivors in, they won’t be able to escape. This makes NOED even more formidable. Just makes sure you don’t use Virulent Bound on healthy survivors as it doesn’t proc the Exposed effect.
2. The Ninja Wesker Build
Perfect Wesker The Mastermind Build - Dead By Daylight
As you dash around the map with your Virulent Bound, your needlessly large Terror Radius will inevitably betray your approach. Though your mobility might be great, it’s useless if you can’t find anyone. Perhaps it’s time to return to your S.T.A.R. S roots and make this a stealth operation.
The Ninja Wesker build allows you to approach your prey from the shadow. While it requires some time to set up, the build utilizes Perks that will give you that time. And should your cover be blown, you’ll still have one last ace in the sleeve – a powerful slow-down.
Unlike the previous builds, the Ninja Wesker build requires some game knowledge. You’ll need to actively play around your stealth to make the most use of it. Still, it’s one of my favorite Albert Wesker builds and you should try it at least once.
What the Ninja Wesker Build Excels In:
- Unpredictable: Most Survivors expect Wesker to have a large Terror Radius. Therefore, they rely on it to alert them to your presence. With this build, you’ll be able to catch them off guard. I’ve had many people run into me thanks to Hex: Plaything and it’s funny to watch.
- Extremely fun to use: The Ninja Wesker Build adopts an alternate playstyle. Thus, it’s very refreshing from other conventional builds for this Killer.
- Has a slow-down: Hex: Pentimento grants you powerful slow-downs if the Survivors decide to cleanse the Playthings. While you may lose your stealth, you’ll gain valuable time.
Build details:
- Call of Brine: This Perk activates for 60 seconds when you damage a generator. It starts regressing at 150/175/200 % regular speed and you can see its aura. Whenever a Survivor hits a good skillcheck on the affected generator, you receive a loud noise notification. Call of Brine allows you to pressure a generator thanks to the regression bonus. Furthermore, it acts as a source of information. Since Survivors are unlikely to consistently keep hitting great skillchecks, you’ll know where they are. Call of Brine adds versatility to this build and helps you ramp up your Plaything stacks.
- Hex: Plaything: As long as at least one Dull Totem exists in the match, this Perk will activate when you hook a Survivor for the first time. For as long as the Totem stands, the affected Survivors become Oblivious. This means they can’t hear your Terror Radius. For the first 90 seconds, only the affected Survivor can cleanse the Totem. The cursed Survivor can see the aura of their Totem when within 24/20/16 meters from it. Hex: Plaything is the key Perk of this build. Having no Terror Radius opens a world of new players for you as Wesker. Since Survivors won’t hear you approaching anymore, you’ll have a much easier time finding new targets. Plaything also allows you to better utilize your mobility better.
- Hex: Pentimento: This Perk allows you to see the aura of every cleansed Totem. You can now rekindle cleansed Totems. Each time you do so, Pentimento gains a token. Each token grants a 20/25/30 % speed penalty to various actions. At 1 Token, it affects the generator speed. At 2, it extends to healing. At 3. It slows down recovery speed too. At 4, it applies to Exit Gates opening speed as well. Once 5 Tokens are reached, each rekindled totem becomes blocked permanently. While you’re unlikely to ever reach 5 Tokens of Pentimento, even just 1 or two stacks are incredibly powerful. Should your Playthings be cleansed, you can rekindle them and gain additional slowdowns. And since Plaything can create so many bothersome Hex Totems, Survivors will almost always want to cleanse them.
- Deadlock: When Survivors finish a generator, the generator with the most progress becomes blocked for 20/25/30 seconds. The effect is self-explanatory – this Perk grants you more time. You’ll want to spend this time hooking Survivors to activate Hex: Plaything on all four of them.
1. The Ultimate Meta Build
WESKER'S BEST BUILD - All Weakness Covered to WIN |The Mastermind| Dead By Daylight Resident Evil DLC
Once you master the Mastermind, you’ll learn to rely more on your skills and less on your Perks. Thus, you won’t need any slow-down Perks to make the game easier for you. Instead, you should seek to play into Wesker’s strong points while making up for his weaknesses. The Ultimate Meta Build does just that.
Since Wesker is a mobile Killer, he can respond to what’s happening across the map immediately. Thus, you’ll need a good information Perk. But his Power provides more than just mobility – it allows you to vault pallets and windows. While vaulting pallets is rarely helpful, vaulting a window can lead to incredibly short chases. Even more so if the window becomes blocked after.
The Ultimate Meta Build’s effectiveness depends solely on your skill. Whether you win or lose depends solely on how well you use your Perks and Power. It’ll take a while to get used to but once you master it, you’ll be ready to take on even the strongest of SWFs.
What the Ultimate Meta Build Excels In:
- Makes the most out of Wesker’s strengths: While mobility is always useful, information can help you maximize its potential. As an M2 Killer, you can either use your basic attack or your Power. This makes Save the Best For Last the perfect Perk for you. Combined with Bamboozle, you’ll gain insane chase potential.
- Effective at High MMR: Unlike most second-rate builds, this one doesn’t rely on getting mediocre Survivors. No matter how good they are, you’ll always get value out of your Perks.
- Rewards your skills: The whole build is centered around your Power. The better you are at using it, the stronger this build will be. It’ll teach you to stop relying on broken Perks and focus instead on your own mechanical skills.
Build details:
- Save the Best for Last: Whenever you hit a Survivor other than the Obsession with a basic attack, this Perk gains a Token up to a maximum of 8. Each Token grants you a 5% cooldown reduction on successful basic attacks up to 40% Hitting an Obsession with a basic attack causes you to lose 4/3/2 Tokens. Any M2 Killer can utilize Save the Best for Last well and Albert Wesker is no exception. Your strategy is simple – try to hit every Survivor with your basic attack except for the Obsession. When chasing your Obsession, you’ll want to use your Virulent Bound instead. This way, you’ll ramp up massive cooldown reduction which will allow you to end your chases even faster.
- Tinkerer: Whenever a generator reaches 70 % repair progress, it triggers a loud noise notification. You’ll gain the Undetectable status effect for the next 12/14/16 seconds. While Undetectable, you have no Terror Radius. Tinkerer provides you with both information and stealth. Thanks to your power, you’ll be able to reach the affected generator within seconds on most maps. And without Wesker’s huge Terror Radius, you’re guaranteed to catch the affected Survivors off guard.
- Call of Brine: This Perk activates for 60 seconds when you damage a generator. It starts regressing at 150/175/200 % regular speed and you can see its aura. Whenever a Survivor hits a good skillcheck on the affected generator, you receive a loud noise notification. When you don’t have Tinkerer active, Call of Brine will be your backup Perk. It not only allows you to maintain pressure on a generator but it also provides invaluable information. Thanks to your Virulent Bound, you’ll be able to return to the affected generator quickly.
- Bamboozle: You vault windows 5/10/15 % faster. After the vault, Survivors can’t vault this window for the next 8/12/16 seconds. Bamboozle can only affect one window at a time. Virulent Bound allows you to vault windows. Combined with Bamboozle, you can quickly dash through a window from a distance and block it at the same time. This shuts down powerful loops suck as main buildings and Killer shacks.

