![[Top 5] Dead By Daylight Best Elodie Rakoto Builds dbd, elodie, rakoto, dead by daylight, builds](/sites/default/files/styles/responsive_image_600xauto/public/2021-09/top_5_dead_by_daylight_best_elodie_rakoto_builds_-_main.jpg.webp?itok=tqdqOu90)
[Top 5] Dead By Daylight Best Elodie Rakoto Builds
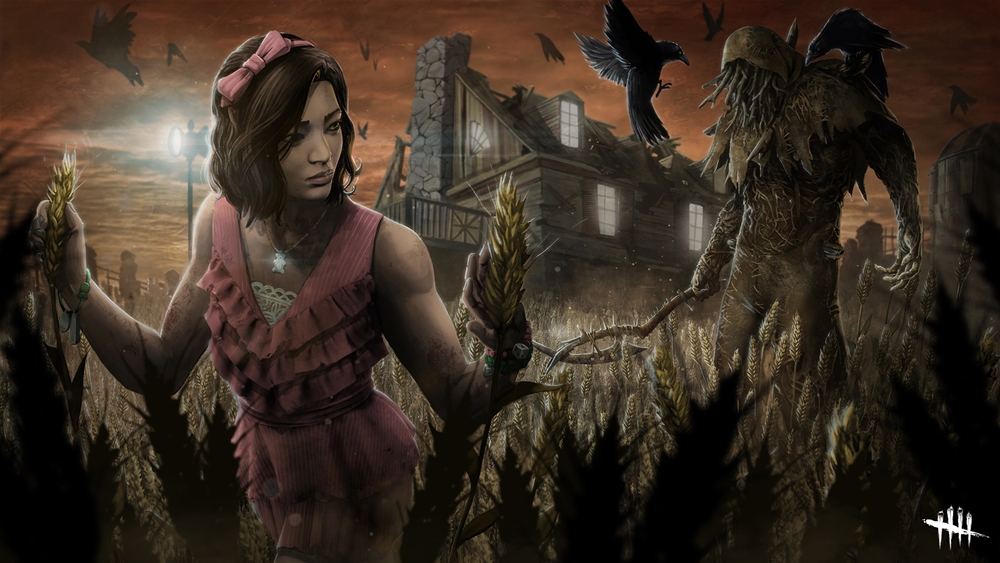
Elodie was introduced to Dead by Daylight in the Chapter 18: A Binding of Kin DLC along with the killer The Twins. Elodie’s perks are somewhat weak in nature, but can be useful in some situations. That being said, let's dive into the best builds using Elodie’s teachable perks.
5. Advanced Elodie
ELODIE RAKOTO.EXE - Dead By Daylight
Starting off, we have Advanced Elodie, which uses all three of Elodie’s teachable perks. This isn’t the best build simply because her perks do not synergize well with each other, but it is a decent build that can let you understand what all of her perks do.
First, we have Appraisal, which allows you to search through a chest that has already been opened. You can only do this 3 times a match, and you can’t use Appraisal on an open chest you have already rummaged through. This is a decent perk, it allows you to basically find another item if you didn’t like the first item you got from a chest, or if you already used that item up, you can get a fresh item.
Next, we have Deception, which will be a perk that you try to confuse the killer with. When you sprint past a locker with Deception active, you can interact with the locker, causing a Loud Noise notification to trigger, as if you just entered the locker. After this, you won’t leave any scratch marks or pools of blood for the next 3 seconds. This is best used when you have some distance from the killer and aren’t within their line of sight.
For Elodie’s final teachable perk we have Power Struggle, which is her hardest perk to get value out of. While the killer has you on their shoulders, and your wiggle progression reaches 25%, Power Struggle activates. You then get the ability to drop a pallet while you are being carried to save yourself. The hard part is that the killer actually has to walk through a pallet for you to drop it.
For our last perk, we have Dead Hard, which will allow you to dash forward while injured to get some extra distance from the killer to make it to a pallet or window you wouldn’t have made it to prior.
What Advanced Elodie Excels In:
- Uses all of Elodie’s perks.
- Lots of items from chests.
- Some potential for mind games.
- Strong exhaustion perk.
Perks Used:
Appraisal: Start the Trial with 3 Tokens:
- When a Chest has already been opened, consume 1 Token to rummage through it for an Item.
- Rummage through Chests 40/60/80% faster.
- Rummaging is only available once per Chest.
Deception: Your adventurous lifestyle requires moments of crafty misdirection.
- Interact with a Locker while holding the Sprint button to trigger a Loud Noise notification for the Killer at your location instead of entering the Locker.
- You will not leave any Scratch Marks or Pools of Blood for the next 3 seconds.
- Deception can only be triggered once every 60/50/40 seconds.
Power Struggle: While being carried by The Killer, reaching 35/30/25% Wiggling progression activates Power Struggle:
- You can drop a nearby, standing Pallet to stun The Killer and escape their grasp.
- Power Struggle deactivates after triggering successfully.
Dead Hard: Press the Active Ability button while running to dash forward.
- Avoid any damage during the Dash.
- Dead Hard causes the Exhausted Status Effect for 60/50/40 seconds.
- Dead Hard cannot be used when Exhausted.
4. Locker Games
NEW Perk DECEPTION is AMAZING! - Dead By Daylight
For our next build, we have Locker Games, which works all around lockers, mostly.
Starting off we have Elodie’s perk, Deception, which will allow you to fake jumping into a locker and remove your scratch marks and pools of blood for 3 seconds. This may give you a chance to trick the killer and allow you to escape from the chase.
Next, we have Quick and Quiet, which won’t leave a loud noise notification when fast vaulting or quickly entering a locker.
Then we have Head On, when you are in a locker for 3 seconds, you can quickly jump out of the locker while the killer is in front of you to stun them.
Lastly, we have Diversion, which allows you to throw a pebble in a direction, leaving scratch marks and a loud noise notification to try to trick the killer on where you went.
The idea of this build is that you want to find an area with multiple lockers, use Deception to fake going into one locker, then use Quick and Quiet to actually get in a different locker without making any noise. When the killer checks the first locker, they will be tricked and may try to check the next locker as well. If they go to check the locker you are in, use Head On to stun them and make a getaway. If you are feeling lucky, you can then try to use Diversion to mislead the killer on where you ran to.
What Locker Games Excels In:
- Good mind game potential.
- Lots of fun when successful.
- Sneaky and tricky perks.
Perks Used:
Deception: Your adventurous lifestyle requires moments of crafty misdirection.
- Interact with a Locker while holding the Sprint button to trigger a Loud Noise notification for the Killer at your location instead of entering the Locker.
- You will not leave any Scratch Marks or Pools of Blood for the next 3 seconds.
- Deception can only be triggered once every 60/50/40 seconds.
Quick and Quiet: Loud Noise notifications for rushing to vault Windows, or to enter or exit Lockers are completely suppressed.
- Quick & Quiet has a cool-down of 30/25/20 seconds.
Head On: While standing in a Locker for 3 seconds, Head On activates.
- When performing a rushed action to leave a Locker, stun the Killer for 3 seconds if they are within range.
- Head On causes the Exhausted Status Effect for 60/50/40 seconds.
- Head On cannot be used when Exhausted or when you have accrued Stillness Crows.
Diversion: Standing within the Killer's Terror Radius while not in a Chase for 40/35/30 seconds activates Diversion.
- Once Diversion is activated, press the Active Ability button while crouched and motionless to throw a pebble, creating a distraction for the Killer at a distance of 20 meters.
- The distraction consists of the following:
- Loud Noise notification
- Scratch Marks
- Diversion's timer resets once the ability has been activated.
3. I’ll Save Myself
Tricking Killers With Power Struggle
I’ll Save Myself is a very situational build, however, it is very strong when you are able to pull it off.
First, we are using Elodie’s teachable perk, Power Struggle. While you are being carried by the killer, if your wiggle progression reaches 25% and you are next to a pallet, you can throw the pallet yourself to free yourself from the killer’s grasp.
To help us use Power Struggle we have our other three perks.
Flip Flop will allow us to convert 50% of our recovery progress while we are on the ground to our wiggle progression. Meaning if we are 50% recovered, we already have Power Struggle activated.
We also have Unbreakable which will allow you to recover faster, and if the opportunity presents itself, allow you to pick yourself up once per game.
Lastly, we have Tenacity, which will allow you to crawl faster, and recover at the same time. So while you are downed and recovering you can crawl yourself over to a pallet.
If the stars align, you will be able to be under a pallet, with over 50% recovery progression, get picked up, and then immediately be able to throw the pallet to save yourself.
What I’ll Save Myself Excels In:
- Strong when able to be used successfully.
- Able to pick yourself up.
- Counters the Twins.
- Counters slugging killers.
Perks Used:
Flip Flop: While in the Dying State, 50% of your Recovery progression is converted into Wiggling progression, up to a maximum of 40/45/50%, once you are picked up by the Killer.
Power Struggle: While being carried by The Killer, reaching 35/30/25% Wiggling progression activates Power Struggle:
- You can drop a nearby, standing Pallet to stun The Killer and escape their grasp.
- Power Struggle deactivates after triggering successfully.
Unbreakable: Once per Trial, you can completely recover from the Dying State.
- Your Recovery speed is permanently increased by 25/30/35%.
Tenacity: Your ferocious tenacity in dire situations allows you to crawl 30/40/50% faster and also recover at the same time.
2. Hatch Only
Take the Hatch or be DEAD... by Daylight
Hatch Only is a build that Yerv used when he was doing the challenge of only leaving through the hatch. This build utilizes Elodie’s teachable perk, Appraisal.
Appraisal allows you to rummage through a chest that has already been opened, 3 times per game. The catch is that you can’t rummage the same chest more than once.
Along with Appraisal, we have Plunderer’s Instinct which will show you the aura of all chests within 32 meters of you. Along with this, it also gives you a much better chance of finding higher rarity items in chests, like keys. This also counts for Appraisal, and not just the initial chest search.
Next, we have Hope, which will give you a 7% haste bonus once the exit gates are powered. This happens either when all the gens are done, or when the killer closes the hatch.
Lastly, we have Left Behind, which will show you the aura of the hatch when you are within 32 meters of it, as long as you are the last survivor remaining.
Using all of these perks together, it is very easy to get out through the hatch, as long as you aren’t found and killed very quickly, which, either way, you wouldn’t have escaped then.
What Hatch Only Excels In:
- Finding great items.
- Faster end game movement speed
- Able to see the hatch’s aura.
Perks Used:
Appraisal: Start the Trial with 3 Tokens:
- When a Chest has already been opened, consume 1 Token to rummage through it for an Item.
- Rummage through Chests 40/60/80% faster.
- Rummaging is only available once per Chest.
Plunderer’s Instinct: The Auras of closed Chests and dropped Items throughout the Trial Grounds are revealed to you within 16/24/32 meters.
- Grants a considerably better chance at finding an Item of a higher Rarity from Chests.
Hope: As soon as the Exit Gates are powered, you gain a 5/6/7% Haste Status Effect for 120 seconds.
Left Behind: When you are the last Survivor remaining in the Trial, the Aura of the Hatch is revealed to you when you are within 24/28/32 meters.
1. Treasure Hunter
The Ultimate Treasure Hunting Build With Appraisal | Dead By Daylight
For our last build, we have Treasure Hunter, which is one of my favorite builds to run since I love to hoard all of my items.
First, we have Plunderer’s Instinct which will show you the aura of all of the chests within 32 meters of you, and allows you to find higher rarity items.
Then we have Appraisal, which will allow you to search those chests one more time if you do not like the item that you received from the chest.
We also have Ace In The Hole which will give you an add-on for any item you find from a chest, and a 50% chance to get a second add-on for the item. Also, if you escape the match with the item, you get to keep the add-ons as well.
Lastly, we have Sprint Burst to help you get to chests faster, or to try to run away from the killer.
The whole point of this build is to find a strong item in a chest, use it, and then rinse and repeat. What I end up doing is usually finding a key, passing it off to nearby survivors, and then try to find more items for myself.
What Treasure Hunter Excels In:
- Finding really strong items in chests.
- Keep add-ons from items you find if you escape.
- Lots of items from chests.
- Good exhaustion perk.
Perks Used:
Ace In The Hole: When retrieving an Item from a Chest, there is a chance an Add-on will be attached to it.
- 100% chance for an Add-on of Very Rare Rarity or lower.
- 10/25/50% chance for a second Add-on of Uncommon Rarity or lower.
- Ace in the Hole allows you to keep any Add-ons your Item has equipped upon escaping.
Appraisal: Start the Trial with 3 Tokens:
- When a Chest has already been opened, consume 1 Token to rummage through it for an Item.
- Rummage through Chests 40/60/80% faster.
- Rummaging is only available once per Chest.
Plunderer’s Instinct: The Auras of closed Chests and dropped Items throughout the Trial Grounds are revealed to you within 16/24/32 meters.
- Grants a considerably better chance at finding an Item of a higher Rarity from Chests.
Sprint Burst: When starting to run, break into a sprint at 150% of your normal running speed for a maximum of 3 seconds.
- Sprint Burst causes the Exhausted Status Effect for 60/50/40 seconds.
- Sprint Burst cannot be used when Exhausted.
You May Also Be Interested In:
- Dead by Daylight Survivor Guide: Top 25 Tips
- Dead by Daylight Killers Guide: Top 25 Tips
- [Top 10] DbD Best Killer Builds That Are Great!
- [Top 100] Dead By Daylight Best Names
- [Top 10] DbD Best Survivor Builds That Are OP!
- [Top 10] DbD Best Killers And Why They're Good
- [Top 15] DbD Best Killer Perks And Why They're Good
- [Top 15] DbD Best Survivor Perks And Why They're Good
- [Top 10] DbD Best Survivors And Why They're Good
- [Top 10] DbD Best Survivor Builds That Are Great
- [Top 15] Ghost Games To Play Today
- [Top 15] Horror Movies That Were Books
- [Top 15] Best Horror Movies That Were Banned
- [Top 5] Dead By Daylight Most Fun Survivors
- [Top 5] Dead By Daylight Best Jane Romero Builds
- [Top 5] Dead By Daylight Best Meg Thomas Builds
- [Top 5] Dead By Daylight Best Claudette Morel Builds
- [Top 5] Dead by Daylight Best Jake Park Builds
- [Top 5] Dead By Daylight Best Nea Karlsson Builds
- [Top 5] Dead By Daylight Best Laurie Strode Builds
- [Top 5] Dead By Daylight Best Bill Overbeck Builds
- [Top 5] Dead By Daylight Best Feng Min Builds
- [Top 5] Dead By Daylight Best David King Builds


