Who Is Moira?
Support is one of the most important roles in Overwatch 2. Tank and support are fighting for the top spot since they can change the entire course of the game with their abilities. One support hero is Moira, a scientist with high healing and damage. However, playing her effectively, especially at higher ranks, can be difficult.
Moira Intro
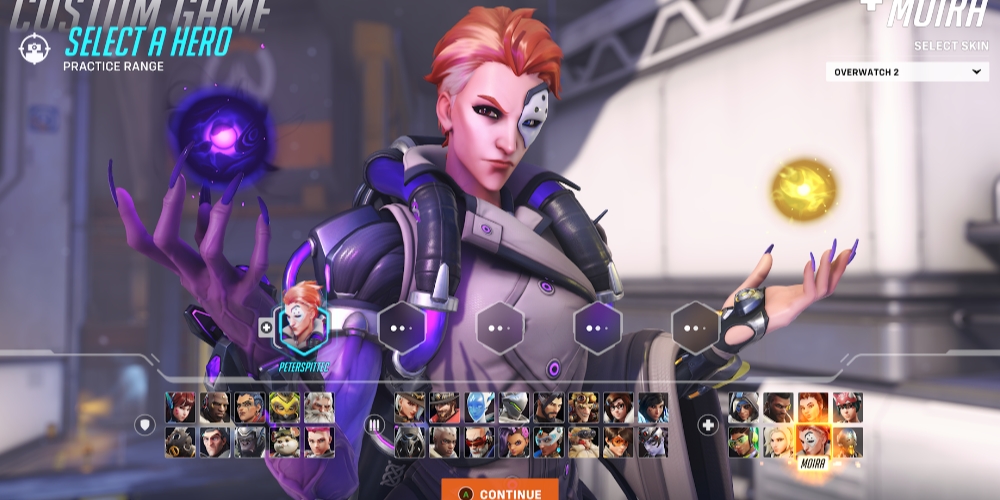
Moira is one of the support heroes in Overwatch 2. She is best utilized at lower ranks, where she can more effectively secure kills and provide a higher impact for the team. Her kit consists of her biotic grasp, her biotic orb, her fade, and her coalescence ultimate.
Moira does a plentiful amount of healing, which makes her useful for keeping tanks like Reinhardt alive. She works well with the beefy tanks since they take more damage than many supports can heal. Lucios, Zenyattas, Kirikos, and sometimes even Anas can’t keep up with the damage, but Moira can.
In general, Moira is not a difficult hero to play. Her kit is weak by support standards but strong when it comes to terrorizing enemies. She’s annoying to play against, and sometimes with. If you want to be annoying to the enemy but not to your team, then here are fifteen tips to steer you in the right direction.
15. When To Play Moira
Moira is not a hero who is useful in every situation. Out of all the support heroes, Moira has the least utility. Her strength is her healing. Along with that, Moira can do both healing and damage at the same time, which makes her valuable in certain situations. However, the higher up the ranks you go, the more useless she becomes.
If your team needs more kill participation and healing, then Moira is a solid pick because she can provide both. If the team already has what Moira provides, then there’s no need to play her. It’d be better to play someone like Ana or Kiriko, who has great utility.
Moira works well with Lucio since Lucio gives the team the utility Moira lacks. Along with that, he heals enough to make up for when Moira needs to DPS to get her healing back. Moira is an aggressive hero, and Lucio brings the best out of her kit.
14. Flanking
Moira needs to make up for her lack of utility by making herself useful in other ways. For example, flanking. Moira is a hero with self-healing abilities and a fade that can get her out of a tricky situation. That’s why flanking isn’t a bad idea when you’re playing Moira, but you have to be careful about it.
For example, try flanking before a big team fight. If you’re on Nepal and you have the point, try flanking to get some extra ult charge and stall the enemy’s attack. This will buy your team time to hold the point longer in a game mode where time is essential.
You can do the same on other maps, but it works best on Push and Control maps. You shouldn’t be flanking all the time because you aren’t a Genji or Tracer, but you have the kit necessary to get yourself out of a bad situation quickly. Feel free to do extra damage and buy time, but not at the expense of your team.
13. Tracking
Moira is a hero where you need to track your targets. She isn’t a projectile hero, which means she doesn’t fire little projectiles at enemies. Instead, she relies on her beam weapon to do damage. This weapon is a vital part of your kit since it recharges your healing and self-heals you.
Tracking refers to tracking your target as they move. This requires you to move with them so your beam stays attached. Although it can be difficult at first, especially if you’re used to using projectiles, it’s easy once you get the hang of it. Even if you’re off by a bit, it’s easy to get back on track (no pun intended).
You can practice tracking with aim trainers. Custom games are your best friend, so utilize them!
12. The Dos And Don'ts Of Fade
Fade is a powerful ability since it’s a get-out-of jail-free card. It keeps you safe and launches you away from the enemy. However, that’s just it: away. It launches you away from enemies. You should not be using fade to initiate a fight. Although that can be useful in some cases, like when your allies are too far from your healing range, you shouldn’t be fading into a fight on your own. You’ll die.
Fading into a fight will result in death. Okay, that’s dramatic, but a majority of the time, you’re going to die if you fade your way into a fight. You’re almost certainly going to die if you fade into a fight alone or with only one other person. The reason why is that you’re vulnerable without your fade, and the cooldown isn’t short enough for you to use it whenever you want.
Time your fades to aid your attack plan, not derail it. Attack with your team and fade out when things get hectic. Fade in if your team is straying too far from you. Use the fade jump to get to higher ground or reposition yourself somewhere the enemy won’t see you. Use fade in creative ways instead of setting yourself up for death.
11. Healing
Your healing is high, and you should focus it on your tank. The healing part of her kit is very simple, but you need to keep in mind that it has a meter that runs out after a certain amount of time. Using her biotic orbs and grasp, you can recharge your healing. The problem is, you need to do damage to get healing, so you need to know how much healing you have left.
I will talk more about awareness later, but I’ll give you a taste here: be aware of your healing bar. Don’t just spam the heal button and pray you’ll have enough. Monitor if you’re running out or if you have more than enough to get you through the fight.
If you run out of healing, consider launching a healing orb while you do a bit of damage to get your healing back. Yes, it recharges over time, but damage is the fastest and most efficient way to replenish what you’ve lost.
10. Positioning
The last tip dealt with healing. In order to recharge your healing, you need to do damage. That begs the question: how close should I stand to the enemy to be able to make an impact? Your range is long, but not so long that you can chill in the back like Ana can. You need to have a dynamic play style.
You should be playing with your team, but as mentioned earlier, you can also flank. When I say play with your team, I don’t mean you need to be sitting behind the tank. You can be on high ground above your team, below them, on the side of them, etc. There is no shortage of positions, as long as you are in line of sight of them and can fade jump to them if needed.
9. Geometry
To use her biotic orbs correctly, you need to know geometry. In the middle of the fight, pull out your old math notebook because you have some math to do. Kidding, of course. The biotic orbs are easy to use and almost always do at least a little bit of damage or healing. However, that doesn’t mean there aren’t ways to make your orbs more effective.
If you are in a tight space, like the lighthouse on Ilios, you can use your healing orb and bounce it off the ceiling. Aim up and let loose. The healing orb will stay mostly in the same position, making it more effective since it won’t fly away.
Look for walls close by that you can bounce the healing orb off of. The closer you can keep it to the team, the better. Try throwing it at different angles and seeing what works best. Don’t stick to the same routine; change it up and see what works for your style.
8. The Suck And The Blow
Moira players have nicknamed her kit the suck and blow because her biotic grasp does both healing and damage. When she does damage, she’s sucking the life out of people. When she heals, she blows healing particles at her teammates. It’s a clever, albeit vulgar, nickname, but it’ll help you remember that you can do both healing and damage.
On every social media platform in existence, Moira players are getting roasted for how little they heal. Even though I’m a support player, I myself have encountered many DPS Moira players and complained about them to the webs. You need to do both the suck and the blow if you want to be a good Moira player.
Don’t limit your capabilities; use her primary fire to drain away the life of an annoyed Genji, and use her healing to keep your tank happy. Simple!
7. Healing Orbs Exist, You Know
As much as damage orbs help you recharge your main healing, healing orbs are very effective at saving a group of allies. You can use your healing orb to heal yourself and anyone else near it. It’ll keep you and your team alive, so why are you exclusively using damage orbs?
This tip serves more as a reminder to heal your teammates with the healing orb; don’t just use the damage. Damage is useful in certain situations, but not when your entire team is dying and begging you to switch from DPS to healing for a second. Don’t ignore your team.
Use healing orbs if you don't want to get yelled at. You’ll probably get yelled at anyway since that’s the state of Overwatch, but still.
6. How To Use Her Ultimate
Her ultimate is very easy to use and doesn’t require much skill. All her ultimate does is make her heal and do damage at the same time. You don’t have to worry about the rest of your kit, only your giant beam of healing and damage. A well-positioned Moira can hit enemies and teammates at the same time, but how do you achieve this?
If you want to achieve good positioning, look at where the enemy is and where your team is. Before using your ult, decide if they’re in a good position for you to get the most out of it. If you manage to do both healing and damage at the same time, that’s incredible!
You can also use it to bypass barriers if there are weak enemies hiding behind Reinhardt. Lastly, you can use it to do more healing if your healing runs out. It’s a good ult for continuously healing your team, especially your tank.
5. Play With Your Tanks
This might sound like a contradictory tip. A few tips ago, I was telling you that flanking is a good idea; now I’m telling you to play with your tanks. The truth is, a game of Overwatch is never static. The situations are always changing, and you need to be fast enough to think on your feet. However, if you play near your tank in many of those situations, you have a higher chance of surviving, and your tank will thank you.
I’m not saying you need to play right next to your tank. I’m saying you should be in their line of sight so they know where you are and can help you. Moira benefits the most when she’s in front, doing both healing and damage. The tank plays in the front too, which makes it a pretty good match.
You can keep your tank alive, and in return, they’ll protect you as much as they can. Don’t take your tank for granted; even though DPS have more responsibility to protect the supports, the tank can still help you if you communicate with them and stay in their range.
4. Countering Enemies
There are many heroes in this game that block projectiles but not beams. The two most popular examples are Genji and D.Va. Seeing as both of those heroes are popular picks in Overwatch 2, you’re a direct counter to them, but to Genji especially. When you’re playing Moira, you should make it your goal to annoy them by targeting them.
As Moira, you’re at a disadvantage because other support heroes are much better than you. I’m sorry if that’s harsh, but most Overwatch players know that’s true. If you’re going to play Moira, there’s nothing wrong with that, unless you make it a problem. Make Moira good by using her to counter enemies instead of just sitting in the back doing nothing.
Find the enemies you can counter and capitalize on your strength. I’m sorry to any Genji players out there; you’ve already been abused enough by Blizzard, and now I’m encouraging Moira players to go after you. Sorry!
3. Tunnel Vision
One thing many support players suffer from is tunnel vision. This is a condition where Overwatch support players don’t have awareness of their surroundings. Support is the role that needs the most awareness. Your teammates are going to be jumping all over the map; there will be enemies trying to flank you; there could be environmental hazards surrounding you; and more. You need to be aware.
Glance around and look for your teammates if you don’t see them. If you have an Ashe on high ground, monitor her and see if she needs help every once in a while. If you have a flanking Genji, monitor him and see when he decides to leave and join the team. He might come back with critical health, so don’t ignore him.
And it extends beyond that; you should be aware of what ultimates your team has. If Roadhog has his ultimate, he’s about to use it and push in. You need to be ready to push in with him. The same applies to enemy ultimates as well. Be aware of which enemies might have their ultimates and be ready to avoid them, preferably by using your fade.
2. Practice
Moira isn’t a hero that can be practiced in the practice range since she isn’t a projectile hero. She has a beam that automatically locks onto enemy targets, making it redundant to train your aim. You can practice fade jumping, but the other parts of her kit need to be practiced in a real game. So, do that!
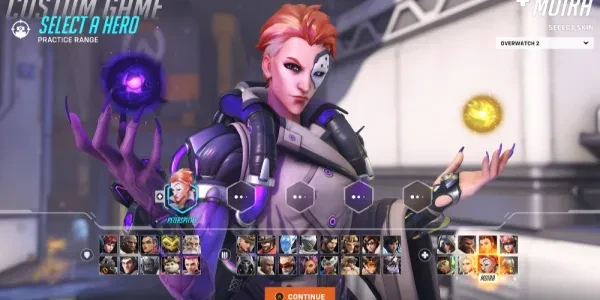
Instead of using the practice range, try using custom games to practice different parts of Moira’s play style. Custom games tend to be more fun than the core game at this point. Not only will you have fun, but you'll also learn more about Moira’s kit.
For example, you’ll experiment with her fade jump and how far she can go. Moira parkour does exist, and you should use it to practice your jumps and movements.
1. Play With Your Team
Moira players, please stop insisting on doing only damage or only healing. You need to do a balance of both. Play with your team and communicate. Communication is key to creating a better playing environment. Beyond that, it keeps you alive and will help you rank up (if you play competitively).
Awareness factors into this tip. You should be aware of what your team needs. If they are lacking in the damage department, go do some more damage. If they are lacking in the healing department, go do some more healing. A good support adapts to what their team needs because they are doing just that: supporting the team.
Although playing with toxic teammates is a bother, sometimes it’s best to listen to your gut and do what the team needs. Don’t be scared to finish off a kill since it will aid your team, even if it makes the DPS players whine at you because you ‘aren’t doing enough healing.’ Do what you can for the team, and you’ll be alright.


