10. Draven
The Glorious Executioner
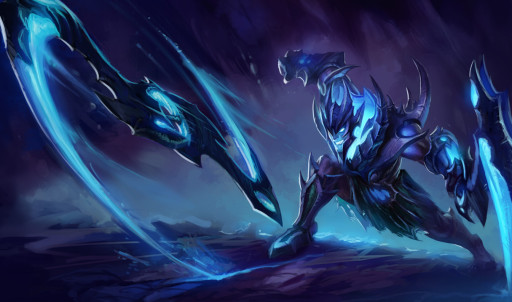
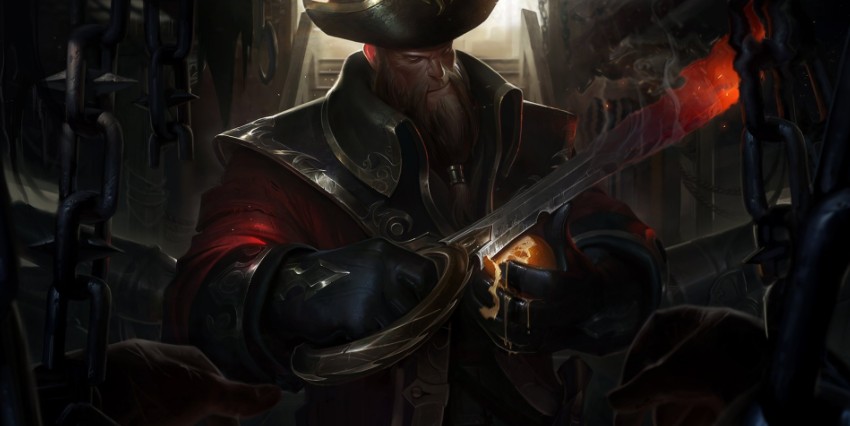
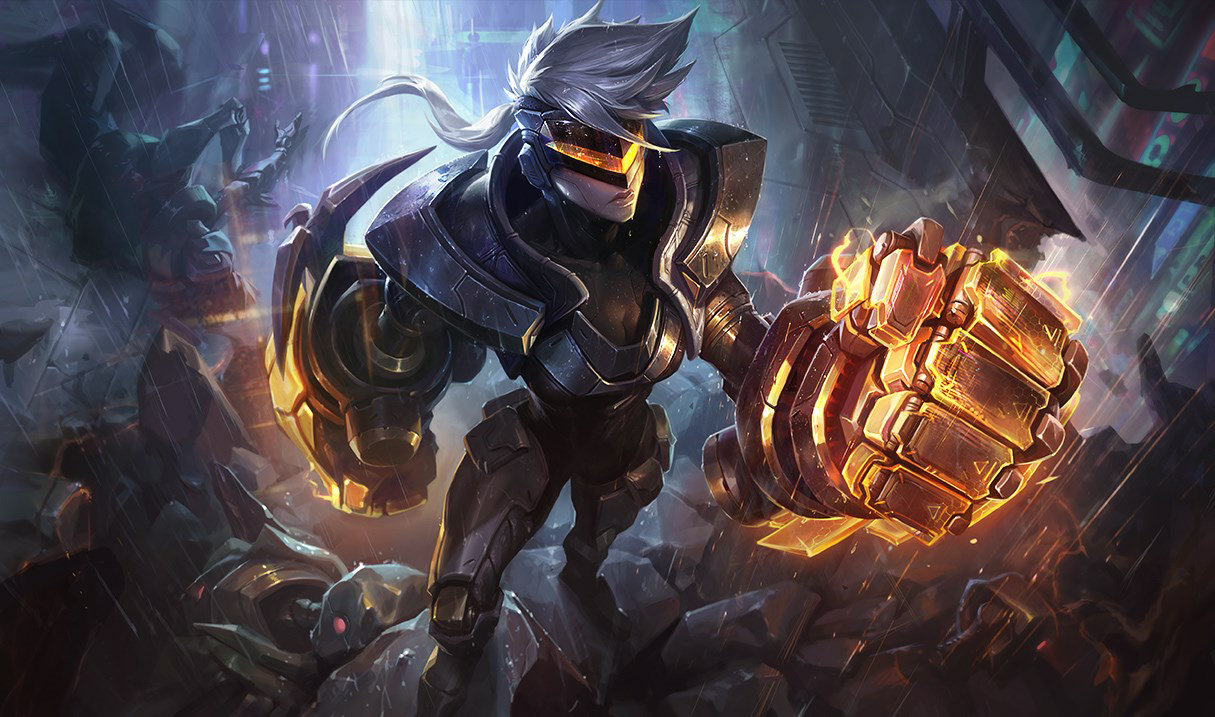
Draven is an AD carry that uses his dominant early game damage along with his gold-generating passive to snowball leads, kill his lane opponents, and take control early and never let go.
So What makes Draven so good?
- Draven’s auto attacks simply do more damage than every other champion in this role during the lane phase. If you trade auto attacks evenly, you are sure to come out on top HP-wise if you’re catching your axes properly.
- Draven is fantastic at all-ins, able to engage with his support, using his Stand Aside (E) in order to follow up with his support’s crowd control abilities, and lay his massive early game damage down to force his opponent out of the lane, or even kill them.
- Draven is one of the few bot lane champions that stands a chance in a duel against mid laners, top laners, and junglers, despite often being behind these other roles in experience. This can be attributed to his insane damage output alongside his Stand Aside (E) and Blood Rush (W) being solid kiting tools for avoiding melee champions like assassins, tanks, and bruisers, while he finishes them off with auto-attacks.
How to play Draven!
- Be Aggressive. You are most certainly the stronger of the two AD carries on game-start, and more than likely the stronger 2v2 lane as well. Make sure to be taking advantage of this, and play around your support for long trades and all-ins that can put the pressure on your lane opponent early, allowing you to control the lane.
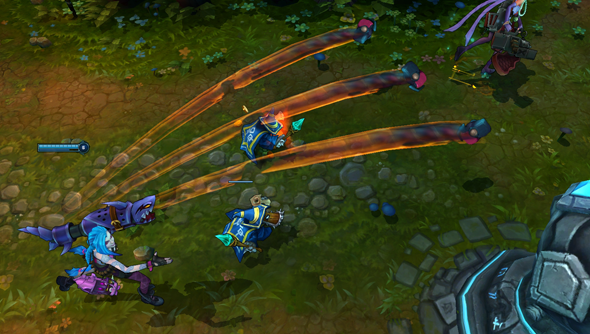
- Make sure you’re catching your axes. Draven’s Spinning Axe (Q) causes his auto attacks to do bonus damage and bounce off the enemies they hit, allowing him to catch them where they’re going to land and refreshing the Spinning Axe’s (Q) duration. Catching your axes is absolutely crucial to keep your damage up, and is basically a prerequisite for winning any fight on this champion. Make sure to get some practice in the practice tool and in normals to help with your ax catching mechanics, as this is the most important champion-specific skill to learn on Draven.
- Avoid Ganks. Draven’s worst nightmare is being camped by the enemy jungler. Make sure to help your support with vision, and constantly be looking at your minimap in order to avoid being ganked. Getting killed in the lane is especially bad for Draven because it kills his momentum, on top of getting rid of the stacks of his passive, League of Draven, which stacks potential gold when you catch his juggling axes, that is cashed in on champion kills.
- Push the lane. As long as you have vision and/or knowledge of where the enemy jungler is, you should be pushing the minion wave in most circumstances. This will deny your lane opponent gold under the tower and put the pressure on the enemy team to deal with you and your support. Draven is adept at pushing because he can win fights, forcing his opponents to play passively and allow the minion wave to be pushed under their tower.
- In team fights, your priority should be to, just like on most AD carries, attack the highest priority target who is SAFE to hit. Make sure you continue catching your axes to keep your damage relevant against tanks and bruisers building armor in the mid and late game. Kite away from high threat enemies with your Stand Aside (E) and Blood Rush (W), and try to hit your long-range area of effect ultimate, Whirling Death (R) on as many enemies as possible at the opportune time.
Build:
- Infinity Edge (can be swapped with Bloodthirster)
- Bloodthirster (can be swapped with Infinity Edge)
- Berserker's Greaves (finished early, depending on game circumstances)
- Rapid Fire Cannon
- Phantom Dancer
- Situational (Defensive item, Death's Dance, Mortal Reminder, etc. depending on enemy team composition.)
Runes:
- Press the attack
- Presence of Mind
- Legend: Bloodline
- Coup de Grace/Cut down
- Nimbus Cloak
- Celerity/Absolute Focus
- Attack speed, Adaptive force, Armor
Ability Max: R>Q>W>E
Here's a guide to advanced Draven Gameplay by a Korean Pro: Arrow!
9. Jinx
The Loose Cannon
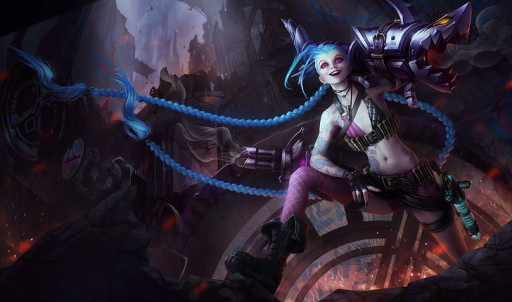
Jinx is a marksman/AD carry that’s fairly weak early, but scales hard into a monster late-game when she pumps out DPS and sprints around the map crushing objectives. A champion who is is to kill minions to farm gold and experience, and then come out of nowhere and kill everyone, Jinx is a powder keg waiting to explode at any moment.
So Why is Jinx Strong Right Now?
- Jinx is what is referred to as a “hyper-carry,” meaning she takes a while to get going, but once she does she is unstoppable. Once she has her first 3 items (see build below) she will have enough attack speed and critical strike to really shred opposing players HP from long range. After these items are completed, Jinx can take control quickly, and really make things hard for her opponents.
- Jinx is an excellent team fighter, with the proper peel. If she can be protected, she is among the highest DPS champions in the whole game, and when she casts Switcheroo! (Q), her auto attacks damage nearby enemies to her target as well, making her that much deadlier in team fight scenarios. Couple this with her area of effect and execute of an ultimate, and you have a deadly team fighter on your hands.
- Jinx takes towers and objectives very quickly and clears minion waves effectively as well. These are again, due to her Switcheroo (Q)! Her pow-pow gun increases her attack speed dramatically, shredding objectives like dragon, baron, and towers. Her rocket launcher fishbones, meanwhile, has an area of effect explosion on hit, clearing minion waves very efficiently. Using these two things effectively can allow jinx to maintain control of the map via minion waves and objective control, even as an AD carry.
How to play Jinx!
- Since she’s a hyper carry, Jinx wants to spend the majority of her lane phase just farming minions. In some cases, she can fight, but she’s fairly immobile and her damage is low early game. So unless you have an aggressive support, or are in a particularly good matchup, try and stay out of fights until you have at least a couple of items.
- In most cases, stay grouped. A lot of AD carries like to farm side waves away from their team in order to scale up to their items more quickly. This can be really tempting on Jinx but is often a recipe for disaster. She’s immobile, so she’s very easy to catch out and kill if she’s alone. Staying with your team allows you to use her incredible objective taking skill to push leads and force team fights. You can farm side waves that are close to your towers but don’t push out past where it’s safe.
- Make sure to farm jungle camps that your team (or the enemy team, if you’re ahead) leaves up. They are a safe form of gold and experience and an efficient and safe way for Jinx to keep moving towards that famous late game she so desperately needs to get to.
- In team fights, stay as far back as you possibly can from the main fight. With Rapidfire Cannon, your Fishbones rocket launcher has a range of 850, and then 700 on her normal autos. This combined with her infinite range Super Mega Death Rocket (R) as well as her Zap! (W) make it so she should be standing at her maximum range at any given time, safe from all the tanks and bruisers that can kill her with ease if they get on top of her. If the fight goes well, use your passive, which grants movement speed on kills, to close that long-range and chase your enemies down.
- When fighting in team fights, normally you want to use Switcheroo! (Q) to switch to your fishbones. However, if you’re attacking one target, especially if that target has found their way close to you, switch back to your pow-pow minigun. The attack speed grants you the highest DPS on a single target you can have (among the highest in the game), and hopefully allows you to survive. Plant your Flame Chompers (E) beneath your feet, kite back, and hope for the best.
Build:
- Infinity Edge
- Berserker’s Greaves (finish based on situation)
- Runaan’s Hurricane
- Rapidfire Cannon
- Phantom Dancer
- Guardian Angel / Death’s Dance / Mercurial Scimitar (situational defensive item)
Runes:
- Lethal Tempo
- Presence of Mind
- Legend: Bloodline
- Coup de Grace
- Nimbus Cloak
- Gathering Storm
- Attack Speed, Adaptive Force, Armor
Ability Max: R>Q>W>E
Here's a pro guide on how to kill it on the rift as Jinx, by xFSN Saber!
8. Twitch
The Plague Rat
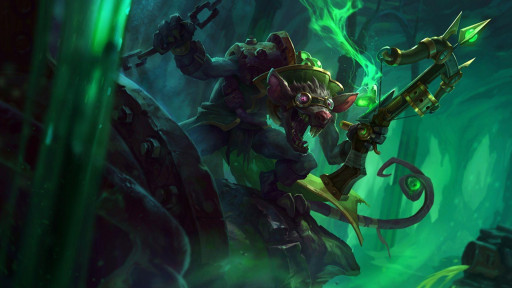
Twitch is a multi-purpose AD carry with the ability to fight early game, scale well into late game team fights, and fight people one-on-one utilizing the element of surprise via his invisibility. Good for many team compositions and situations. As much of an assassin as he is an AD carry, Twitch has reliable damage and can snowball hard, making him great for winning games from the bot lane role.
So why play Twitch?
- Twitch is a hyper carry, especially in late-game team fights. His ultimate, Spray and Pray (R) makes his auto attacks go through enemy champions in a line, so it can hit more than one. This makes his area of effect damage devastating. Using his invisibility from his Ambush (Q), he can position properly, stand somewhere safe, and unload on the enemy team before they know what hit them.
- Twitch can function as an assassin if played correctly as well. His Ambush (Q) can catch enemy players by surprise, and Twitch’s damage is high enough to kill them before they even know what’s happening. This can lead to free objectives and pressure that help win games with ease, and the extra gold from kills helps you get to the late game faster.
- Twitch is moldable. He can run a number of different runes, such as Press the Attack, Lethal Tempo for longer trades, and even Hail of Blades in his good matchups if he has an aggressive support. He can win lane and snowball, or he can simply stay safe and farm and wait for his hypercarry items. He can stay behind his team in team fights, or he can position aggressively with his Ambush (Q). There are many different ways to win games on twitch, so he can be picked into many situations.
Twitch tips and tricks!
- Twitch is uniquely suited to punishing enemy AD carries, mages, or squishy supports who overextend. Make sure to use your Ambush (Q) to sneak up on and kill enemies who get greedy for farm in the mid-game once you have 2 items or so, depending on how far ahead you are.
- Make sure you stack your passive (one stack per auto-attack), before using your Contaminate (E). This will maximize its damage and help win trades. You don’t have to stack it to full every time, but the more auto attacks you can safely put onto the enemy target before using Contaminate (E), the better your trades will end up in the laning phase.
- Twitch is extremely immobile and only has his Ambush (Q) to make sure he’s positioned well. Kiting (or auto-attacking while moving away from threats) and positioning are skills that are much needed on Twitch. Make sure you’re positioned correctly and kiting away from significant threats in team fights, but also be in a spot where your Spray and Pray (R) can hit as many targets as possible.
- Twitch can get free, safe recalls by using his Ambush (Q) immediately before his recall. This can allow him to get better back timing and not miss minion waves that would crash into his tower, as he doesn’t have to waste time finding a safe place to back. Just make sure you’re not standing on a pink ward!
- When you come out of your Ambush (Q), make sure to auto-attack, then throw your Venom Cask (W), then continue autoing. This allows you to get an extra auto-attack in, as they won’t escape the Venom Cask (W) slow in time to avoid your extra auto-attack. Every auto counts, especially on hypercarry champions like twitch, so use this combo to enhance your micro-play and pick up some extra kills!
Build:
- Manamune
- Berserker’s Greaves
- Runaan’s Hurricane
- Infinity Edge
- Phantom Dancer
- Mortal Reminder, Lord Dominik’s Regards, Guardian Angel, Mercurial Scimitar (situational)
Runes:
- Lethal Tempo/Press the attack
- Presence of Mind
- Legend: Alacrity
- Coup de Grace
- Nimbus Cloak
- Gathering Storm
- Attack Speed, Adaptive Force, Armor
Ability Max: R>E>Q>W
Here's KingStix's guide to climbing the ranked ladder with Twitch!
7. Ezreal
The Prodigal Explorer
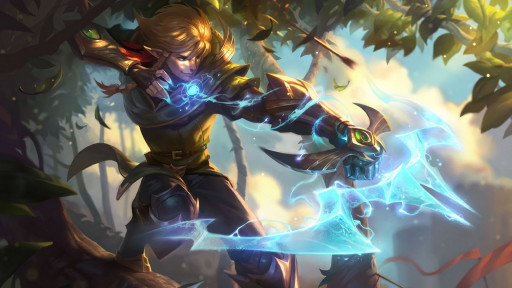
Ezreal’s strength comes from his safety, his burst damage, and his versatility. A slippery AD carry whose hard to catch and kill, he’s able to avoid death and burst his enemies down from relative safety with his long-range abilities.
So why is Ezreal strong?
- Ezreal is versatile. He can fit into almost any team composition, and play against any team composition too. Whether the enemy team has a lot of tanks, assassins, bruisers, or squishy mages, ezreal can adapt to any situation. A lot of this is due to his Arcane Shift (E) being an exceptional escape tool to move yourself to safety, or in some circumstances, to chase (although this is mostly not recommended). He can build many different items, play well in the lane with any support (and adapt to that supports playstyle), and can even get the best of a lot of champions one-vs-one.
- Ezreal is safe. His Arcane Shift (E) is among the best repositioning tools in the game. It allows him to kite enemy champions with ease, and avoid all-ins by aggressive supports in lane, and assassins, tanks, and bruisers in the mid and late game. His Mystic Shot (Q) is a long-range skill shot on a low cooldown, which also allows him to farm from a safe distance, poke from a safe distance, and not have to auto in order to farm and harass in lane. These two skills combine to make ezreal the safest champion pick in the bottom lane.
- Ezreal has high burst damage. He can kill enemy champions quickly if he hits all of his skills, which makes him sneaky good at one vs. ones, especially against other AD carries. This is especially true after he builds his sheen item, blade of the ruined king, and any other items with “on hit” effects. This is because his Mystic Shot (Q) procs all on hit effects simultaneously, so if you hit a target with Mystic Shot (Q) that’s already affected by Essence Flux (W), the instant damage is extremely high.
So how do you play Ezreal effectively?
- Adapt to your support in the lane. If you have an all-in support, like Nautilus, Thresh, or Leona, use your burst damage to go all-in on the enemy lane and get kills. If you have a sustain support, like Nami or Soraka, stay back and farm with Mystic Shot (Q), making you and your healing support untouchable even when harassed. If you have a poke support, like Vel’koz or Karma, move around the minion wave and help harass with Mystic Shot (Q) and Essence Flux (W). Adapting to your support will help you win or go even in most of your lanes as Ezreal.
- Build to counter the enemy team composition. Ezreal’s versatile build allows for buying items that are specifically good against certain champions. If the enemy team has 3 or more attack damage threats or if you’re behind, substitute your trinity force for Iceborn Gauntlet. If the enemy team has multiple tanks that need to be killed, build a blade of the ruined king (although Ezreal’s main weakness is his struggle to kill tanks). If the enemy team has someone like Rengar or Zed, you can even build Zhonya’s Hourglass, as the active is incredibly useful, and Ezreal has some Ability Power scaling on his abilities.
- Play around your Muramana power spike. Once Ezreal stacks his Manamune into a Muramana, and has his sheen item, his burst potential is enormous. Use this opportunity where you become among the strongest champions on the map to surprise enemies with your damage and win fights, enabling you to take objectives and push for a win.
- Spam your abilities at all times while you stack your Tear Of The Goddess/Manamune, the mana costs are low, the payoff is huge, and it’s important to get to the above-mentioned power spike as quickly as possible.
Build:
- Manamune
- Ionian Boots of Lucidity
- Iceborn Gauntlet/Trinity Force
- Death’s Dance/Blade of the ruined King/Luden’s Echo (hybrid build)
- Bloodthirster/Hextech Gunblade (hybrid build)/Death’s dance
- Guardian Angel/Mercurial Scimitar (situational defense)
Runes:
- Conqueror
- Presence of Mind
- Legend: Bloodline
- Coup de Grace
- Magical Footwear
- Cosmic Insight
- Attack Speed, Adaptive Force, Armor’
Ability Max: R>Q>E>W
Here's GameLeap's guide to winning games on Ezreal!
6. Karthus
The Deathsinger
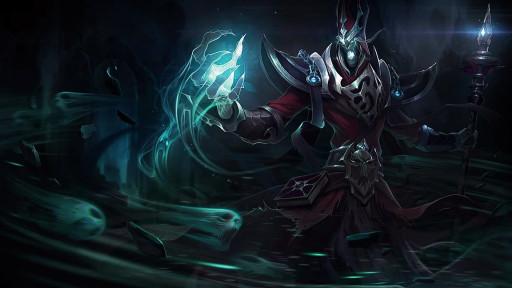
Unlike all the other champions on this list, Karthus isn’t an AD carry at all. He is a mage who has somehow found himself in the bottom lane as of late. His late-game damage, as well as incredible team fight, make him a force to be reckoned with, and his low cooldown Q makes him difficult to deal with in lane, as he can harass often, push fast, and farm efficiently.
So what makes Karthus so good in the bottom lane right now?
- He can farm safely without needing to be in auto-attack range. This is because his Lay Waste (Q) basically functions as his auto-attack, given its heavy damage and low cooldown. He can use it to poke from a decent range, farm from relative safety and chunk AD carries who tend to have not much in the way of magic resist, especially if they neglect to take it in their runes when they see this matchup.
- His Wall of Pain (W) gives him the utility to assist ganks as well as escape from them. This is especially devastating in the bottom lane where there are supports to follow up on Karthus’s slow. The kills he gets from ganks can help snowball him into hypercarry mode and make him a pain in the butt all game long.
- Karthus’s Requiem (R) gives him full map pressure by being un-missable damage on every champion on the map at the same time. If he gets going, which with his dark harvest and easy farming in the bottom lane he normally does, this ability can win team fights on its own, making coming back against a fed Karthus nearly impossible because he will cast this every fight without fail, even if you kill him first.
So how do you get the most out of Karthus bottom?
- Make sure you’re going out of your way to stack Dark harvest. This quickly becomes one of your main damage sources, so seek out low HP enemies to finish off with Requiem (R) or just your normal abilities. Once your dark harvest is stacked enough, simply watch for low health enemy champions on the map, cast Requiem (R), and watch the fireworks.
- Don’t be afraid to die! Karthus can cast abilities, including Requiem (R) for a short time after death. Often on Karthus, walking into the enemy team with your Defile (E) and surviving for as long as possible, while laying down as much damage as possible, is the best way to go about playing skirmishes and team fights. Sure, the enemy team might get some gold, but if you play it right, you should get a little bit more.
- Use the Wall of Pain (W) and Lay Waste (Q) as a zoning tool in the lane. These spells have a longer range than the majority of auto-attacks, so you can walk up and use them at maximum range to safely zone the enemy away. AD carries are squishy and do not want to be hit by your mage abilities in the lane, so try to force them away from the wave to deny them gold and experience. Be careful of supports like Leona and Thresh who will engage on you, however! Don’t give up free kills just to zone, not worth it!
- Use your auto attacks to farm the minions, and save your mana for your Lay Wastes (Q) that you use to harass the enemy laner. This will allow you to force them out of lane more, and hopefully get the same amount of farm. Karthus has a weak auto-attack so this might take some getting used to, but it is far more efficient.
- NEVER flash in or engage with Karthus, and always start fighting a bit later. This will make it so your sustained damage is laid down as much as possible before and after you die. You want to be able to cast your ultimate near the end of the fight when it has the potential to kill. It will damage low health enemies a TON if you’ve stacked your dark harvest properly!
Build:
- Luden’s Echo
- Sorcerer’s Shoes
- Liandry’s Torment
- Rabadon’s Deathcap
- Void Staff
- Morellonomicon
Runes:
- Dark Harvest
- Taste of Blood
- Eyeball Collection
- Ravenous Hunter/Ultimate Hunter
- Presence of Mind
- Coup de Grace
- Adaptive Force, Adaptive Force, Armor
Ability Max: R>Q>E>W
Here's a ProGuides vid on taking Karthus to the bottom lane!
5. Vayne
The Night Hunter
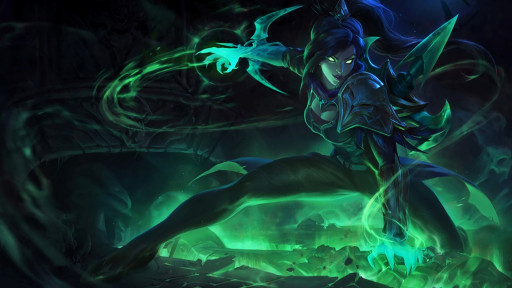
Vayne is an AD carry like no other. She can function as a normal hyper-carry who scales hard into the late game, shredding tanks and squishy champions alike with her percent maximum HP true damage, but she also excels in one-vs-ones with many strong champions, allowing her to push side lanes and even play in the top lane into certain matchups.
So what makes Vayne so good?
- For a hypercarry, Vayne is surprisingly good at fighting in the lane. With the right supports, her Silver Bolts (W) combined with her Press the Attack rune can lay down some serious damage early game, and catch unsuspecting enemies by surprise. She can take both short trades and long trades, and all-in efficiently for a hypercarry.
- Vayne’s damage late game is patently absurd, as her Silver Bolts (W) does percent maximum HP true damage, and her Tumble (Q) resets her auto-attack timer and increases her damage. These two skills combined with a Guinsoo’s Rageblade make her single target damage shred people insanely fast.
- In the hands of a skillful player, Vayne can one-vs-one almost any champion in the game, even the tanks, bruisers, and duelists that can be found in the top lane. Her Final Hour (R) causes her Tumble (Q) to turn her invisible, and her Condemn (E) can stun her opponents against walls. This combined with her Silver Bolts (W) allows her to dance around pretty much every other champion, and whittle them down quickly with autos until they die.
So how do you take advantage of Vayne’s strengths?
- Take good trades in the lane, but make sure you don’t trade with very long range champions like Caitlin or Jinx, as your range is short. Play the matchups well, if you can get harassed off the wave simply farm to late game, and if you can all-in with a Thresh or Nautilus type support, do so.
- Cast Condemn (E) and then flash to make it more difficult for your opponents to avoid the angle. This is a difficult move to pull off, so practice it in the practice tool first. If you flash directly after the cast, but before the projectile hits the enemy, the game will register the new angle, allowing you to get some surprise stuns.
- You can elongate the amount of time you’re invisible by not auto-attacking after your Tumble (Q) during your Final Hour (R). Use this to escape danger if you’re caught out of position, reposition during a fight, or sneak up on someone out of the fog of war or brush.
- Play team fight’s “front to back.” This means to kill the frontline tanks and bruisers first and make your way through the team towards the enemy carries. The reason for this is twofold. Firstly, it allows your team to peel enemies off of you as you can stay as a single unit. Secondly, it is common for new Vayne players to think they can tumble through invisible and shred enemy carries. While you can kill them, putting yourself in danger is not optimal because you are usually the best way to kill the enemy team’s tanks, and can leave the enemy carries for last.
- This is a niche tip, but if your team or the enemy team can create terrains, such as Anivia’s wall, or Jarvan IV’s Cataclysm, then you can Condemn (E) enemies into those walls as well! Remember to keep this in mind if Jarvan, Anivia, Taliyah, or other terrain-creating champions are on your team or even the enemy team.
Build:
- Blade of the Ruined King
- Berserker’s Greaves
- Guinsoo’s Rageblade
- Infinity Edge
- Phantom Dancer
- Guardian Angel/Mercurial Scimitar/Mortal Reminder (situational)
Runes:
- Press the Attack
- Triumph
- Legend: Alacrity
- Coup de Grace
- Taste of Blood
- Ravenous Hunter
- Attack Speed, Adaptive Force, Armor
Ability Max: R>W>Q>E
Here's an awesome Vayne guide for beginners by MipZ!
4. Senna
The Redeemer
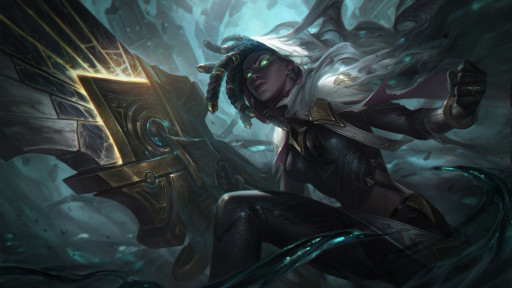
Senna is a strange champion, a hybrid between an AD carry and support, who can just as easily play either position. She is decent in the lane with her healing and harass, but is squishy and immobile, so is weak against all-ins. However, her utility, infinitely scaling range, and CC make her deadly in the mid and late game, and as her range grows she goes from difficult to almost impossible to deal with.
So what makes Senna so effective?
- Her passive increases her attack damage and range as she stacks it up. This stack has no limit, so as the game goes on she becomes a headache to deal with because she can hit enemies from so far away. She doesn’t shred people like other AD carries on this list might, but she does damage all the same, and though it might come slower, it’s relatively safe and enough to get the job done.
- She has an insane amount of utility for an AD carry. She has an area of effect snare, a full team stealth ability, an ultimate (Dawning shadow (R) ) that does damage and shields allies across the map, and a low cooldown poke and heal (Piercing Darkness (Q)) that applies on-hit effects. All of this utility in one neat package on an AD carry gives Senna’s team a unique advantage in that they normally have more CC and healing than the opposition because those things almost never come from the AD carry role.
- Although she’s easy to gank or kill in the lane, senna’s lane phase can be pretty solid against the right matchups. Her glacial augment is a pain to deal with, and if she has a support that can peel or disengage, she is pretty hard to stick to despite her lack of mobility. This relative safety makes her ability to scale that much better, and harder to stop.
Senna tips and tricks!
- Your Piercing Darkness (Q) can go through multiple targets, healing allies, and damaging enemies. Make sure you line it up to hit as many units as possible. Whether you need the extended range on the end to last hit minions, harass the enemy laner, or heal an ally, make sure to keep this in mind as the game moves on as to not lose a lot of the power of your Piercing Darkness (Q).
- Piercing Darkness (Q) can be cast on ANY targetable unit. That includes allied and enemy towers, allied and enemy minions, allied and enemy champions and wards, etc. Use this knowledge to your advantage when playing around towers or in the jungle near wards, as you can use these things to hit enemies or allies with your Piercing darkness when you are out of range.
- Be careful while in your Curse of the Black Mist (E)! Although the enemy can’t see how many allies are inside of it or where they are, they know that you are in the middle and can target you accordingly. This can be used against you, as to hit you with skills, kill you or cancel the ability, or to your advantage, as you can try and bait out skills until your team can jump out of the mist and strike.
- If a unit dies after being hit by Last Embrace (W), the root effect immediately triggers. Try to use this in the lane to kill minions near your lane opponent, rooting them and granting you some free damage.
- In team fights, try to keep your distance from enemy tanks and bruisers, using the range you’ve been stacking all game to keep them at bay. Cast your Dawning Shadow (R) on as many allies and enemies as you can hit at once, in order to maximize the effect. Cast your Last Embrace (W) on cooldown to keep enemies rooted. If you want to engage a team fight, group with your team and cast your Curse of the Black Mist (E) to pounce on unsuspecting enemies with your whole team.
Build:
- Manamune
- Boots of Swiftness
- Black Cleaver
- Umbral Glaive
- Rapidfire Cannon
- Mortal Reminder/Lord Dominick’s Regards
Runes:
- Glacial Augment
- Magical Footwear
- Biscuit Delivery
- Approach Velocity
- Presence of Mind
- Legend: Alacrity
- Adaptive Force, Adaptive Force, Armor
Ability Max: R>Q>W>E
Here's a helpful video on how to wreck games on Senna!
3. Jhin
The Virtuoso
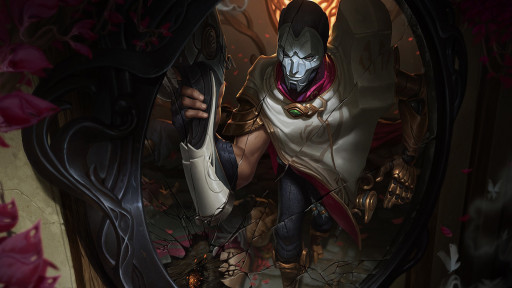
Jhin is a methodical marksman who utilizes his long-range abilities in combination with his devastating auto attacks to supply damage and utility to his team. His four auto-attack reload mechanic completely informs how the champion plays and has to be played around competently for a Jhin player to succeed.
Why is Jhin good right now?
- While he doesn’t have the DPS to absolutely shred enemy teams like Twitch and Jinx, his auto attacks pack a whole lot of punch. This is especially true of the fourth of his four autos, which automatically critically strikes, is an execute (does extra damage to low health enemies), and grants him bonus movement speed (along with his other critical strikes). These autos can absolutely destroy single targets, especially squishy ones, who Jhin is particularly adept at killing.
- His Deadly Flourish (W) and Curtain Call (R) are both long-range abilities that snare and slow, respectively. This allows Jhin to help allies in fights that he is fairly distant from, keeping him safe, and nabbing his team some extra damage and kills. This utility is rare on AD carries, so it is helpful to bring to the role.
- In the laning phase, Jhin shines when he’s being ganked for. His Deadly Flourish (W) allows him to assist ganks quickly, and his deadly autos help him secure kills on ganks easily. Make sure to call for jungle help if you’re being pushed in on Jhin.
How to play Jhin and win!
- Always cast Dancing Grenade (Q) directly before your fourth auto-attack. This is because your fourth auto-attack is an execute, so you want to get as much damage down right before it as possible.
- If you have your Fleet Footwork and third auto attack up at the same time, use your Fleet Footwork movement speed after the third auto to run up and use the Dancing Grenade (Q) and fourth auto, and then use the movement speed from that critical strike to run out of the enemy carry’s range. This is an extremely efficient trading pattern and should be taken advantage of if available in the lane.
- If you’re in a lane against someone who pushes your lane in, such as Caitlyn or Sivir, start with Doran’s ring instead of Doran’s blade. This will allow you to cast more Dancing Grenades (Q) and clear the waves more efficiently, as to lose less farm.
- While team fighting, sit on the cusp of the fight and dip in and out of the fray. Do this in order to stay safe in between your slow auto attacks. Cast your ultimate either to start the fight or if you never found a good opportunity when it's finished and enemies are running away. NEVER cast it in the middle of a chaotic fight, as it leaves you helpless and you will be killed immediately.
- Make sure to prepare the minions for your Dancing Grenade (Q) to kill them and bounce off. This causes it to deal more damage to the enemy champions. This is easier to do with the caster minions in the back of the wave, as they are squishier and closer to the enemy laners.
Build:
- Infinity Edge
- Boots of Swiftness (buy early)
- Rapidfire Cannon
- Stormrazor
- Phantom Dancer/Guardian Angel
- Lord Domnick’s/Mortal Reminder
Runes:
- Fleet Footwork
- Presence of Mind
- Legend: Bloodline
- Coup de Grace
- Nimbus Cloak
- Gathering Storm
- Adaptive Force, Adaptive Force, Armor
Ability Max: R>Q>W>E
Here's an in-depth Jhin guide by YeagerLoL!
2. Ashe
The Frost Archer
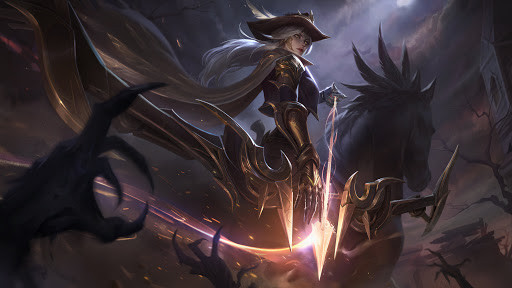
Ashe is a unique AD carry who excels in her utility more than her pure damage. She is somewhat of a hyper carry, able to do tons of damage late into the game, but she is mostly used for her many slows and excellent stun that can be used in a variety of ways for devastating effect.
So how exactly is Ashe so good?
- Ashe’s lane phase is oppressive due to her Volley (W) being exceptional long-range poke and a slow. This allows her to harass both enemy laners at once, slow them for extra auto attacks, and push the wave quickly and efficiently. In contrast, her Ranger’s Focus (Q) lets her excel in longer trades as well, during which escaping her is nearly impossible, and trading back with her will likely result in a won trade for Ashe.
- Ashe’s Crystal Arrow (R) is one of, if not the best single ability in the game. It has an infinite range, stuns for a longer duration the longer it travels, and has a massive hitbox. This combination creates an ability that can engage skirmishes and team fights, catch out unsuspecting enemies, or give Ashe some much-needed self-peel in sticky situations.
- Ashe’s damage is quite high late game, and if she uses her Crystal Arrow (R) to engage a solid team fight, she can follow it up by shredding single targets quickly and efficiently, while slowing them so they have a hard time both chasing her down and escaping.
So how do you use Ashe’s kit to its full effectiveness?
- Use Ashe’s passive’s slow, as well as her Volley (W) to harass the enemy champions in lane without being attacked back. If you get the slow down by autoing an enemy champion while they are attacking a minion, you can walk away faster than they can walk up and get their next auto attack off on you due to the slow. Use this trick along with your Volley (W) to push the enemy in and trade.
- Make sure to use your Hawkshot (E) regularly in the enemy jungle to try and track the enemy jungler! Since Ashe is immobile and fairly squishy she is an easy target for roaming mids and junglers who want easy kills. This can be negated with information, however, so use Hawkshot (E) very liberally in the lane phase. Beyond lane, use it to check objectives or un-warded jungle before your team walks into the fog of war.
- Ashe’s crowd control allows her to force fights easily. When ahead, look to engage with Volley (W) or Crystal Arrow (R) and follow up with autos and Ranger’s Focus (Q) until the enemy dies. Ashe is exceptionally hard to get away from or stick to due to her passive slow, stun on Crystal Arrow (R), and slow on Volley (W). These along with the Approach Velocity rune make her pretty much inescapable. Make sure you assert your dominance once you win lane.
- Stay with your team in the mid-late game! Ashe is strong, but plenty of champions can catch her out one-on-one. Her utility best serves her in a team composition that engages heavily and dives the enemy backline, team fights with area of effect ultimates, or peels back off fights and kites away. Do not get greedy for farm that’s not by any of your towers, as the Zed’s and Talon’s of the world see you with dollar signs in their eyes. Be careful!
Build:
- Blade of the Ruined King
- Berserker’s Greaves
- Runaan’s Hurricane
- Infinity Edge/Death’s Dance (situational)
- Phantom Dancer/Mortal Reminder/Lord Dominik’s Regards (situational)
- Guardian Angel/Mercurial Scimitar (situational)
Runes:
- Lethal Tempo
- Presence of Mind
- Legend: Alacrity
- Coup de Grace
- Magical Footwear
- Approach Velocity
- Attack Speed, Adaptive Force, Armor
Ability Max: R>W>Q>E
Here's some educational gameplay on how to win games on Ashe by Shark Zone!
1. Caitlyn
The Sheriff of Piltover
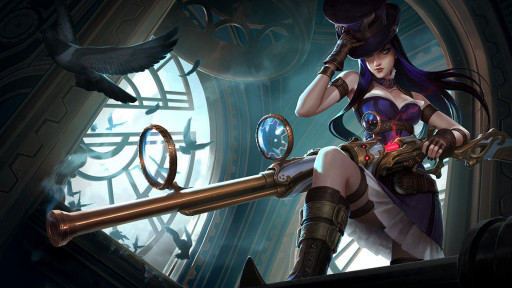
Caitlyn is the cream of the crop when it comes to AD carries or the bottom lane in general. She is an extremely oppressive lane bully, is incredibly adept at taking towers and objectives, has great gank assist and can escape harm, and scales super well into the late game. The jack-of-all-trades of the bottom lane, she is a great pick against any other bottom lane and can dominate late game team fights if she gets ahead, which she normally does.
So what makes Caitlyn the best?
- Caitlyn’s laning is absolutely dominant. Her long auto attack range makes it extremely difficult to trade auto attacks with her, and she can poke her enemy off the wave with ease. She can push the wave fast with her Piltover Peacemaker (Q), and auto-attack the enemy champions under the tower and often avoid the damage. This push and poke strategy synergizes well with many supports, and often nets Caitlyn a severe gold and experience advantage into the mid and late game, due to her opponent losing so much gold to the tower.
- Caitlyn scales extremely well, especially for a lane bully. Her classic AD carry build centered around critical strike and attack speed lends itself to massive Headshots (Caitlyn’s passive) late game, which chunk enemy carries to near death, and put decent sized dents in the health bars of tanks as well. She can create space with her Yordle Snap Trap (W) and 90 Caliber Net (E) to stay safe in fights and shred enemy teams from a mile away.
- Caitlyn excels when “sieging” towers. This is when a team groups on one tower and slowly whittles it down to nothing, then moves onto the next tower. Her long-range and nasty waveclear allows her to do this extremely efficiently. Sieging many towers and keeping all 3 waves pushed puts a ton of pressure on the enemy team, allowing Caitlyn’s team to take control of the map via wards and objective control
So how does this translate into your play?
- Be forceful in the lane. Push the wave into your opponent’s tower as much as is safe. Poke them when they go for their minions from long range, and stay back to take yours from relative safety. Keep your Yordle Snap Traps (W) down in the lane brushes or in the river to avoid being taken by surprise by a support or jungler, and keep putting the pressure on. Junglers will come, so make sure your river is warded up and you are safe from ganks.
- Take your lane’s tower, then move on to mid. There’s not much use in pushing far past the enemy’s first tower on Caitlyn. Your services are better used mid, where you can take another tower and move onto more objectives. Remember, you aren’t a one-vs-one champion, and can be killed easily if alone. Group with your team, and use your champion’s insane strengths to choke out the enemy.
- Trade in bushes. Your Headshot passive stacks twice as quickly in bushes. This means you can get that big auto attack twice as often if you position yourself correctly. Doing this will force your enemies to use more health pots, mana, and resources, or eventually either back or die, allowing you to take the actions above with more ease. This is a simple but important tip to do well on Caitlyn.
- Buy a blue trinket at level 9! This goes for almost all AD carries, but it is especially important on Caitlyn. This will allow you to get extra kills with Ace in the Hole (R) on enemies who’d otherwise disappeared into the fog of war. Cast the trinket where you think the enemy is, and be prepared to immediately cast Ace in the Hole (R) on them.
- In team fights your main concern should be your own safety. You have some tools to protect yourself, but many champions can still destroy you if you’re caught out on your own. Stay with your support, tank, or control mage and keep your distance. Abuse your absurd range in order to stay safe from harm, and kite back unless the enemy team is running away.
Build:
- Stormrazor/Infinity Edge
- Berserker’s Greaves
- Infinity Edge/Stormrazor
- Rapidfire Cannon
- Phantom Dancer/Bloodthirster (situational)
- Guardian Angel/Mercurial Scimitar (situational)
Runes:
- Fleet Footwork
- Triumph
- Legend: Bloodline
- Coup de Grace
- Nimbus Cloak
- Gathering Storm
- Attack Speed, Adaptive Force, Armor
Ability Max: R>Q>W>E
Here's a really quick 5 minute Caitlyn Guide to get you started!
All 10 of these great bottom laners will help you win games on the rift! So what are you waiting for? Hop into the bottom lane and start auto attacking, your team needs you!

