Which are the strongest bosses in Dark Souls 3?
The most popular aspect of every Dark Souls game is the boss fights. It is almost a signature for the franchise. From Software gives us some of the best challenges in video game history and with each game it has merely gotten better. Trying to figure out what you may be up against? Here we’ll discuss all the boss encounters from the weakest to the strongest so you don’t have to walk into any fight empty handed.
25. Ancient Wyvern
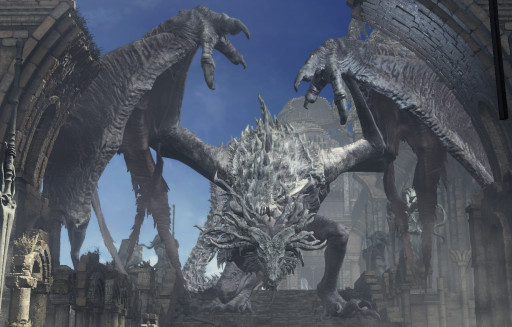
Dragons are legendary. Typically, you see them and fear crosses you merely thinking about the challenge. Not this guy. If you had your hopes up for an epic dragon slaying, save that for later.
Boss Location: Archdragon Peak.
Boss Behavior:
- He’s relatively slow.
- He will stomp around quite a bit if you are near him.
- His fire breath deals a bit of damage, but it bearable for a hit.
- He will follow you throughout the zone.
Ancient Wyvern must be defeated before you can progress through the rest of Archdragon Peak. How would one go about this task? It’s easier than you think.
How to defeat this boss:
- Run past the dragon.
- Run past various enemies.
- Climb rafters.
- Plunge attack.
- ??????
- Profit.
Video guide to defeating this boss is available here.
Boss Loot:
- Dragon Head Stone
- Around 70,000 Souls
Difficulty Rating: 10/100
24. High Lord Wolnir
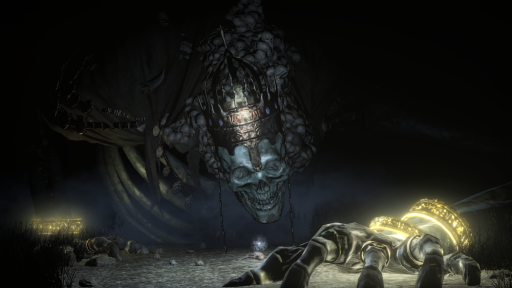
A lord of taste as well as an heir of fire, his most notable asset is his bling. He comes out of darkness to decimate those who encroach on his territory with menacing…vapors?
Boss Location: Catacombs of Carthus.
Boss Behavior:
- He slams the ground with both hands.
- He swipes the full area in front of him often.
- He releases dangerous vapors.
- Summons skeletons if in the fight too long.
- He will cast a dangerous spell with his weapon if allowed.
High Lord Wolnir must be defeated to progress through the main story line. Menacing as he looks, all he cares about is one thing: his bling!
How to defeat this boss:
- Enter the fight, moving to either left or right of the arena.
- Focus on the shiny parts…the super bling gold bangles!
- Whack them until they shatter.
- Profit!
Video guide to defeating this boss is available here.
Boss Loot:
- 22,000 souls
- Grave Warden Pyromancy Tome
- Soul of High Lord Wolnir
- Access to Irithyll of the Boreal Valley
Difficulty rating: 15/100
23. Deacons of the Deep
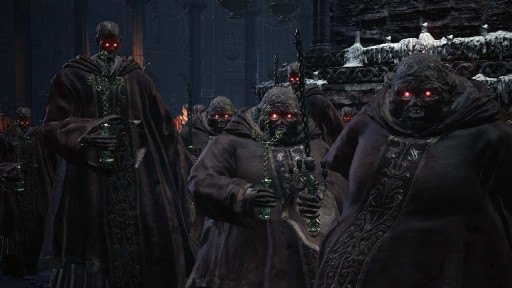
Your first boss that may pose a bit of a challenge! Mind you, this is due to sheer numbers more than anything. This is a hoard boss. There are many deacons, but only one is important.
Boss location: Cathedral of the Deep.
Boss Behavior:
- This boss is slow.
- They will move in a group.
- The deacons cast fireballs primarily.
- Their melee attack is easily avoidable.
- If allowed, they will collaborate and cast a deadly spell on the player.
The deacons must be defeated to progress through the main story line of the game.
How to defeat this boss:
- Enter the fog gate.
- Immediately notice which deacon has the red glow to him (like the RTSR)
- Kill the deacons as you see fit, focusing on the one with the red glow.
- When enough are killed the main entity spawns.
- Kill the main entity (the one with the staff).
- Profit.
Video guide to defeating this boss is available here.
Boss Loot:
- 13,000 souls
- Soul of the Deacons of the Deep
- Small Doll
- Pope swag.
Difficulty rating: 20/100
22. Curse-rotted Greatwood
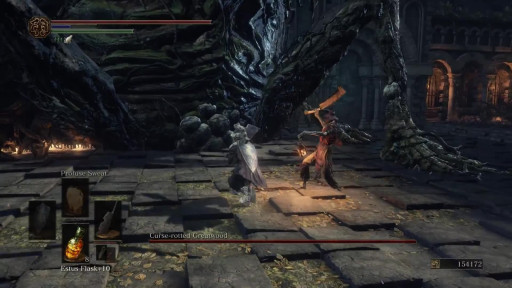
From holy to holly, we go into the next boss fight. This great tree may look menacing, but no need to worry. Just like our friend Wolnir, he’s got parts that are dear to him. Break the parts, break the tree.
Boss location: Undead Settlement.
Boss Behavior:
- This boss is a heavy hitter.
- There are cannon fodder enemies to bug you.
- He casts no spells.
- Does have multiple slamming attacks.
- Will try and grab the player.
This is an optional boss. Though you don’t have to fight him, killing him brings access to a very special aspect of the game series…boss weapons!
How to defeat this boss:
- Enter the fog gate.
- Enemies around the boss will aggro before him.
- Avoid the trees attacks while you attack the weak points on the body.
- Once enough weak points are destroyed, you must avoid a new body part that will sprout.
- Continue to destroy the weak points until death.
- Profit.
Video guide for defeating this boss is available here.
Boss loot:
- 7,000 souls
- Soul of the Curse-Rotted Greatwood
- Transposing Kiln
- Access to a wooden shield.
- Access to an area required for the Mad Covenant.
Difficulty rating: 25/100
21. Vordt of the Boreal Valley
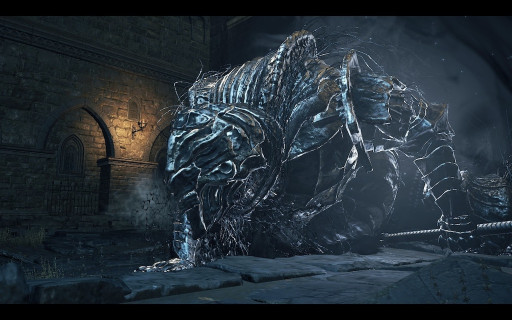
Our next contender is a frigid one. He will send shivers down your spine, but not with fear.
Boss location: High Wall of Lothric.
Boss Behavior:
- Uses a large mace.
- Weapon has frost damage and proc.
- Has multiple stages.
- Will trample you if not dodged correctly.
This boss is required to progress through the main story line of the game.
How to defeat this boss:
- Enter the fog gate.
- Wait for Vordt to approach.
- Make an effort to get and stay near his rear.
- Use a dark weapon, or your lightning resin for extra damage.
- Basically R1 spam until defeat.
- Profit.
Video guide for defeating this boss is available here.
Boss loot:
- 3,000 souls
- Soul of the Vordt of the Boreal Valley
- Access to next area.
Difficulty rating: 25/100
20. Yhorm the Giant
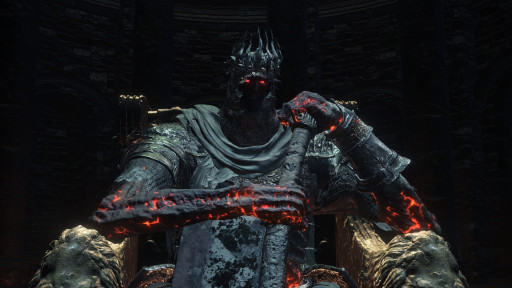
Size can be intimidating. Especially when it comes with the fire and rage of a giant! One thing can be said here though; size can also be deceiving.
Boss location: Profaned Capital.
Boss Behavior:
- Has a large machete.
- Will become engulfed in flames.
- Has multiple stages.
- Will alternate between sword, slams and stomps.
This boss is required to progress through the main story line of the game.
How to defeat this boss:
- Enter the fog gate.
- Run past Yhorm to his throne.
- Take up the item to the right of the throne as you approach and equip.
- Use the sword skill (L2) to charge the weapon.
- Release the attack with strong attack button (R2) while pressing (L2).
- Rinse and repeat.
- Profit.
Video guide for defeating this boss is available here.
Boss loot:
- 36,000 souls
- Soul of the Yhorm the Giant.
- Cinders of a Lord.
- If storyline is followed you will now have access to a certain NPC’s gear
Difficulty rating: 30/100
19. Iudex Gundyr
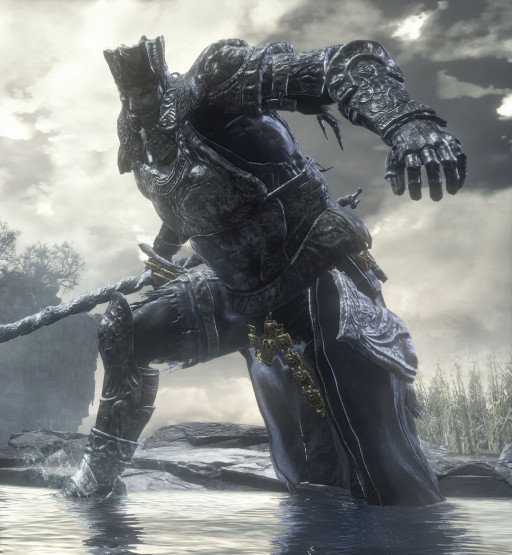
Yes, you may be surprised, but the first boss in the game is not the easiest! He does give you a good taste of what’s to come.
Boss location: Cemetery of Ash.
Boss Behavior:
- Has multiple stages.
- Has incredible range and mobility.
- Will grab you if possible for an attack.
This boss is required to progress through the main story line of the game.
How to defeat this boss:
- Enter the fog gate.
- Approach and remove the sword from his chest.
- Begin striking as he is rising up.
- Basic R1 until his second form.
- Roll away once second phase starts to dodge transforming attack.
- Dodge and roll; rinse and repeat.
- Profit.
Video guide for defeating this boss is available here.
Boss loot:
- 3,000 souls
- Coiled Sword for Shrine bonfire.
Difficulty rating: 35/100
18. Crystal Sage
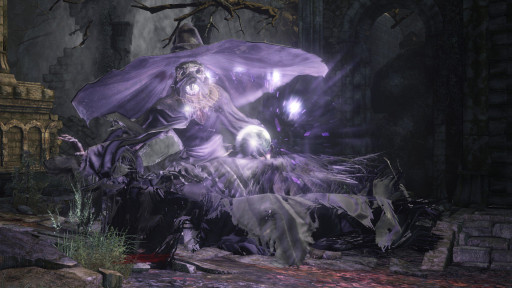
This boss is our first true magic wielding enemy. Like the prior Dark Souls games, crystal magic is quite powerful. He has a lot of damage potential behind him, but is relatively a glass cannon.
Boss location: Road of Sacrifices.
Boss Behavior:
- Not pure caster, can melee.
- Will teleport around arena after taking so much damage.
- Spawns copies during second phase.
This boss is required to progress through the main story line of the game.
How to defeat this boss:
- Enter the fog gate.
- As you approach, the sage will spawn from the ground.
- Strike, while dodging the spells and potential melee attack if close enough.
- Wait for second stage, which he will spawn and teleport again with no attack between.
- Avoid or simply single strike the copies, as the real boss is the purple one.
- Rinse and repeat.
- Profit.
Video guide for defeating this boss is available here.
Boss loot:
- 8,000 souls
- Soul of the Crystal Sage.
Difficulty rating: 35/100
17. Old Demon King
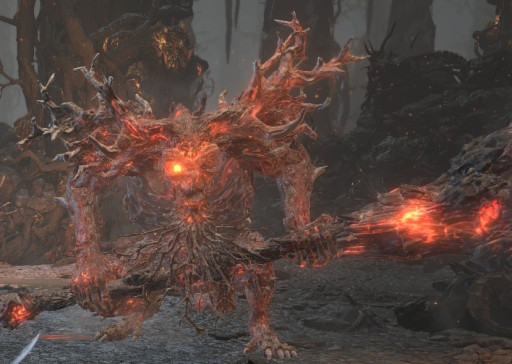
Get off his lawn! If you don’t, this old man will burn you out. The Old Demon King is a feisty one.
Boss location: Smouldering Lake.
Boss Behavior:
- Will cast fire and strike with his melee hammer.
- Casts more powerful spells if you are away from him.
- Has at least 4 different spells that he can cast.
- Can tail swipe you.
- Telegraphs his attacks, so the signs are easy to learn.
This boss is NOT required to progress in the game and is purely for optional rewards.
How to defeat this boss:
- Enter the fog gate.
- As you approach, he will rise from the ground.
- Avoid his initial attacks of the hammer slam and the burst of fire from his palm.
- He will ember on second stage, which will also come with more fire attack spam.
- Dodge the rings of fire by rolling into and back out of them.
- Run from the hail of fire balls.
- Rinse and repeat until he staggers and falls to his knees around 15% of his health left.
- Finish him off, avoiding a few feeble attack attempts.
- Profit.
Video guide for defeating this boss is available here.
Boss loot:
- 25,000 souls
- Soul of the Old Demon King.
Difficulty rating: 40/100
16. Abyss Watchers
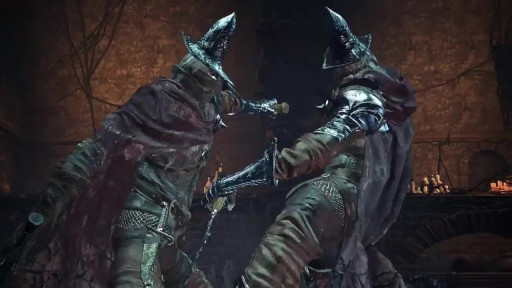
Which boss is it? Can you keep an eye on the right one? They are a legion for they are many!
Boss location: Farron Keep.
Boss Behavior:
- Has multiple summons.
- Is very active and quick.
- Multiples can target you.
- Can tail swipe you.
- Telegraphs his attacks.
This boss is required to progress in the game.
How to defeat this boss:
- As you approach, he will charge at you.
- Be prepared to dodge a barrage of attacks.
- Basic attacking until the first summon, who will try immediately to attack you.
- As the fight progresses, another summon will spawn with red eyes.
- Second summon can attack the boss as well as the first summon.
- Attack, dodge, rinse and repeat until second phase.
- Avoid the new attacks that are now accompanied with fire.
- Boss can be parried and can also be riposted.
- Attack, rinse and repeat.
- Profit.
Video guide for defeating this boss is available here.
Boss loot:
- 18,000 souls
- Soul of the Blood of the Wolf.
- Cinders of a Lord.
Difficulty rating: 45/100
15. Oceiros, the Consumed King
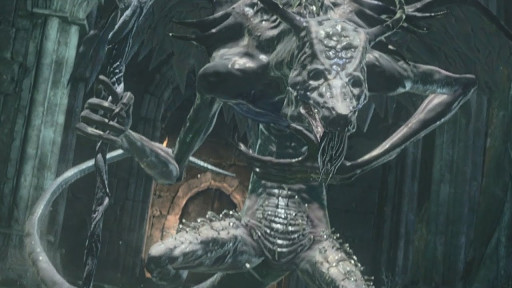
Our second dragon on the list. He is a bit preoccupied looking for his child, but has no problem taking out his frustrations on you!
Boss location: Consumed King’s Garden.
Boss Behavior:
- Has multiple phases.
- Starts slow and gets much faster once enraged.
- He will attack with crystal magic as well as another sorcery.
- Can charge at high speeds in stage two.
- Will tail swipe you.
This boss is NOT required to progress in the game. He is needed to access a secret area.
How to defeat this boss:
- Enter the fog gate.
- As you approach, he will walk slowly towards you until within attack range.
- His first attack is usually a slam or swipe of his staff as he tries to be close.
- You can attack him while dodging his melee while avoiding his spells.
- On phase two, you need to be prepared to dodge charges.
- Avoid his flying crystal magic casts.
- Stay close to him if comfortable or far from him to avoid the tail spins.
- Attack, dodge, rinse and repeat.
- Profit.
Video guide for defeating this boss is available here.
Boss loot:
- 58,000 souls
- Soul of the Consumed Oceiros.
Difficulty rating: 50/100
14. Soul of Cinder
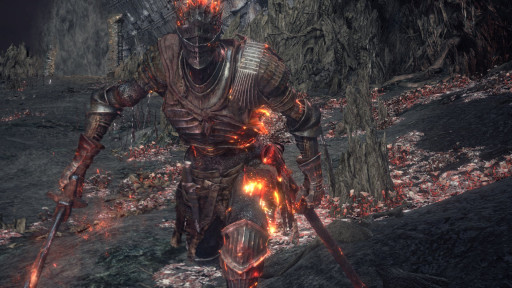
Wait! Isn’t this the end game boss? Indeed, it is. By this point you have experienced everything he has to dish out. His fight is challenging, but not hard.
Boss location: Kiln of the First Flame.
Boss Behavior:
- Has multiple phases.
- Will switch between different combat styles throughout first phase.
- Uses crystal magic as well as pyromancy and miracles.
- Performs an explosive attack to signal phase 2 (melee only then on).
- Has a wombo-combo in phase 2 that can juggle you in the air and almost one shot.
This boss is required to progress in the game. You will then have the option to move on to NG+.
How to defeat this boss:
- He will rise as you approach and almost immediately begin to attack.
- You need to avoid his swings which will switch through multiple weapon types.
- Dodge his crystal magic spells and avoid the pyromancy toxic breath.
- He may heal himself as anytime of the fight with a miracle. It is telegraphed.
- Move away for phase two, which is at the end of his first health bar.
- There will be a melee barrage that deals both physical and fire damage.
- Attack, dodge, rinse and repeat.
- Profit.
Video guide for defeating this boss is available here.
Boss loot:
- 100,000 souls
- Soul of the Lords.
Difficulty rating: 55/100
13. Champion Gundyr
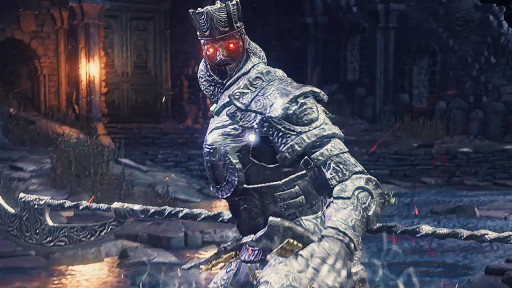
Don’t be fooled with the memory of his twin, Iudex. This Gundyr is no push over.
Boss location: Untended Graves.
Boss Behavior:
- Two phase boss: mad and angry.
- Is a heavy hitter.
- Will alternate between glaive attacks, punches, kicks and grabs.
- Begins at a moderate pace.
- Phase two is much faster, longer combos and more aggressive.
This boss is NOT required to progress in the game. He is for loot and access to the rest of the area beyond him, dark Firelink Shrine.
How to defeat this boss:
- He will rise as you approach and tends to start with a delayed attack.
- You need to dodge his attacks and avoid his swings.
- This boss can be parried and riposted.
- Phase two is signaled by a fierce stomp and aggressive stance.
- Avoid getting hit if possible as the rest of the combo will most likely hit you too.
- Dodge, attack or parry, riposte.
- Rinse and repeat.
- Profit.
Video guide for defeating this boss is available here.
Boss loot:
- 60,000 souls
- Soul of Champion Gundyr.
Difficulty rating: 60/100
12. Aldrich, Devourer of Gods
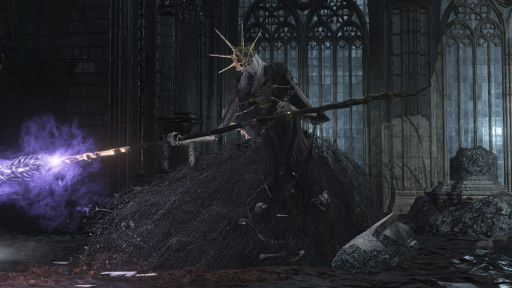
Wearing the shell of his last meal, Aldrich is a boss to be reckoned with. His fight can be quite intense.
Boss location: Anor Londo.
Boss Behavior:
- This boss has a magic phase and a fire phase.
- Will cast crystal magic, melee, a miracle spell, and a barrage of arrows.
- First phase arrows will spread one direction.
- Second phase arrows will follow you for a time.
- Does teleport to the area of the room furthest from you throughout the fight.
This boss is required to progress in the game.
How to defeat this boss:
- He will begin to attack or buff his weapon as you enter.
- The trick is to keep close as possible to him to help control his attacks.
- This boss will spam crystal magic that can go through the pillars in the room.
- Avoid the magic and dodge around the boss’ body to avoid the melee attacks.
- Attack as you can between each wave until he teleports.
- Move to the area furthest away to get close as soon as possible.
- Rinse and repeat.
- Profit.
Video guide for defeating this boss is available here.
Boss loot:
- 50,000 souls
- Soul of Aldrich.
- Cinders of a Lord
Difficulty rating: 65/100
11. Champion’s Gravetender and Gravetender Great Wolf

Sif?! Sorry, not this pup. Gravetender and Wolf are a challenging duo. Gravetender will begin alone, but will signal for his loyal Wolf when the threat of death is upon him.
Boss location: Painted World of Ariandel.
Boss Behavior:
- Can cast sorcery, but is predominately melee.
- There are a couple of regular wolves at the start of the fight.
- Will cast or rush you if far away.
- Will use his weapon skill for a buff and to knock you away.
- The Wolf will rush you, running past you attacking and leaving a frost debuff.
- Both are fast and aggressive.
This boss is NOT required to progress in the game. This can unlock the pvp arena.
How to defeat this boss:
- Dispose of the wolves that will run out to you ahead of the Gravetender.
- You can then either dodge or parry the Gravetender’s attacks.
- Attack, rinse, and repeat until he is nearly dead and summons his Wolf.
- Dispose of the Gravetender first while avoiding his Wolf’s attacks.
- Dodge and attack to finish off the Wolf.
- Profit.
Video guide for defeating this boss is available here.
Boss loot:
- 60,000 souls
- Champion’s Bones.
- Valorheart.
Difficulty rating: 65/100
10. Dancer of the Boreal Valley
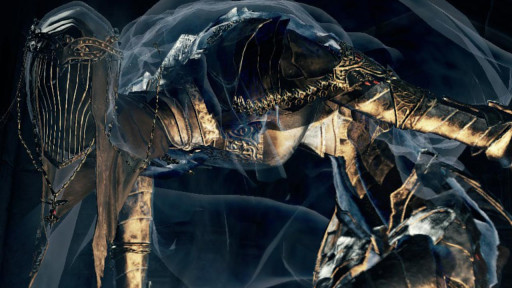
Dancer is graceful as she twirls her blades of death towards you. Don’t get distracted by her moves as her body language clearly states she’s out to end you!
Boss location: High Wall of Lothric.
Boss Behavior:
- Is quick, but often executes delayed attacks.
- Has a reach that is over half the length of the room.
- Uses fire and dark magic.
- Will alternate between sword swipes, slaps, fire/dark, and grabbing attacks.
- Will draw out a second sword for phase two.
This boss is required to progress in the game. Defeating her will unlock two areas.
How to defeat this boss:
- Most importantly, dodge TOWARDS the hand that tries to grab attack you.
- Avoid her fire and dark as she draws lines or presses the ground.
- Most of her melee attacks, including the spin, can be dodged close to her.
- Try and keep to her rear for quick punishes between her moves.
- Attack, dodge, rinse, and repeat.
- Profit.
Video guide for defeating this boss is available here.
Boss loot:
- 60,000 souls
- Soul of the Dancer.
Difficulty rating: 70/100
9. Dragonslayer Armour
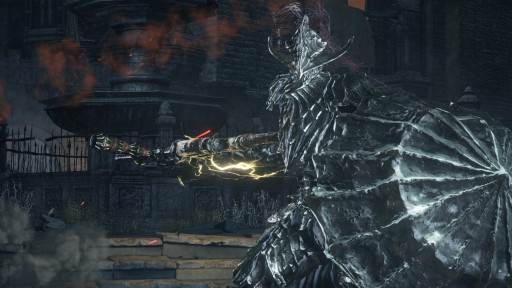
A living suit of armor with a serious grudge. That, partnered with some flying friends that like to throw in a word now and then; you got yourself a dodge filled boss fight!
Boss location: Lothric Castle.
Boss Behavior:
- Is very aggressive.
- Has multiple attacks including slams, swipes, lightning, and force.
- Will try to stay close to you.
- Shields himself often.
- Has dragon pets on the outside of the arena that will shoot projectiles and laser beams.
This boss is required to progress in the game. Defeating him will unlock access to the next area.
How to defeat this boss:
- Enter the boss fog and prepare to guard or dodge almost immediately.
- When his axe is held to the sky, be sure to avoid the downward lightning attack.
- He cannot be parried, but can be staggered.
- Use the fountain to put a moment’s space between you and him to heal if needed.
- Attack, dodge, rinse, and repeat.
- Profit.
Video guide for defeating this boss is available here.
Boss loot:
- 64,000 souls
- Soul of Dragonslayer Armour.
Difficulty rating: 70/100
8. Pontiff Sulyvahn
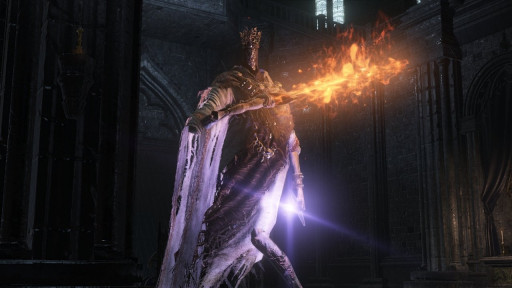
The Pontiff is a difficult fight without practice. It may take a couple of tries to defeat him, as he is the first boss with multiple weapons that move independently from one another.
Boss location: Irithyll of the Boreal Valley.
Boss Behavior:
- Has long attack combos.
- Attacks will often have him thrusting towards you or shooting something at you.
- Has a second phase that will be signaled by kneeling and sprouting black wings.
- Summons a copy of himself that will telegraph by doing the attacks the real one is going to do next.
This boss is required to progress in the game. You must have defeated Deacons and Wolnir.
How to defeat this boss:
- He can be parried, staggered, and riposted.
- He will do an initial lunge attack to begin the fight as you approach.
- Keep in mind you can only parry the FIRE sword.
- His clone has low health, focus on destroying it whenever summoned.
- Punish after parry or at the end of combos.
- Profit.
Video guide for defeating this boss is available here.
Boss loot:
- 28,000 souls
- Soul of Pontiff Sulyvahn.
Difficulty rating: 75/100
7. Halflight, Spear of the Church
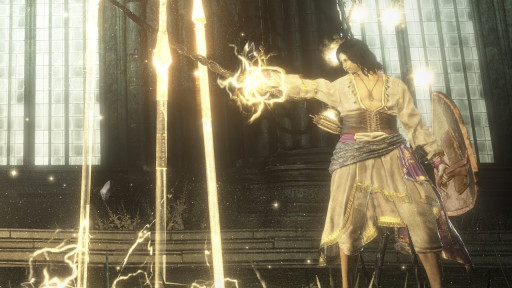
If you are not all familiar with pvp in dark souls, this fight will be an introduction. It can be extremely challenging or quick and simple. Special circumstances earned it this spot on the list.
Boss location: The Ringed City.
Boss Behavior:
The giant adjudicator will die on his own after summoning your opponents.
- Can be an NPC or a summoned player.
- The player can be a part of the covenant or place the summon sign on the map.
- A summoned player will have the health of a boss plus an attack only usable here.
- The NPC will attack with a katana, ranged dark spell, and miracle only here.
- Either boss version will have added church guardians that will fight and heal.
This boss is NOT required to progress in the game. You will be granted a covenant item.
How to defeat this boss:
- She/he can be parried, staggered, and riposted.
- The NPC will use dark magic, so have resistance or be prepared to dodge.
- The katana attacks of the NPC are rapid and in combos.
- Focus on the church guardians with standard attacks while avoiding the boss.
- Defeat the boss.
- Profit.
Video guide for defeating this boss is available here.
Boss loot:
- 80,000 souls
- Filianore’s Spear Ornament
- Titanite Slab.
Difficulty rating: 75/100
6. Lorian, Elder Prince and Lothric, Younger Prince
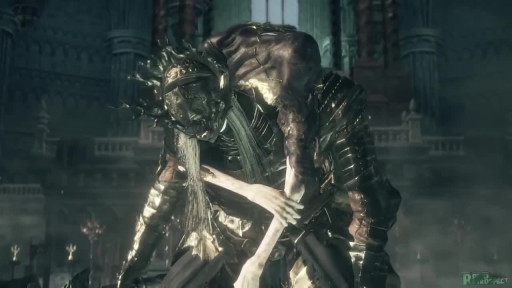
Brothers bound by fate, these princes are a decent challenge. They act individually and in sync with one another, which increases their difficulty marginally.
Boss location: Grand Archives.
Boss Behavior:
- The older prince will fight you alone first.
- He is aggressive, has use of fire and miracle attacks, as well as he can teleport.
- The fire attacks will come in the form of a cone and the miracle is a beam.
- There are two phases.
- Second phase his brother will join him on his back.
- The brother casts multiple miracles, including healing Lorian when his HP reaches zero.
This boss is required to progress in the game.
How to defeat this boss:
- Enter the fog gate and be prepared to dodge a teleporting overhead slam attack.
- Avoid the fire cones by rolling off to the side and the miracle beam the same way.
- Sword hand can be parried, but has a VERY small window and odd positioning.
- He can be poise broken and riposted.
- Attack, dodge, rinse, repeat.
- His brother will join and may cast a combined beam attack that needs to be dodged.
- Get Lorian down and then attack his brother before he casts a wrath of the gods to heal him.
- Rinse, repeat.
- Profit.
Video guide for defeating this boss is available here.
Boss loot:
- 85,000 souls
- Soul of the Twin Princes
- Cinders of a Lord.
Difficulty rating: 80/100
5. Darkeater Midir

Our final dragon! Don’t be fooled by the performance of his predecessors. Midir is a force to be reckoned with in all sense of the word.
Boss location: The Ringed City.
Boss Behavior:
- Will rise as you approach.
- Uses dark magic, fire, and humanity blasts.
- Will grab you if allowed for a pin attack.
- Shoots cones and waves of fire.
- Fires a laser beam that is front to back and one that is around the room.
- Alternates between slams, claw swipes, casting, and tail swipes.
This boss is NOT required to progress in the game. Defeating him awards special items.
How to defeat this boss:
- His attacks can be dodged.
- Run away from the fire attacks and dodge the beams.
- His rear is the “safest” place, but his head takes the most damage.
- Basic attacking and avoiding will carry you in this boss fight.
- Try not to rush, it is an endurance fight.
- At a certain percent he will fall and can be finished with a riposte.
Video guide for defeating this boss is available here.
Boss loot:
- 150,000 souls
- Soul of Dark Eater Midir
- Spears of the church.
Difficulty rating: 85/100
4. Demon Prince
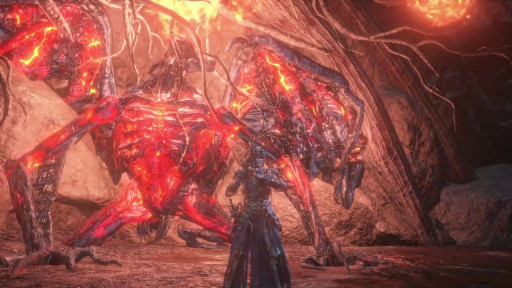
We’ve already experienced brothers causing us troubles. Why not have a bit more twofer action? Meet what happens when you combine the demon in pain with a demon from below.
Boss location: The Dreg Heap.
Boss Behavior:
- There will be two demons.
- One uses toxic and one uses fire.
- They will alternate which does what throughout the fight.
- Upon defeat of both demons, the Demon Prince will arise from the body of the last one killed.
- (Pain) Will give you a fireball happy Prince.
- (Below) Will give you the easier fight. Prince will have a beam as his power attack.
This boss is required to progress in the entire game. Defeating allows access to more of the DLC.
How to defeat this boss:
- Both demons can be dodged, staggered, and riposted.
- Basic attack, avoid, rinse and repeat to defeat them.
- Hitting in the head as much as possible is advised.
- The Prince will have more drastic and telegraphed moves, easy to avoid.
- He can also be staggered and riposted.
- Attack, avoid, rinse, and repeat; then profit!
Video guide for defeating this boss is available here.
Boss loot:
- 75,000 souls
- Soul of Demon Prince
Difficulty rating: 85/100
3. The Nameless King
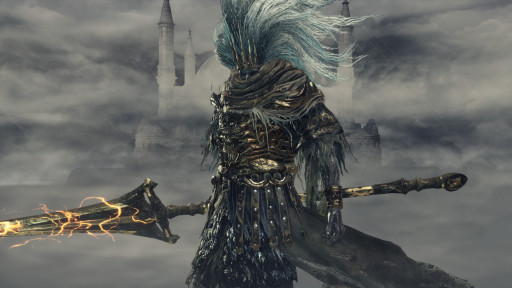
His name is Nameless. He is the ruler of the storms. He commands and nature obeys. Bring yourself ready for a real fight. He and his wyvern will be all too eager to challenge you.
Boss location: Archdragon Peak.
Boss Behavior:
- First phase of the fight he will be upon his wyvern
- The wyvern will use fire attacks as well as stomps if under him and bites if in front.
- Nameless will attack you with thrusts and swipes of his spear from the wyvern.
- He will take in the essence of his dead companion signaling next phase.
- Nameless will use force to throw wind attacks at you, strikes, and lightning.
- He will also have a delayed lightning attack.
- Fight has difficult lock on, so be mindful while avoiding.
This boss is NOT required to progress in the entire game. Defeating allows access to an armor.
How to defeat this boss:
- Lightning or bleeding is suggested for the first phase as the wyvern is weak to it.
- Avoid the fire breaths by dodging or standing beside the wyvern’s head.
- Take the free attacks while near his head.
- Riposte when the wyvern staggers.
- Avoid Nameless’ attacks when the wyvern sweeps down over you.
- Nameless’ attacks can be easily dodged if timed properly and they cover the arena.
- One vs one with Nameless is a simple tank and spank kill.
Video guide for defeating this boss is available here.
Boss loot:
- 80,000 souls
- Soul of The Nameless King.
Difficulty rating: 90/100
2. Sister Friede
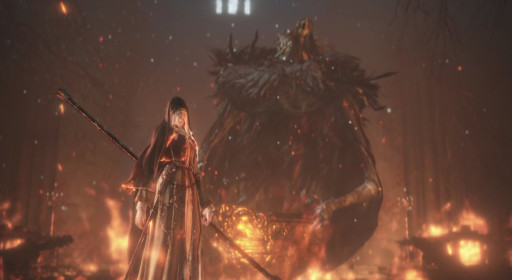
They have made a promise and will do whatever is needed to keep it. She will not allow the ashen one to meddle in the painted world. Be ready to stand your ground…through ice and flames!
Boss location: Painted World of Ariandel.
Boss Behavior:
- This fight has 3 phases.
- Phase 1 is just Friede who will use melee, ice, and teleportation to sneak attack you.
- Phase 2 is with Father Ariandel as well who will use fire and lava while she uses her melee and ice. She will also make attempts to heal their combined health bar.
- He will alternate between lava pours, fire spurts, and cauldron clam combos.
- Phase 3 is with Friede alone.
- She will have black flame and ice along with her melee attacks and teleportation.
- She has a high damage move that she will rise into the air for.
This boss is NOT required to progress in the entire game.
How to defeat this boss:
- First phase is ice dodging on the ground, melee avoiding and teleportation tracking.
- She can be backstabbed and offers many punishable opportunities in all phases.
- Second phase is mostly avoiding Friede while attacking the weaker Father.
- He can be easily handled by staying behind him and avoiding his swing attacks.
- Third Phase is black flame and ice. She will almost spam abilities between melee.
- Dodge, attack, avoid, backstab, rinse, and repeat. Profit!
Video guide for defeating this boss is available here.
Boss loot:
- 54,000 souls
- Soul of Sister Friede.
- Titanite Slab
Difficulty rating: 95/100
1. Slave Knight Gael
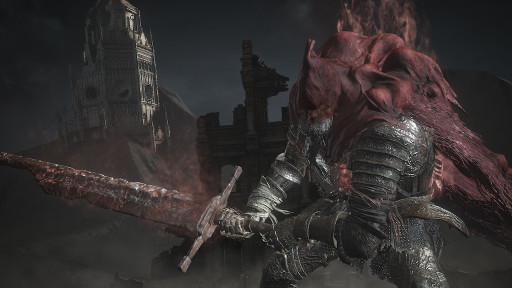
As you enter this fight you may recognize him. You’ve seen him before…but where? Is he friend or foe?
Boss location: Painted World of Ariandel.
Boss Behavior:
- He is very fast and has long combos.
- First part of the fight will be a melee spam with rapid attacks.
- Second part of the fight, signaled by him turning hollow, he has more skills.
- There will be a rapid firing crossbow, melee, as well as more attack animations from his cape.
- The third phase of the fight will introduce lightning strikes in clusters.
- During this time, he will also be shooting at you, lunging at you, attacking you with his sword and cape as well as teleporting even if you get too far away.
This boss is NOT required to progress in the entire game.
How to defeat this boss:
- In the beginning of the fight, Gael will charge at you, so prepare to dodge.
- He is weak to strike, frostbite, and poison/toxic.
- He cannot be parried, but can be riposted after stagger in stages 2 and 3.
- The miracle spell can be dodged or parried away with the spell parrying shield.
- The crossbow shots can be dodged as well.
- It is suggested to avoid the lightning as it’s placement is telegraphed but still random.
Video guide for defeating this boss is available here.
Boss loot:
- 120,000 souls
- Soul of Slave Knight Gael.
- Blood of the Dark Soul
Difficulty rating: 100/100
You may also be interested in:

