A great team is never complete without a star player. In Genshin Impact, most commonly, these are the DPS characters: powerful units with a great capacity for dealing tons of damage while in play. Although we do appreciate the concept of having a well-rounded team, having just one solid DPS in your party truly makes a huge difference.
Read along to find out the best DPS units in the game so far (Patch 4.1). Take note that by “best”, we mean to evaluate the character as a whole, not just combat and utility but also when it comes to characterization, style, and impact in the game. Also keep in mind that these characters are judged at C0 to measure combat prowess fairly.
10. Xiao

The mere sight of him strikes fear into his opponents.
First up on our list is one of the famed DPS powerhouses of Liyue. As an adeptus, he is expected to hold a great deal of strength, especially as he is also called the Vanquisher of Demons. This unit enjoys jumping and slamming down on his enemies endlessly making mobs very easy to take down.
Combat
Xiao is an anemo polearm user who gets most of his power from his burst. This lets him don his mask and greatly enhance his abilities, but most notably, imbues all his attacks with anemo. This also greatly buffs his jumping capabilities, which opens a new playstyle of focusing on plunging attacks.
His skill is a simple dash that lets him gain energy quickly, and this can be cast up to two times. It is also a neat feature that he can cast this while in the air.
The Vermillion Hereafter set is almost tailor-made for him as this increases his ATK gradually as his HP decreases due to his burst. His best free-to-play weapon is the Blackcliff Pole as this gives him a boost in CRIT DMG to deal more damage.
Analysis
With all of this, Xiao is a unit that really takes up time on the field, so don’t expect to be using him in quick-swap teams. Build him correctly with a few good supports, and he will be sure to rid the area of all your foes.
What Makes Xiao Great for DPS:
- Normal Attack: Whirlwind Thrust: Performs up to 6 consecutive spear strikes.
- Charged Attack: Consumes a certain amount of Stamina to perform an upward thrust.
- Plunging Attack: Plunges from mid-air to strike the ground below, damaging opponents along the path and dealing AoE DMG upon impact. Xiao does not take DMG from performing Plunging Attacks.
- Lemniscatic Wind Cycling: Xiao lunges forward, dealing Anemo DMG to opponents in his path. Can be used in mid-air. Starts with 2 charges.
- Bane of All Evil: Xiao dons the Yaksha Mask that set gods and demons trembling millennia ago.
- Yaksha's Mask: · Greatly increases Xiao's jumping ability.· Increases his attack AoE and attack DMG.· Converts attack DMG into Anemo DMG, which cannot be overridden by any other elemental infusion. In this state, Xiao will continuously lose HP. The effects of this skill end when Xiao leaves the field.
- Conqueror of Evil: Tamer of Demons: While under the effects of Bane of All Evil, all DMG dealt by Xiao increases by 5%. DMG increases by a further 5% for every 3s the ability persists. The maximum DMG Bonus is 25%.
- Dissolution Eon: Heaven Fall: Using Lemniscatic Wind Cycling increases the DMG of subsequent uses of Lemniscatic Wind Cycling by 15%. This effect lasts for 7s, and has a maximum of 3 stacks. Gaining a new stack refreshes the effect's duration.
9. Itto
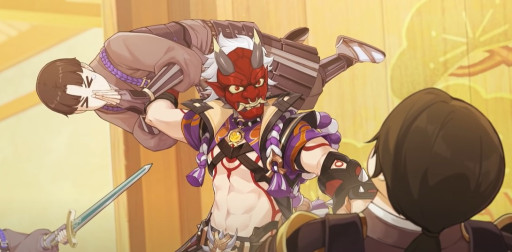
Have no fear, the one and oni is here!
Strength and style are probably the best words that would describe this character. Being an oni, he is born with the blood of fierce and powerful beings, but in truth, he’s a really nice guy.
Combat
Itto is a Geo claymore user whose playstyle also revolves around getting a massive power boost from his burst. This allows a large portion of his DEF to be converted to ATK, which, when built right, can have you surpassing even 5000 ATK while in his burst mode. This blends in well with his special charged attack, which lets him unleash a flurry of wild slashes upon his foes.
His skill is a simple one, but is deceivingly one of the hardest-hitting attacks in the game. He throws his buddy Ushi into unsuspecting enemies, which would then taunt them. Pair this with the buff from his burst, and you can one-shot most enemies in the game or deal significant damage to tougher ones.
The Husk of Opulent Dreams set is a no-brainer to have on Itto as it maximizes his damage output to the max. He also works perfectly well with The Whiteblind as a weapon with its good DEF benefits.
Analysis
Itto was made to satisfy the wilder players of the game. He packs a lot of damage in his strikes and is the best geo DPS right now.
What Makes Itto Great for DPS:
- Normal Attack: Fight Club Legend: Perform up to 4 consecutive strikes. When the 2nd and 4th strikes hit opponents, Itto will gain 1 or 2 stacks of Superlative Superstrength, respectively. Max 5 stacks. Triggering this effect will refresh the current duration of any existing stacks. Additionally, Itto's Normal Attack combo does not immediately reset after sprinting or using his Elemental Skill, "Masatsu Zetsugi: Akaushi Burst!"
- Charged Attack: When holding to perform a Charged Attack, Itto unleashes a series of Arataki Kesagiri slashes without consuming Stamina. Instead, each Arataki Kesagiri slash consumes 1 stack of Superlative Superstrength. When the final stack is consumed, Itto delivers a powerful final slash. If no stacks of Superlative Superstrength are available, Itto will perform a single Saichimonji Slash.
- Plunging Attack: Plunges from mid-air to strike the ground, damaging opponents along the path and dealing AoE DMG upon impact.
- Masatsu Zetsugi: Akaushi Burst!: Hurls Ushi, the young akaushi bull and auxiliary member of the Arataki Gang, dealing Geo DMG to opponents on hit. When Ushi hits opponents, Arataki Itto gains 1 stack of Superlative Superstrength. Ushi will remain on the field and provide support in the following ways:· Taunts surrounding opponents and draws their attacks.· Inherits HP based on a percentage of Arataki Itto's Max HP.· When Ushi takes DMG, Arataki Itto gains 1 stack of Superlative Superstrength. Only 1 stack can be gained in this way every 2s.· Ushi will flee when its HP reaches 0 or its duration ends. It will grant Arataki Itto 1 stack of Superlative Superstrength when it leaves.
- Hold: Adjust throwing angle. Ushi is considered a Geo construct. Arataki Itto can only deploy 1 Ushi on the field at any one time.
- Royal Descent: Behold, Itto the Evil!: Time to show 'em the might of the Arataki Gang! For a time, Itto lets out his inner Raging Oni King, wielding his Oni King's Kanabou in battle. This state has the following special properties: · Converts Itto's Normal, Charged, and Plunging Attacks to Geo DMG. This cannot be overridden. · Increases Itto's Normal Attack SPD. Also increases his ATK based on his DEF. · On hit, the 1st and 3rd strikes of his attack combo will each grant Arataki Itto 1 stack of Superlative Superstrength. · Decreases Itto's Elemental and Physical RES by 20%. The Raging Oni King state will be cleared when Itto leaves the field.
- Arataki Ichiban: When Arataki Itto uses consecutive Arataki Kesagiri, he obtains the following effects: · Each slash increases the ATK SPD of the next slash by 10%. Max ATK SPD increase is 30%. · Increases his resistance to interruption. These effects will be cleared once he stops performing consecutive slashes.
- Bloodline of the Crimson Oni: Arataki Kesagiri DMG is increased by 35% of Arataki Itto's DEF.
8. Ayato

A highly respectable man with the skills of a great warrior.
It is undeniable that he is one of the most eloquent characters in the game. As the head of one of the commissions of Inazuma, he is wise and strong, with a heart for all his peers. Yet as the head of the Kamisato clan, he was trained to fight since his youth, and this can be greatly seen in his mastery of swordplay.
Combat
Kamisato Ayato is a hydro sword user who specializes in hydro application and consistent normal attacks. The bread and butter of his kit is his skill, which lets him enter a stance where he can unleash a flurry of hydro attacks that are considered as normal attacks. This pairs well with units that can boost or synergize well with normal attacks, such as Yun Jin or Yelan.
His burst is a simple hydro rain that can be good for continuous hydro application when his skill finally goes on cooldown. Ayato overall is a pretty convenient DPS to use that works well with many different teams. Build him with enough attack and a good crit ratio, and he can slice down almost any enemy to shreds.
His multiple strikes make the most out of the Echoes of an Offering set. The Blackliff Longsword or the Lion's Roar are both good options for him to use as weapons.
Analysis
Ayato is the best DPS to use if you just want to breeze through the game. His easy playstyle is highly comfortable and overall damage can be boosted with a lot of sub-DPS options.
What Makes Ayato Great for DPS:
- Normal Attack: Kamisato Art - Marobashi: Perform up to 5 rapid strikes.
- Charged Attack: Consumes a certain amount of Stamina to dash forward and perform an iai.
- Plunging Attack: Plunges from mid-air to strike the ground below, damaging opponents along the path and dealing AoE DMG upon impact.
- Kamisato Art: Kyouka: Kamisato Ayato shifts positions and enters the Takimeguri Kanka state. After this shift, he will leave a watery illusion at his original location. After it is formed, the watery illusion will explode if opponents are nearby or after its duration ends, dealing AoE Hydro DMG.
- Takimeguri Kanka: In this state, Kamisato Ayato uses his Shunsuiken to engage in blindingly fast attacks, causing DMG from his Normal Attacks to be converted into AoE Hydro DMG. This cannot be overridden. It also has the following properties: ·After a Shunsuiken attack hits an opponent, it will grant Ayato the Namisen effect, increasing the DMG dealt by Shunsuiken based on Ayato's current Max HP. The initial maximum number of Namisen stacks is 4, and 1 stack can be gained through Shunsuiken every 0.1s. This effect will be dispelled when Takimeguri Kanka ends. ·Kamisato Ayato's resistance to interruption is increased. ·Unable to use Charged or Plunging Attacks. Takimeguri Kanka will be cleared when Ayato leaves the field. Using Kamisato Art: Kyouka again while in the Takimeguri Kanka state will reset and replace the pre-existing state.
- Kamisato Art: Suiyuu: Unveils a garden of purity that silences the cacophony within. While this space exists, Bloomwater Blades will constantly rain down and attack opponents within its AoE, dealing Hydro DMG and increasing the Normal Attack DMG of characters within.
- Kamisato Art: Mine Wo Matoishi Kiyotaki Kamisato Art: Kyouka has the following properties: ·After it is used, Kamisato Ayato will gain 2 Namisen stacks. ·When the water illusion explodes, Ayato will gain a Namisen effect equal to the maximum number of stacks possible.
- Kamisato Art: Michiyuku Hagetsu: If Kamisato Ayato is not on the field and his Energy is less than 40, he will regenerate 2 Energy for himself every second.
7. Wanderer

He's left his old life yet destruction still follows him.
Harbingers are notorious for being some of the most powerful beings in Teyvat. Their skills are unrivaled, and they all bring their own types of uniqueness to the table.
Combat
Wanderer is a must-have on this list, as he is currently the only unit in the game who can fly and attack enemies from above. Besides this, as an anemo catalyst user, all his attacks are automatically imbued with anemo, which makes way for a whole lot of swirls when playing with him.
His elemental skill is the core of his kit. This allows him to levitate and enhance his normal attacks greatly. This pairs well with his naturally high attack speed, which can even be buffed with the right artifacts and weapons. Match him up with other units that synergize well with normal attacks or any buffer, such as Bennett, and he can take care of business with no mercy.
The Desert Pavilion Chronicle set is a must-have for Wanderer as it increases your damage and attack speed. He also makes good use of The Widsith as a free-to-play weapon due to all its benefits being beneficial for him.
Analysis
Wanderer makes roaming Teyvat an extremely fun experience. Terrorizing enemies from above is something that only he can do. If you want to feel the power of a Harbinger, Wanderer is the DPS for you.
What Makes Wanderer Great for DPS:
- Normal Attack: Yuuban Meigen: Performs up to 3 attacks using wind blades, dealing Anemo DMG.
- Charged Attack: Consumes a certain amount of Stamina, gathers a build up of high wind pressure, and deals AoE Anemo DMG after a short casting time.
- Plunging Attack: Calling upon the power of Anemo, the Wanderer plunges towards the ground from mid-air, damaging all opponents in his path. Deals AoE Anemo DMG upon impact with the ground.
- Hanega: Song of the Wind: Concentrates the power of the winds to break free from the shackles of the earth, dealing AoE Anemo DMG before leaping into the air and entering the Windfavored state.
- Windfavored: The Wanderer cannot perform Plunging Attacks in this state. When he uses Normal and Charged Attacks, they will be converted into Kuugo: Fushoudan and Kuugo: Toufukai respectively; the DMG they deal and their AoE will be increased, and their DMG will be considered Normal and Charged Attack DMG respectively. Kuugo: Toufukai will not consume Stamina. The Wanderer will hover persistently during this time. While this state is active, the Wanderer's movements gain the following properties: · Persistently consumes Kuugoryoku Points to maintain this hovering state. · When sprinting, additional Kuugoryoku Points will be consumed for the Wanderer to accelerate mid-air. Holding sprint will cause persistent Kuugoryoku Point consumption to maintain speed. This effect will replace his default sprint. · Jumping expends extra Kuugoryoku Points to increase hovering height. Holding jump will cause persistent Kuugoryoku Point consumption to keep increasing hovering height. Running out of Kuugoryoku Points will end the Windfavored state. A second cast during the duration of Windfavored will also end it.
- Kyougen: Five Ceremonial Plays: Compresses the atmosphere into a singular vacuum that grinds all troubles away, dealing multiple instances of AoE Anemo DMG. If the character is in the Windfavored state due to the skill "Hanega: Song of the Wind," Windfavored state will end after casting.
- Jade-Claimed Flower: If Hanega: Song of the Wind comes into contact with Hydro/Pyro/Cryo/Electro when it is unleashed, this instance of the Windfavored state will obtain buffs according to the contacted element(s): · Hydro: Kuugoryoku Point cap increases by 20. · Pyro: ATK increases by 30%. · Cryo: CRIT Rate increases by 20%. · Electro: When Normal and Charged Attacks hit an opponent, 0.8 Energy will be restored. Energy can be restored this way once every 0.2s. You can have up to 2 different kinds of these buffs simultaneously.
- Gales of Reverie: When the Wanderer hits opponents with Kuugo: Fushoudan or Kuugo: Toufukai in his Windfavored state, he has a 16% chance to obtain the Descent effect: The next time the Wanderer accelerates in mid-air while in this instance of the Windfavored state, this effect will be removed, this acceleration instance will not consume any Kuugoryoku Points, and he will fire off 4 wind arrows that deal 35% of his ATK as Anemo DMG each. For each Kuugo: Fushoudan and Kuugo: Toufukai that does not produce this effect, the next attack of those types will have a 12% increased chance of producing it. The calculation of the effect production is done once every 0.1s.
6. Childe

Years of intense training and he's still striving to improve.
Up next, we have another Harbinger on our list. He has been present since patch 1.1, but the times have not changed the destruction that this character can bring.
Combat
Childe is a hydro bow user who can switch into melee mode with his skill. In this mode, he slashes foes with great speed and decent range, all while applying tons of hydro. His burst can apply the riptide effect or activate it when in melee mode.
He is very resilient as he provides you with multiple options on how to engage your opponents. Make sure to maximize the application of his marks in order to get the most damage possible out of his rotations.
Nymph's Dream is currently the best artifact set for Childe as it greatly boosts his hydro damage. As for his weapon, you can be sure that Rust will give you a lot of damage.
Analysis
In the current state of the game, hydro enablers such as Childe are some of the most sought-after due to their great synergies with other elements. In his case, however, the learning curve and large downtime of his skill are what keep him from getting higher on our list.
What Makes Childe Great for DPS:
- Normal Attack: Cutting Torrent: Perform up to 6 consecutive shots with a bow.
- Charged Attack: Perform a more precise Aimed Shot with increased DMG. While aiming, the power of Hydro will accumulate on the arrowhead. An arrow fully charged with the torrent will deal Hydro DMG and apply the Riptide status.
- Riptide: Opponents affected by Riptide will suffer from AoE Hydro DMG effects when attacked by Tartaglia in various ways. DMG dealt in this way is considered Normal Attack DMG. · Riptide Flash: A fully-charged Aimed Shot that hits an opponent affected by Riptide deals consecutive bouts of AoE DMG. Can occur once every 0.7s. · Riptide Burst: Defeating an opponent affected by Riptide creates a Hydro burst that inflicts the Riptide status on nearby opponents hit.
- Plunging Attack: Fires off a shower of arrows in mid-air before falling and striking the ground, dealing AoE DMG upon impact. When Tartaglia is in Foul Legacy: Raging Tide's Melee Stance, he cannot perform a plunging attack.
- Foul Legacy: Raging Tide: Unleashes a set of weaponry made of pure water, dealing Hydro DMG to surrounding opponents and entering Melee Stance. In this Stance, Tartaglia's Normal and Charged Attacks are converted to Hydro DMG that cannot be overridden by any other elemental infusion and change as follows:
- Normal Attack: Perform up to 6 consecutive Hydro strikes.
- Charged Attack: Consumes a certain amount of Stamina to unleash a cross slash, dealing Hydro DMG.
- Riptide Slash: Hitting an opponent affected by Riptide with a melee attack unleashes a Riptide Slash that deals AoE Hydro DMG. DMG dealt in this way is considered Elemental Skill DMG, and can only occur once every 1.5s. After 30s, or when the ability is unleashed again, this skill will end. Tartaglia will return to his Ranged Stance and this ability will enter CD. The longer Tartaglia stays in his Melee Stance, the longer the CD. If the return to a ranged stance occurs automatically after 30s, the CD is even longer.
- Havoc: Obliteration: Performs different attacks based on what stance Tartaglia is in when casting.
- Ranged Stance: Flash of Havoc: Swiftly fires a Hydro-imbued magic arrow, dealing AoE Hydro DMG and applying the Riptide status. Returns a portion of its Energy Cost after use.
- Melee Stance: Light of Obliteration: Performs a slash with a large AoE, dealing massive Hydro DMG to all surrounding opponents, which triggers Riptide Blast.
- Riptide Blast: When the obliterating waters hit an opponent affected by Riptide, it clears their Riptide status and triggers a Hydro Explosion that deals AoE Hydro DMG. DMG dealt in this way is considered Elemental Burst DMG.
- Never Ending: Extends Riptide duration by 8s.
- Sword of Torrents: When Tartaglia is in Foul Legacy: Raging Tide's Melee Stance, on dealing a CRIT hit, Normal and Charged Attacks apply the Riptide status effect to opponents.
5. Alhaitham

One of the few researchers who actually has the nation's best interests at heart.
Initially deemed the dendro Keqing, this guy quickly proved that he is on a completely different level.
Combat
Alhaitham is one of the few truly capable dendro DPS units, and he does his role really well. His playstyle revolves around imbuing his normal attacks with dendro while triggering his Chisel-Light Mirrors that you gradually stack up. His burst casts an AoE field that deals multiple dendro slashes to unsuspecting foes.
He thrives in elemental teams that make use of his high EM stats. Alhaitham also works well in quick swap teams as he retains his mirror stacks even when switched out. This gives you better control over how you wish to spread your damage in combat.
He can work great with either Gilded Dreams or Deepwood Memories, depending on the teammates you have. The Iron Sting proves to be a reliable free weapon for him as it gives a good boost to his EM.
Analysis
As a highly consistent dendro enabler, he flourishes in many different team compositions that focus on dendro-related reactions. Depending on what style you choose, you can be sure that he can provide enough damage and application to get your desired numbers.
What Makes Alhaitham Great for DPS:
- Normal Attack: Abductive Reasoning: Performs up to 5 rapid strikes.
- Charged Attack: Consumes a certain amount of Stamina to unleash 2 rapid sword strikes.
- Plunging Attack: Plunges from mid-air to strike the ground below, damaging opponents along the path and dealing AoE DMG upon impact.
- Universality: An Elaboration: Rushes forward, dealing Dendro DMG to nearby opponents when the rush ends, causing a Chisel-Light Mirror to form. Holding this skill will cause it to behave differently. Enters Aiming Mode to adjust the direction of Alhaitham's rush attack.
- Chisel-Light Mirror: When this skill is unleashed, Alhaitham will generate 1 Chisel-Light Mirror. If there are no Mirrors at this time, he will generate 1 additional Mirror. Chisel-Light Mirrors will have the following properties: · When he possesses Chisel-Light Mirrors, Alhaitham's Normal, Charged, and Plunging Attacks will be converted to Dendro DMG. This cannot be overridden. · When attacks of the aforementioned kind hit opponents, the Chisel-Light Mirrors will unleash a Projection Attack that deals AoE Dendro DMG based on the number of Mirrors on the field. · A total of 3 Chisel-Light Mirrors can exist at once. · The Chisel-Light Mirrors will disappear one after the other over time, and will all disappear when Alhaitham leaves the field.
- Particular Field: Fetters of Phenomena: Creates a Particular Binding Field and deals multiple instances of AoE Dendro DMG. If Chisel-Light Mirrors exist when this ability is unleashed, all such Mirrors will be consumed and increase the number of DMG instances dealt. 2s after this ability is unleashed, if 0/1/2/3 Mirrors were consumed, Alhaitham will generate 3/2/1/0 new Mirrors in turn.
- Four-Causal Correction: When Alhaitham's Charged or Plunging Attacks hit opponents, they will generate 1 Chisel-Light Mirror. This effect can be triggered once every 12s.
- Mysterious Laid Bare: Each point of Alhaitham's Elemental Mastery will increase the DMG dealt by Projection Attacks and Particular Field: Fetters of Phenomena by 0.1%. The DMG of both aforementioned abilities can be increased by a maximum of 100% this way.
4. Ayaka

With all her formal appearances, she still has time to train.
This lady is the embodiment of Inazuman eloquence and grace. As a Kamisato, she too was trained at a young age to handle the sword, and her mastery of cryo only makes her that much more dangerous.
Combat
Ayaka is a cryo sword user that may have a simple kit, but her damage percentages are off the charts, making her one of the most easy DPS units to play in the game. By simply using her unique dash, she imbues her sword with cryo that can last for a decent duration. Her skill is a simple AoE cryo explosion that, when paired with melt, can really take down mobs. Her burst summons a huge snowstorm that ravages enemies in its path, all while dealing multiple chunks of cryo damage.
She can utilize both the Noblesse Oblige set or the Blizzard strayer set depending on how your team is built. The Amenoma Kageuchi is a decent craftable weapon to have her use.
Analysis
She is arguably one of the most fun units to use in freeze teams and one of the most deadly picks for melt teams. Her simple kit is also beginner friendly while more experienced players can focus more on optimizing her cryo application.
What Makes Ayaka Great for DPS:
- Normal Attack: Kamisato Art - Kabuki: Performs up to 5 rapid strikes.
- Charged Attack: Consumes a certain amount of Stamina to unleash a flurry of sword ki.
- Plunging Attack: Plunges from mid-air to strike the ground below, damaging enemies along the path and dealing AoE DMG upon impact.
- Kamisato Art: Hyouka: Summons blooming ice to launch nearby opponents, dealing AoE Cryo DMG.
- Kamisato Art: Senho: Ayaka consumes Stamina and cloaks herself in a frozen fog that moves with her. In Senho form, she moves swiftly upon water. When she reappears, the following effects occur: · Ayaka unleashes frigid energy to apply Cryo on nearby opponents. · Coldness condenses around Ayaka's blade, infusing her attacks with Cryo for a brief period.
- Kamisato Art: Soumetsu: Summons forth a snowstorm with flawless poise, unleashing a Frostflake Seki no To that moves forward continuously.
- Frostflake Seki no To: · A storm of whirling icy winds that slashes repeatedly at every enemy it touches, dealing Cryo DMG. · The snowstorm explodes after its duration ends, dealing AoE Cryo DMG.
- Amatsumi Kunitsumi Sanctification: After using Kamisato Art: Hyouka, Kamisato Ayaka's Normal and Charged Attacks deal 30% increased DMG for 6s.
- Kanten Senmyou Blessing: When the Cryo application at the end of Kamisato Art: Senho hits an opponent, Kamisato Ayaka gains the following effects: · Restores 10 Stamina · Gains 18% Cryo DMG Bonus for 10s.
3. Ganyu

Another adeptus makes it to our list. She is one of the oldest characters in the game, even being one of the combatants in the archon war. Her skill and experience shine through her kit, which gets her the top 3 spot on our list.
Combat
She is by far the best cryo bow user in the game. Her charged shots create AoE cryo blooms that deal massive damage. As a DPS, this is the core of her playstyle, making Genshin Impact feel like an FPS game. To pair with this, her skill creates a dummy that taunts enemies, while her burst creates a hail of cryo that is great for application when she’s off-field.
Ganyu is at her deadliest when leading melt teams. The melt reaction greatly amplifies the damage output of her arrows making every shot worthwhile.
The Wanderer's Troupe set boosts her charged attack damage while also giving her a little EM to strengthen her melt reactions. The Prototype Crescent is an ideal craftable weapon for her, especially as it gives you a bigger boost if you get headshots.
Analysis
There is not much more to say about this sniper. Put her in any melt or freeze team and see how a true archer does it. If you like fighting far away from danger, this is the DPS for you.
What Makes Ganyu Great for DPS:
- Normal Attack: Liutian Archery: Perform up to 6 consecutive shots with a bow.
- Charged Attack: Perform a more precise Aimed Shot with increased DMG. While aiming, an icy aura will accumulate on the arrowhead before the arrow is fired. Has different effects based on how long the energy has been charged: · Charge Level 1: Fires off an icy arrow that deals Cryo DMG. · Charge Level 2: Fires off a Frostflake Arrow that deals Cryo DMG. The Frostflake Arrow blooms after hitting its target, dealing AoE Cryo DMG.
- Plunging Attack: Fires off a shower of arrows in mid-air before falling and striking the ground, dealing AoE DMG upon impact.
- Trail of the Qilin: Leaving a single Ice Lotus behind, Ganyu dashes backward, shunning all impurity and dealing AoE Cryo DMG.
- Ice Lotus: · Continuously taunts surrounding opponents, attracting them to attack it. · Endurance scales based on Ganyu's Max HP. · Blooms profusely when destroyed or once its duration ends, dealing AoE Cryo DMG.
- Celestial Shower: Coalesces atmospheric frost and snow to summon a Sacred Cryo Pearl that exorcises evil. During its ability duration, the Sacred Cryo Pearl will continuously rain down shards of ice, striking opponents within an AoE and dealing Cryo DMG.
- Undivided Heart: After firing a Frostflake Arrow, the CRIT Rate of subsequent Frostflake Arrows and their resulting bloom effects is increased by 20% for 5s.
- Harmony between Heaven and Earth: Celestial Shower grants a 20% Cryo DMG Bonus to active party members in the AoE.
2. Hu Tao

All the souls in Liyue have this lady looking after them.
Famed as one of the members of the Liyue DPS trio, this unit has the greatest potential among them all. This girl can achieve unreal damage numbers when paired with the right teammates, and she still packs a punch even with all the new enemies introduced in the game.
Combat
Hu Tao is a pyro polearm user who, like most on our list, gets her power from imbuing her weapon with pyro. What makes her special, though, is the great ATK buff that she gets from casting her skill. This lets her access her maximum potential all for the cost of a skill, whereas other characters on our list need to use their bursts. Her burst is a single sweep of pyro damage that when paired with her buff, can wipe the floor with anyone you’re taking on.
For a burst focused build, you can use Noblesse Oblige with her along with any other set that can provide HP. For a more rounded build, the Crimson Witch of Flames set is definitely what you would want for her. Blackliff Pole can be a good free weapon for her to get those massive damage numbers.
Analysis
You can play her as a charged attack-focused unit, as her special animation lets her cast this multiple times smoothly. The other option is a burst-focused playstyle that sets up multiple abilities from teammates that can buff her burst to deal hundreds of thousands of damage in a single instance.
What Makes Hu Tao Great for DPS:
- Normal Attack: Secret Spear of Wangsheng: Performs up to six consecutive spear strikes.
- Charged Attack: Consumes a certain amount of Stamina to lunge forward, dealing damage to opponents along the way.
- Plunging Attack: Plunges from mid-air to strike the ground below, damaging opponents along the path and dealing AoE DMG upon impact.
- Guide to Afterlife: Only an unwavering flame can cleanse the impurities of this world. Hu Tao consumes a set portion of her HP to knock the surrounding enemies back and enter the Paramita Papilio state.
- Paramita Papilio· Increases Hu Tao's ATK based on her Max HP at the time of entering this state. ATK Bonus gained this way cannot exceed 400% of Hu Tao's Base ATK.· Converts attack DMG to Pyro DMG, which cannot be overridden by any other elemental infusion.· Charged Attacks apply the Blood Blossom effect to the enemies hit.· Increases Hu Tao's resistance to interruption.
- Blood Blossom: Enemies affected by Blood Blossom will take Pyro DMG every 4s. This DMG is considered Elemental Skill DMG. Each enemy can be affected by only one Blood Blossom effect at a time, and its duration may only be refreshed by Hu Tao herself. Paramita Papilio ends when its duration is over, or Hu Tao has left the battlefield or fallen.
- Spirit Soother: Commands a blazing spirit to attack, dealing Pyro DMG in a large AoE. Upon striking the enemy, regenerates a percentage of Hu Tao's Max HP. This effect can be triggered up to 5 times, based on the number of enemies hit. If Hu Tao's HP is below or equal to 50% when the enemy is hit, both the DMG and HP Regeneration are increased.
- Flutter By: When a Paramita Papilio state activated by Guide to Afterlife ends, all allies in the party (excluding Hu Tao herself) will have their CRIT Rate increased by 12% for 8s.
- Sanguine Rouge: When Hu Tao's HP is equal to or less than 50%, her Pyro DMG Bonus is increased by 33%.
1. Neuvillette

We all know how he feels when the rain starts pouring down.
Taking the top spot is none other than the newest 5-star released in the game right now. He is the man dominating the meta right now and his gameplay is as satisfying as it is effective.
Combat
Neuvillette is a one-of-a-kind DPS who focuses on casting his charged attack, a beam of hydro that ransacks any opponent in its way. What makes this game-changing is the fact that he can cast it up to three times straight if he has enough droplets around him.
His skill is a simple AoE burst of hydro that is mainly used to create three droplets for him to use. His burst deals a decent amount of AoE hydro damage, which then produces six droplets. Using these two in conjunction with his charged attack can almost guarantee that you’ll have a beam ready whenever you wish.
His go-to set is the Marichaussee Hunter set which maximizes his HP loss into CRIT Rate. For weapons, the Prototype Amber is a great craftable option that gives him a nice chunk of HP.
Analysis
As a hydro unit, he matches well with many team compositions, with him as the on-field hydro enabler. What makes him so good, however, is that even on his own, he can take down groups of enemies by just spamming his beam. He also has the perfect artifact set that increases his charged attack damage and CRIT Rate, which makes it a no-brainer option for him.
In the current state of the game, he reigns supreme, and he’ll only get better as we see new supports or sub-DPS units get introduced in the game.
What Makes Neuvillette Great for DPS:
- Normal Attack: As Water Seeks Equilibrium: With light flourishes, Neuvillette commands the tides to unleash a maximum of 3 attacks, dealing Hydro DMG.
- Charged Attack Empowerment: Legal Evaluation: While charging up, Neuvillette will gather the power of water, forming it into a Seal of Arbitration. In this state, Neuvillette can move and change facing, and also absorb any Sourcewater Droplets in a certain AoE. Every Droplet he absorbs will increase the formation speed of the Seal, and will heal Neuvillette. When the charging is stopped, if the Symbol has yet to be formed, then a Charged Attack will be unleashed. If it has been formed, then a Charged Attack: Equitable Judgment will be unleashed.
- Charged Attack: Consumes a fixed amount of Stamina to attack opponents with a rupturing blast of water, dealing AoE Hydro DMG.
- Charged Attack: Equitable Judgment: Unleashes surging torrents, dealing continuous AoE Hydro DMG to all opponents in a straight-line area in front of him. Equitable Judgment will not consume any Stamina and lasts 3s. If Neuvillette's HP is above 50%, he will continuously lose HP while using this attack.
- Plunging Attack: Gathering the might of Hydro, Neuvillette plunges towards the ground from mid-air, damaging all opponents in his path. Deals AoE Hydro DMG upon impact with the ground.
- O Tears, I Shall Repay: Summons a Raging Waterfall that will deal AoE Hydro DMG to opponents in front of Neuvillette based on his Max HP. After hitting an opponent, this skill will generate 3 Sourcewater Droplets near that opponent.
- Arkhe: Pneuma: At certain intervals, when the Raging Waterfall descends, a Spiritbreath Thorn will descend that will pierce opponents, dealing Pneuma-aligned Hydro DMG.
- O Tides, I Have Returned: Unleashes waves that will deal AoE Hydro DMG based on Neuvillette's Max HP. After a short interval, 2 waterfalls will descend and deal Hydro DMG in a somewhat smaller AoE, and will generate 6 Sourcewater Droplets within an area in front.
- Heir to the Ancient Sea's Authority: When a party member triggers a Vaporize, Frozen, Electro-Charged, Bloom, Hydro Swirl, or a Hydro Crystallize reaction on opponents, 1 stack of Past Draconic Glories will be granted to Neuvillette for 30s. Max 3 stacks. Past Draconic Glories causes Charged Attack: Equitable Judgment to deal 110%/125%/160% of its original DMG. The stacks of Past Draconic Glories created by each kind of Elemental Reaction exist independently.
- Discipline of the Supreme Arbitration: For each 1% of Neuvillette's current HP greater than 30% of Max HP, he will gain 0.6% Hydro DMG Bonus. A maximum bonus of 30% can be obtained this way.

