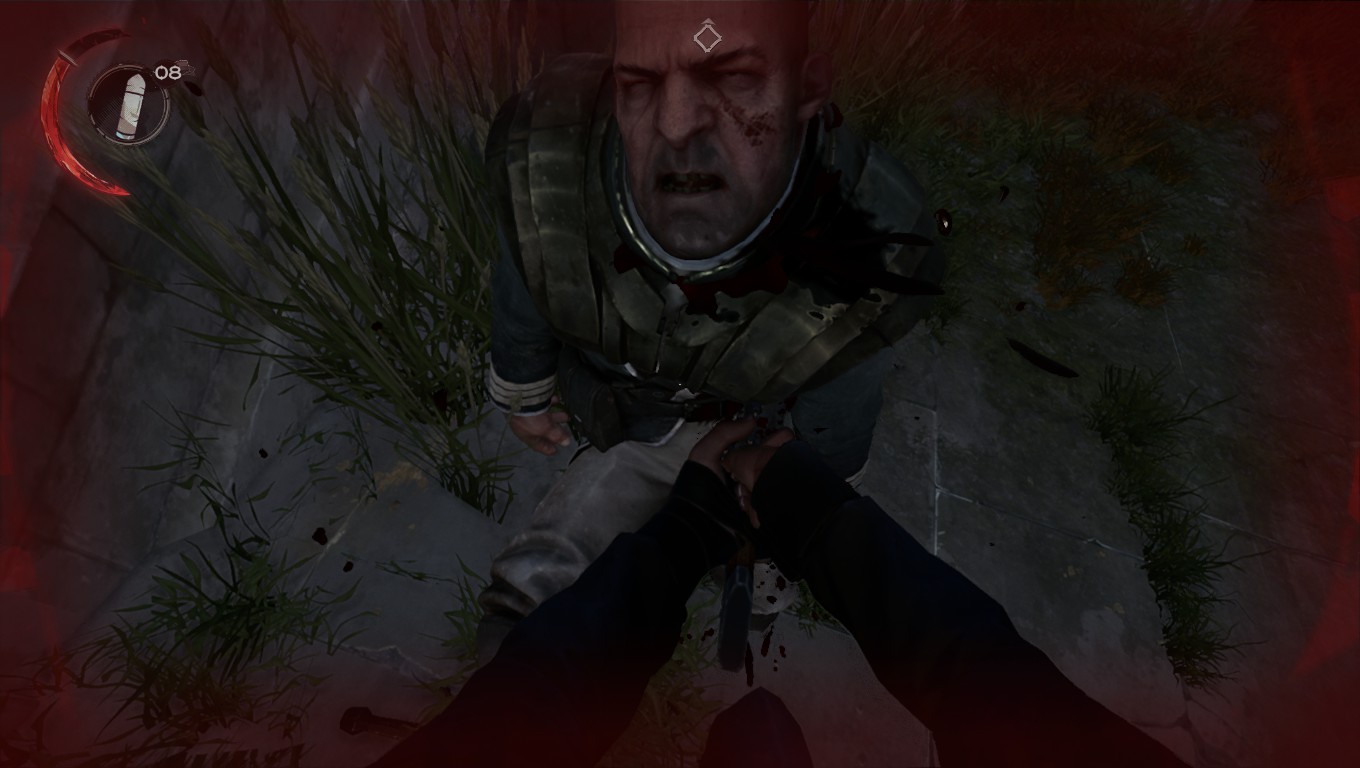
Howdy guyz. Killing folk in Dishonored 2 is pretty fun, ya know, the good old slicing NPC’s in half, cutting their legs off, perhaps swiftly decapitating their head off their shoulders, but did you know that you could get an edge by fiddling around with the settings?
Yes, if you change some of your in-game settings you could make life easier for yourself and annihilate everything in your playthrough more smoothly - I’ll be talking about the most important settings in Dishonored 2 that will boost your performance, your combat capabilities, and other useful settings. Anyways, let’s get to it:
25. Crosshair Style
Changing your crosshair:
Useful if you don't find the current crosshair accurate or comfortable enough.
Why it’s useful:
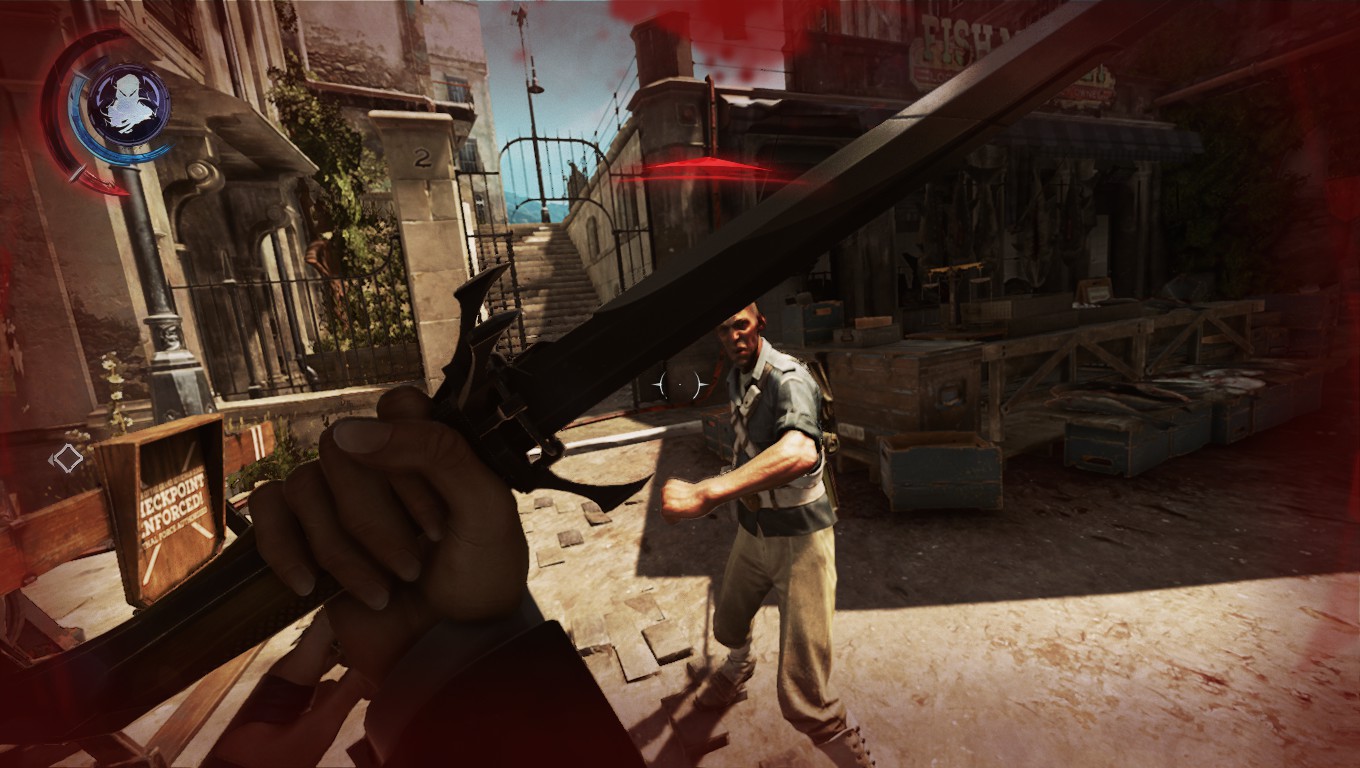
The best crosshair in my opinion is the “normal” one as it represents just a tiny dot in the middle of your screen, works best for headshots and aiming in general.
How to change your crosshair:
Click on the arrow next to the option and select a crosshair that fits you the most(normal/simple), or you could just turn it off if you’re looking for a challenge!
24. Quick Save/Quick Load
Changing your keys for saving and loading:
The default key for saving is F5, and the default key for loading your save is F9 - I don’t like the keys they are binded to by default, so I just changed them to F1 and F2.
Why it’s useful:
For me, it made my game easier to save in crucial moments.
How to change your keys:
Click on the setting key tab and click on a key that you want to bind it to.
23. Brightness
How to make the environment more visible in Dishonored 2:
One of the ideas is to change the brightness to the highest value.
Why it’s useful:
Increasing your brightness will make everything more visible, that includes your enemies. It might make your game look a bit ugly, but it’s still a useful tip!
How to change the brightness levels:
Click on the Brightness Tab and set it to a high value(higher value=stuff becomes more visible).
22. Rat Shadows
Improving performance via disabling the rat shadows:
One of many ways of improving performance in Dishonored 2 is disabling the shadows for rats - for god’s sake, there are millions if not trillions of rats in Dishonored, so make sure these little bastards don’t have their shadows.
Why it’s useful:
Boosts your performance at the cost of rats not having their shadows. Poor little things!
How to turn off the rat shadows:
Go to Visuals>Quality Settings>Rat Shadows(disable rat shadows)
21. Display Grenade Markers
How to see grenade markers:
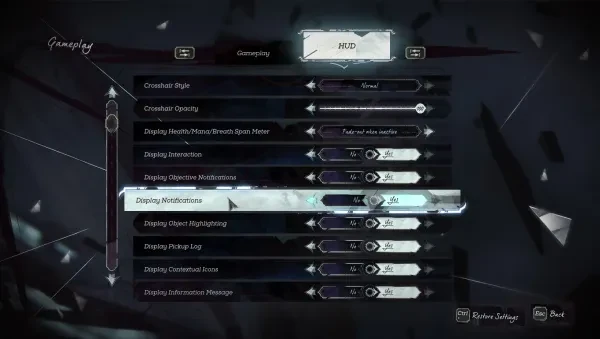
Some opponents might throw a grenade at your feet, for some reason this setting was disabled for me and it took me about 30 hours to realize that this setting was a thing.
Why it’s useful:
- You can see exactly where the grenade is
- Either run away from it
- Or grab it and throw it at the enemy
How to turn this setting on:
Go to Gameplay>Hud>Display Grenade Markers(switch it on)
20. Shadow Quality
Improving performance via lowering the Shadow Quality:
Earlier we’ve discussed the rat shadows and now we’re talking about shadows of objects, people, buildings, and plenty of other things.
Why it’s useful:
Disabling or lowering your shadows will significantly improve your FPS
How to turn off the shadows or lower their quality:
Go to Visuals>Quality Settings>Lower/disable shadows
19. Field of View
Increase awareness of your surroundings:
FOV is extremely crucial in Dishonored, the higher it is the more you see and awareness of your surroundings is the key to having fun and being successful in Dishonored 2. Screenshots for comparison:
110 FOV
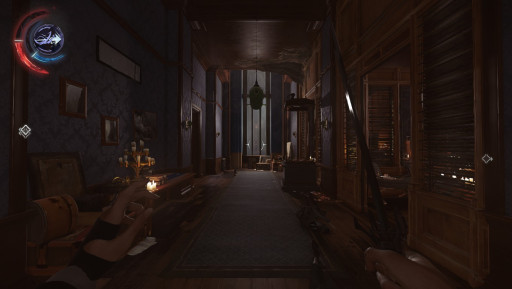
and 65 FOV:
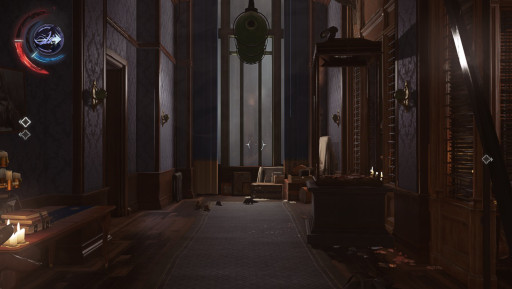
Why it’s useful:
- Makes combat a lot easier(your enemies are easier to monitor and fight back)
- Increased awareness of your surroundings
- With low FOV you’re playing like you’re looking through binoculars. Nuff said.
How to increase FOV:
Go to visuals>Video Settings>Increase FOV(might affect your FPS)
18. Mana Elixir(key binding)
How to change the key for the Mana Elixir to Mouse4:
The default key for a Mana Elixir in Dishonored 2 is T, and you know what? I goddamn hate that key, it was always uncomfortable for me so I’ve changed it to mouse4.
Why it’s useful:
- Lesser chance of a misclick if you bind the Mana Elixir to Mouse4
- More comfortable to have it binded on Mouse4 IMO
How to change the key for the Mana Elixir:
Navigate to Controls>Keyboard Mapping>Click on the Mana Elixir tab and change it to M4
17. Invert Y-Axis
Enabling the Invert Y-Axis:
When you move your mouse/joystick up the screen, your screen will face downwards instead of up. That’s the point of this setting and it’s kinda weird...
Unless you played Tie-Fighter games or Microsoft Flight Sim for most of the time and you suddenly switched to Dishonored.
Why it’s useful:
It’s useful for players who find this sort of mouse movement comfortable, which is for a minority of players
How to change it:
Go to Options>Controls>Gamepad>Set the Invert Y-Axis to “Yes”
16. Display Tutorial Notifications
Disabling the notifications:
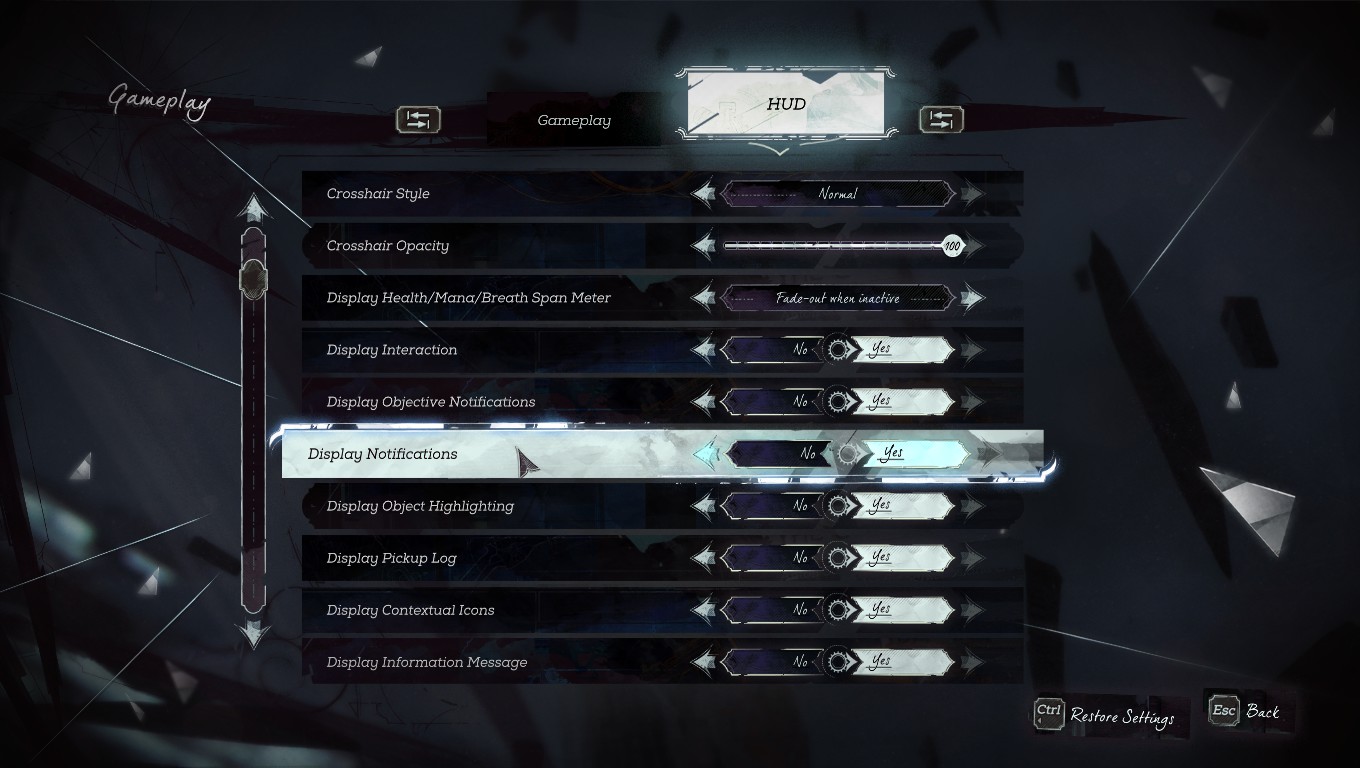
Are these silly notifications hiding chunks of your screen, even though you have played Dishonored 2 multiple times? Worry not, you can disable them!
Why it’s useful:
They’re distracting and cover parts of your screen
How to disable the Tutorial Notifications:
Go to Gameplay>HUD>Disable Tutorial Notifications
15. Bloodfly Shadows
Disabling the Bloodfly Shadows:
Yup, the same thing with rat shadows, it can cause massive lag spikes when entering infested apartments.
Why it’s useful:
Improves performance and that’s pretty much it :P
How to disable Bloodfly Shadows:
Go to Visuals>Qualitty Settings>Disable Bloodfly Shadows
14. Display Awareness Markers
Enabling the Awareness Markers:
Simply lets you know whether you were spotted by hostiles. For some reason a few settings were disabled for me in the HUD options, this one included.
Why it’s useful:
- Makes sneaking easier
- Let’s you know whether your foes have spotted you
How to enable the Awareness Markers:
Options>Gameplay>HUD>Enable the Awareness Markers.
13. Music
Disabling the music:
To be honest, this is optional, if you like the combat music you can skip this listing.
Why it’s useful:
Disables the music if it’s too distracting for you during combat
How to disable the music:
Go to Audio>Turn off or lower Music Volume
12. Auto Aim Model
Enabling the Auto Aim Model:
It’s an option that allows you to lock your crosshair on certain body parts - a very helpful setting that will boost your fun meter in Dishonored 2 :-).
Why it’s useful:
- Makes aiming a lot easier for both friction and snap models
- Snap - locks your crosshair on a body part that you’re looking at from a certain distance
- Friction - slows your aim down when you look at an enemy
11. Auto Aim Strength
Setting the Auto Aim Strength:
You can set it from 0 to 100 - determines how much your crosshair locks on body parts/enemies
Why it’s useful:
Makes your crosshair lock on targets more effectively(if you set it to a high value)
You could also decrease the Auto Aim Strength to lower amounts, thus decreasing the effectiveness of your crosshair locking on targets(useful if you want to swap targets, aim at something else, etc).
Where to find this setting:
Go to Options>Controls>Mouse&Keyboard and set your Auto Aim Strength to whatever you wish
10. Killcam
Disabling the Killcam:
Now, disabling the killcam can be painful, but it has its massive benefits and after +100 hours in Dishonored, I also disabled this option. You can either set it to Normal/Frequent or just completely disable it.
Why it’s useful:
- Killcams take a few seconds, disabling this option will allow you to instantly kill your opponent
- Makes combat easier as it allows you to not lose sight of your opponents due to the killcams
How to disable the killcams:
Go to options>Gameplay>Disable/change Killcams
How to find Post Process Anti-Aliasing:
Navigate to Visuals>Quality Settings>Post Process Anti-Aliasing
9. Headphones
Enabling the headphones setting:
They are turned off by default, so don’t panic, your headphones are probably working and it’s just the game’s mumbo jambo!
Why it’s useful:
Headphones are better than speakers while playing Dishonored 2(You focus on sound more)
How to turn on your headphones:
Options>Audio>Headphones(ON)
8. Health Elixir
Binding the Health Elixir to a different key:
I personally don’t like this key binded to R, I bind Corvo’s powers to that key and it’s just plain uncomfortable for me to have it selected as a Health Elixir(I have it binded to M5)
Why it’s useful:
- Less fingerwork on the keyboard
- You can bind more important powers/weapons to R
How to change the key for the Health Elixir:
Go to Options>Controls>Keyboard Mapping>Click on the tab next to the Health Elixir and change it to a different key, more better-suited key)
7. Light shafts
Improving performance via disabling the light shafts:
Light shafts are the rays of light falling from the sky when the vision of the moon/sun is partially blocked. This might make the game look a bit dull/unrealistic in certain places.
Why it’s useful:
Improves performance at the cost of weaker graphics
How to disable the Light Shafts:
Go to Visuals>Quality Settings>Light Shafts(OFF)
6. Camera Motion Blur
Disabling Motion Blur:
This is kinda a funny one, you know why I have this setting disabled? Because the motion blur effect makes me literally sick - I have motion sickness, thus I have to disable this option on many games. Damn it. But it also improves your performance so, no vomit and no FPS-lags!
Why it’s useful:
- No motion sickness
- Slightly better performance
How to disable Camera Motion Blur:
Go to Visuals>Quality>Disable Camera Motion Blur
5. Auto-Use Mana Elixirs
Disabling Auto-Use Mana Elixirs:
Prevents you from auto-using a mana elixir when you don’t need or want to.
Why it’s useful:
- Prevents the player from using all of his Mana Elixirs during combat
- OR when you’re near a sink or a fountain, where you can easily replenish your stupid mana
Where to find this setting:
Go to Options>Gameplay>Disable the Auto-Use Mana Elixir
4. Headbob
Disabling the Headbob effect:
It’s the shaking of your camera view while walking/running - disabling this setting might make gameplay look unrealistic but it’ll stabilize your camera view.
Why it’s useful:
- Stable camera view
- Makes combat easier IMO
How to disable the Headbob:
Go to Options>Gameplay>disable or lower the Headbob effect
3. View sensitivity X/Y
Increasing the view sensitivity:
This setting is pretty important, as the view sensitivity by default is set to 41, both on X and Y. This might make the game run sluggish and odd.
Why it’s useful:
- Improves your reflex
- Smoother combat
- Improves turning rate
How to change the view sensitivity:
Go to Controls>Gamepad>View Sensitivity X/View Sensitivity Y(set them both to 70-80 for awesome results!)
2. Post Process Anti-Aliasing
How to improve performance by changing/disabling Post Process Anti-Aliasing:
Fiddling around with this setting might greatly improve your FPS, either by setting it to OFF or lower values.
Why it’s useful:
- Off - Highest performance, everything looks trash tho
- FXAA Low - Low quality, high performance - might result in blurred in-game graphics
- FXAA High - Medium Quality, high performance - slightly results in blurred in-game graphics
- TXAA 1 - High Quality, medium performance - improve ‘’jagged edges’’ effect, but may result in slightly blurred in-game graphics
How to find Post Process Anti-Aliasing:
Navigate to Visuals>Quality Settings>Post Process Anti-Aliasing
1. Shortcuts
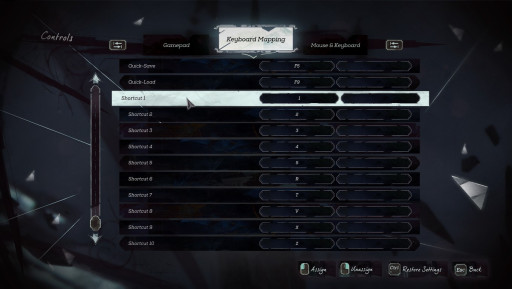
Managing your shortcuts:
Shortcuts are important, in total there are 10 of them and by default, they are set from 1-10 - you could of course change them as I did, here’s a screenshot:
Why it’s useful:
Shortcuts from 1-5 are pretty useful and viable, but shortcuts from 6-10 are pretty hard to reach with your fingers during combat or other situations. That’s why it’s a good idea to set them to letters which are more viable!
Where are the shortcuts:
Go to Options>Controls>Keyboard Mapping
Summary:
And those were my 25 favorite settings that I’m currently using, there are many more options that might improve your performance, but that’s for you to look up. Hope you enjoyed this article and found it useful, have fun dismembering everything you see in Dishonored 2, and see you in my future articles :-). THANKS, AND CIAO!

