If you enjoy Commander, give Brawl a try!
Brawl has finally been released on MTG Arena!
If you’re at a loss about what deck you should be playing then look no further.
In celebration of this Format’s Arena debut, let’s take a look at the top 10 Brawl decks you can take into the new game mode every Wednesday.
10. Syr Gwyn, Hero of Ashvale

Much like the rest of her deck, Sir Gwyn likes long walks on the beach and hitting your opponent's face.
Syr Gwyn currently has at least 46 user submitted decks between MTGGoldfish and Aetherhub. Her popularity is from the inherent power and speed Knight tribal has.
Syr Gwyn decks want to establish a board of knights, equip them with artifacts, and then swing for lethal. If there was ever an aggro deck in Brawl, this would be one of the best ones.
What’s Good About This Deck
- Faster than most other decks since most Knights are cheap to play
- 0 cost for equips like Colossal Hammer will create giant Knights
- Even without your commander, a knight tribal highlander deck can function pretty well
How To Play This Deck Effectively
- Turn 1, Foulmire Knight or Knight of the Ebon Legion are the only creatures you can play here.
- In some decks, it may be better to play Foulmire Knight as a draw, but in this deck, you’ll appreciate the early deathtouch body. Since Brawl can be a slower format, getting the damage in now and equipping Foulmire later can be useful.
- If you’re going first, Knight of the Ebon Legion is usually the better play since you can attack with him before your opponent gets to attack with the creature they play on turn 1. If you’re going second, Foulmire is better since your opponent will attack before you do, and having a Deathtouch body will deter more attacks
- Turn 2, the best play here is to get Arcane Signet out. It sounds slow, but getting a mana fixer is going to be extremely useful in a three-colored deck. It also eases up the need for a land next turn since you’ll be at 3 mana, which is where the majority of your creature and equipment costs are.
- If Arcane Signet isn’t in hand then you can always play any two-cost knight or equipment. I recommend playing the knight since the extra body will be more useful.
- Hold on to Embereth Shieldbreaker. In Brawl, most players will have Arcane Signets or other ramp artifacts so they can get their commander out faster or to fix mana. Destroying one of these ramps can be a huge setback.
- If you notice that your opponent is over-reliant on an artifact for a specific color, then use Embereth Shieldbreaker to destroy that artifact. This becomes more important if you’re against a deck running more than two colors that needs an artifact to fix for their missing color.
- Turn 3, the best cards for this turn are Acclaimed Contender, Midnight Reaper, Heraldic Banner, and Mace of the Valiant.
- Play Heraldic Banner if you have it. if you played Arcane Signet last turn. I would recommend naming White since most of the Knights tend to have white mana in their colors, and there are a few cards in this deck that can make white soldier tokens. After that, you should have two mana left if you played a land this turn, allowing you to play an additional card.
- Acclaimed Contender is also an ideal play since it’s both a 3/3 body and can get you a Knight or Equipment. Acclaimed is great here since, at worst it’s a 3/3 body that can block fast creatures, at best it’s a body that also sets up your Turn 4 play.
- Mace of the Valiant is the next best since it will get stronger the longer it’s on the board. It’s also important to get this onto the board early since your opponents will hopefully not have too many creatures that you need to deal with.
- Midnight Reaper has a useful 3/2 body, and if you lose any creatures then you’ll get to draw a card. This is great since this deck is also hungry for card draw in later turns.
- If you played a creature last turn, then you can play and equip Steelclaw Lance this turn. This should give you a decent-sized creature to bully your opponent with.
- Turn 4, if you played a land every turn and played Heraldic Banner and Arcane Signet, then this is the soonest you can get your commander onto the board. In matchups that are lacking removal or if your opponent is tapped out this turn, I would recommend playing Syr Gwyn so you can equip your knights for free and attack to draw more cards.
- In matchups where you know your opponent is sitting on removal, then you can instead just flood the board with more knights and equipment this turn. You don’t have to equip your artifacts just yet since you can equip everything for free when Syr Gwyn comes out.
- More creatures followed by a Knights Charge can also be a good play here just to start draining your opponents of more life.
- Playing a two-cost Knight and flashing a Shining Armor on your opponent’s turn can be a useful combat trick if your opponent was expecting a trade.
- Turn 5, Syr Conrad can be a good play here if you’ve established a board. But from this point onward, if you haven’t hit 6 mana yet, then you should be playing more Knights and artifacts onto the board. Usually by this point, your opponent will have some decent sized threats on the board, so keep Cavalier of Night back so you can remove it.
- Turn 6, the same rules for Turn 4 apply here, except playing Syr Gwyn is even more important than ever since your hand should be running thin by this point. Play Syr Gwyn if you have enough creatures and knights onto the board. Once she’s out, equip all your Knights for free and attack to draw some cards.
- Colossal Hammer is great to play with Syr Gwyn since, for 7 mana, you can play both of them and then equip one of your knights with the Hammer.
- If Crystal Slipper is on the field, then equipping it to Syr Gwyn to attack with her is also a great idea.
- If Crystal Slipper is on the field, then equipping it to Syr Gwyn to attack with her is also a great idea.
- By this point, your opponent should be low on life since your creatures will tend to be stronger than theirs. If you're struggling to break through your opponent’s walls, then here are a few finishers to keep in mind:
- Smitten Swordmaster//Curry Favor can drain your opponents of life-based on the number of Knights you control
- Playing a Knight’s Charge and then attacking with your Knights can be enough to put lethal on your opponent.
- Unbreakable Formation can give you a free attack by giving your creatures Vigilance, Indestructible, and a +1/+1 counter on each of them.
- A surprise Embercleave can also do the trick since you can flash it onto whichever creature wasn’t blocked for lethal damage on your opponent.
Cards
Commander
1 Syr Gwyn, Hero of Ashvale (ELD) 330
Deck
1 Order of Midnight (ELD) 99
6 Plains (ELD) 250
1 Shining Armor (ELD) 29
1 Knight of the Ebon Legion (M20) 105
6 Swamp (ELD) 258
1 Smitten Swordmaster (ELD) 105
1 Syr Konrad, the Grim (ELD) 107
1 Wintermoor Commander (ELD) 205
1 Inspiring Veteran (ELD) 194
1 Truefire Captain (GRN) 209
1 Skyknight Legionnaire (GRN) 198
1 Skyknight Vanguard (M20) 218
1 Midnight Reaper (GRN) 77
1 Embercleave (ELD) 120
1 Command Tower (ELD) 333
1 Colossus Hammer (M20) 223
1 Heraldic Banner (ELD) 222
1 Marauder's Axe (M19) 240
1 Sacred Foundry (GRN) 254
1 Temple of Triumph (M20) 257
1 Gateway Plaza (GRN) 247
1 Godless Shrine (RNA) 248
1 Blood Crypt (RNA) 245
1 Wind-Scarred Crag (M20) 260
1 Fabled Passage (ELD) 244
1 Ancestral Blade (M20) 3
1 Crystal Slipper (ELD) 119
1 Silverwing Squadron (ELD) 315
1 Unbreakable Formation (RNA) 29
1 Temple of Silence (M20) 256
1 Scoured Barrens (M20) 251
1 Mace of the Valiant (ELD) 314
1 Knights' Charge (ELD) 328
1 Arcane Signet (ELD) 331
1 Steelclaw Lance (ELD) 202
1 Chromatic Lantern (GRN) 233
1 Tournament Grounds (ELD) 248
1 Embereth Shieldbreaker (ELD) 122
5 Mountain (ELD) 262
1 Acclaimed Contender (ELD) 1
1 Foulmire Knight (ELD) 90
1 Embereth Skyblazer (ELD) 321
1 Corpse Knight (M20) 206
1 Cavalier of Night (M20) 94
1 Evolving Wilds (RIX) 186
9. Nissa Ramp

Nissa showing off all the mana she's about to drown you in.
This deck made it on the list because of its 60% winrate on MtgArena.pro. Nissa Ramp has a pretty simple game plan: when you get to 5 mana, play Nissa. After that, dump your oodles of mana into something that will help you win the game like Finale of Devastation, End-Raze Forerunner, or Stonecoil Serpent.
What's Good About This Deck
- More ramp than you can shake a stick at
- The moment you get to untap after playing Nissa is usually the moment your opponents are going to be very sad
- Big spells for big plays
How To Play This Deck Effectively
- Turns 1 - 3, this deck wants as much mana as it can possibly get. During these early turns, you want to focus on just ramping as safely as you can. Keep an eye out for any large threats like early Commanders or highly synergistic cards from your opponents since those will need to be removed or at least kept in check.
- Remember, your opponent won’t want to attack if you have the biggest creature on the board. During these early ramp turns, ask yourself if you really need to spend a removal on that creature, or if you can scare your opponent into not doing anything by just having a bigger creature. This deck is light on removal, and the removal that it does bring only gets better the longer you hold onto it.
- Remember, your opponent won’t want to attack if you have the biggest creature on the board. During these early ramp turns, ask yourself if you really need to spend a removal on that creature, or if you can scare your opponent into not doing anything by just having a bigger creature. This deck is light on removal, and the removal that it does bring only gets better the longer you hold onto it.
- Turn 4, you should be able to play Nissa here. Once Nissa is on the board, use her +1 to create a 3/3 Forest with Vigilance that can also tap for 2 mana.
- If you suspect your opponent has a trick or counterspell up their sleeve, wait to play Nissa. Build up your board with cards like Evolution Sage, Voracious Hydra, Shifting Ceratops, or Questing Beast. These cards usually demand answers and can force your opponent to burn whatever plans they had for Nissa on them.
- When you get to 7+ mana (6 mana if you have a forest in hand for the turn after) you can try playing Nissa since, even if she gets removed, you can play her again next turn.
- Once you get your first untap with Nissa, you want to either set up a system where you can draw into your win con or just play your win con.
- Your best draw options are The Great Henge, Beast Whisperer, and Guardian Project. Once 2 of these are on the board then you can start drawing 3 cards every time it’s your turn.
- Your win-con here is going to be any creature with an X cost or Finale of Devastation.
- If you have Finale of Devastation in hand, cast it where X = 10 (so 12 mana in total). After that, you have a few options to help you win the game.
- End-Raze Forerunner should be your go-to win-con here. It enters the battlefield and gives all of your creatures trample and haste. With the +10/+10 from Finale, this should definitely be lethal,
- If End-Raze Forerunner isn’t an option and you outnumber your opponents then you can tutor for God-Eternal Rhonas who will double your attack power and give your creatures vigilance. If you can give any of your creatures trample then this should end the game.
- If you need just one big creature to attack for lethal, then Beanstalk Giant should deal close to 16+ damage if you only have 6 lands. This can be a great win out of nowhere if your opponent just wiped the board.
- Go for Meteor Golem if you just need to remove one creature/permanent that’s stopping you from swinging for lethal.
Cards
Commander
1 Nissa, Who Shakes the World (WAR) 169
Deck
1 Gift of Paradise (M19) 184
1 Beast Whisperer (GRN) 123
1 Nullhide Ferox (GRN) 138
1 Prey Upon (GRN) 143
1 Biogenic Ooze (RNA) 122
1 End-Raze Forerunners (RNA) 124
1 Guardian Project (RNA) 130
1 Incubation Druid (RNA) 131
1 Arboreal Grazer (WAR) 149
1 Evolution Sage (WAR) 159
1 Finale of Devastation (WAR) 160
1 God-Eternal Rhonas (WAR) 163
1 New Horizons (WAR) 168
1 Nissa's Triumph (WAR) 170
1 Paradise Druid (WAR) 171
1 Mana Geode (WAR) 241
1 Karn's Bastion (WAR) 248
1 Cavalier of Thorns (M20) 167
1 Leafkin Druid (M20) 178
1 Leyline of Abundance (M20) 179
1 Shifting Ceratops (M20) 194
1 Voracious Hydra (M20) 200
1 Meteor Golem (M20) 232
1 Scuttlemutt (M20) 238
1 Cryptic Caves (M20) 244
1 Woodland Mystic (M20) 344
20 Forest (ANA) 60
1 Gilded Goose (ELD) 160
1 Heraldic Banner (ELD) 222
1 Arcane Signet (ELD) 331
1 Beanstalk Giant (ELD) 149
1 The Great Henge (ELD) 161
1 Kenrith's Transformation (ELD) 164|
1 Once Upon a Time (ELD) 169
1 Questing Beast (ELD) 171
1 Clockwork Servant (ELD) 216
1 Spinning Wheel (ELD) 234
1 Stonecoil Serpent (ELD) 235
1 Castle Garenbrig (ELD) 240
1 Gingerbread Cabin (ELD) 245
8. Torbran, Thane of Redfell

Few things can burn as hard as Torbran and his merry Dwarves.
Torbran decks are one of the best mono-colored creature decks in Brawl right now, with a Torbran deck making it into Top 16 of Aetherhub’s Brawl tournament. This deck wants to put down elementals and then swing for the fences. Torbran himself helps the game plan by making sure everything on his side of the board does 2 more damage than it should. While that may not sound like too much, if you’re activating Cavalcade more than 3 times then that’s 9 damage from just declaring attacks.
What's Good About This Deck
- Plays like Brawl’s version of a Cavalcade deck
- Torbran puts a fast and hard to interact with clock on your opponents
- There is something magical about creating a bunch of elemental tokens and then swinging for 3 damage from each Cavalcade trigger.
How To Play This Deck Effectively
- Turn 1, play Scorch Spitter, Fervent Champion, or Grim Initiate. This will put early pressure on your opponent and can set up for more cavalcade triggers later.
- Turn 2, Chandra’s Embercat, Runaway Steamkin, Mask of Immolation, or Chandra’s Regulator are the best plays here.
- While it can be tempting to play Thunderkin Awakener, I would wait until you have an elemental in your graveyard that you can keep recurring. The best targets for him are Lavakin Brawler and Scampering Scorcher.
- While it can be tempting to play Thunderkin Awakener, I would wait until you have an elemental in your graveyard that you can keep recurring. The best targets for him are Lavakin Brawler and Scampering Scorcher.
- Turn 3, the best card to play is Chandra, Alcolyte of Flame. This way you can make elementals with her, keep up the early pressure, and set up for more Cavalcade triggers next turn.
- Chandra’s Spitfire also works here too since it accomplishes similar goals to Alcolyte of Flame, but Spitfire can work as a better blocker.
- It’s not a bad idea to just play a 1 mana spell and a 2 mana spell. Playing Cavalcade and another creature can work to help put down more damage on your opponents and sets up for a Turn 4 Torbran.
- Turn 4, if Cavalcade is on the field, play Torbran. This way each Cavalcade trigger will be hitting for 3 damage each. If Spitfire is on the field, then it can grow larger through those triggers.
- If you don’t have any of that on the field then continue setting up more elementals. Scampering Scorcher, Lavakin Brawler, Fires of Invention, and either of the 4-mana Chandras can work here
- If you don’t have any of that on the field then continue setting up more elementals. Scampering Scorcher, Lavakin Brawler, Fires of Invention, and either of the 4-mana Chandras can work here
- Turn 5, will have you finish whatever you needed to do on Turn 4. If Torbran is still on the field, then you can either burn out the rest of your opponent’s life on this turn or just play enough creatures to make your opponent’s life miserable.
- Turn 6 and 7, play any of the big game enders this deck has to offer.
- Chandra, Awakened Inferno can act as a soft, one-sided board wipe.
- Drakuseth will swing the game in your favor and acts as an evasive beater
- MIrror March can make copies of Thunderkin Awakener, Scampering Scorcher, Lavakin Brawler.
- Sundering Stroke can either be a satisfying finisher or a way to get rid of 3 creatures/planeswalkers that are stopping you from winning
Cards
Commander
1 Torbran, Thane of Red Fell (ELD) 147
Deck
1 Sundering Stroke (ELD) 144
1 Chandra's Embercat (M20) 129
19 Mountain (ANA) 64
1 Chandra's Pyrohelix (WAR) 120
1 Chandra's Regulator (M20) 131
1 Chandra's Triumph (WAR) 121|
1 Chandra, Acolyte of Flame (M20) 126
1 Chandra's Spitfire (M20) 132
1 Chandra, Fire Artisan (WAR) 119
1 Thunderkin Awakener (M20) 162
1 Mask of Immolation (M20) 151
1 Chandra's Flame Wave (M20) 295
1 Chandra, Awakened Inferno (M20) 127
1 Shock (M20) 160
1 Infuriate (M20) 145
1 Grim Initiate (WAR) 130
1 Scorch Spitter (M20) 159
1 Runaway Steam-Kin (GRN) 115
1 Smelt-Ward Ignus (RNA) 116
1 Chandra, Novice Pyromancer (M20) 128
1 Chandra's Outrage (M20) 130
1 Drakuseth, Maw of Flames (M20) 136
1 Fire Urchin (GRN) 101
1 Scampering Scorcher (M20) 158
1 Castle Embereth (ELD) 239
1 Dwarven Mine (ELD) 243
1 Claim the Firstborn (ELD) 118
1 Fervent Champion (ELD) 124
1 Irencrag Feat (ELD) 127
1 Cavalcade of Calamity (RNA) 95
1 Mirror March (RNA) 108
1 Fires of Invention (ELD) 125
1 Leyline of Combustion (M20) 148
1 Scorching Dragonfire (ELD) 139
1 Risk Factor (GRN) 113
1 Bonecrusher Giant (ELD) 115
1 Repeated Reverberation (M20) 156
1 Tectonic Rift (M20) 161
1 Rubble Reading (RNA) 110
1 Demolish (WAR) 123
1 Lavakin Brawler (M20) 147
7. Kaalia, Zenith Seeker

Angels, demons and Dragons, oh my!
A Kaalia deck placed 7th in Aetherhub’s community tournament and has been showing itself to be a steadily growing threat in the Brawl scene. When Kaalia enters the battlefield, she can look for some of Standard’s biggest flying threats - Spawn of Mayhem, Aurelia, Skarrgan Hellkite and Darkuseth to name a few - and add them to your hand while also being a flying beatstick in her own right.
What’s Good About This Deck
- Lots of fliers to make your opponent’s life miserable
- Kaalia makes sure you curve into a threat every time you play her
- Board wipes and recursion makes this deck fairly resilient against most other strategies
How To Play This Deck Effectively
- Turns 1-2, set up for your later fliers. Get Crystal Slipper out so your fliers can attack the turn they come down. Otherwise you want to play some of your creatures just to keep your opponent’s early planeswalkers in check. But if you don’t have anything to play here then it’s not a terrible loss.
- Turn 3, play Kaalia to get another flying threat for later. Kaalia’s 3/3 body can help deter attacks and in later turns, help swing into opponents without losing a blocker.
- Tajic, Bedevil, or Prison Realm become the better play here if your opponent is playing early planeswalkers or other threats while your board is empty.
- Tajic, Bedevil, or Prison Realm become the better play here if your opponent is playing early planeswalkers or other threats while your board is empty.
- Turn 4, this is when the Kaalia deck shifts from control heavy to creature heavy. If the board is too out-of-control to put down fliers, or if you haven’t played anything other than Kaalia, then play Kaya’s Wrath to clear everything and then start playing fliers on Turn 5. Otherwise, you can start playing your larger value fliers.
- Turn 5, Doom Whisperer and Skarrgan Hellkite are the best plays here. If you really need another flier and Kaalia was removed, then you can replay her now to get another creature for later turns.
- You can also play cheaper creatures and then flash in an Embercleave to catch your opponent off guard.
- You can also play cheaper creatures and then flash in an Embercleave to catch your opponent off guard.
- Turn 6, play Lilliana so you can force sacrifices on your opponent while you, at worst, just lose Kaalia and any of your small creatures.
- If things have gone out of control again, then this is the turn where Planar Cleansing is also available, so you can destroy any other troublesome permanents that could be getting in your way
Cards
Commander
1 Kaalia, Zenith Seeker (M20) 210
Deck
1 Knight of the Ebon Legion (M20) 105
1 Angel of Vitality (M20) 4
1 Arcane Signet (ELD) 331
1 Aurelia, Exemplar of Justice (GRN) 153
1 Bedevil (RNA) 157
1 Blood Crypt (RNA) 245
1 Bond of Revival (WAR) 80
1 Bonecrusher Giant (ELD) 115
1 Bounty Agent (GRN) 2
1 Brought Back (M20) 9
1 Prison Realm (WAR) 26
1 Castle Ardenvale (ELD) 238
1 Castle Locthwain (ELD) 241
1 Chromatic Lantern (GRN) 233
1 Command Tower (ELD) 333
1 Crystal Slipper (ELD) 119
1 Doom Whisperer (GRN) 69
1 Drakuseth, Maw of Flames (M20) 136
1 Embercleave (ELD) 120
1 Embodiment of Agonies (M20) 98
1 Evolving Wilds (M20) 246
1 Giant Killer (ELD) 14
1 Angel of Grace (RNA) 1
1 Gideon Blackblade (WAR) 13
1 Light Up the Stage (RNA) 107
1 Godless Shrine (RNA) 248
1 Liliana, Dreadhorde General (WAR) 97
1 Mortify (RNA) 192
5 Plains (ELD) 253
1 Tajic, Legion's Edge (GRN) 204
1 Order of Midnight (ELD) 99
4 Mountain (ELD) 265
1 Rakdos, the Showstopper (RNA) 199
1 Sacred Foundry (GRN) 254
1 Seraph of the Scales (RNA) 205
1 Castle Embereth (ELD) 239
1 Skarrgan Hellkite (RNA) 114
1 Spawn of Mayhem (RNA) 85
5 Swamp (ELD) 261
1 Temple of Silence (M20) 256
1 Temple of Triumph (M20) 257
1 Tibalt's Rager (WAR) 147
1 Tournament Grounds (ELD) 248
1 Despark (WAR) 190
1 Kaya's Wrath (RNA) 187
1 Conclave Tribunal (GRN) 6
1 Planar Cleansing (M20) 33
1 Sorin, Vengeful Bloodlord (WAR) 217
6. Grumgully, The Generous

This deck is generous with two things: +1/+1 counters and violent beatings.
Aetherhub’s a community Brawl tournament had this Grumgully deck take 5th. Based on how it played and the list itself, this deck can power out plenty of threats to compete with some of the best decks out there. The idea is to get Grumgully out, then play creatures that benefit from growing larger. Once that’s done, you want to set up the board with support pieces that can draw you into more creatures.
What's Good About This Deck
- Creates an army of buffed creatures fairly quickly
- Early ramp can also be turned into threats
- Green and Red open up a decent amount of removal options
How To Play This Deck Effectively
- Turn 1, if you can play Arboreal Grazer then it would be a great help. That way you can play a land next turn and get Grumgully out on Turn 2.
- Be aware, that if you are aiming to ramp out your commander early against a blue player, the earliest counterspell they can have for Grumgully is at 2 mana.
- Be aware, that if you are aiming to ramp out your commander early against a blue player, the earliest counterspell they can have for Grumgully is at 2 mana.
- Turn 2, if you ramped on Turn 1, then you can drop Grumgully here if the coast is clear. If not, the safest thing you can do is play any of your ramp spells so you can set up for a later turn.
- Once Grumgully is safely on the board, you should start playing creatures that can give you more advantages when they have +1/+1 counters. For example, Incubation Druid can make more mana once it has a +1/+1 counter. Incubation Druid is also useful in case Grumgully is ever removed since you should be able to replay Grumgully again.
- Grumgully also gives a +1/+1 counter to each of the tokens made by Krenko or Legion Warboss. If your opponent isn’t ready to handle this, then this synergy can get out of hand crazy fast.
- Grumgully also gives a +1/+1 counter to each of the tokens made by Krenko or Legion Warboss. If your opponent isn’t ready to handle this, then this synergy can get out of hand crazy fast.
- Rhythm of the Wild does wonders for this deck. It creates a way to give all of your creatures haste or enter the battlefield with a+1/+1 counter (two counters if Grumgully is on the board). You can also rest easy whenever you need to recast Grumgully since it can no longer be countered.
- Before your hand starts running too thin and if you still have creatures in hand, get The Great Henge and Guardian Project onto the field. This way each creature you play will draw you one or two cards.
Cards
Commander
1 Grumgully, the Generous (ELD) 192
Deck
1 Kraul Harpooner (GRN) 136
1 Arboreal Grazer (WAR) 149
1 Domri's Ambush (WAR) 192
1 Return of the Wildspeaker (ELD) 172
1 Thrash // Threat (RNA) 229
1 Pelt Collector (GRN) 141
1 Barkhide Troll (M20) 165
1 Incubation Druid (RNA) 131
1 Leafkin Druid (M20) 178
1 Paradise Druid (WAR) 171
1 Skarrgan Hellkite (RNA) 114
1 Thorn Mammoth (ELD) 323
1 Wildborn Preserver (ELD) 182
1 Zhur-Taa Goblin (RNA) 215
1 Evolution Sage (WAR) 159
1 Gruul Spellbreaker (RNA) 179
1 Krenko, Tin Street Kingpin (WAR) 137
1 Legion Warboss (GRN) 109
1 Thrashing Brontodon (M20) 197
1 Questing Beast (ELD) 171
1 Biogenic Ooze (RNA) 122
1 Pollenbright Druid (WAR) 173
1 Voracious Hydra (M20) 200
1 Bonecrusher Giant (ELD) 115
1 Domri, Anarch of Bolas (WAR) 191
1 Nissa, Who Shakes the World (WAR) 169
1 Arcane Signet (ELD) 331
1 The Great Henge (ELD) 161
1 Rhythm of the Wild (RNA) 201
1 Guardian Project (RNA) 130
1 Once Upon a Time (ELD) 169
1 Castle Embereth (ELD) 239
1 Command Tower (ELD) 333
1 Gruul Guildgate (RNA) 250
1 Evolving Wilds (RIX) 186
1 Fabled Passage (ELD) 244
1 Karn's Bastion (WAR) 248
6 Mountain (ANA) 64
1 Rugged Highlands (M20) 250
1 Stomping Ground (RNA) 259
10 Forest (ANA) 65
1 Lava Coil (GRN) 108
1 Kenrith's Transformation (ELD) 164
1 Chromatic Lantern (GRN) 233
1 Jiang Yanggu, Wildcrafter (WAR) 164
5. Chulane, Teller of Tales

"You will all remember this as the day you almost killed Chulane, Teller of Tales!" - Chulane when he returns to your hand.
On both paper and Arena, Chulane is one of those commanders that needs to be removed before he gets to do anything. He builds up an insane amount of value and can make creatures like Frilled Mystic become a reoccurring pain. This list made it to 6th place in Aetherhub’s Community Tournament, and Chulane himself has had over 60 decks submitted to MTGoldfish and Aetherhub.
What's Good About This Deck
- Chulane can draw cards, so you can dig for answers where other decks may stall a bit
- Chulane can bounce himself or other creatures for more value or protection
- White mana provides access to some of the format’s most flexible removal spells
How To Play This Deck Effectively
- Turns 1-3, just like with every deck that uses Green, you want to use this time to get mana ramps out. For this deck specifically, since you’re using 3 colors, keep your mana fixers alive so you can keep playing any missing mana symbols you may need.
- Once you reach 5 mana, play Chulane. Similar to Nissa, you want to make sure you are playing Chulane in the safest position possible cause once he’s on the board, you can run away with the game fairly quickly.
- For turns after you played Chulane, keep three mana open at all times. If your opponent decides to try and remove Chulane, then you can use his own ability to return him to hand so you can avoid commander tax. This is also important if a useful, repeatable creature like Frilled Mystic is on the board. This way you return the creature to your hand on your opponent’s end step then replay it again when you need it.
- For turns after you played Chulane, keep three mana open at all times. If your opponent decides to try and remove Chulane, then you can use his own ability to return him to hand so you can avoid commander tax. This is also important if a useful, repeatable creature like Frilled Mystic is on the board. This way you return the creature to your hand on your opponent’s end step then replay it again when you need it.
- At 7 mana, you can make the most of the turn you’re currently on and, even if Chulane is removed, you can play him again next turn. Be aware, this gives your opponents another turn of you being tapped out when you replay Chulane.
- After Chulane is on the board, you want to continue ramping. To do this, play more creatures so you can get a draw and a land play. You’ll know you’ve ramped enough when you can play a creature with a strong enter-the-battlefield effect every single turn.
- For example, once you hit 10 mana, you can play Agent of Treachery then, on your opponent’s end step, return it to your hand. Now you can steal a permanent from your opponent every single turn.
- For example, once you hit 10 mana, you can play Agent of Treachery then, on your opponent’s end step, return it to your hand. Now you can steal a permanent from your opponent every single turn.
- At 7 mana, you can also use Frilled Mystic then return it on your opponent’s end step. While this won’t end the game, it can stall the game for however long you want since you can continually counter whatever your opponent is playing while your hand is always restocked with Chulane’s draws.
Cards
Commander
1 Chulane, Teller of Tales (ELD) 326
Deck
4 Plains (ELD) 250
4 Island (ELD) 254
5 Forest (ELD) 266
1 Beanstalk Giant (ELD) 149
1 Simic Guildgate (RNA) 257
1 Prison Realm (WAR) 26
1 Forbidding Spirit (RNA) 9
1 Spectral Sailor (M20) 76
1 Silhana Wayfinder (RNA) 141
1 Selesnya Guildgate (GRN) 256
1 Cavalier of Gales (M20) 52
1 Deputy of Detention (RNA) 165
1 Feasting Troll King (ELD) 152
1 Tranquil Cove (M20) 259
1 Faerie Vandal (ELD) 45
1 District Guide (GRN) 128
1 Thornwood Falls (M20) 258
1 Gilded Goose (ELD) 160
1 Firemind Vessel (WAR) 237
1 Blossoming Sands (M20) 243
1 Castle Ardenvale (ELD) 238
1 Faerie Formation (ELD) 316
1 Fabled Passage (ELD) 244
1 Elite Guardmage (WAR) 195
1 Circuitous Route (GRN) 125
1 God-Eternal Oketra (WAR) 16
1 Growth Spiral (RNA) 178|
1 Sphinx's Insight (RNA) 209
1 Fierce Witchstalker (ELD) 154
1 Gingerbread Cabin (ELD) 245
1 Flower // Flourish (GRN) 226
1 Parhelion II (WAR) 24
1 Incubation Druid (RNA) 131
1 Golden Egg (ELD) 220
1 Thorn Mammoth (ELD) 323
1 Incubation // Incongruity (RNA) 226
1 Command Tower (ELD) 333
1 Azorius Guildgate (RNA) 243
1 Hallowed Fountain (RNA) 251
1 Steelbane Hydra (ELD) 322
1 Keeper of Fables (ELD) 163
1 Temple of Mystery (M20) 255
1 Arcane Signet (ELD) 331
1 Time Wipe (WAR) 223
1 Maraleaf Pixie (ELD) 196
1 Frilled Mystic (RNA) 174
1 Gyre Engineer (RNA) 180
1 End-Raze Forerunners (RNA) 124
1 Paradise Druid (WAR) 171
4. Kykar, Wind’s Fury

Kykar plays like a miniature storm deck and I love him for that. You go, Bird-Wizard!
Kykar has gotten more popular since the banning of Oko since this deck prefers to have Kykar sit back and generate value.
Kykar’s game plan is to play noncreature spells to create spirits, and then use those spirits to either control the board or ramp into a powerful spell to win the game.
What’s Good About This Deck
- Beyond Kykar, this deck isn’t very reliant on creatures
- Flexible game plan since you can win through tokens, large spells, Planeswalkers, or just control-beats
- Kykar can be built in several different ways since he only cares about noncreature spells
How To Play This Deck Effectively
- Turns 1 - 2, set up Electrostatic Field or play Arcane Signet.
- Electrostatic Field is the best here since it blocks any early aggression and can ping your opponent’s health later.
- Arcane Signet is the preferred play here since ramping is rarely a bad thing this early.
- Turn 3, if you played Arcane Signet on turn 2 and a land on Turn 3, then this would be the earliest you can play Kykar. This can be useful if you want to force your opponent to use removal, or if you don’t think they have removal yet and want to develop your board more.
- Alternatively, I would play Saheeli or Teferi first. Both of these cards usually demand an answer before they get out of hand. At 4 mana, you can play Saheeli and then immediately follow with Opt or another 1 mana spell to create a 1/1 to protect her with.
- Teferi can help you stall creatures and flash in answers later in the game.
- If you get Heraldic Banner, I recommend playing it and naming White so you can make 2/1 spirit tokens through Kykar.
- The Royal Scions aren’t bad here since they come down with 5 Loyalty Counters (6 after you use their +1), which can be pretty tanky. I would play them if you are digging for a specific card for next turn or if you’ve already set up a board to protect them. Otherwise, I would hold them until you get Kykar down first.
- If your opponent has swamped the board in creatures this early however, you can use Deafening Clarion to wipe the board or Solar Blaze on Turn 4.
- Turn 4, the best play here is Smothering Tithe. This will ramp you every time your opponent draws or your opponent has to pay mana to deny you the ramp. It’s a win-win!
- if you’ve been using answers to keep your opponent’s board in check, then this is also not a bad time to draw for more answers through Chemister’s Insight or Drawn from Dreams.
- if you’ve been using answers to keep your opponent’s board in check, then this is also not a bad time to draw for more answers through Chemister’s Insight or Drawn from Dreams.
- Turn 5, you can play Kykar with a one-mana spell so you can get immediate value through him. This is the best move if you want to develop your board right now.
- However, if your opponent has some threats on the board or if they played their commander this turn, you can also wipe the board through Solar Blaze, Time Wipe, or Realm-Cloaked Giant// Cast-Off.
- Divine Visitation can also develop your board for this turn. If you do this, you’ll want to get Kykar or Saheeli onto the board as soon as possible.
- Turn 6, this is the best time to play Kykar. If you play Kykar here for the first time, then you can keep 2 mana up to protect him. Alternatively, if you lost Kykar to removal during any of the earlier turns, then Turn 6 becomes the soonest you can recast him.
- After you get Kykar on the field, cast as many noncreature spells as you can so you can flood the board with 1/1 flying spirits.
- What you do with these flying spirits will vary based on the deck you’re up against.
- If you’re up against a deck that can’t seem to remove all of your fliers, then keep your spirits around and swing with them. Once Heraldic Banner or Divine Visitation is on the board, then you can seal your opponent’s fate within the next turn or two.
- If the deck you’re playing against prefers stalling, then you can just hold onto your creature tokens until you draw Expansion//Explosion. Once you do, you can tap out all of your mana, sacrifice all of your spirits, and cast Explosion to end the game.
- When in doubt, storm it out. If you have a bunch of ways to draw cards in hand, then you can play Niv-Mizzet, Thousand-Year Storm + Ral, or Storm Conduit to deal damage to your opponent every time you cast your spells. You can use your spirits to help fuel your storm and Niv can help you draw into more cards. Electrostatic Field can also help you finish the game if you decide to take this route.
Cards
Commander
1 Kykar, Wind's Fury (M20) 212
Deck
1 Opt (XLN) 65
1 Shock (M19) 156
1 Spectral Sailor (M20) 76
1 Narset, Parter of Veils (WAR) 61
1 Brazen Borrower (ELD) 39
1 Electrostatic Field (GRN) 97
1 Niv-Mizzet, Parun (GRN) 192
1 Realm-Cloaked Giant (ELD) 26
1 Saheeli, Sublime Artificer (WAR) 234
1 Teferi, Time Raveler (WAR) 221
1 Ral, Storm Conduit (WAR) 211
1 Expansion // Explosion (GRN) 224
1 The Royal Scions (ELD) 199
1 Anticipate (M19) 44
1 Lava Coil (GRN) 108
1 Radical Idea (GRN) 52
1 Chemister's Insight (GRN) 32
1 Shimmer of Possibility (RNA) 51
1 Clear the Mind (RNA) 34
1 Deafening Clarion (GRN) 165
1 Skewer the Critics (RNA) 115
1 Drawn from Dreams (M20) 56
1 Solar Blaze (WAR) 216
1 Time Wipe (WAR) 223
1 Flood of Tears (M20) 59
1 Emergency Powers (RNA) 169
1 Thousand-Year Storm (GRN) 207
1 Smothering Tithe (RNA) 22
1 Into the Story (ELD) 50
1 Arcane Signet (ELD) 331
1 Chromatic Lantern (GRN) 233
1 Heraldic Banner (ELD) 222
1 Prison Realm (WAR) 26
1 Divine Visitation (GRN) 10
1 Steam Vents (GRN) 257
1 Hallowed Fountain (RNA) 251
1 Field of the Dead (M20) 247
1 Azorius Guildgate (RNA) 243
1 Boros Guildgate (GRN) 244
1 Izzet Guildgate (GRN) 251
1 Fabled Passage (ELD) 244
4 Island (ELD) 254
3 Mountain (ELD) 262
2 Plains (ELD) 250
1 Castle Vantress (ELD) 242
1 Command Tower (ELD) 333
1 Sacred Foundry (GRN) 254
1 Swiftwater Cliffs (M20) 252
1 Temple of Epiphany (M20) 253
1 Temple of Triumph (M20) 257
1 Tranquil Cove (M20) 259
1 Wind-Scarred Crag (M20) 260
1 Chandra, Awakened Inferno (M20) 127
3. Korvold, Fae-Cursed King
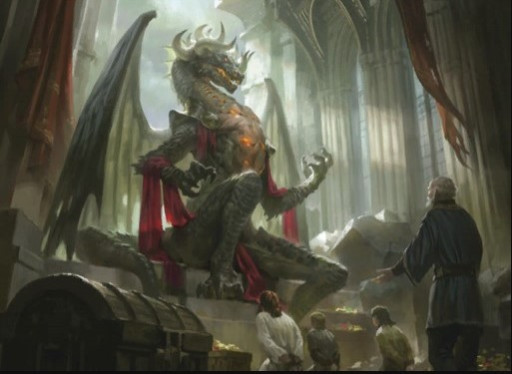
I'm sorry planeswalkers, you're too late. Korvold must feed.
With at least 86 new deck submissions to MTGgoldfish and Aetherhub in the last 4 months, Korvold has been getting ridiculously popular since the Oko ban.
For good reason too. This deck is the Brawl version of the sacrifice decks that are gaining popularity in Standard right now. Its main purpose in life is to sacrifice as many things as it can while Korvold is on the field, then swing with a massive dragon king.
What’s Good About This Deck
- Flexible Voltron-like strategy, so if you like decks that build big creatures, then this dragon is for you.
- Plays very similarly to Rakdos/Jund Sacrifice, so if you enjoy those decks then you know most of the interactions in this deck
- Without the commander, this deck can still rely on Cauldron Familiar + Witch’s Oven synergy as a backup plan
How To Play This Deck Effectively
- Turn 1, since you’re in the Jund color shard, you have access to some of the best early turn plays.
- Gilded Goose gives you food, ramp, and a body, making it the perfect play on this turn.
- Gutterbones this early can be a good play too since he has a decent 2/1 body and can be recurred later when you have your sacrifice engines online.
- If you have Witch’s Oven or Cauldron Familiar, then this would be a great time to play it. If you’re up against a deck that’s Red or Green I’d play Cauldron Familiar first since Red and Green will usually have artifact removal.
- Turn 2, play Arcane Signet to ramp. If you didn’t play Gilded Goose last turn, then Arcane Signet is more important just to fix for any colors you could be missing.
- Paradise Druid also works, but Arcane Signet is preferred since you can still tap it for mana once it comes out.
- Piper of the Swarm is also a good play on this turn since you can start making rats whenever you have spare mana. Once Korvold is out with three rats on the field, Piper’s second ability becomes back-breaking for decks since it draws 3 cards, puts 3 counters on Korvold, and gives you control of your opponent’s best creature.
- Dreadhorde Invasion can help you create a decent-sized creature in the next few turns or constant sacrifice targets. This enchantment also gives Korvold a constant sacrifice target. You’d have to find a way to mitigate the constant life loss, but once Witch’s Oven or Savvy Hunter is out, you can eat food to recover any lost life.
- Priest of the Forgotten Gods is useful on this turn just for its 1/2 body. But it can help set up more sacrifices and ramp in later turns.
- Turn 3, if you’ve been ramping, this is the earliest you can get Korvold out. If you have a sacrifice target that you don’t mind losing, then an early Korvold can be obnoxious for your opponent to deal with. If you think your opponent is sitting on removal and want to wait to play Korvold, then this deck has a few options.
- Savvy Hunter is a 3/3 body that helps create more food tokens and can be an outlet for food later. It’s also one of the best ways to draw outside of your commander.
- Mayhem Devil and Judith both work well so you can convert your sacrifices into damage. Mayhem Devil is a bit better since you can use it with Fabled Passage and Lotus Field to trigger it.
- Krenko is the safest creature to play in this situation. If left alone, it can be a massive threat, so your opponent has to eventually deal with it. If they don’t, then you get plenty of sacrifice targets or a start on a token back up plan.
- Turn 4, Questing Beast and Rankle can both be used as haste beaters on Turn 4. Questing Beast is better if you’re worried about large creatures hitting you back, while Rankle works better if you want to either make your opponent discard or sacrifice creatures. Rankle is also great since this deck has plenty of ways to make disposable creatures.
- Turn 5, at this point you should have mana and a board to play Korvold. As long as you played at least one ramp, then you can play Korvold this turn and then Fabled Passage or Lotus Field to buff him and draw cards. If Mayhem Devil is on the field, then you can get several damage triggers this turn too.
- Once Korvold sticks to the field, use your many sacrifice outlets to make him large enough to swing for lethal. Witch’s Oven, Cauldron Familiar, Priest of the Forgotten Gods, Vraska, and Savvy Hunter are all able to create sacrifice triggers without any additional mana costs.
- Even if Korvold is removed, if you’ve built up enough creatures to sacrifice and enough ways to sacrifice them, you can use Judith or Mayhem Devil to either ping away your opponent’s creatures or deal enough damage to win the game.
- If Korvold is being targeted with removal, you can also sacrifice creatures in response to get draws from Korvold.
Cards
Commander
1 Korvold, Fae-Cursed King (ELD) 329
Deck
1 Storrev, Devkarin Lich (WAR) 219
1 Priest of Forgotten Gods (RNA) 83
1 Questing Beast (ELD) 171
1 Knight of the Ebon Legion (M20) 105
1 Piper of the Swarm (ELD) 100
1 Lovestruck Beast (ELD) 165
1 Judith, the Scourge Diva (RNA) 185
1 Mayhem Devil (WAR) 204
1 Orzhov Enforcer (RNA) 79
1 Cavalier of Night (M20) 94
1 Leafkin Druid (M20) 178
1 Gutterbones (RNA) 76
1 Leyline Prowler (WAR) 202
1 Rankle, Master of Pranks (ELD) 101
1 Gilded Goose (ELD) 160
1 Murderous Rider (ELD) 97
1 Savvy Hunter (ELD) 200
1 Plaguecrafter (GRN) 82
1 Izoni, Thousand-Eyed (GRN) 180
1 Lotus Field (M20) 249
4 Swamp (ELD) 258
5 Forest (ELD) 266
2 Mountain (ELD) 262
1 Rugged Highlands (M20) 250
1 Castle Locthwain (ELD) 241
1 Command Tower (ELD) 333
1 Stomping Ground (RNA) 259
1 Overgrown Tomb (GRN) 253
1 Blast Zone (WAR) 244
1 Rakdos Guildgate (RNA) 255
1 Jungle Hollow (M20) 248
1 Bloodfell Caves (M20) 242
1 Temple of Malady (M20) 254
1 Fabled Passage (ELD) 244
1 Evolving Wilds (M20) 246
1 Liliana, Dreadhorde General (WAR) 97
1 Tibalt, Rakish Instigator (WAR) 146
1 Vraska, Golgari Queen (GRN) 213
1 Garruk, Cursed Huntsman (ELD) 191
1 Dreadhorde Invasion (WAR) 86
1 Command the Dreadhorde (WAR) 82
1 Once Upon a Time (ELD) 169
1 Deathsprout (WAR) 189
1 Liliana's Triumph (WAR) 98
1 Bedevil (RNA) 157
1 Spark Harvest (WAR) 105
1 Arcane Signet (ELD) 331
1 Assassin's Trophy (GRN) 152
1 Angrath's Rampage (WAR) 185
1 The Great Henge (ELD) 161
1 Casualties of War (WAR) 187
2. Alela’s Tokens
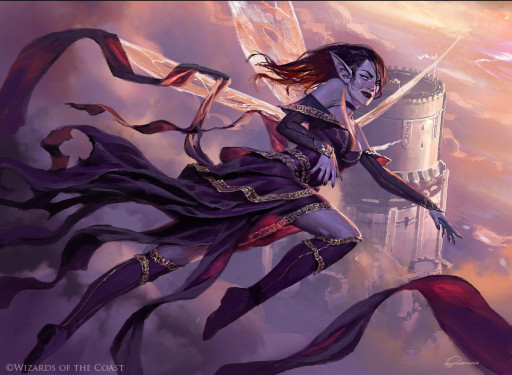
Alela leads an army of flying smug faeries in Brawl.
As the third most popular deck in Brawl on MTGoldfish and Aetherhub, Alela brings an obnoxious token strategy that can easily overwhelm most opponents. Since she also has deathtouch on her, Alela discourages players from attacking her while she sets up strong value plays that require enchantment removal to truly stall her.
What's Good About This Deck
- Flier heavy
- Once Divine Visitation is on the board, you can swarm people in 5/4 angels
- Flying and Deathtouch means Alela can act as the ultimate deterrent against flying attacks
How To Play This Deck Effectively
- Turns 1-3, play early fliers and ramp. Vantress Gargoyle, Teferi, and Empyrean Eagle are great starts.
- Save cheap enchantments and artifacts for after Alela is on the board.
- Save cheap enchantments and artifacts for after Alela is on the board.
- Turn 4 will depend on what deck you’re up against. If you’re playing against a deck that wants to get in as many flying attacks as it can, then playing Alela to discourage that would be a good idea. However, if you’re up against a deck where there aren’t too many early threats or you’ve handled most of the major threats, then you can save Alela for later. Smothering Tithe is great here since it can slow down your opponent and accelerate your game.
- Alternatively, if you have Sephara in hand, then it’s important that you get Alela out so you can start making fairies. Once you have at least 3 other fairies, you can tap all of them to cast Sephara.
- Alternatively, if you have Sephara in hand, then it’s important that you get Alela out so you can start making fairies. Once you have at least 3 other fairies, you can tap all of them to cast Sephara.
- Turn 5, ideally you play Alela and a low-cost artifact/enchantment so you can make a 1/1 faerie. However, if you have Divine Visitation in hand, then get that onto the board as soon as possible.
- Once Alela and Divine Visitation are on the board, start flooding the board in enchantments and artifacts. This way you can make as many 4/4 angels as you can and swing for lethal next turn.
- If you don’t have Divine Visitation then you can focus on just making fairies and then buffing them through anthem effects like Heraldic Banner or Ethereal Absolution.
Cards:
Commander
1 Alela, Artful Provocateur (ELD) 324
Deck:
1 Angelic Exaltation (RNA) 2
1 Arcane Signet (ELD) 331
1 Arcanist's Owl (ELD) 206
1 Banish into Fable (ELD) 325
1 Cavalier of Dawn (M20) 10
1 Chromatic Lantern (GRN) 233
1 Conclave Tribunal (GRN) 6
1 Dance of the Manse (ELD) 186
1 Dead Weight (GRN) 67
1 Disinformation Campaign (GRN) 167
1 Divine Visitation (GRN) 10
1 Doom Foretold (ELD) 187
1 Empyrean Eagle (M20) 208
1 Ethereal Absolution (RNA) 170
1 Frogify (ELD) 47
1 Glass Casket (ELD) 15
1 Golden Egg (ELD) 220
1 Heraldic Banner (ELD) 222
1 Mace of the Valiant (ELD) 314
1 Manifold Key (M20) 230
1 Meteor Golem (M20) 232
1 Mirrormade (ELD) 55
1 Oath of Kaya (WAR) 209
1 Planar Cleansing (M20) 33
1 Prison Realm (WAR) 26
1 Sephara, Sky's Blade (M20) 36
1 Shambling Suit (ELD) 230
1 Single Combat (WAR) 30
1 Stonecoil Serpent (ELD) 235
1 Teferi, Time Raveler (WAR) 221
1 The Circle of Loyalty (ELD) 9
1 Tome of Legends (ELD) 332
1 Vantress Gargoyle (ELD) 71
1 Wishclaw Talisman (ELD) 110
1 Witching Well (ELD) 74
2 Island (AKH) 258
4 Plains (AKH) 256
2 Swamp (AKH) 262
1 Azorius Guildgate (RNA) 243
1 Castle Ardenvale (ELD) 238
1 Castle Locthwain (ELD) 241
1 Castle Vantress (ELD) 242
1 Command Tower (ELD) 333
1 Dimir Guildgate (GRN) 246
1 Dismal Backwater (M20) 245
1 Fabled Passage (ELD) 244
1 Gateway Plaza (WAR) 246
1 Godless Shrine (RNA) 248
1 Hallowed Fountain (RNA) 251
1 Orzhov Guildgate (RNA) 252
1 Scoured Barrens (M20) 251
1 Temple of Silence (M20) 256
1 Tranquil Cove (M20) 259
1 Watery Grave (GRN) 259
1. Nicol Bolas, Dragon-God

Bolas, God-Pharoah of Amonkhet and a terrifying Commander in Brawl.
Bolas plays a brutal control game. Since he has access to the three colors best known for their ability to keep the board clear, Bolas wants to play plenty of Planeswalkers to buff himself while keeping enemy walkers down. Bolas would be higher, but he usually shines better in Multiplayer situations where there can be more planeswalkers on the field that he can copy - a feature that will be added later in Arena.
For now, Bolas is able to terrorize the other decks through his dizzying array of control spells and an army of Planeswalkers.
What's Good About This Deck
- Planeswalker heavy
- Creatures, Planeswalkers, and spells in this deck all involve stalling opponents or taking away their tools
- Once Bolas is on the field, he can slowly grind the game to a halt for your opponents
How To Play This Deck Effectively
- Turns 1-3, an early Thought Erasure would be perfect. This allows you to nip any future problems early, look at what your opponent could be planning for later turns, and get a sneak peek at what your next draw is going to be. Otherwise, keeping the board clear and ramping are the goals during these early turns.
- An early Wall of Lost Thoughts will also help keep any early creatures at bay while also protecting your Planeswalkers in later turns.
- Mu Yanling can establish your planeswalkers early since she can neuter a creature’s attack every turn while she just gets stronger.
- If you’re against a deck that isn’t creature heavy but wants to draw more later, playing a Narset on this turn may not be a bad idea since her 5 loyalty makes her tough enough to take a hit or two.
- Turn 4, start playing four-mana Planeswalkers. You want to either start building a strong lead against your opponents here or force your opponent to play their planeswalker hate cards early so you can play Bolas next turn safely.
- God-Eternal Kefnet can also act as a way to get more out of your control spells and as a 4/5 blocker.
- God-Eternal Kefnet can also act as a way to get more out of your control spells and as a 4/5 blocker.
- Turn 5, while Bolas may be an option here, it’s also not a bad idea to play a three-mana planeswalker with a two-mana spell. For example, Saheeli and a spell may help you establish a board presence while also creating more 1/1 creatures you can use later.
- If the coast is clear, play Bolas. The sooner you can start removing cards from your opponent’s hand and drawing more of your deck, the better. Since Bolas also comes with built-in removal, he can also act as a quick solution to any problematic permanents.
- If you played Mu Yanling earlier, you can also play Bolas just to make another 4/4 Bird token.
- Turn 6, if she’s in your hand, play Liliana. She can be a backbreaker against creature-oriented decks. Between those sacrifices and any other disruptive effects your other planeswalkers may have, this is the turn where you can really start locking your opponent out of the game.
- Turn 7, if you haven’t played Bolas already, then this would be a great time to play him since you can get him on the board and keep two mana open for a counterspell. Once he’s on the field, you can now double up on planeswalker abilities or empty your opponent’s hand one card at a time while you draw into more answers. If the game reaches this point, your opponent will usually only have one more turn to try and dig for an answer before getting stuck on just top deck cards.
Cards
1 Murderous Rider (ELD) 97
1 Gateway Plaza (GRN) 247
1 God-Eternal Kefnet (WAR) 53
1 Thief of Sanity (GRN) 205
1 Narset, Parter of Veils (WAR) 61
1 Liliana, Dreadhorde General (WAR) 97
1 Ugin, the Ineffable (WAR) 2
1 Sarkhan the Masterless (WAR) 143
1 Swamp (ELD) 258
1 Bedevil (RNA) 157
1 Angrath's Rampage (WAR) 185
1 Tyrant's Scorn (WAR) 225
1 Ritual of Soot (GRN) 84
1 Enter the God-Eternals (WAR) 196
1 The Elderspell (WAR) 89
1 Arcane Signet (ELD) 331
1 Chromatic Lantern (GRN) 233
1 Temple of Epiphany (M20) 253
1 Watery Grave (GRN) 259
1 Blood Crypt (RNA) 245
1 Steam Vents (GRN) 257
1 Dimir Guildgate (GRN) 246
1 Rakdos Guildgate (RNA) 255
1 Command Tower (ELD) 333
1 Fabled Passage (ELD) 244
1 Izzet Guildgate (GRN) 251
1 Evolving Wilds (RIX) 186
1 Dismal Backwater (M20) 245
1 Interplanar Beacon (WAR) 247
1 Swiftwater Cliffs (M20) 252
1 Bloodfell Caves (M20) 242
1 Castle Vantress (ELD) 242
1 Lotus Field (M20) 249
1 Castle Locthwain (ELD) 241
1 Karn's Bastion (WAR) 248
1 Plaza of Harmony (RNA) 254
1 Mobilized District (WAR) 249
1 Agent of Treachery (M20) 43
1 Lochmere Serpent (ELD) 195
1 Niv-Mizzet, Parun (GRN) 192
1 Mountain (ELD) 262
1 Ral, Izzet Viceroy (GRN) 195
1 Mu Yanling, Sky Dancer (M20) 68
1 Saheeli, Sublime Artificer (WAR) 234
1 Ral, Storm Conduit (WAR) 211
1 Kasmina, Enigmatic Mentor (WAR) 56
1 Chandra, Acolyte of Flame (M20) 126
1 Angrath, Captain of Chaos (WAR) 227
1 Chandra, Fire Artisan (WAR) 119
1 Wall of Lost Thoughts (RNA) 59
1 Thought Erasure (GRN) 206
1 Ionize (GRN) 179
2 Island (ELD) 254
1 Negate (RIX) 44
1 Tale's End (M20) 77
1 Sinister Sabotage (GRN) 54
1 Disdainful Stroke (GRN) 37
1 Lava Coil (GRN) 108
1 Nicol Bolas, Dragon-God (WAR) 207
You may also be interested in:

