![[Top 15] Dead Cells Best Mutations And Why They're Good Dead Cells Best Mutations And Why They're Good](/sites/default/files/styles/responsive_image_600xauto/public/2022-11/dead_cells_mutations.jpg.webp?itok=Bfd-2nPa)
Dead Cells is all about experimenting with various builds. Every run you play, you can try various weapons, skills, and mutations. Mutations are passive abilities that you can choose once you've cleared the first three biomes. Because you can only have three active mutations, you must be very careful when selecting the best one for that particular run. Let's take a look at the best mutations for defeating The Hand of the King and earning the next boss cell.
15. Scheme
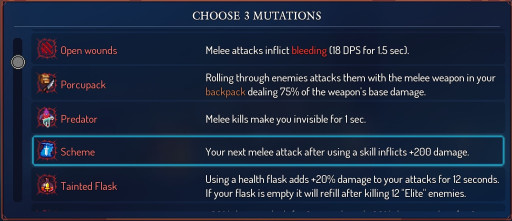
Scheme is a very situational mutation; usually, you pick it in situations where you have low cooldown skills. You want to trigger the mutation condition as much as possible to make it worth a slot. Mutation deals flat damage, which is better in earlier biomes. But in the right build and hands, this mutation can shine.
What Scheme Excels In:
- Fast Brutality builds, focusing on dealing a huge amount of damage in a short time.
- Grappling Hook and Phaser are the best skills to have with this mutation. You can spam those spells to stay on top of the enemies and constantly trigger Scheme.
- Because of its cooldown, Infantry Grenade is also excellent with this mutation.
Use Scheme if you run low cooldown brutality skills.
Scheme full details:
- The next melee attack after using a skill inflicts +[200 base] damage.
- Scaling: Brutality (red).
- Scheme Blueprint drops from Sweepers. It has a 10% drop chance and costs 50 cells to unlock.
14. Berserker
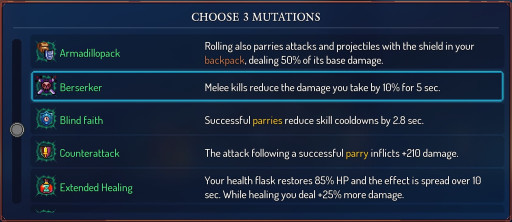
Sometimes the attacks of your enemies are faster than your weapon, and you take a lot of unnecessary damage. Berserker is one method of dealing with it.You no longer need to be afraid of heavy nukes from enemies after picking up Berserker; this complements the slow, sustained build of Survival well.
What Berserker Excels In:
- It synergizes well with the mutation Recovery or a colorless Spite Sword.
- Run it in Survival builds with slow melee weapons like Broadsword, Nutcracker, Scythe Claw or Tombstone.
- It can also work in Brutality build, but the damage reduction will not be as high.
- The damage reduction can go up to 60% per hit when you have 14+ Survival scrolls equipped.
Use Berserker if you run slow Survival builds and take too much damage in between your attacks.
Berserker full details:
- Grants the player a defence buff that reduces all damage they take by [10 base] % for 5 seconds after killing an enemy with a melee attack.
- The effect is refreshed with each enemy killed.
- Scaling: Survival (green).
- Berserker Blueprint drops from Failed Experiments on 4+ boss cell difficulty. It has a 0.4% drop chance and costs 100 cells to unlock.
13. Parting Gift
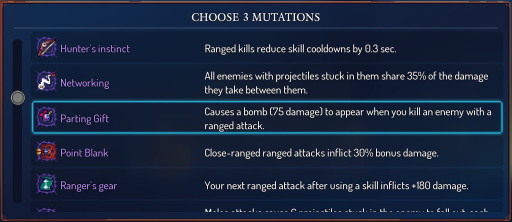
This mutation excels at clearing biomes. There is always room for Parting Gift, when you run a ranged Tactics build. Killing just one enemy will trigger a snowball effect of spawning bombs and dealing damage left and right. The only downside of this mutation is that it is not effective against bosses.
What Parting Gift Excels In:
- It works best in combination with the ranged weapon Electric Whip.
- Deflecting Parting Gifts bombs with melee weapon Flashing Fans will trigger its critical damage condition.
- It works in almost any ranged build.
Use Parting Gift if need to kill crowds of monsters fast.
Parting Gift full details:
- Enemies killed with non-melee attacks leave a bomb on the ground. The bomb after 0.7 seconds will detonate, dealing [75 base] damage to the enemies around.
- Scaling: Tactics (purple).
- You can find Parting Gift Blueprint in a secret area in the Graveyard biome. It cost 50 cells to unlock.
12. Acrobatipack
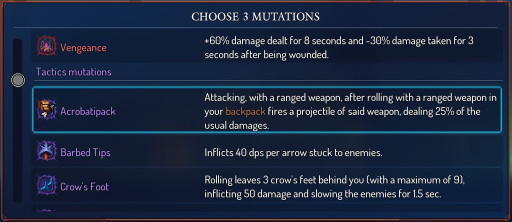
Acrobatipack is one of three mutations that make weapons in your backpack viable. This mutation scales with Tactics builds and ranged weapons; every time you attack after roll, you fire a projectile from a weapon that is in your backpack. One ranged attack every 3 seconds doesn't sound like much, but it also applies all the effects of the weapon.
What Acrobatipack Excels In:
- This mutation works with all ranged builds, but in builds that apply damage over time statuses such as poison, bleeding, or fire, this mutation is busted.
- The best-ranged weapons that work with this mutation are Alchemic Carbine, Firebrands, Boomerang, The Boy's Axe, Hokuto's Bow, or Ice Shards.
- The launched projectile does not consume the ammo of the weapon in the backpack. Therefore, weapons with highly limited ammo, such as The Boy's Axe, can be fired multiple times from the backpack without needing to retrieve any.
- Projectiles can still be pulled from enemies by using the Ripper mutation for extra damage.
Use Acrobatipack if you want to apply effects from a ranged weapon that is in your backpack.
Acrobatipack full details:
- Attacking with a ranged weapon, after rolling with a ranged weapon in your backpack fires a projectile of said weapon, dealing [25% base] of the usual damages.
- This mutation has a cooldown of 3 seconds.
- Scaling: Tactics (purple).
- Acrobatipack Blueprint drops from Sweepers. It has a 10% drop chance and costs 120 cells to unlock.
11. Combo
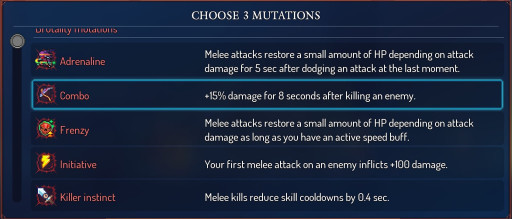
Do you lack damage in your Brutality build? There is Combo for that. This is the mutation you will choose if you are unsure of what type of build you want yet. It is always a viable and well-rounded mutation. The only downside of this mutation is that it is not as effective in boss fights.
What Combo Excels In:
- Works with both ranged and melee kills.
- Combo increases the damage of not only your weapons but also your skills.
- Percentage scaling bonus damage is noticeable from the get-go and doesn't fall off in later biomes.
Use Combo if you run a Brutality build and want to elevate your damage even more.
Combo full details:
- + [15% base] damage for 8 seconds after killing an enemy.
- Each kill refreshes the damage buff.
- Scaling: Brutality (red).
- Mutation Combo is available from the start of the game.
10. Ygdar Orus Li Ox
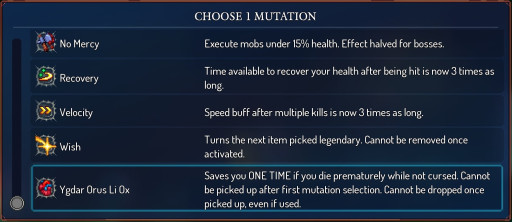
Ygdar Orus Li Ox, aka YOLO, is one of the most controversial mutations in the game. The community is split in half regarding this item; one half absolutely loves this mutation, and the other half despises it and says that it is a waste of a mutation slot.
What Ygdar Orus Li Ox Excels In:
- YOLO is the best mutation for beginners because it guarantees one "extra" life.
- In the hardest, 5-boss difficulty, when triggered, it removes all accumulated Malaise and disables this debuff for the rest of the run.
- It prevents you from getting one shot.
Use Ygdar Orus Li Ox if you want extra life.
Ygdar Orus Li Ox full details:
- Upon taking lethal damage which does not trigger sudden death prevention, it freezes nearby enemies, restores 25% of the player's max health, removes all accumulated Malaise and then becomes disabled for the rest of the run.
- Scaling: Colorless, it does not scale.
- Mutation Ygdar Orus Li Ox is available from the start of the game.
9. Support
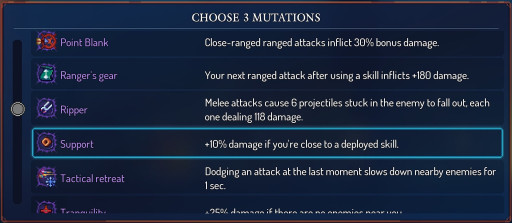
Support is more of a situational mutation, picked in situations when one of your skills is turret or trap. Your damage is increased while you fight near a deployed skill. This works best in small areas, boss fights, or with slow or lockdown skills and weapons.
What Support Excels In:
- Work with the following skills: Double Crossb-o-matic, Sinew Slicer, Heavy Turret, Barnacle, Flamethrower Turret, Wolf Trap, Crusher, Explosive Decoy, Tesla Coil, and Scavenged Bombard.
- There are some double-turret builds that are really powerful with this mutation on top.
- One of the few mutations that work better in boss fights than biomes.
Use Support if you run a deployable turret or trap skill in your build.
Support full details:
- + [10% base] damage if you're close to a deployed skill.
- This mutation only works with skills that fall under the category "Traps & Turrets."
- Scaling: Tactics (purple).
- Mutation Support is available from the start of the game.
8. No Mercy
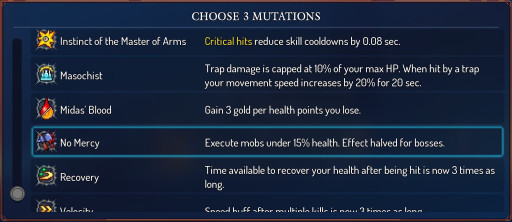
No Mercy is an interesting mutation; it basically lowers the HP of monsters by 15% and bosses by 7.5%. This completely changes the game's dynamics; some weaker weapons can actually finish enemies. There's also something very satisfying about seeing the big red text "BOSS EXECUTED!" after you slay the boss.
What No Mercy Excels In:
- In the earlier biomes, it helps lower damage weapons kill monsters.
- It works great with damage-over-time effects like poison, bleeding, or fire.
- No Mercy lowers the health of bossers by 7.5%; they are easier to kill, and you are able to kill them before they use their most powerful attacks.
Use No Mercy if you want to make enemies more vulnerable and easier to kill.
No Mercy full details:
- When an enemy goes to or under 15% of their maximum health (or 7.5% for bosses), they die instantly.
- Scaling: Colorless, it does not scale.
- No Mercy Blueprint drops from Slashers. It has a 1.7% drop chance and costs 100 cells to unlock.
7. Gastronomy
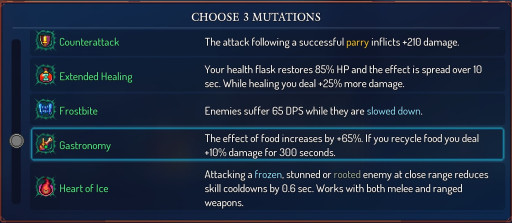
This is the best healing mutation in the game. Some players use it every single run, even in non-Survival builds. It almost doubles the healing effect of the food you find in biomes, and on top of that, if you sell food, you gain a damage buff for 5 minutes.
What Gastronomy Excels In:
- Small foods heal you by 25%, and big foods heal you by 80%.
- You can run this mutation in off-color builds.
- The damage buff stacks if multiple food items are recycled. They wear off individually.
- You can recycle food before leaving one biome so that the damage buff is active in the next one.
Use Gastronomy if you need extra healing from food.
Gastronomy full details:
- The effect of food increases by +65%. If you recycle food, you deal + [10% base] damage for 300 seconds.
- Scaling: Survival (green).
- Gastronomy Blueprint drops after you kill the boss Conjunctivius for the fourth time. It costs 50 cells to unlock.
6. Kill Rhythm
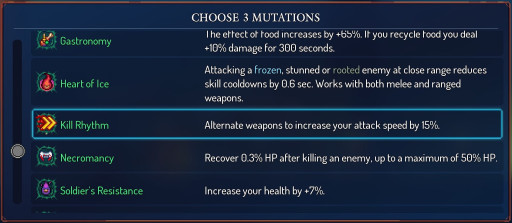
Kill Rhythm is a go-to mutation for people who enjoy two-handed weapons. There are some cool combos with different weapons with this mutation. To name one strategy, dual-binding builds that use this mutation can be insane. However, learning how to pull off combos properly will take some practice.
What Kill Rhythm Excels In:
- Works best with two-handed weapons like Heavy Crossbow, Repeater Crossbow, Ice Crossbow, Explosive Crossbow, Scythe Claw, or dual binding builds.
- This mutation increases the charge speed of weapons with charge attacks, such as the Flint or Toothpick.
- Increases the attack speed of slow weapons.
- Scales with survival, but it can also be used in off-color builds.
Use Kill Rhythm if you switch between both your weapons after every hit.
Kill Rhythm full details:
- Alternating weapons increase attack speed by [15 base] % for 2 seconds.
- Scaling: Survival (green).
- Kill Rhythm Blueprint drops from Oven Knights on 2+ boss cell difficulty. It has a 0.4% drop chance and costs 150 cells to unlock.
5. Open Wounds
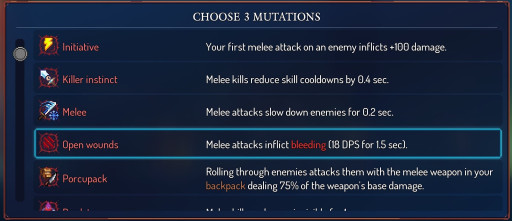
This mutation works even if you do not use the bleeding status damage in your build. It is a safe pick in almost any situation when playing Brutality. However, the full potential of Open Wounds is reached when you pair it with other skills and weapons that utilize bleeding status, which can lead to some interesting burst damage
What Open Wounds Excels In:
- Weapons that already inherently inflict bleeding (such as the Blood Sword or the Bloodthirsty Shield) will still be able to add another bleed stack via this mutation. So you apply two bleed stacks with one hit.
- The best weapon to pair with this mutation is Sadist's Stiletto because it instantly triggers its critical condition.
- Scales with the most Brutality builds, which employ melee weapons with quick attacks.
Use Open Wounds if you run a bleeding build or a fast melee Brutality weapon.
Open Wounds full details:
- Each melee attack inflicts one stack of bleeding effects ([18 base] DPS for 1.5 seconds).
- Scaling: Brutality (red).
- Open Wounds Blueprint drops from Lacerators. It has a 0.4% drop chance and costs 50 cells to unlock.
4. Barbed Tips
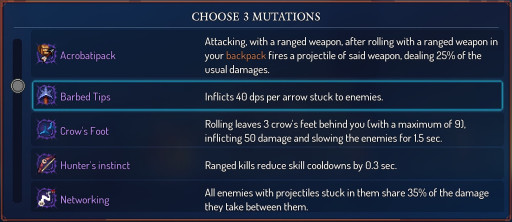
Barbed Tips are all about chip damage, which increases with every projectile that is stuck in the enemy. This is a simple strategy; the more arrows you shoot, the more damage you deal over time. Just make sure that you don't have an affix, "Arrows stuck in enemies come back," on your skills.
What Barbed Tips Excels In:
- The best-ranged weapons to use with this mutation are Multiple-nocks Bow, Repeater Crossbow, or Quick Bow.
- Works with any Tactics build that runs ranged weapon that shoots projectiles.
- You can pair Barbed Tips with mutation Ammo, which doubles the ammo of ranged weapons.
Use Barbed Tips if you have a ranged weapon that fires a high number of projectiles in a short time.
Barbed Tips full details:
- Inflicts [40 base] damage per second, per arrow stuck to enemies.
- Scaling: Tactics (purple).
- Barbed Tips Blueprint drops from Toxic Miasmas. It has a 10% drop chance and costs 80 cells to unlock.
3. Armadillopack
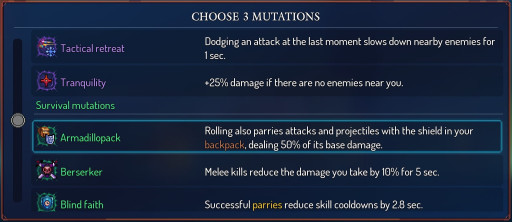
Similar to Acrobatipack, Armadillopack is one of three mutations that make weapons in your backpack viable. This mutation makes use of shields stored in the backpack; while rolling, you can parry enemy attacks. Armadillopack is the best mutation in the game for players who don't like having a shield in their weapon slot but still want to use the parry mechanic.
What Armadillopack Excels In:
- Armadillopack can provide protection while still allowing for non-shield combos.
- This is an extremely effective mutation for builds that don't like having shields or builds containing two-handed weapons. Use it in builds that have slow weapons.
- It also reflects bombs and flying projectiles.
- This mutation works in every build, even off-color ones.
Use Armadillopack if you don't have room for a shield in your weapon slots.
Armadillopack full details:
- Rolling will parry melee attacks and deflect projectiles with the shield in the backpack, dealing [50 base] % of the shield's damage.
- Scaling: Survival (green).
- Armadillopack Blueprint drops from Toxic Thornies. It has a 1.7% drop chance and costs 100 cells to unlock.
2. Emergency Triage
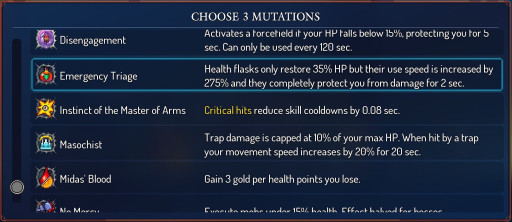
How can having 35% healing instead of 60% be any good? Many new players skip this mutation completely because they think that the healing reduction is not worth it. And then they get killed by the boss because they don't have enough time to heal between attacks. With Emergency Triage you heal almost instantly instead of slowly over time.
What Emergency Triage Excels In:
- This is the best mutation for boss fights.
- In addition to almost instant healing, Emergency Triage provides complete damage protection for 1.5 seconds after you use your flask.
- It works in any build, regardless of strat or color.
Use Emergency Triage if you are about to face the last two bosses.
Emergency Triage full details:
- Health potions only restore 35% HP but their use speed is increased by 275% and it completely protects you for 1.5 seconds.
- Scaling: Colorless, it does not scale.
- Emergency Triage Blueprint drops after you kill the boss, The Time Keeper, for the seventh time. It costs 100 cells to unlock.
1. Disengagement
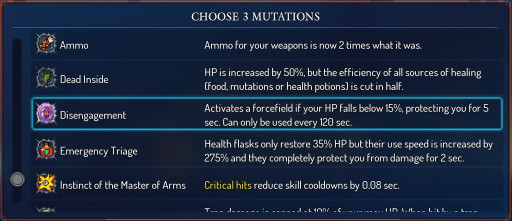
Upgraded Ygdar Orus Li Ox. Similar to YOLO, it stops situations where the player would die, while simultaneously not permanently taking up space in the mutation slots and being reusable. This mutation is always a great pick and it will save your runs countless times.
What Disengagement Excels In:
- Is extremely useful in glass cannon builds that have low HP.
- You can combine it with Emergency Triage before the boss fights to make healing easier and prevent you from dying instantly when the boss hits the full combo.
- If you want, you can pick it every single run; it works in any build, regardless of strat or color.
Use Disengagement if you want extra protection, that can save your whole run.
Disengagement full details:
- If your HP falls below 15%, a force field protects you for 5 sec. Can only be used every 120 sec.
- Scaling: Colorless, it does not scale.
- You can find Disengagement Blueprint in a secret area in the Prisoners' Quarters biome. It cost 200 cells to unlock.

