There are many settings in Call of Duty’s Warzone, and with it being such a graphically intensive game, most people will need to customize them. Everyone's setup can be different and can use slightly different settings but the 15 listed here will provide an advantage to all players. The advantages that you can expect to see from these settings will be things like latency, visual clarity and frame rate improvements.
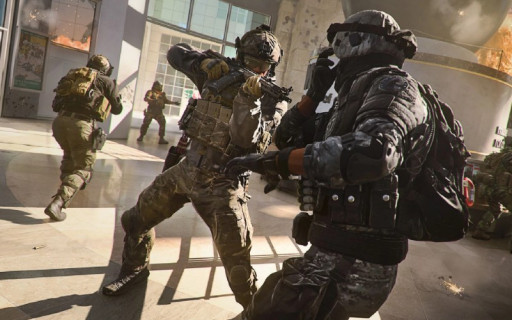
15. 1st Person Camera Movement
Image
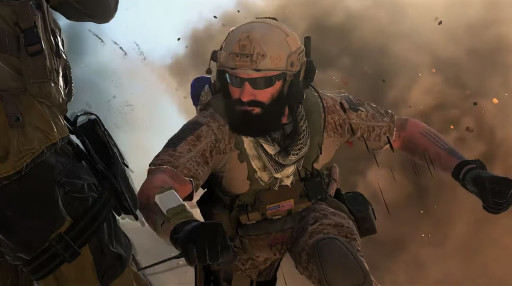
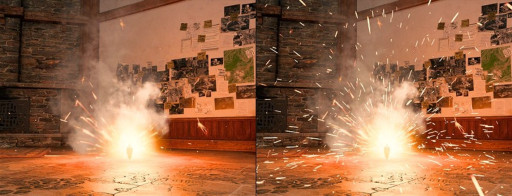
Leaving this setting as default will result in lots of unnecessary shaking of your camera from explosions and various sources. By setting this to Least [50%] you will be reducing the amount your camera shakes by about half.
The reason we want to reduce this as much as possible is that it will not shake our camera off of enemies. It can also make the game more disorienting and harder to identify enemies when they are on your screen
What to set it to: Least [50%]
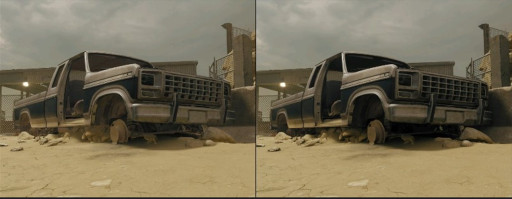
14. Ambient Occlusion
Image
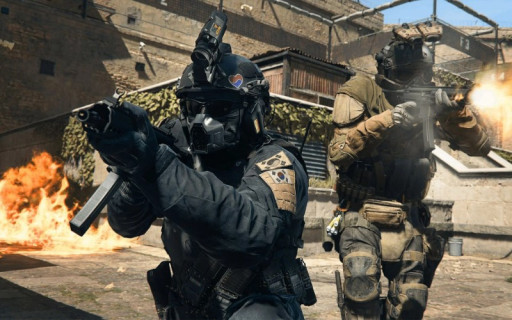
Ambient occlusion will add soft shadows that intersect with each other to create depth on some objects in the environment. By turning this off we can prevent this from happening and remove a lot of added darkness to some areas around the map.
By removing added darkness we are removing areas that will be difficult to see enemies in. This effectively removes the ability to “hide in the shadows” in some areas around the map.
What to set it to: Off
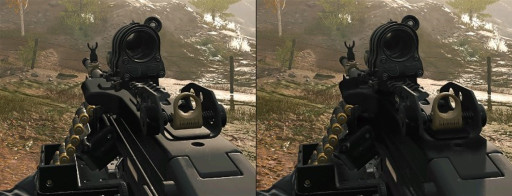
13. Screen Space Shadows
Image
Screen space shadows add a level of shadow detail to the weapon and character. While keeping this on High isn’t terrible, putting it to low will give us more frames per second (FPS).
Turning this down gives us a slight advantage with more FPS, 5 FPS will be barely noticeable but with all the settings changed the amount gained can stack up and be substantial. We have seen reports that turning this off will prevent you from seeing enemies' shadows when they’re on rooftops above you, that is why we suggest Low.
What to set it to: Low
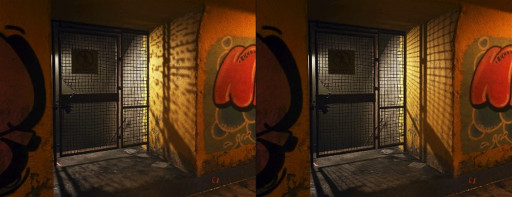
12. Shadow Quality
Image
This is the selection of the level of details for shadows from objects around the map. The higher this setting the sharper and clearer the shadows will become. Lowering this setting can make big impacts on your FPS.
Changing this setting to either normal or low is the best option in terms of FPS gain and visuals. Depending on the strength of your system and how many frames you want is what will decide which setting to use. We don’t recommend very low because the shadows tend to be very blurry and the gain is minimal compared to low, however if you are on a slow system it may be a good choice.
What to set it to: Low or Normal depending on system
11. Local Texture Streaming Quality
Image
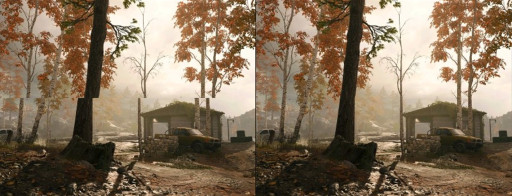
This changes the streaming quality of distant zones for large maps and can make seeing enemies from distance better as we are playing on a large map. Putting this to normal will make the game look better with minimal FPS changes.
We want to change this setting to normal because it has little downsides but can make the environment look better at a distance. Making the game look more crisp for far distances can potentially make spotting enemies easier.
What to set it to: Normal
10. Shader Quality
Image
Shader Quality is the lighting treatment applied on some surfaces and has a slight impact on the colorization of these surfaces. This setting is a big one in terms of FPS so setting it to low will be able to provide you with a considerable boost.
We want to have this setting on low when playing competitive game modes like Warzone. While the game might not look as pretty on low, this setting makes a drastic change to your FPS. Change it to low and take the advantage.
What to set it to: Low
9. Depth of Field
Image
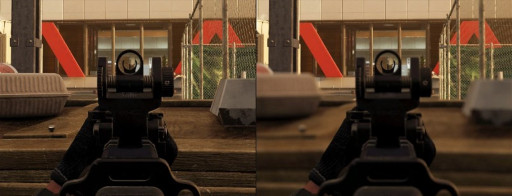
Depth of Field is a camera lens simulation that adds blur to out-of-focus regions on your skin, primarily noticeable when aiming down sights. We don’t want to have any added blurriness on the screen so turning this off will solve that problem.
By turning this setting off we will be making it easier to see enemies when we are already aiming down sight. This provides a competitive advantage because you can take enemies out very quickly in this game, so spotting them first is very important.
What to set tit to: Off
8. Variable Rate Shading
Image
This setting will essentially give priority to the center of your screen for things like rendering and FPS. This setting is newer and we want to put this on as it can even help with giving more FPS.
The center of our screen is obviously the most important because when we are shooting at an enemy that is where they are. So giving priority to this section priority of your resources will give you an advantage in terms of clarity, so you hopefully hit more shots.
What to set it to: On
7. Volumetric quality
Image
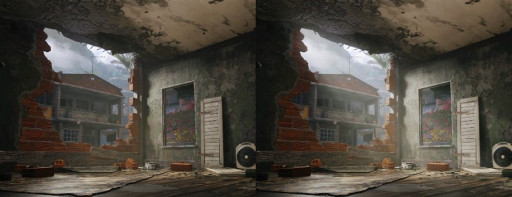
Selecting the quality of lighting, fog and clouds can make large differences in the game. I think that this setting looks really nice but can make seeing through fog and some lighting much more difficult while costing us FPS.
Turning this to low will give us more frames to play with, hopefully giving us better accuracy. More importantly is the clarity you can see with this setting turned on low, the image looks much less clouded by the lighting.
What to set it to: Low
6. Tessellation
Image
This selects the range that subdivisions will receive increased geometry to improve rendering quality and can make objects look a lot more 3D. The problem is that it takes a lot of resources to do this at all ranges so turn it to near to make the game run smoother or off if your system is struggling.
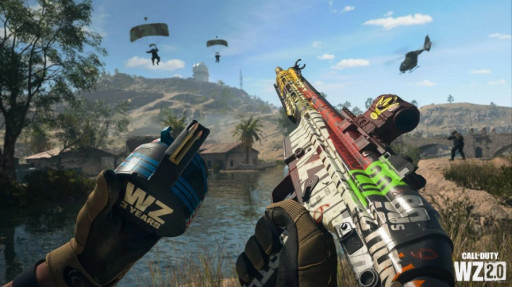
The only advantage to changing this setting is the FPS increase and potentially making it easier to see enemies through grassy areas.
What to set it to: Near or Off
5. Particle Resolution
Image
This is a big setting when it comes to performance as it creates many more effects with explosions. The higher this setting the more visual clarity will be created and the more FPS it will take.
We turn this setting to either low or very low in pretty much all situations because this setting causes a lot of visual noise and decreases FPS. The advantage we gain from the FPS will build up over all the settings but in terms of visual clarity, this one will make a big difference.
What to set it to: Low or Very Low
4. Upscaling/ Sharpening
Image
Upscaling / sharpening is one of the most complicated settings in Warzone. This will add a solution to the game to maximize performance and create a sharper image. FidelityFX CAS has been said to be the best option for framerate while providing a nice sharp image. If you really need more FPS and have a card that supports DLSS you could use that option but It tends to add latency, which we don’t want.
Setting this to FidelityFX CAS will provide a slightly sharper image potentially making it easier to see enemies. The main reason we want to use this though is for the FPS boost as it is quite a noticeable change. As for the strength, it is personal preference and would recommend anywhere between 70 and 100.
What to set it to: FidelityFX CAS strength 70-100
3. Motion Blur
Image
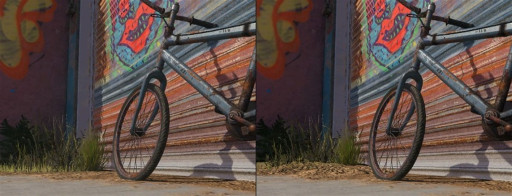
A notorious setting for causing headaches and nausea and for me a setting that gets turned off immediately on any game. This setting creates a blurred effect when you move your camera in game and with things moving on your screen.
By turning this off we are basically seeing properly at all times, and it doesn’t feel like we need glasses. The clearer the picture is the better your aim will be, that's the advantage to turning this off.
What to set it to: Off
2. Vsync
Image
Vsync is a setting that most games have that almost all the time should be turned off. It will sync your monitor's refresh rate with the amount of FPS that you are getting. The problem is this often causes screen tears and can add latency just making the game feel worse. However, if you have screen tears with this setting off then it could help reduce screen tearing.
On all games you most likely want this turned off because we want to have our FPS match our refresh rate by increasing the FPS not by reducing the refresh rate. As I mentioned earlier, it causes screen tearing and increases latency thus giving us an advantage when it is turned off.
What to set it to: Off
1. Display Mode
Image
Choosing your proper display mode may seem like an obvious one to some but a lot of times people don’t know which is best. Fullscreen exclusive is going to result in the best FPS and reduce the amount of latency the most in all cases.
We make sure this setting is on fullscreen exclusive to reduce latency and give us the best FPS making the game feel overall smoother. When you have a smooth running game it is easier to track enemies and therefore get more kills.
With the Vancouver spawn location, Pen as my starting weapon and the writers class. I begin my journey through the rough webscape to find the lost tome of the Sages of Success.