 Home
Home PC Game Trailers
 News
News Menu
Menu[Top 10] Warframe Best Companions (Ranked)
Updated: 28 Apr 2024 2:21 pm

Even God-Like warriors love dogs.
 BY: Mark D.
Ever feel like defending the entire solar system from countless billions of evil-doers would be a lot easier with a side-kick? You do? Are you also finding yourself falling to decision paralysis over choosing the right companion considering time investment and limited companion slots? You are? Then that means you’re in the right place Tenno! Because in this article I’ll be ranking the top 10 best Companions to have in Warframe as of April 2024!
Couple things to go over first:
What are Companions?
These are well-trained (or programmed), completely loyal, personal allies to the Tenno that they can bring to every mission. Companions have their own unique abilities called precepts, are fully moddable (special mention to the bond mods introduced in the 2023 Companion rework), and they come with their own weapons and decorative armor. You can name these creatures once tamed or Gilded, customize their appearance to match your own, and even pet them on your ship!
Why is it important to choose the right Companion?
Think of it like outsourcing work, or dietary supplements. These Companions cover what your Warframe lacks, they balance the tipping scales of your individual power with their own and with every Companion being suited for different situations, you better choose the right weight. So let’s get into it!
10. Panzer Vulpaphyla

I could never guess where its eyes are… does it even have eyes?
See the Panzer Vulpaphyla in action:


Ahh the Panzer Vulpaphyla, if a fall from grace could be personified. Well, it isn’t actually that bad (it wouldn’t have made this list if it was), see this Infested cat used to be the number one companion pre-rework because of two things, its practical immortality, with Panzer Devolution and its capability to spread Viral procs with Viral Quills all the time, even when its supposed to be dead.
Nowadays, post-rework, basically all companions are immortal by way of going into a regenerative state instead of dying out-right, wherein they go into a sort of cooldown while they revive themselves. That and the new Bond mods allow a chosen few companions to spread multiple statuses better than the Panzer ever could.
So, is the Panzer Vulpaphyla bad now? Nope, just not as strong as it was before… by comparison to other Companions. Viral, as a status effect, is still just as strong as it was in 2023. Panzer isn’t the only immortal one now sure, but Panzer Devolution still allows the Panzer to cast Viral Quills while hovering over your shoulder, this means constant uptime and constant status spreading. So, fret not if you’re itching to get your hands on one of these Infested beauties, the Panzer Vulpaphyla hasn’t changed a bit it's just lower down in the priority-to-farm list than it was before.
What the Panzer Vulpaphyla excels in:
- Survivability in higher level missions through Panzer Devolution.
- Consistency in spreading Viral procs through Panzer Devolution and Viral Quills.
- Relatively low mod investment seeing as the Panzer can function well with just two mods equipped.
Choose the Panzer Vulpaphyla if:
- You need a lot of Viral procs.
- You need Viral procs all the time.
- You are heading into a particularly dangerous mission with little options to keep your Companion alive.
Panzer Vulpaphyla base stats:
- Health: 680
- Shields: 370
- Armor: 300
Total normal attack damage:
- Slash: 80
- Critical Chance: 20%
- Critical Multiplier: 2x
- Status Chance: 7.5%
How to get the Panzer Vulpaphyla:
Head to the Cambion Drift (open-world) and find a wounded feral Panzer Vulpaphyla (you can wound them yourself just be careful not to actually kill the poor thing). Then pick them up by interacting with the wounded creature and restore them to health at Son inside the Deimos Necralisk using some of the items that he sells.
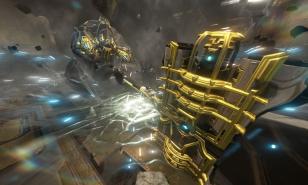
9. Dethcube / Dethcube Prime

Never thought a faceless cube could be so endearing.
See the Dethcube in action:
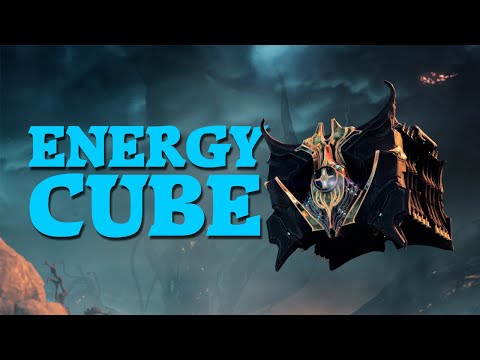
Ironically the Dethcube’s main use isn’t actually for killing enemies, weird right? Sure with the right build it can still kill but it’s actually better used as an energy printer, guess the name Energycube doesn’t sound as cool. You see, with the precept Energy Generator modded onto the Dethcube it will spawn an energy orb every ten kill assists the Dethcube gets, yes kill assists, this has no cooldown either.
So, Energy Generator paired with the universal pickup mod Vacuum, that does what it says on the tin, will mean the Dethcube can reliably top up your energy reserves as long as it gets to plink at enemies. Now, this energy generation isn’t the strongest in the game, what with Arcane Energize and Nourish, but it’s a great supplement if you’re ever running a particularly energy inefficient build that needs just that much more energy.
What the Dethcube excels in:
- Passive energy generation through Energy Generator.
- Relatively low investment to get it going.
- Versatility since you will almost always need energy anyway.
Choose the Dethcube if:
- You need some form of energy regeneration in missions.
- You need a little help clearing trash mobs (remember the Dethcube can still kill).
- You don’t really have anything else to bring.
Dethcube base stats:
- Health: 560
- Shields: 250
- Armor: 80
Deth Machine Rifle base stats:
- Impact: 0.5
- Puncture: 0.25
- Slash: 4.25
- Critical Chance: 5%
- Critical Multiplier: 2x
- Status Chance: 1%
- Fire Rate: 8.300 attacks per/sec
- Range: 300m
Dethcube Prime base stats:
- Health: 600
- Shields: 300
- Armor: 150
Deth Machine Rifle Prime base stats
- Impact: 0.7
- Puncture: 0.35
- Slash: 5.95
- Critical Chance: 10%
- Critical Multiplier: 2x
- Status Chance: 4%
- Fire Rate: 10.000 attacks per/sec
- Range: 300m
How to get the Dethcube and the Dethcube prime:
The blueprint for the base version of the Dethcube can be bought with credits from the Market console aboard your Orbiter. You will only need resources to build the Companion.
The Dethcube Prime on the other hand is farmed by part from opening specific Void Relics in Void Fissure missions. These Relics are:
Carapace, a uncommon drop for:
Axi N7
Lith M6
Lith T4
Lith V9
Meso L1
Meso R3
Neo B7
Neo T2
Systems, a common drop for:
Axi I1
Axi P2
Lith B8
Lith S10
Meso T6
Neo E2
Neo G2
Neo I2
Blueprint, a rare drop for:
Lith D1
Lith D3
Lith D4
Neo D3
Neo D6
Cerebrum, a rare drop for:
Lith D2
Meso D4
Meso D6
Neo A7
Neo D2
You can also trade for the full Dethcube Prime set or the Relics to farm it with other Tenno.
Both versions of the Deth Machine Rifle come pre-installed on their respective Dethcube once claimed from the Foundry.
8. Shade / Shade Prime / Prisma Shade

Good old eye laser!
See Shade in action: Shade Prime

Surprised to see Shade on this list? Well don’t be, you see Shade offers one thing, a very strong thing called invisibility. How does it give you this invisibility? Well, Shade comes with a precept called Ghost, Ghost cloaks Shade’s owner whenever they come within 24m of an enemy and the invisibility only goes away when you attack with any weapon or no enemy is within 24m. Damage from Warframe abilities (while within 24m of an enemy) will not break Ghost’s invisibility. This is incredibly useful survivability as, if the enemy can’t see you they can’t kill you, especially in the Steel Path where there is no shortage of enemies to stay within 24m of.
What Shade excels in:
- Assisting in stealth missions through Ghost’s invisibility.
- Providing good survivability to caster Warframes with Ghost.
- By far the lowest mod investment required as Ghost needs no supplementary bond mods, is cheap to max-out, and just works out the box.
Choose Shade if:
- You are running a particularly squishy and close-range caster Warframe.
- You are going on a stealth mission and don’t have access to invisibility.
- You need some form of survivability in higher levels like the Steel Path.
Shade base stats:
- Health: 600
- Shields: 130
- Armor: 80
Burst Laser base stats
- Impact: 0.7
- Puncture: 6
- Slash: 0.3
- Critical Chance: 2.5%
- Critical Damage: 1.3x
- Status Chance 2%
- Fire Rate: 1.607 attacks per/sec
- Range: 30m (the range of the weapon itself is not listed on the wiki so this data is based on the max rank and range of the Assault Mode precept)
Prisma Shade base stats:
- Health: 700
- Shields: 300
- Armor: 80
Prisma Burst Laser base stats:
- Impact: 1
- Puncture: 8.5
- Slash: 0.5
- Critical Chance: 5%
- Critical Damage: 2x
- Status Chance: 10%
- Fire Rate: 1.607 attacks per/sec
- Range: 30m (again based on the Assault Mode precept)
Shade Prime base stats:
- Health: 700
- Shields: 300
- Armor: 100
Burst Laser Prime base stats:
- Impact: 1.2
- Puncture: 10.2
- Slash 0.6
- Critical Chance: 6.25%
- Critical Damage: 2.35x
- Status Chance: 14%
- Fire Rate: 1.875 attacks per/sec
- Range: 30m (Assault Mode precept)
Where to get Shade and its variants:
The base Shade blueprint can be purchased with credits in the Orbiter Market console.
Prisma Shade can sometimes be sold by Baro Ki’teer when he appears in Relays every two weeks. Baro sells Prisma Shade for 300,000 Credits and 500 Ducats.
Shade Prime can be farmed through opening Void Relics. These Relics are:
Carapace, a rare drop for:
Neo S18
Lith S15
Systems, a uncommon drop for:
Lith A6
Axi B6
Meso P14
Blueprint, a uncommon drop for:
Axi A17
Axi W3
Meso B9
Meso N14
Cerebrum, a common drop for:
Axi G11
Neo W1
Neo F2
Neo N22
Unranked Prisma Shades (with no Catalyst or Forma) and the set and Relics for Shade Prime can be traded for with other Tenno.
Burst Laser and all its variants come with every Shade once claimed or bought.
7. Sly Vulpaphyla

Again with the no-eyes thing? Seriously?
See the Sly Vulpaphyla in action:

Hey Tenno, do you not like getting hit? Do you love casting abilities more than using weapons? And, do you want really short cooldown buffs that essentially act like a passive with really short downtimes? Well then grab a Sly Vulpaphyla, a very consistent defensive Companion that, in my opinion, is severely underrated by the community.
Now, let's take a look at Sly Vulpaphyla’s precepts. Survival Instinct a precept mod that allows the Sly Vulpaphyla to decrease enemy accuracy against its owner by 40% for eight seconds or until their next weapon attack with a cooldown of five seconds. Its second precept is called Sly Devolution, which is similar to Panzer Devolution but, instead of firing out Viral Quills, the Sly Vulpaphyla will debuff enemies’ accuracy by 20% for 8 seconds after every kill before reviving itself from its larval form after 30 seconds.
The true strength of the Sly Vulpaphyla shines when it is paired with caster-type or ability damage focused Warframes, kinda like Shade. Now, I’m gonna quote the previous paragraph “decrease enemy accuracy against its owner by 40% for eight seconds or until their next weapon attack” Survival Instinct, like Shade’s Ghost, is not canceled by ability damage and unlike shade the Sly Vulpaphyla doesn’t require enemies to be within range so Sly’s evasion works better for longer range casters and you still have access to Sly’s evasion through Sly Devolution if it dies, albeit a weaker version.
Sly Vulpaphyla excels in:
- Keeping casters alive through Survival Instinct and Sly Devolution.
- Staying active in the fight even when down with Sly Devolution.
- Offering very reliable survival buffs without having to work around specific ability triggers.
- Surviving even the highest level missions.
Choose the Sly Vulpaphyla if:
- You’re playing a longer range caster that struggles to take advantage of Shade’s Ghost.
- You are going into a high level mission with little option to keep you and your Companion alive.
- You want consistent survivability buffs constantly active on you.
Sly Vulpaphyla Base stats:
- Health: 680
- Shields: 370
- Armor: 300
Total normal attack damage:
- Slash: 80
- Critical Chance: 20%
- Critical Multiplier: 2x
- Status Chance: 7.5%
How to get the Sly Vulpaphyla:
Same method as getting a Panzer Vulpaphyla, just look for a wounded feral Sly Vulpaphyla instead, pick it up and bring it to Son so he can heal and tame it for you.
6. Vasca Kavat

So you’re telling me the VAMPIRE cat isn’t bothered by the SUN!?
See the Vasca Kavat in action:

You find yourself dying a lot, Tenno? Yeah? Want a boost to start punching a little above your Mod level? Well then the Vasca Kavat might be for you! This vampiric cat has a precept mod called Transfusion and it allows the Vasca to instantly revive its owner when they go down with 20% of its own health every two minutes. Vasca also comes with another precept called Draining Bite that deals 400 damage to a single enemy and restores 10% of the Kavats health with a cooldown of only 20 seconds.
Both these Mods synergize pretty well with each other and the self-healing from Draining Bite means that Vasca needs less baby-sitting than other organic pets considering it can heal itself. So, with a tanky enough Vasca Kavat (it can’t revive if it doesn’t have enough health) and a little confidence you will find yourself with a relatively comfortable safety net to keep you out of bleed-out; Maintaining buffs you would otherwise need to re-cast on revive, and protecting you from seeing that mission failed screen too often!
Vasca Kavat excels in:
- Keeping its owner alive through Transfusion.
- Tanking damage with self-healing through Draining Bite.
- Supporting buff heavy builds with Transfusion revives.
Choose the Vasca Kavat if:
- You’re struggling to stay alive in certain missions.
- You’re running a buff heavy build that takes a while to stack back up once buffs are wiped on death.
- You aren’t doing super high level stuff like endurance runs. Though Vasca is fairly Tanky it is by no means invincible and with the insane scaling past level 200 it simply can’t keep up.
Vasca Kavat base stats:
- Health: 310
- Shields: 270
- Armor: 300
Total Normal attack damage:
- Slash: 80
- Critical Chance: 20%
- Critical Multiplier: 2x
- Status Chance: 7.5%
How to get a Vasca Kavat:
First, bring one of your owned non-Vasca Kavats (Vulpaphylas wont work) to the Plains of Eidolon at night and have it bitten by a wild Vasca Kavat. Once your Kavat has been bitten, take it back to your Orbiter and apply a Kavat Template to your infected cat to cure it and get a Vasca Imprint.
Repeat these two steps twice to get two Imprints. Once you have two Vasca Imprints gather the normal requirements for breeding a Kavat (10 Kavat Genetic Codes scanned from wild normal Kavats and an Incubator Power Core) and start breeding your very own Vasca.
5. Smeeta Kavat

I know it looks a bit like a Pug but trust me that's a Smeeta Kavat… It just came out looking like that.
See the Smeeta Kavat in action:
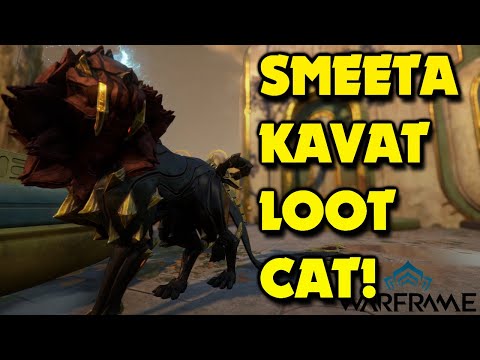
If you like lots of loot, buffs, and maybe also a little gambling then you’re gonna love the Smeeta Kavat. Smeeta is a very special Companion that comes with a very special precept called Charm that bestows one of six overlapping buffs to Smeeta’s owner every 27 seconds. These six buffs are:
Critical Chance Bonus:
Sets the owners Critical Chance to 200% (forced orange crits) for 30 seconds. Can also affect some Warframe abilities.
Energy Refund:
All energy spent by Warframe abilities is refunded for 10 seconds.
Doubled Pickups and Affinity:
Any Pickups and Affinity (exp) are doubled for 120 seconds.
Instant Reload:
Reload instantly once. This buff will never be applied if the Tenno does not have any reloadable weapons equipped, reducing the buff pool by one.
Reinforced Shields:
Gives the owner 150 Overshield and negates the next hit taken.
Rare Resource:
Smeeta will create 1 copy of the rarest resource in the locations drop table for example: Argon Crystals when in the Void.
Many Tenno say Smeeta is the de-facto best Companion in Warframe. Here’s my take: It’s too inconsistent, a one in six or one in five chance for the buff that you actually want (double pick-ups) with a 27 second cooldown between buffs is a gamble no matter how you look at it. Charm takes away too much player control in my opinion and simply is not the best buffing option that the Tenno have.
So is the Smeeta Kavat bad? No it's just not perfect. Every buff has its use, sure you don’t know what buff is coming next but no matter what it is it won’t be objectively bad. This, in my opinion, is Smeeta’s true strength: Versatility and an actually effective option for Companion based loot multiplication (sorry Chesa Kubrow enjoyers). So make sure to take advantage and get a Smeeta fast as Digital Extremes has hinted at a Charm nerf coming with the phase 2 Companion rework coming (allegedly) in 2024.
Smeeta Kavat Excels in:
- The application of various useful buffs with Charm.
- Versatility through Charm being good in basically any mission.
- Loot multiplication, also through Charm.
Choose Smeeta if:
- You’re on a farming run.
- You want orange crits sometimes.
- You want a lot of buffs.
Smeeta Kavat base stats:
- Health: 390
- Shields: 230
- Armor: 300
Total normal attack damage:
- Slash: 80
- Critical Chance: 20%
- Critical Multiplier: 2x
- Status Chance: 7.5%
How to get a Smeeta Kavat:
First, complete the starter quest Howl of the Kubrow to gain access to the Incubator segment. Next, get your hands on a Kavat Incubator Upgrade Segment blueprint, easiest method is buying one from the Clan Dojo (provided your clan already has it researched), it can also drop very rarely from Hyekka Masters, and can also be purchased with Platinum from the Orbiter Market.
Once you’ve installed the Kavat Incubator Upgrade Segment you will need to farm up a couple more resources. First is an Incubator Power Core, this is purchasable as a reusable blueprint from the Orbiter market. After that you will need 10 Kavat Genetic Codes. You can get said Codes by scanning wild Kavats on Deimos missions with either a Synthesis or Codex Scanner.
Now that you have the means to start breeding Kavats you have two options available to get a Smeeta. The first is by continuously breeding Kavats, spending Genetic Codes and Power Cores, for a 50% chance for one to be a Smeeta. The second option you have is to buy two Smeeta Imprints from other Tenno with Platinum either through the in-game trade chat or through Warframe.market, these Smeeta Imprints are listed at 20 Platinum a piece as of April 2024.
4. Adarza Kavat

Imagine the things it can hear with those ears.
See the Adarza Kavat in action:

I know that Tenno love Critical Hits, especially the red ones- I mean it’s just free damage, and Warframe is all about Damage. I also know that Crits are pretty hard to achieve consistently and not every weapon can get Crit Chances high enough for the huge red numbers that Tenno crave. So, what if Crits were easier to get? What if you had an Adarza Kavat?
What do Adarza Kavats have to do with Crits you ask? Well, they come with a precept called Cat’s Eye that gives every ally in 25m a final, additive, 60% Critical Chance bonus (this means the bonus is applied after all Mods and other Crit buffs) for ten seconds with a cooldown of twenty seconds. This is an incredibly consistent Crit buff that is substantial enough to push even the lowest base Crit values to orange or even red Crit territory.
What the Adarza Kavat excels in:
- Crit buffing through Cat’s Eye.
- Semi-decent synergy with certain Bond and Tek Mods.
- Buffing not only Warframes but all allies Crit rate with Cat’s Eye.
Choose Adarza if:
- You’re running a Crit based weapon.
- You want some sort of Crit buff for allies in missions.
- You already have enough survivability buffs and need something that gives damage.
Adarza Kavat base stats:
- Health: 310
- Shields: 230
- Armor: 300
Total normal attack damage:
- Slash: 80
- Critical Chance: 20%
- Critical Multiplier: 2x
- Status Chance: 7.5%
How to get the Adarza Kavat:
Same method overall as getting a Smeeta Kavat, you can either go with the 50/50 incubation or just trade for Adarza Imprints instead of Smeeta Imprints. Adarza Imprints go for 10 Platinum a piece on Warframe.market as of April 2024.
3. Hounds

Go get em boy!
See the Hounds in action:

Bit of a complicated one here so strap in. Notice how I wrote “Hounds” plural for the title? Well, that's because Hounds are a modular companion. They have four total segments, 3 different parts for each segment, and 81 different possible combinations of Hound. Each of these segments determine your Hounds final stats, the precepts that it comes with, and even the Mod Polarities it will have.
I will be listing the different segments and parts later on but here's the one thing you should know. You must have or have had a Gilded Hound with the Hinta Stabilizer in its tail slot, everything else comes down to personal preference. See, the Hinta Stabilizer is important because it gives you a copy of the Hound precept called Synergized Prospectus that, once acquired, can be equipped on any Hound no matter the composition of its parts. This, in my opinion, is the best Hound precept as it lets your Hound fire a seeking ball of electricity that damages any enemy within 10 meters of it, the ball can also ricochet up to seven times- seeking the nearest enemy within 30 meters after every bounce.
So, what’s the big deal? Electric procs aren’t all that useful right? Well, Synergized Prospectus pairs really well with two of the new Bond mods; Namely, Momentous Bond, that adds a random element to your Companion for 30 seconds whenever you kill an Eximus unit, and Manifold Bond, that lets your Companions abilities inflict its equipped weapons status effects and reduces Companion ability cooldown by 3 seconds every time you kill an enemy with more that three unique statuses affecting it.
With one precept and two Bond mods a Synergized Prospectus Hound can, provided you can get consistent Eximus kills, prime whole rooms of enemies with so many different statuses over and over again with just a few casts of Synergized Prospectus, this level of Status spreading is only matched by certain weapons, Warframes themselves, and only one other Companion later on in this list.
Hounds excel in:
- Status spreading through Synergized Prospectus.
- Crowd control through different Audit precepts (listed in stats section).
- Decent survivability through different Denial precepts (also will be listed in stats section).
Choose a Hound if:
- You want an incredibly versatile Companion.
- You need a lot of status spreading.
- You are going into missions that spawn many Eximus units.
Hound base body and weapon stats along with the precepts provided by part:
First, the Model segment. These parts determine the appearance of your Hounds head, the weapon it will have, and will give you a copy of one of the three available Audit precepts:
Bhaira:
- The Bhaira model provides the Null Audit precept that allows the Hound to copy an Eximus unit's abilities for 60 seconds while stripping the copied eximus’ overguard by 50%.
- Bhaira Hounds also come equipped with Lacerten melee weapon.
Lacerten base stats:
Total weapon damage:
- Impact: 76
- Slash 76
- Critical Chance: 10%
- Critical Multiplier: 3x
- Status Chance: 15%
Dorma:
- Dorma Hounds come with the Repo Audit precept that will periodically emit a magnetic pulse that disables any enemy’s ranged weapons within 30 meters.
- Dorma Hounds come with the Batoten melee weapon.
Batoten base stats:
Total weapon damage:
- Impact: 76
- Puncture: 76
- Critical Chance: 10%
- Critical Multiplier: 3x
- Status Chance: 15%
Hec:
- Hec Hounds come with the Equilibrium Audit that releases three shockwaves every 30s that damages and inflicts knockdown on any susceptible enemy within 15m.
- The Hec model also provides the Akaten weapon:
Akaten base stats:
Total weapon damage:
- Puncture: 76
- Slash: 76
- Critical Chance: 10%
- Critical Multiplier: 3x
- Status Chance: 15%
Next we have the Core segment. These parts determine the Hounds torso appearance and base health, shield, and armor stats.
Adlet:
Stats:
- Health: 350
- Armor: 350
- Shields: 450
Garmr:
Stats:
- Health: 350
- Armor: 450
- Shields: 350
Raiju:
Stats:
- Health: 450
- Armor: 350
- Shields: 350
Then we have the Hound's legs. Parts in the Bracket segment give you copies of the Denial precepts and bonuses to the Hounds base stats.
Cela:
- The Cela bracket gives the Reflex Denial precept that generates a shield that reflects 90% of the damage it takes in magnetic pulses for 10 seconds over 12 meters.
Stat bonuses:
- +10% Health
- +15% Shields
- -5% Armor
Urga:
- Urga bracket Hounds come with the Diversified Denial precept that will fabricate 3 specters (clones) of the Hound that will fight for 30 seconds dealing 85% of the Hounds total damage.
Stat bonuses:
- +15% Health
- -5% Shields
- +10% Armor
Zubb:
- Zubb hounds will come with the Evasive Denial precept that will teleport the Hound away from combat while engaging a displacement field that gives it a 75% chance to dodge enemy fire for 8 seconds.
Stat bonuses:
- -5% Health
- +10% Shields
- +15% Armor
Finally we have the Stabilizer segment. These parts will determine the Hounds tail appearance, its Mod polarities, and will give you copies of the different offensive Prospectus precepts.
Frak:
- Frak Hounds will come with the Focused Prospectus precept that fires a beam of heat that deals 900 damage over 9.5 seconds.
- Vazarin polarity (D symbol).
Hinta:
- Hinta Stabilizer Hounds come with the Synergized Prospectus precept as mentioned in my analysis earlier.
- Madurai polarity (V symbol).
Wanz:
- Wanz Hounds come with Aerial Prospectus that allows them to launch a beacon toward any enemy within 27 meters, the beacon will then call down an orbital strike dealing 1200 Blast damage within 7 meters.
- Naramon polarity (dash symbol).
How to craft and Gild your Hound:
Individual Hound segment blueprints will be rewarded randomly whenever you defeat a Sister of Parvos.
Hounds can then be assembled by Legs in Fortuna for 4000 Credits and two Companion slots (for the Hound and its weapon).
After assembly the Hound must be leveled to 30 once, then returned to Legs to be Gilded.
To Gild a Hound you must have a Solaris United rank of at least Doer, have 10 Training Debt-Bonds on hand, and 5000 Standing. After Gilding the hound can be given a custom name and will be reset to level 0. Gilding a hound will unlock its full functionality and award you the mastery points for the Model of the given hound only.
You can also opt to farm for the pre-built Hounds that come from Sisters of Parvos instead of the blueprints for a custom built Hound. These pre-built Hounds will act like an un-gilded Hound and possess the name of their previous owner. Once Gilded there is no difference with these Hounds to the custom built Hounds other than the fact that you cannot choose the parts that make up their segments pre-gilding.
2. Diriga

Ahh the superiority of Grineer engineering… Balloons.
See Diriga in action:

Diriga, the King of Companion status priming! Not even Synergized Prospectus Hounds can achieve the consistency of status spreading that a well built Diriga can provide for you.
You see Tenno, Diriga has a precept mod called Arc Coil that zaps up to 7 enemies within 10 meters for Electric damage with a 10% Status chance. Now hear me out, that doesn’t sound very good right? I mean, a 7 enemy cap and 10% status but, this precept paired with the previously mentioned Manifold and Momentous Bond mods will start relentlessly zapping any enemy that comes close with nearly every status effect present on Diriga’s currently equipped weapon and in the entire game (for the case of Momentous Bond).
Now you might be asking: who even needs this much Status? Simple, Melee users. You see, in Warframe there exists a Mod for melee weapons called Condition Overload that adds 80% melee damage to the target for each Status type currently active on the target, you can then easily achieve +240% damage with just three Statuses on target and keep in mind Condition Overload has no status type limit and Diriga (theoretically) has access to every status effect in the game, doesn’t stray far away from you like Hounds, and depending on the Status effect can even crowd control enemies or kill them outright with Arc Coil alone.
Diriga excels in:
- Very reliable close-range status priming.
- Sticking close to its owner, inadvertently boosting Arc Coil’s effectiveness (seriously, Diriga floats closer to you than the other Sentinels).
- Crowd control and ad-clear through the massive amounts of status effects from Arc Coil.
Choose Diriga if:
- You are running any Condition Overload build or type of effect that takes advantage of status count on enemies.
- You’re an avid melee enjoyer.
- You’re anticipating a staggering amount of enemy density in missions.
Diriga base stats:
- Health: 700
- Shields: 150
- Armor: 80
Vulklok (Diriga’s base weapon) base stats:
- Electric: 85
- Critical Chance: 35%
- Critical Multiplier: 2.5%
- Status Chance: 25%
How to get Diriga:
Buy the Diriga blueprint for Credits from the Orbiter market.
1. Nautilus

Nautilus my beloved!
See Nautilus in action:

Nautilus! Hail to the king baby! The Sentinel that came with the infamous Railjack update has received the most noticeable glow-up out of all the Companions with indirect buffs from the Bond mods introduced in the phase 1 Companion rework. Cordon. Cordon- Cordon-Cordon it’s all about Cordon! This precept is the undisputed star of Companion abilities right now you see, Cordon targets one enemy and then forces all other enemies within 30 meters of the target closer to it (kinda like Mag’s bubble without the bubble) every fifteen seconds.
Now, Cordon didn’t used to be this good,why? Uptime. 15 seconds was too long to wait for most Tenno but, with Manifold bond and out-sourced Status priming Nautilus with Cordon alone starts to rival the crowd control potential of even some Warframes! This is just too good, it helps out weapons making enemies easier to target, certain Warframe abilities that are directional, and is the best Companion based CC available right now.
Nautilus excels in:
- Crowd control through Cordon.
- Grouping with Cordon.
- Possessing the ability to cast Cordon.
Choose Nautilus if:
- You need a reliable form of Grouping in your build.
- You’re expecting huge crowds of enemies and need to control them.
- You frequently find yourself in situations where there are too many crowds of enemies damaging you because they aren’t currently being crowd controlled.
How to get Nautilus:
You can get Nautilus’ parts and blueprint from running the Railjack defense mission in the Arva Vector of the Neptune Proxima.
Nautilus sets can also be traded or a built copy can be purchased with Platinum from the Orbiter market.
You may also be interested in:
Share this Article:

- Log in or register to post comments


![[Top 9] Warframe Best Daggers And How To Get Them (Ranked Good To Best)-01](https://www.gamersdecide.com/sites/default/files/styles/308x185-scale-crop--more-top-stories/public/top_9_warframe_best_daggers_and_how_to_get_them_ranked_good_to_best.jpg "Warframe Daggers Main Photo")
![[Top 20] Warframe Best Melee Weapons Ranked (And How To Get Them)-01](https://www.gamersdecide.com/sites/default/files/styles/308x185-scale-crop--more-top-stories/public/top_20_warframe_best_melee_weapons_ranked_and_how_to_get_them-01.jpg "Warframe Melee Weapons Main Photo")


![[Top 10] Warframe Best AMP Combinations That Are Powerful (Latest Patch Angels of Zariman)-1](https://www.gamersdecide.com/sites/default/files/styles/308x185-scale-crop--more-top-stories/public/top_10_warframe_best_amp_combinations_that_are_powerful_latest_patch_angels_of_zariman-1.jpg "Unleash your wrath with a Kamehameh- uh I mean, a rasenga- no, with AMPS! (I swear it’s not the same)")


![[Top 5] Warframe Best Fishing Spears That Are Excellent (Latest Patch Echoes Of The Zariman)-1](https://www.gamersdecide.com/sites/default/files/styles/308x185-scale-crop--more-top-stories/public/top_5_warframe_best_fishing_spears_that_are_excellent_latest_patch_echoes_of_the_zariman.jpg "Warframe Fishing Spears Main Photo")
![[Top 12] Warframe Best Tenet Weapons Ranked (And How To Get Them)-01](https://www.gamersdecide.com/sites/default/files/styles/308x185-scale-crop--more-top-stories/public/top_12_warframe_best_tenet_weapons_ranked_and_how_to_get_them-01.jpg "Warframe Tenet Weapons Main Photo")


![[Top 10] Warframe Best Secondary Weapons That Are Powerful (Latest Patch Angels of Zariman) And How To Get Them-01](https://www.gamersdecide.com/sites/default/files/styles/308x185-scale-crop--more-top-stories/public/top_10_warframe_best_secondary_weapons_that_are_powerful_latest_patch_angels_of_zariman_and_how_to_get_them-01.jpg "Secondary Weapon Master: Mesa")


![[Top 15] Warframe Best Primary Weapons That Are Powerful (Latest Patch Echoes Of The Zariman)-01](https://www.gamersdecide.com/sites/default/files/styles/308x185-scale-crop--more-top-stories/public/top_15_warframe_best_primary_weapons_that_are_powerful_latest_patch_echoes_of_the_zariman-01.jpg "Warframe Primary Weapons Main Pic")
![[Top 5] Warframe Best Incarnon Weapons Ranked (And How To Get Them)-1](https://www.gamersdecide.com/sites/default/files/styles/308x185-scale-crop--more-top-stories/public/top_5_warframe_best_incarnon_weapons_ranked_and_how_to_get_them-1.jpg "Warframe Incarnon Weapons Main Photo")


![[Top 3] Warframe Excavation Mission Tiers (Latest Patch Echoes Of The Zariman)-1](https://www.gamersdecide.com/sites/default/files/styles/308x185-scale-crop--more-top-stories/public/top_3_warframe_excavation_mission_tiers_latest_patch_echoes_of_the_zariman-1.png "Warframe Excavation Tiers Main Photo")
![[Top 10] Warframe Best Index Weapons Ranked (And How To Get Them)-01](https://www.gamersdecide.com/sites/default/files/styles/308x185-scale-crop--more-top-stories/public/top_10_warframe_best_index_weapons_ranked_and_how_to_get_them-01.jpg "Warframe Index Weapons Main Photo")


![[Top 10] Warframe Best Heavy Blades That Are Powerful (Latest Patch Angels of Zariman) And How To Get Them - 1](https://www.gamersdecide.com/sites/default/files/styles/308x185-scale-crop--more-top-stories/public/top_10_warframe_best_heavy_blades_that_are_powerful_latest_patch_angels_of_zariman_and_how_to_get_them_-_1.jpg "The bigger your weapon, the harder you’ll make your enemies fall.")
