Home
Home PC Game Trailers
 News
News Menu
Menu[Top 5] FF16 Best Builds That Are Powerful
Updated: 04 Jan 2024 6:24 pm

An example of what a build should be like.
 BY: Danish Bin Sattar
With Seven Eikons to choose and mix your combos, abilities, and stratagem, it would make sense for a specific build to be tailored to one’s gameplay style or preference.
The great thing is that there are both Offensive Builds and Defensive Builds for this game so that you can customize your playstyle according to your needs! Oh, and there are Early-Game as well as Late-Game Builds built as we
That being said, let’s start today’s article with the Best Builds that you can have in-game! Remember that you need to have unlocked at least three Eikons to have a proper build.
5. Phoenix + Garuda + Titan Build
 The first three Eikons that you unlock.
Alright, first up, we have the Phoenix + Garuda + Titan Build or, as I would like to call it, “The Early Game Build” since these three Eikons are the first ones that you get in accordance with your first playthrough.
With this build, you mostly get high mobility and many Area of Effect (or AoE for short) attacks that can be quite damaging for enemies within your radius. We’ll start with Phoenix first and have Ifrit’s abilities, “Ignition” and “Will O’ The Wykes”, equipped with them.
What you’ll get with this combo specifically is multiple damage and mobility within your battle radius as the “Phoenix Shift” Ability combined with the former two abilities makes you a literal tank.
Coming to Garuda with “Aerial Blast” and “Lightning Rod” Abilities present in your slot, you can even use the “Deadly Embrace” Eikon Feat of Garuda to bring down enemies when their “Stagger” meter reaches the halfway point.
And with Titan on your arsenal, you can land punishing counters and unleash parries via “Raging Fists” followed by the “Judgment Bolt” ability for immense damage. If you don’t have Ramuh unlocked OR require too many Ability Points, you can use Titan’s “Windup” Ability in its replacement.
Why the Phoenix + Garuda + Titan build is powerful:
- Powerful Area of Effect (AoE) Attacks deal with massive health damage.
- Lightning Rod helps to amplify already enormous damage output.
- Aerial Blast and Judgment Bolt (if equipped and mastered) delivers massive Stagger damage.
- Will O’ The Wykes not only delivers damage but also absorbs oncoming enemy attacks.
- Phoenix Shift closes in the gaps between the enemy and Clive.
- Titanic Block helps to Block and deliver three counterattacks as well.
- If appropriately timed, Raging Fists can parry enemy attacks and deliver a flurry of punches.
- Windup (if equipped) can pummel enemies to the ground.
- Deadly Embrace can bring down enemies once the Stagger meter reaches the halfway point, providing an opening for multiple attacks.
Use this build if you like:
- To stay on the offensive while delivering massive damage.
- To close in on enemies and finish them off quickly.
- Effective crowd control of hordes of enemies.
4. Bahamut + Shiva + Odin Build
 Bahamut, Shiva, and a bit of Odin’s Skill Tree.
Now comes the “Bahamut + Shiva + Odin” Build, or as I would like to call it, “The Late Game Build,” since you get these three Eikons near the end of the game on your first playthrough. Their shining moments come once you start New Game +.
With this build, you get a decent amount of mobility, but it’s all about filling the “Zantestsuken” gauge to its fullest, so you need to make sure you’ve “Mastered” the “Arm of Darkness” Eikon Feat of Odin to make sure it reaches Level 5, which will provide MASSIVE stagger damage as well as health damage.
And as part of my stratagem, use either the “Upgraded” or “Mastered” versions of Heaven’s Cloud and Dancing Steel and equip them with Odin to build up that meter quickly and use “Zantestsuken” repeatedly.
For Shiva, her “Cold Snap” Eikon Feat must be “Mastered” along with the amazing AoE Attack “Diamond Dust” and equip this along with Ramuh’s “Lightning Rod” ability for delivering that maximum damage.
For Bahamut, equip the “Mastered” versions of “Impulse” and “Gigaflare” on the Bahamut slots, and be sure to upgrade the “Wings of Light” Eikon Feat to be able to use Level 4 Megaflare. Once that’s set and done, you’ll be good to go.
Why the Bahamut + Shiva + Odin build is powerful:
- Powerful Area of Effect (AoE) Attacks deal with massive health damage.
- Lightning Rod helps to amplify already enormous damage output.
- Odin’s Zantetsuken eviscerates enemies with one strike once its charge meter is built up.
- Shiva’s Cold Snap freezes enemies in place and stops the Stagger meter regeneration in time.
- Diamond Dust also increases the damage multiplier and delivers a very powerful AoE attack.
- Gigaflare melts down enemy health bars and is pretty useful for massive destruction.
- Impulse can hit multiple enemies while Clive performs basic combos to drain the Stagger bar of enemies completely.
Use this build if you like:
- To play defensive, maintaining the gap between you and your opponent.
- To close in on enemies and finish them off quickly.
- Effective crowd control of hordes of enemies.
- Complete decimation of a large boss in an arena.
- To have complete mobility during combat.
3. Garuda + Titan + Shiva Build
 The complete Eikon Skill Tree.
Now comes the Post-Game Builds because you’ll be able to mix and match many Eikons and their abilities and Eikon Feats. Just like this build right here!
Start with Garuda and equip Ramuh’s “Lightning Rod” and Ifrit’s “Will O’ The Wykes” in the slots first. They cost relatively fewer Ability Points to Master than other Eikon Abilities. With Garuda’s “Deadly Embrace,” you can bring down enemies when their Stagger meter reaches the halfway point.
When it comes to Titan, go with the usual “Raging Fists” and “Windup” abilities and play defensive with the enemies.
Place Shiva’s “Diamond Dust” and Bahamut’s “Gigaflare” in the Shiva Eikon Slots and let “Cold Snap” do the magic in combat.
Why the Garuda + Titan + Shiva build is powerful:
- Powerful Area of Effect (AoE) Attacks deal with massive health damage.
- Lightning Rod helps to amplify already enormous damage output.
- Odin’s Zantetsuken eviscerates enemies with one strike once its charge meter is built up.
- Shiva’s Cold Snap freezes enemies in place and stops the Stagger meter regeneration in time.
- Diamond Dust also increases the damage multiplier and delivers a very powerful AoE attack.
- Gigaflare melts down enemy health bars and is pretty useful for massive destruction.
- Titanic Block helps to Block and deliver three counterattacks as well.
- If timed properly, Raging Fists can parry enemy attacks and deliver a flurry of punches.
- Windup can pummel enemies to the ground.
- Deadly Embrace can bring down enemies once the Stagger meter reaches the halfway point, providing an opening for multiple attacks.
Use this build if you like:
- To stay on the offensive while delivering massive damage.
- To play defensive, maintaining the gap between you and your opponent.
- To close in on enemies and finish them off quickly.
- Effective crowd control of hordes of enemies.
- Complete decimation of a large boss in an arena.
- To have complete mobility during combat.
2. Bahamut + Titan + Odin Build
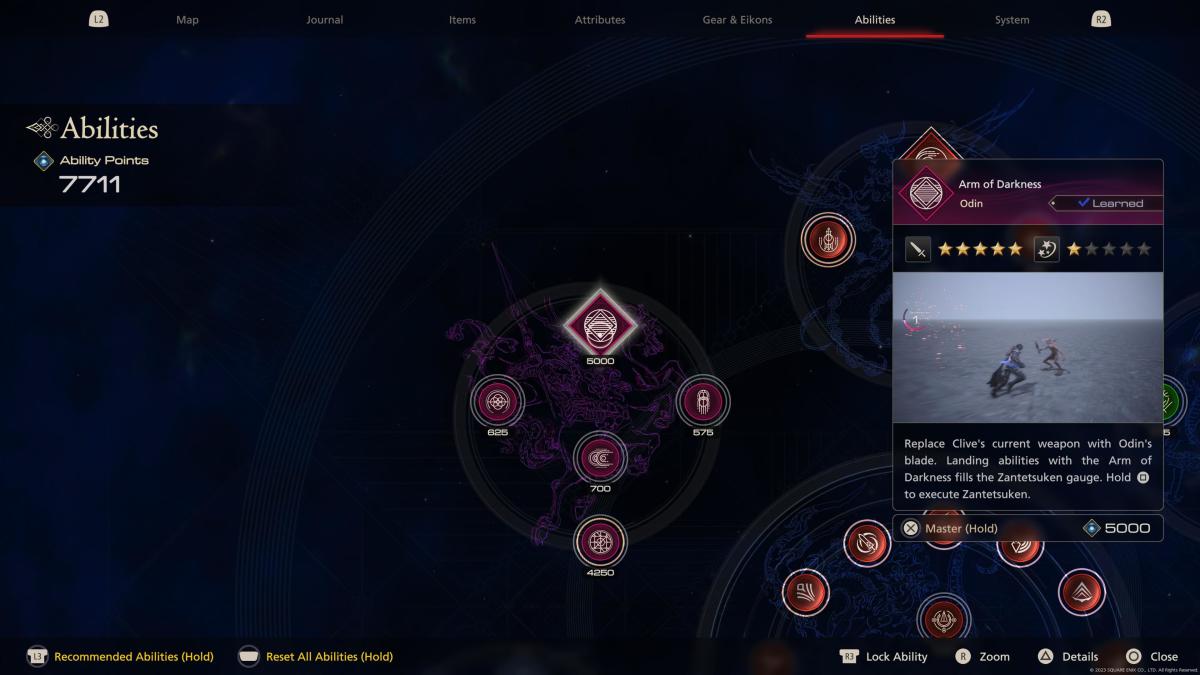 Odin’s Skill Tree
If you want massive and continuous Stagger damage towards enemies, then this Eikon combo is perfect for you.
With Bahamut, go with the good old “Impulse” and “Gigaflare” to decimate those enemies and use “Wings of Light” in between to use “Megaflare.” Make sure all of them are “Mastered,” at least.
The same combination with Titan, “Raging Fist,” and “Windup” are your best friends, and with “Titanic Block”, you can launch counter-attacks against oncoming enemies.
In Odin’s case, it is necessary to have “Mastered” the “Arm of Darkness” Eikon Feat for Level 5 “Zantetsuken” as well as the “Dancing Steel” ability to charge up that Zantetsuken gauge. Put on “Diamond Dust” as well for massive AoE damage as well as a Stagger attack multiplier.
Why the Bahamut + Titan + Odin build is powerful:
- Powerful Area of Effect (AoE) Attacks deal with massive health damage.
- Odin’s Zantetsuken eviscerates enemies with one strike once its charge meter is built up.
- Diamond Dust also increases the stagger multiplier and delivers a very powerful AoE attack.
- Gigaflare melts down enemy health bars and is pretty useful for massive destruction.
- Titanic Block helps to Block and deliver three counterattacks as well.
- If timed properly, Raging Fists can parry enemy attacks and deliver a flurry of punches.
- Windup can pummel enemies to the ground.
- Dancing Steel rapidly charges the Zantetsuken meter while delivering massive damage to enemies.
Use this build if you like:
- To stay on the offensive while delivering massive damage.
- To play defensive, maintaining the gap between you and your opponent.
- To close in on enemies and finish them off quickly.
- Effective crowd control of hordes of enemies.
- Complete decimation of a large boss in an arena.
1. Garuda + Titan + Bahamut Build

Bahamut Skill Tree.
This build is probably the least expensive in terms of Ability Points and the most damage-delivering build in-game.
Start with Garuda and place her “Gouge” ability and Ramuh’s “Lightning Rod” ability in the slot right there. The “Deadly Embrace” ability will help you bring town towering enemies down once the Stagger bar reaches the halfway point.
The same setup with Titan goes here as well with “Raging Fists” and “Windup,” allowing you to play defensive while launching counters with “Titanic Block.”
Slight change in Bahamut’s slots, though; you should have “Gigaflare” maxed out and place “Diamond Dust” in this Eikon slot as well to deliver massive Stagger damage. If you have this setup equipped, you’ll be decimating enemies in no time.
Why the Garuda + Titan + Bahamut build is powerful:
- Diamond Dust also increases the damage multiplier and delivers a very powerful AoE attack.
- Gigaflare melts down enemy health bars and is pretty useful for massive destruction.
- Titanic Block helps to Block and deliver three counterattacks as well.
- If timed properly, Raging Fists can parry enemy attacks and deliver a flurry of punches.
- Windup can pummel enemies to the ground.
- Deadly Embrace can bring down enemies once the Stagger meter reaches the halfway point, providing an opening for multiple attacks.
- Powerful Area of Effect (AoE) Attacks deal with massive health damage.
- Lightning Rod helps to amplify already enormous damage output.
- Gouge can help trap enemies in its attack range.
Use this build if you like:
- To stay on the offensive while delivering massive damage.
- To play defensive, maintaining the gap between you and your opponent.
- To close in on enemies and finish them off quickly.
- Effective crowd control of hordes of enemies.
- Complete decimation of a large boss in an arena.
And that’s about it with the best builds! I really hope this helped! One thing to note: you need to have abilities “Mastered” to be able to swap different Eikon Abilities on different slots, and if you think you don’t have enough points, you can always reset your Ability Points and place them in the abilities you want to actually use to be able to master them.
You may also be interested in:
Share this Article:

- Log in or register to post comments