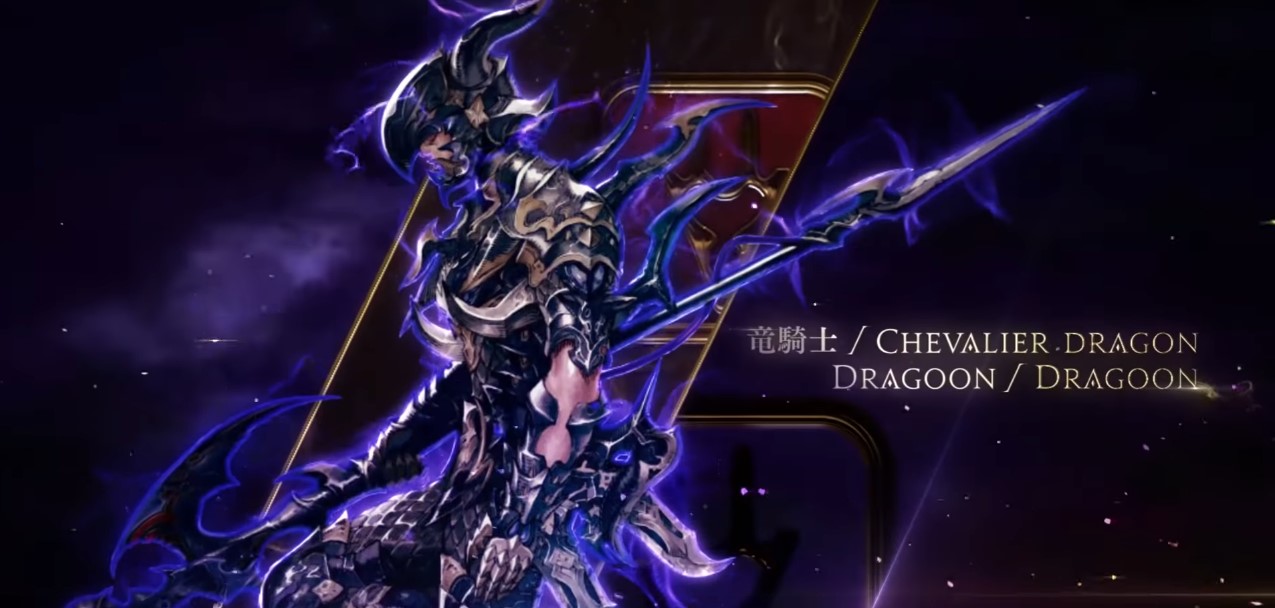
Flying high and slaying dragons, the Dragoon job in FFXIV is regarded as one of the most fun jobs in the game. But how does one Dragoon? How does one avoid the “floor tank” nickname? Well, I’m here to help. This guide will be focusing on the level 80 rotation and tips for the Dragoon. This will also help newer players understand how they should build out their hot bar for future skills and such
Single Target Rotation
So to start I’ll focus solely on the single target rotation for the dragoon.
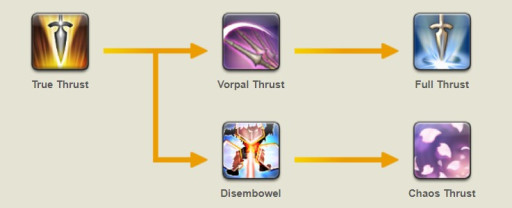
So you’ll want to mostly use the Disembowel into chaos thrust to open as they both apply debuffs to enemies. If you have the Blood of the dragoon gauge up it will also add two additional skills at the end of each combo
- Fang and Claw- Delivers an attack with a potency of 320.360 when executed from a target's flank. Can only be executed while under the effects of Sharper Fang and Claw and either Blood of the Dragon or Life of the Dragon.Additional Effect: Extends Blood of the Dragon duration by 10s to a maximum of 30s
This can only be executed after the Full thrust variation.
- Wheeling thrust-Delivers an attack with a potency of 320.360 when executed from a target's rear. Can only be executed while under the effects of Enhanced Wheeling Thrust and either Blood of the Dragon or Life of the Dragon.Additional Effect: Extends Blood of the Dragon duration by 10s to a maximum of 30s
You can also execute Fang and Claw and Wheeling thrust one after the other after level 64. If you adhere to directional requirements you will also be Raiden Thrust Ready.
- Raiden Thrust-Delivers an attack with a potency of 330. Can only be executed when Raiden Thrust Ready.
This is an upgraded version of True Thrust so you this won’t be assigned to your Hotbar.
So to break it down the rotation will go something like
True Thrust-> Disembowel->Chaos Thrust-> Wheeling Thrust->Fang and Claw-> Raiden Thrust
True Thrust-> Vorpal Thrust->Full Thrust-> Fang and Claw->Wheeling Thrust-> Raiden Thrust
It might seem daunting at first glance but it’s fairly simple after a little practice and if you’re leveling up the skills come together in an understandable fashion.
AOE Rotation
The Aoe Rotation is pretty simple. It’s just 3 skills that combo into one another.

This rotation also extends your Dragon gauge as well.
Jumps and Dives
So jumps and dives are the main draws of dragoons, you fly high and bring your spear crashing down on whatever poor enemies you happen to be targeting. There are currently 3 jumps in the dragoon’s arsenal. I’ll break down what they do and how they differ.
- Jump-Delivers a jumping attack with a potency of 310. Returns you to your original position after the attack is made. Additional Effect: Grants Dive Ready. Duration: 15s
This is the basic jump that the dragoon uses. It’s on a 30s cooldown and grants you dive ready bonus which allows you to use mirage Dive. It upgrades to High Jump at 74.
- Mirage Dive-Delivers an attack with a potency of 300.Additional Effect: Strengthens the gaze of your Dragon Gauge by 1 if under the effect of Blood of the Dragon or Life of the Dragon.Can only be executed when Dive Ready.
This is used immediately after Jump if you have Blood of the Dragoon up. This also strengthens the gaze of the brood on your Blood of the dragon gauge which we will cover later in the article.
- Elusive Jump-Executes a jump to a location 15 yalms behind you.
This allows you to escape some AOEs but I’d be careful using this skill. It’s on a 90s cooldown. You can easily backflip off ledges and to your death. I wouldn’t use it unless you are sure of your footing.
- Spineshatter Dive-Delivers a jumping attack with a potency of 240. Cannot be executed while bound
This is just a straight-up damage dive on a 60s cooldown. I’d recommend using this whenever you have your gauge up.
- Dragonfire Dive-Delivers a jumping fire-based attack with a potency of 380 to target and all enemies nearby it.
This is a great AOE attack that does a great amount of damage to enemies. It’s on a 120s so you can’t use too much.
Gauge
So the Blood of the dragon gauge is the Dragoon’s action gauge. It strengthens the effectiveness of the jumps and dives.

If you get your gaze up to two and use Gersikoul it switches to a crimson and becomes the life of the dragon gauge.
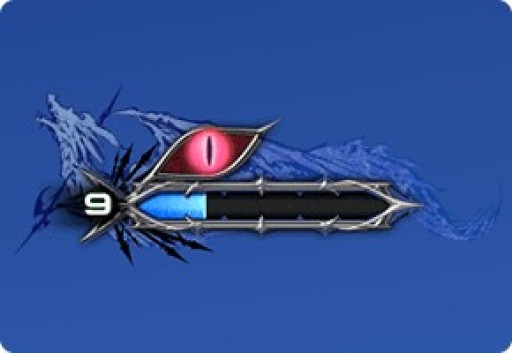
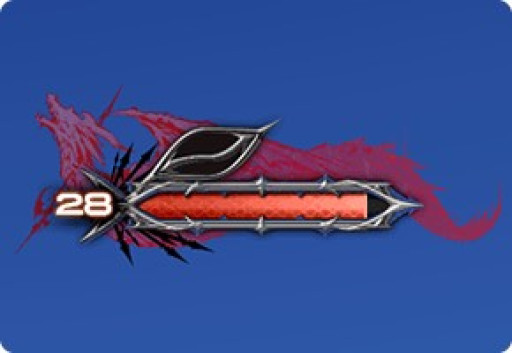
While using Life of the dragon you can execute both Stardiver and Nastrond.
- Stardiver-Delivers a jumping fire-based attack to target and all enemies nearby it with a potency of 600 for the first enemy, and 30% less for all remaining enemies
Use this skill when possible, it deals high damage and only has a 30s cooldown.
Other Skills
- Life surge-Ensures critical damage for the first weaponskill used while Life Surge is active. Duration: 5s. Effect cannot be applied to damage over time. Additional Effect: Absorbs a portion of damage dealt as HP
Life surge is best used when weaving before a high damage skill but it’s not absolutely necessary in my opinion. It has a cooldown of 45s as well. It can heal as well providing it some more utility.
- Piercing talon-Delivers a ranged attack with a potency of 150.
Despite being the Dragoon’s only ranged attack this skill is nigh useless. It’s useful in single-player content when you need to draw some aggro but that’s pretty much it.
- Lance Charge-Increases damage dealt by 15%. Duration: 20s
This skill was revamped from the previous Blood for Blood skill which has provided it with some more utility with fewer drawbacks. It now only increases damage rather than debuffing the user as well. I’d recommend using this with your rotation
- Battle Litany-Increases critical hit rate of self and nearby party members by 10%. Duration: 20s
This skill is great to use at the start of a boss fight. Just throw it out quickly right before everyone charges in. It’s on a longer cooldown of 180s so you won’t be able to throw it out that often.
- Geirskogul-delivers an attack with a potency of 300 to all enemies in a straight line before you. Can only be executed while under the effect of Blood of the Dragon. Additional Effect: Changes Blood of the Dragon to Life of the Dragon while under the full gaze of the first brood. Action changes to Nastrond while under the effect of Life of the Dragon.
This is the skill that transitions the Blood of the Dragon gauge to the life of the Dragon gauge. I’d recommend using it only when you have to do so as it has a cooldown of 30s. Once the gaze is full use Geirskogul.
- Dragon Sight-Grants Right Eye to self, increasing damage dealt by 10%. Also grants target party member Left Eye, increasing damage dealt by 5% as long as target remains within 12 yalms.Duration: 20s
You can use this skill to buff one other player. I’d recommend using it on another melee DPS if there is one in the party as there is a maximum distance of 12 yalms (yards). If there isn’t one, I’d recommend giving it to the tank (the off-tank if you’re in 8 man content).
Role Actions
- Second Wind- Instantly restores own HP. Cure Potency: 500
This skill is really only useful in single-player content since most of the time there will be a healer(still don’t eat damage, they aren’t there to only babysit you) but it is helpful in a pinch when you need some quick heals and the healers are busy. It’s on a 120s cooldown however so you can’t rely on it.
- Leg Sweep- Stuns target. Duration: 3s
This skill is mildly useful at best. It can help in large mob pulls but mostly is used for stunning and running away if you accidentally pull something in the world. It’s on a 40s cooldown as well. Most of the time, you’ll want to focus on making sure you’re doing damage.
- Bloodbath- Converts a portion of physical damage dealt into HP. Duration: 20s
This skill can be useful in a pinch as well. You’ll want to use it when you don’t have Second wind up and need a quick pick me up. It’s great for more single-player content. It’s on a 90s cooldown so it doesn’t take as long as Second Wind
- Feint-Lowers target's strength and dexterity by 10%. Duration: 10s
This can help in certain situations. If you’re in between rotations or are just waiting for a certain skill to be off cooldown you can use this so you’re still contributing in some way. It’s on a 90s cooldown so you can’t throw it out all time but it’s not bad by any means.
- Arm’s Length-Creates a barrier nullifying most knockback and draw-in effects. Duration: 6s. Additional Effect: Slow +20% when the barrier is struck. Duration: 15s
So while being the exact same skill that tanks have this is less useful because the barrier has to be struck in order for it to apply the slow effect and ideally your tank is being hit not you. It can provide utility if you are unsure of your footing or are in single-player content without a tank. It’s one the same cooldown at 120s.
- True North- Nullifies all-action direction requirements. Duration: 10s. Maximum Charges: 2
This is useful if for some reason you have trouble hitting positions. Maybe the boss is really big and doesn’t hang out on the arena (Looking at you Eden Leviathan) or there are a ton of AOEs being cast. Whatever the case you can use this in a quick pinch to make sure that you still Raiden Thrust up. After 2 uses, it’s on a 45s cooldown so not terribly long. Ideally, you want to hit position requirements but it doesn’t always work out that way.
Bringing it all together
So it may seem like a lot but it’s fairly simple once you get the hang of it. Your goal as a dragoon is to make sure you’re doing lots of damage so that means using things like Stardiver and Nastrond when you get the chance. The rotation I like to use on bosses is
Blood of the Dragon (You should already have this on)-> Single target rotation-> Jump->Mirage Dive-> Single target rotation on repeat ->Jump->Mirage Dive->Geirskogul-> Stardiver-> Nastrond-> Single target Rotation
Try to keep Life of the Dragon up as much as you can and remember to use your other skills while waiting for Jump to come off of cooldown. Use battle Litany and Dragonsight when possible.
For groups of enemies, I like to use
Blood of the Dragon-> Jump->Mirage Dive-> AOE rotation on repeat while weaving Spineshatter and Dragonfire in there->Jump->Mirage Dive->Geirskogul-> Stardiver-> Nastrond-> AOE Rotation
General tips
Mind your footing! Especially when using skills like Elusive jump. It is very easy to backflip off the edge of the arena.
Healers are not your babysitters. A healer’s job is to heal but they should not be healing or reviving you constantly. They need to make sure that the tank has a decent amount of health while making sure the other DPS players are up as well. Move out of the way if need be. If they have to choose between you or the tank they will pick the tank.
Move out of AOES. This one seems self-explanatory yet I see some people not moving when an AOE happens. You do not need to be in there and dragoons are fairly mobile anyways. You have nothing to gain by standing in one.
Do not purposely pull mobs. Mistakes happen, sometimes you pull too much enmity. In this case, run towards your tank so they can pull it off of you. If you go around pulling enmity on purpose your tank will not be happy with you.
The Dragoon is a fun and enjoyable DPS job to play. It has a fantastic DPS output and some really fun skills. It’s also the canon class in Heavensward so there is some extra story dialogue.
You may also be interested in:

