 Home
Home PC Game Trailers
 News
News Menu
MenuSims 4: How To Build An Amazing House (25 Tips for Players)
Updated: 08 May 2024 8:11 pm
")
Why do you build me up buttercup?
 BY: Stacie L.
Building in The Sims 4 is a rewarding and loved pastime, with many Simmers spending hours creating homes to put up on the Marketplace for others to use and enjoy. Seeing all those fantastic houses made by others can sometimes lead a player to try their hand at building a cozy home for their Sim family. These 25 tips and tricks will help you build a beautiful home from scratch that you can proudly share with others.
1. Pick The Best Lot

Location, location, location.
To build a fantastic house in The Sims 4, you first need a plot. The game gives you many different plots of different sizes, so you have many choices. When choosing the perfect plot, knowing what size house you want to build and how much of a yard you want your Sims to have is vital.
Starting on a medium-sized lot gives you plenty of room to make a nice build and has some room for landscaping. Smaller lots are suitable for single-bedroom builds or tiny houses that dont take up much space, but a family home with more than two bedrooms will fit nicely on a medium-sized lot.
It all comes down to the size of the build. If the house takes up two-thirds of the lot, that is the sweet spot. This gives you the space to build a beautiful home and the ability to landscape and tie the build together with trees, outdoor furnishings, and activities.
2. Plan Your Layout

Measure twice, cut once.
After you have chosen your plot, the next step in building a fantastic house in The Sims 4 is to plan out the layout based on your needs and the needs of your Sims. How many bedrooms does your family need? Do you want a large front foyer, or does the front door open in the living room? How many floors do you want? Planning is essential to achieving the build you want.
When building a house for a family, you need to plan for many factors. Start small with your builds; as you get more comfortable building in The Sims 4, you can make more significant and more complicated layouts. Most of the time, a smaller room is better than a giant one full of free space that you now need to fill with furniture.
Look up different housing layouts to get a good idea for your build. Using real-life floor plans can help you gain essential insight into the form and function of each room. Don't be afraid to copy layouts until you are confident enough to make one yourself; imitation is a great way to learn! There are many sources of inspiration, from tiny homes to full-blown mansions.
3. Create A Shell

Shape it the way you like.
Using a reference house, start by placing the outside walls, creating a shell that will be the overall shape of the house. It can be daunting to start a build, so just take the largest area in your chosen floor plan and build off of that. Don't worry about the individual rooms first, which will come later.
Focusing on getting the right proportions can help a shell come together. It's important to remember that The Sims 4 runs on a grid system, so sometimes the layout you've chosen for reference might need to be tweaked to translate correctly into the game. Trust yourself, and don't get discouraged if the shell doesn't come out perfectly; that's okay!
When building the shell, use different-sized boxes to achieve the desired look. When placing the boxes, go from the largest to the smallest, making it easier to see the whole picture immediately. This way, you can add to the structure as you see fit, adjusting here and there to make the shell look exactly how you want. Feel free to add your own details or features; it's your house, after all.
4. Terrain Tools

Making a mountain out of a molehill.
You can customize the lot you are working with. One option is changing the terrain around the build itself. You can make ponds, put your home on a hill, and change the color of the grass—anything you can think of. Terrain tools can be tricky initially, but you can do some simple things to make your build look more realistic.
Making a pond is easy; it just takes a few clicks. First, choose the Lower Terrain option and make a divot in the area you want to have a pond. Make it manageable and start off using the smallest brush to have more control over the changes. After that, choose the Raise Water or Fill to Height option and click on the hole you made. It should make water appear, and you will have a lovely pond. You can also use this same tip to make a moat around the build if you want to.
Once you have the home figured out, you can use the terrain painting feature to add dirt to the outside edge of the house. This adds more realism to the build, as the terrain around a home is usually not grass straight up to the walls. Doing the same around trees and bushes can add even more to the build. Finish the house with a nice little path painted to the front door using the terrain painting tool. Sure, you could use flooring to add a path, but the terrain painting tool can provide an alternative to just flooring.
5. Placing A Roof

Nothing better than a roof over one's head.
Roofing can be a nightmare, especially for a newbie builder, as it often comes out weird and clunky. A roof can make or break a house's look and frequently brings a build together. These simple tips will help you become a pro in no time.
You can't go wrong with a simple gabled roof. This triangular-shaped roof is straightforward and clean and can be used in many ways to give dimension to the build. It is also a good idea to keep the roofs facing the same way at the same angle, allowing the build to come together and look more streamlined. Angles are everything for roofing, so make sure the different parts measure up.
As with the other tips, start with the larger area in your house and work your way in. Once you have covered the most significant portion of the house, look at the remaining shapes that make up the shell. Play around with different roofing tools to achieve the look you want, changing the height or size of the roofing or rotating the roof 90 degrees to see it from a different angle.
6. Planning Out Rooms

Country style or modern?
Now that you have a beautiful shell, it's time to enter the house and section off different rooms. Every home needs at least one bedroom, one bathroom, a kitchen, and a living room, but your family's needs will constitute how many of each room you need and any other types of rooms depending on your Sim's needs.
Trying to fit all the rooms you need to build into the empty shell can be daunting, but once you get the hang of it, the rooms will practically make themselves. Start with the bigger rooms first and work your way down. Don't be afraid of diagonal walls; they can add character and charm to rooms, as well as tiny cubbies that you can fill with clutter later on to customize your Sim's home.
When placing down walls and sectioning off rooms, make sure to take into account the flow of the house. Flow will enhance your gameplay and make it easier for sims to get their needs met. Here is a great chance to use your reference, as architects often take flow into account when making the layouts of homes.
7. Use Furniture For Reference

How does this look?
If you need help with the sizes of your rooms, place some furniture down to see how it fits in the area you've created. This will help you know how the room will look when it is furnished and give you an idea of the best layout in the initial stages of your build.
Put down cheap furniture, to begin with, and do not worry too much about the actual pieces you will use for the proper build. These pieces are only used to help space out your rooms; thus, you only need to take up the space required to get an idea of how the room will be organized.
Feel free to rearrange the walls to make the room work as you want. Little nooks can be good places to place things like desks or a bookshelf. Don't be afraid to leave little bump-outs to add charm and personality to your build.
8. Placing Windows

Windows are the... Eyes of the house?
Windows can look awkward, especially if you place them in accordance with the rooms they are in. There are also so many windows to choose from. How do you pick a style, and how do you make it look good aesthetically?
This is where your reference comes in handy. Look at the building and the types of windows it uses. Find some that match or are similar enough and try them out. The best thing about building in The Sims 4 is that you are not limited in your options. Want a big bay window? Use several windows together to make a unique and custom appearance.
Ensure each window is the same height as the others; if you accidentally have one window lower than the others, the whole house can look off. Try out different options; you don't have to have the same window for each room. Looking at real houses, you will see that the windows vary even in the same building.
9. Deciphering Doors

Love is an open door.
Doors are simple, but, as with windows, there are many to choose from, even with just base game. The most important door you will place is the front door of your house. This is the first impression of your Sim's home and can be quite the statement piece. Does your Sim have a quirky, solid wood door, or is it a windowed door that offers a glimpse into the Sims' lives?
When placing doors inside the house, make sure to have bb.moveobjects on so you can put doors anywhere. Make sure to consider the house's flow when placing down doors; you dont want to have a room you can only get to by going through every room in the house.
A good rule of thumb is to have a central room that can easily reach the main bedrooms and the kitchen. Having a bathroom ensuite or even a closet is okay, but you dont want too many doors going into a bedroom. Try placing archways in your home as well. An archway into the kitchen or living room can open up a house and bring a homey touch to even the smallest builds.
10. Outdoor Lighting

Bright as the sun.
Depending on your build, you may have a substantial outside area to work with. With a lot of room comes a need for lighting. Lighting is important to pull a design together and keep an eye on those pesky Sims while they barbeque or swim. Having ample lighting can enhance the gameplay.
Placing a wall sconce by the door can be an inviting addition to the outside of your house, illuminating the main entrance and welcoming others into the home. Along the same lines, some glow in the hedges or inside the pool can create a relaxing ambiance and make the space more dynamic.
Spicing up your outdoor areas with little hanging lights or a firepit can also give Sims new ways to interact with their surroundings. Sims can roast marshmallows or hotdogs on a firepit or have conversations around a campfire. Try different lighting colors and intensities to create the perfect mood for your space.
11. Porches

Nothing quite like front porch sittin'.
Perhaps you dream of a home with a wrap-around porch or a balcony over the main entrance. Porches and fences to dress them up can bring interest and function to a building. Many houses have at least a raised entryway to make it more inviting.
When placing a porch, take a few seconds to raise the foundation a few clicks. This will add realism, as most houses have a foundation they are built on and can make a porch look much more realistic. After you have raised the foundation a bit, make sure to add stairs and columns. If it looks nice, add a nice fence at the edge of the porch to bring it all together.
When placing a porch, consider what you want the sims to be able to do with this space. Is it a small porch with only enough room for a few people or a large plantation-style porch with a chessboard and a row of rocking chairs? This will help you figure out the best proportions for your porch.
12. Columns

Be like the Romans!
Have you finished the outside of the house, but it's still wanting? Add a few columns or trims to the building! Columns can be placed on the corners of the house at different intervals to make a unique and put-together look for the outside of a home.
Columns can be added to patios to bring the whole build together, almost like the bow on a present. They can take a plain-looking build and add class, giving it a stately appearance. If you have a two-story house, you can make the columns taller, bringing the two stories together nicely.
When placing columns, less is often more. It only takes a few columns to dress up a house, whereas one with too many can look too busy or segmented. Columns should be placed on the edges of the home and near the entrance, framing the door and finishing off the exterior cleanly.
13. Trims

The perfect icing on the cake.
When adding trim, think of it as the icing on the cake. Trim can bring together the house's columns and roofing, making the build look tidy and finished. It only takes a quick click; afterward, the finished product would make even the surliest of Sims smile. (I'm looking at you, Agatha.)
I recommend using trim on the roof, as it combines the roof pieces into a cleaner, more finished look. After you are done with the roof trim, take some time to add trim to your porches. This brings the whole look together, and there are many styles to choose from.
When adding trim, take a moment to look at your inspiration. Should the trim be thick and detailed, or should a simple ridge be added to the roof? Little details like this can elevate a mediocre build to new heights, improving its look and feel immensely.
14. Halfwalls

Half the size, all the personality.
Half-walls can open up a room or provide privacy. They can be used with cabinets to make a more substantial island or bar to break up the kitchen and living room. They can also be used in the bathroom to add modesty to a standing shower. Either way, they can break up a large room without completely shutting it off from the rest of the house.
When placing half-walls, you can choose from several heights. To pick the best, you must consider what you use them for. The lowest half-wall can surround the opening at the second story of a staircase. The largest half-wall can be a private wall in a bed or bathroom.
You can also use half-walls to open one room into another. For example, take a half-wall that separates the dining room from the kitchen. The Sim eating dinner can see into the kitchen and chat with the Sim making dinner.
15. Adding A Chimney

Chimney sweeps, anyone?
If you want the home to look more, well, homey, there's a quick trick you can do to make the house look more like a family home. Though there are chimneys and fireplaces in Build Mode, you can make a quick chimney by adding a small room to the side of your house. It will give the outside of the house a more traditional feel.
Adding a chimney doesn't necessarily mean you need to put a fireplace where the chimney is; it can just be a visual novelty. If you want to make it functional, you will need to use one of the chimney attachments from Build mode.
You want to make a 2 x 1 or a 3 x 1 room on the side of the house. Then, depending on how many floors your build is, add another wall until it is the same height as the building. Then switch over to half walls, select the second-to-last one, and make one last room on top. Then, you will have a little chimney you can decorate any way you'd like.
16. Kitchen Tips

Cooking in style.
Kitchens must be functional, but does that mean they can't be stylish? No! Depending on the size of the room you have made for the kitchen space, there are many ways to dress up this special room. Kitchens can be a place of gathering and family bonding, so why not add some homey touches?
When placing your countertops, don't just use the default style. If you go to the cog wheel on the side, you will see different types of counters can be placed. This way, you can make a wrapping countertop by adding a corner piece and creating an island for more appliances. The options are endless!
You can also add cupboards to the kitchen in various styles. Cabinets can add the final oomph you need to make the kitchen look functional and inviting, making your Sim happy to cook and share meals.
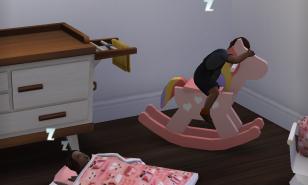
17. Bedroom Tips

Lay your head in a comfy bed!
Bedrooms are by far my favorite part of any build. It's a lot of fun to make each room distinct and customized for the Sim who lives in it. With all the clutter you can place in bedrooms, you can create thousands of unique and customized rooms for your Sims.
Make sure to grab a bed that matches the personality of the Sim living there. If the Sim is a messy child and you have the Laundry Day pack, add some piles of clothes on the floor. If your Sim is an artist, add an easel and a small still life on a table nearby.
Whether the room is big or small, solo or shared, bedrooms are where you can let your Sim's unique story shine. You can also make the walls and flooring match your theme, creating an exceptional space for your Sims.
18. Bathroom Tips

Every king needs his throne.
Bathrooms are another fun room to design and can also hold a lot of stories. Depending on your packs, you can make a walk-in shower or a lovely bathing area. Bathrooms are necessary, but they don't have to be dull.
The Sims 4 has a kit that is all about bathroom clutter. It is a great kit if you like decorating and making rooms your own. I recommend the bathroom Clutter Kit to anyone who wants to take their bathroom decorating up a notch.
You can use walls to make a small platform when designing your bathroom. You do this by selecting the small room made and lifting the foundation one tick. After this, remove the walls around it and add a stand-alone showerhead. This makes an elevated shower look fancy, even in a small bathroom.
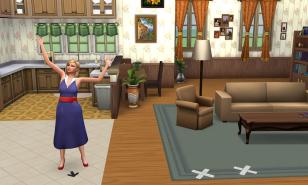
19. Living Room Tips

As I live and breathe!
Families spend most of their time in living rooms, which need to bring together each person's aspects and provide a central place for the whole family to exist. When planning a living room, it is very important to consider how to fit the entire family comfortably.
To make a living room more homey, seating around a TV or a fireplace can make the room more than just a room. Whether you have a family of one or an eight-person family, having a seat for everyone makes gameplay more realistic and enhances the family dynamic. A family of two may only need a loveseat, but you must get creative with larger families.
When designing a living room, a large archway can make the space feel bigger and less cramped, especially when the family is larger. Even smaller areas can seem larger with the proper layout and furniture. Take time to think about your Sim's interests and interweave their story into the room.
20. Other Room Options

Plants go in any room!
Other rooms may be needed in a build. Studies, dining rooms, laundry rooms, and sunrooms are just a few rooms you can add to your build. If you have a spot in your home that you are still trying to figure out what you want to do with it, think again about your Sims and what they will need to follow their dreams.
Some things, like garages, are in real-life buildings. Though The Sims 4 doesn't have cars for Sims to use, you can make the space look like a garage and add a workout room or a small mother-in-law suite that the family can rent out with the new For Rent expansion.
It can feel challenging to fill a house, especially when the build is more extensive, but trust your creativity and think about things your Sims will enjoy. Making a small sun room with a glass roof is an excellent addition to any home and can open up a build. Finding the right items to spruce up a room can also be helpful, which brings us to the next tip: debug.
21. Debug

Unique items just a mouse click away!
Debug has many different items that you can use to add variety and interest to builds. These include cars, trees, other plants, buildings, and collectibles. The only limitation is that Sims cannot act on these items; they are only for show. But the good thing? They are entirely free!
To get the debug items, you must enable cheats by typing 'testingcheats true' into the cheat box. Then, you need to enter two codes after cheats are enabled. These codes are bb.showHiddenObjects and bb.showLiveEditObjects. You need to join them in that order. Once that is done, go to Buy Mode and look at the search bar. There should be a bunch of **DEBUG** selections to choose from.
It can be hard to look through everything, as there isn't an easy way to search for something, but with a bit of time, you can find something for every build and liven up the build, making it more exciting and unique to other builds done by others on the Marketplace.
22. Choosing the Perfect Siding

Fancy inside and out.
To make a house a home, you have to replace the nasty grey walls with some siding or brick to make the build look finished. There are many different styles to choose from, and many of them can change the look of a build just by applying it to the outer walls. Depending on what you are going for, you can have a home that looks like a suburban family abode or a warehouse district shack on the side of the freeway.
You don't have to pick just one siding, either. Mixing and matching can often result in some amazingly aesthetic homes and make the character of the build shine through. For example, you could use brick wallpaper on the side of the house where the chimney is, but use a lovely pale blue siding for the rest of the house. This will add some diversity and charm to the build.
There are many siding options to choose from, but take your time. Choose one at a time until you find one that truly meets your build idea. If you are still having a hard time, the wallpaper categories can point you in the right direction.
23. Outdoor Funiture

Everyone loves a good patio.
Adding things for your sims to do outside can be a great way to satisfy an Outdoorsy Sim's whims or provide fun activities for children. If you have some room and want to add outdoor fun to your Sims' lives, there are many options.
Different homes call for various outdoor activities. You can make a gardening space for that Sim with a green thumb or a stargazing area for that spacy Sim. Either way, feel free to play around with different items to accentuate the interests of the family you will move in with.
If your Sims have children, grab some jungle gyms or swings. You can then use terrain paint to make the flooring under the equipment a different color. Have a huge backyard? Put in a pool or grab a treehouse that your family of Sims can build together. There are so many possibilities, and the customization is endless.
24. Pools

Blub blub splash!
Pools can add a splash of fun to a build. Adding a small pool to a build, especially if the family you are building the house for has kids, can add a lot of fun. It doesn't need to be a vast, Olympic-sized pool; a small pool for a small family can work even better than a large pool with a defined area.
I like to make the area around my pools fun and interactive. To do this, you can add some flooring; tile flooring works well around the pool. If there is enough room, you can add lounge chairs, a table, and a grill. Your sims will thank you for the fantastic area.
To place a pool, go to the pool tools and drag the tool across the ground to the desired size. You can make it a simple rectangle or add bump-outs to it. Remember to use some lighting and decals you can place in the pools! This can add variety and fun to a rather bland pool experience.
25. Landscaping

Flowers, trees, and rocks!
Landscaping is the last thing to do to make your build a home. You can use debug to add cute trees and flowers or use the landscaping section in Build Mode to create enchanting gardens or tree houses to escape into on a hot summer day. The best home is a landscaped home.
The landscaping items can be found in Build mode. You can access them by clicking on the tree and the little log on the side. Add trees first, then frame your trees and the house with bushes and flowers. Depending on the kind of biome the plot you chose is in, you can have a lot of fun selecting the perfect flora for your build.
If a tree or bush isn't the right size, you can always resize it by hitting the bracket keys while placing the item. The left bracket sizes the object down, while the left bracket sizes the object up. It doesn't only work on landscaping objects, either. Try this trick when placing clutter around your builds.
You may also be interested in:
Share this Article:

Image Gallery

Sims 4: How To Build An Amazing House (25 Tips for Players)
Sims 4 How To Build An Amazing House 25 Tips for Players
- Log in or register to post comments


")
