Home
Home PC Game Trailers
 News
News Menu
Menu[TOP 10] FF14 Best DPS for High Damage (6.3)
Updated: 03 Aug 2023 2:11 pm
")
The realm of Eorzea is full of nasty surprises and deadly creatures, so you have access to multiple Jobs to help take them down. Here's a ranked list of the best DPS Jobs for High Damage in the 6.3 update.
 BY: Kai T.
As a brave Warrior of Light, you and your party members venture down into perilous dungeons to fight gruesome bosses. With a wide array of monsters to battle and a huge selection of armaments at your disposal, finding the right Class/Job can be a challenge for new players. If acquiring the best DPS is your game, then these ten Jobs are calling your name. With these high DPS builds you'll deal damage faster than a speeding Chocobo.
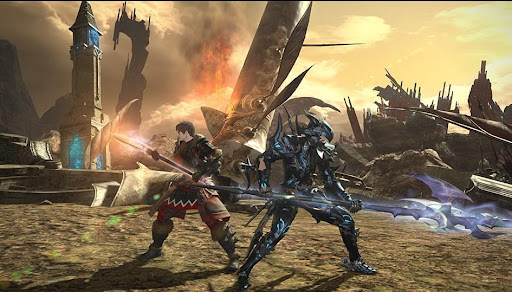
A Lancer and a Dragoon stand together in the heat of battle.
#10: The Bard Job

Heal through a hearty banter and destroy to an epic tune.
Music soothes the Savage Beast, and it can kill it just as fast with a skilled Bard Job. Hailing as a Physical Ranged DPS role, the Bard's purpose is to consistently grant buffs to their fellow Party Members by playing songs that grant status effects. While on the offensive, the Bard uses their instrument as a bow, slinging down arrows on their enemies with insane self-buffs for high DPS. Yep, it's the power of music that strengthens you and your party, in a powerful, cheesy way.
The best strategy for a Bard is to rotate your three songs (The Wanderer's Minuet, Mage's Ballad, and Army's Paeon) in different stages for your fellow Party Members. Whether you grant them an increased Critical Hit Rate, Direct Hit Rate, or just increasing your overall Damage value, it all contributes to powering up both the Bard and the entire Party. You can decide which buff will be in effect based on the song you play. This makes the Bard class instrumental during raids.
In summary, the Bard just continues to get stronger once their Party Members receive their buffs from songs. Bards also have access to personal buffs, like Raging Strikes that increase damage by 15%, as well as Soul Gauge abilities with huge damage values and wide AoE (Area of Effect). It's safe to say that the Bard does not hold back on being a true rockstar in dealing damage.
- The Bard has the strongest party-wide buff ranges in the game, ranging between 20-30 yalms (the in-game unit of measurement) for all three songs.
- Not only will you increase your damage potency, but your Party Members will also deal more damage from your buffs. This is a great class to bring along for raids.
- Remember, the best way to maximize your Bard's power is to fight with a party. A lone Bard can't tap into their full potential with only self-buffs.
- There are three Gauges to look out for as a Bard, this being your Song, Soul, and Coda gauges.
- The Song Gauge shows how much time you have before your selected Song is over, thus ending the current buff.
- The Soul Gauge is the measure of Repertoire proc that is made while a Song is played. A higher Soul Gauge from gaining Repertoire proc lets the Bard use powerful attacks, like Apex Arrow and Blast Arrow.
- The Coda Gauge increases after you start playing any of the three songs at your disposal. The accumulated Coda is then stored away until it's used for casting ‘Radiant Finale’, a powerful damage buff for everyone.
- The Bard Class is only unlocked after reaching Level 30 on the Archer Class, as well as completing the Level 30 Class quest, "The One That Got Away".
- You'll also need to complete the Level 20 main quest "Slyph-Management" and "A Song of Bards and Bowmen" to fully unlock the Bard class.
Here are two guides to building up a powerful Bard Job build:
https://www.icy-veins.com/ffxiv/bard-pve-dps-gear-best-in-slot
https://www.thebalanceffxiv.com/jobs/ranged/bard/leveling-guide/
DPS Power Score: 74/100
#9: The Red Mage Job

The more I attack, the stronger I get. Talk about a broken strategy.
Who needs a sword when YOU become the weapon? As a Red Mage, your job is to cast various spells that generate Black and White Mana to power yourself up and deliver deadly magic combos. Stay quick on the battlefield and be mindful of your mana gauges to ensure victory.
A Red Mage’s power is based on the player's Black Mana and White Mana Gauges. Both gauges should try to stay equivalent, with no more than a 30-point difference between the two. Spells such as Verthunder III and Veraero III will increase each Mana Gauge while dealing damage to enemies. Keep both Mana numbers balanced to utilize the full destructive power of the Red Mage.
Take advantage of Dualcast so your next spell will require no time to cast at all, turning you into a rapid-casting mage of destruction. Also, don't be afraid to use Embolden to increase everyone's magic damage. Consistency is key if you want to gain access to deadly spells, so keep both Mana Gauges in check!
- Once the Black Mana and White Mana Gauges reach 50, you can start your ferocious magic combo.
- Your combo consists of three weaponskills, these being Enchanted Riposte, Enchanted Zwerchhau, and Enchanted Redoublement. All of these skills will cost you both Black and White Mana while returning huge damage to foes.
- Casting any one of these weaponskills grants you a Mana Stack. You can store up to three Mana Stacks at once.
- If you have three Mana Stacks, you can consume them for a Finisher, such as Verflare, Verholy, Scorch, and Resolution.
- These Finishers will help you generate more Black and White Mana to continue your carnage with the three weaponskills.
- As a Red Mage, you also have the Impact ability, allowing you to deal high damage over a wide area of effect for some breathing room.
- Red Mages are not all about destruction, as they can help out with healing spells like Magick Barrier, Verraise, and Vercure in or out of battle.
- To unlock the Red Mage, you'll need to be Level 50 with either a Disciple of War or Magic Job and have access to the Stormblood DLC expansion.
- After meeting those prerequisites, complete the quest, "Taking the Red," which will grant you the Red Mage Job stone.
Here are two guides to building a destructive Red Mage Job build:
https://www.icy-veins.com/ffxiv/red-mage-pve-dps-gear-best-in-slot
https://www.thebalanceffxiv.com/jobs/casters/red-mage/leveling-guide/
DPS Power Score: 83/100
#8: The Summoner Job

Keep killing more of my magical creatures so I can call them back even stronger.
You're motivated to raid a dungeon but too lazy to fight for yourself, so why not call on supernatural deities to die for you? The Summoner Job is the perfect role for your easy-going playstyle and spells doom for your foes. As a Summoner, you'll be constantly building up energy for different powers through Aethercharge and Dreadwyrm Trance, each spell alternating what other kinds of spells/summons you may cast.
The Summoner has great mobility all around, making this an able-bodied role with easy progression for more power. As a Summoner, you'll be on the lookout for two gauges, the Aetherflow and Trance Gauge. The Trance Gauge measures the amount of time you can enter a Trance state, imbuing the player with powers in different stages; however, the Aetherflow Gauge holds a stack of Aetherflow for casting devastating spells like Fester and Painflare.
Your Summons consist of two types, Primal and Demi-Primal. Primal Summons are elemental beasts that fight alongside you, like Ifrit-Egi, Titan-Egi, and Garuda-Egi. Demi-Primal Summons are much more powerful and call upon such creatures as Demi-Bahamut and Demi-Phoenix, each with their own unique abilities.
- Cast Aethercharge to power up all of your Ruin spells and Outburst.
- Enter Dreadwyrm Trance to switch out Ruin III and Outburst with Astral Impulse and Astral Flare.
- Once you upgrade Dreadwyrm Trance to the max, you'll be able to use Summon Bahamut and Summon Phoenix whilst in a Tranced state. Pay attention to the Trance Gauge so you know how much longer your Summons will be active.
- The Elemental Arcanum (below the Trance Gauge) is a meter that displays three gems showing what types of powers are available to you during a Summon. These gems charge whenever you activate Aethercharge.
- Based on the charged-up gems in the Elemental Arcanum, you can deal significant damage with various elemental attunements, including Gemshine and Precious Brilliance.
- As a Summoner, you always have access to a simple creature named Carbuncle. This Summon can be altered on the go with various elemental versions.
- These versions include Summon Ruby, Summon Topaz, and Summon Emerald. All of these versions of Carbuncle are deadly in their own right with high DPS values.
- You can only summon Ifrit, Titan, or Garuda based on the current version of Carbuncle you have summoned (Ruby for Ifrit, Topaz for Titan, Emerald for Garuda).
- The Summoner is a pivotal Caster Role to fulfill, as they also power up Party Members with various status effects and can even cast Resurrection.
- To unlock the Summoner, reach Level 30 with the Arcanist Class. From there, complete the quests, "Way of the Arcanist," and "Austerities of Flame,’’ to receive the Soul of the Summoner Job stone.
Here are two guides conjured up for building a powerful Summoner Job:
https://www.icy-veins.com/ffxiv/summoner-pve-dps-gear-best-in-slot
https://www.thebalanceffxiv.com/jobs/casters/summoner/leveling-guide/
DPS Power Score: 85/100
#7: The Dragoon Job

The power of the dragons course through your veins ferociously, so take flight and smite those who oppose you.
Ever had the dream of flying high in the air as a mighty scaled dragon? Well, keep dreaming, cause this pulverizing Dragoon Job is the closest you'll get. As a Melee DPS role, the Dragoon Job soars high in the sky with jumping attacks and controls the flow of battle utilizing draconic energy with a mighty lance.
The Dragoon Job enters combat with a peculiar fighting style. Your movements are rigid on the ground, but as graceful as a dancer once you're up in the air. Whether you thrust your lance from above or fire bursts of dragon energy, you'll have to stick to your role of delivering painful blows upon foes. Your core fighting mechanics rely on two sets of combos, Chaotic Spring and Heaven's Thrust.
As a high-leveled Dragoon, you'll gain access to the Dragoon Gauges, these being Blood of the Dragon or Life of the Dragon. Both Gauges simply increase your Jumping attacks to insane numbers, all while building up your combos for high DPS values. The Dragoon specializes in delivering one-shot strikes with massive damage but take heed of how much you use your abilities, as this class has no way to shorten their own cooldowns/recast times by themselves.
- Take this class with a bit of salt, as you won't be able to use any of the higher DPS attacks until you unlock the Dragoon Gauges at Level 54.
- As you level up, take that downtime to learn how to effectively place buffs and get used to smaller combos.
- Similar to the Bard Job, the Dragoon Job has two abilities that increase their own damage and Critical Hit Rate, like Battle Litany and Dragon Sight.
- Once you have access to the Dragoon Gauges, your Jumping attack damage will increase significantly. It brings a high-skill, high-reward type of playthrough, so make sure you know how to land your blows with precision.
- If you want an even higher DPS yield, then pay attention to the Gaze of the First Blood, the giant red eye in your Dragoon Gauge. These stack from 0-2 charges and only go up when you successfully execute a Mirage Dive.
- When your Gaze of the First Blood is maxed out, activating your next Geirskogul attack will instantly change your blue Blood of the Dragon Gauge into the powerful red Life of the Dragon Gauge.
- Having the Life of the Dragon Gauge activated means you are at the pinnacle of your DPS capabilities for the Dragoon Job. Embrace your hard work with the menacing Stardiver attack.
- You have a third piece to the Dragoon Gauge, these being two scale-shaped units called Firstminds' Focus. This Gauge unlocks at Level 90 and brings the hardest-hitting attack Dragoons can bring to a fight.
- Players can charge Focus by successfully executing either a Raiden Thrust attack or by using Draconian Fury. At max charge (2 units), you can spend your Focus on Wyrmwind Thrust, a quick, painful attack that damages all enemies.
- To unlock the Dragoon Job, you must be a Level 30 Lancer and complete all seven class quests. Afterward, complete the quest "Eye of the Dragon," to receive the Dragoon Job stone.
You won't be left in the wind with these two guides on building a Dragoon Job:
https://www.icy-veins.com/ffxiv/dragoon-pve-dps-gear-best-in-slot
https://www.thebalanceffxiv.com/jobs/melee/dragoon/leveling-guide/
DPS Power Score: 88/100
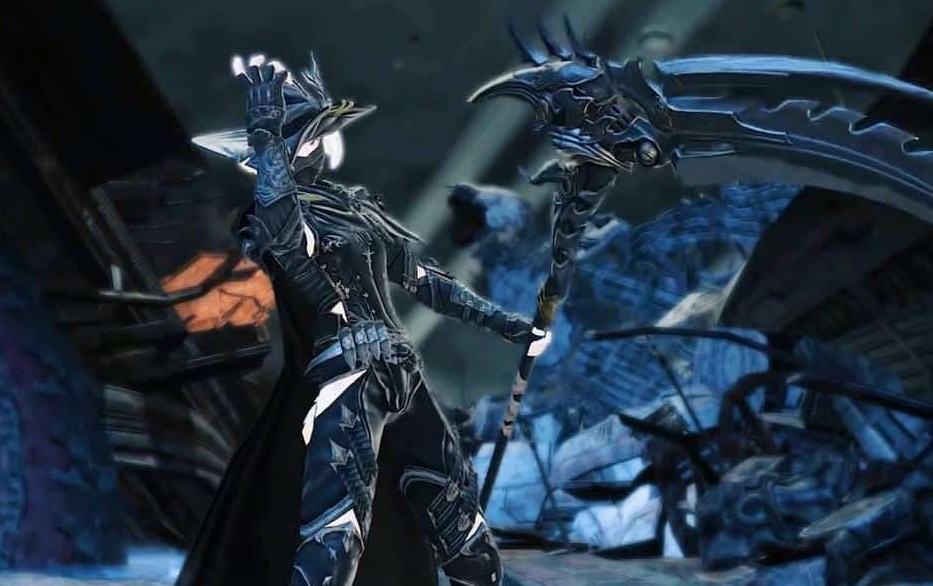
#6: The Ninja Job

Now you see me, now you don't.
Become silent yet deadly, now in a more refreshing manner as well. As an agent of stealth, the Ninja Job does not hold back with its ninjutsu prowess or with the ability to utilize the land, air, and other living beings to its advantage. Takedown your foes with dual daggers that cut fast and kill faster with a myriad of stealthy abilities.
A Ninja's main course of attack drives from their Trick Attack, a heavy-hitting ability that takes a whole minute to recharge. While waiting for the next opportunity to strike, a Ninja's second role is to administer buffs for their party. Strategize your approach with Mug to weaken enemies and steal their items, all while building up Ninki for further DPS abilities.
The Ninja is the most flexible role, opting out as a DPS Melee Job that turns into a mobile supporter with buffs, as well as a Ranged type while your ninjutsu abilities are on cooldown. As a player, you'll learn to be versatile in picking what role is needed more than the other during a fight. Are you needed for damage yet, can you weaken and steal with Mug, or does your team need extra support as a Ranged type? Stay on your feet to find that perfect balance and maximize your potential.
- With DPS at its core, the Ninja Job can deal excessive amounts of damage at once with Trick Attack. Utilize the two Ninja Gauges, Huton and Ninki, to further increase your success in battle.
- The Huton Gauge, shown as a shuriken star, displays how long your current buff will last until time runs out.
- The Ninki Gauge, displayed as a scroll meter, keeps track of how much Ninki you have. Ninki is used for heavy DPS move sets.
- You gain Ninki whenever you use your weaponskills or certain abilities like Mug and Meisui.
- Use Ninki on powerful skills like Bunshin, Bhavacakra, and Hellfrog Medium to deal high amounts of damage.
- The Ninja Class also acts as a temporary Ranged position with Throwing Dagger, a useful skill to use while waiting on your Ninjutsu abilities to recharge.
- The Ninja is highly mobile with different skills that help them move around the environment quickly. Abilities like Shukuchi, Fleeting Raiju, and Forked Raiju can help the Ninja clear some distance and can deal damage.
- The Hide ability allows Ninjas to blend in with their surroundings, rendering them almost invisible to other enemies at the cost of Ninjas losing 50% of their movement speed. This ability is useless on enemies 10 levels higher than the Ninja's current level or if certain enemies are blessed with a special sight effect.
- To become a Ninja, one must already have their Rogue Class at Level 30. Once this is done, complete the quest, "Peasants by Day, Ninjas by Night," to be rewarded with the Soul of the Ninja Job stone.
These two scrolls (guides) will help you crawl up the way of the Ninja Job:
https://www.icy-veins.com/ffxiv/ninja-pve-dps-gear-best-in-slot
https://www.thebalanceffxiv.com/jobs/melee/ninja/leveling-guide/
DPS Power Score: 89/100
#5: The Monk Job

Enlightenment starts with violence, but when does it end?
Who knew that the path to enlightenment was paved in gruesome violence? As for the Monks in Final Fantasy XIV go, their journey to spiritual guidance rests within their fists. So crack those knuckles and keep your kicks high as you learn that the essence of inner peace must be fought for in this high Melee DPS Job.
Just because the Monks' fighting style is rudimentary doesn’t mean their techniques are shriveled compared to a sword or a wand. As a Monk, you hop around the battlefield with swift kicks and hard punches between core rotation periods that serve a blessed beating to your foes. Monks can rally their Party with damage buffs casting Brotherhood and heal their brethren using Mantra.
Monk players need to pay attention to their Chakra and Master Gauges to fully expand their ass-kicking arsenal. The Chakra Gauge holds the Monk's inner spirit as fuel for well-rounded abilities that start at Level 15. Dedicated players who reach Level 60 can gain access to the Master's Gauge; a meter that stores Beast Chakra for serious DPS output values.
- The Monk Class has a generally high DPS output and is well equipped with abilities that change their moves from direct hits to area-of-effect attacks.
- The Mantra skill is useful for healing both Monks and Party Members by increasing their overall HP recovery by 10%.
- The Chakra Gauge measures how much Chakra the Monk has accumulated within their body. This Chakra is used for certain battle skills like The Forbidden Chakra and Enlightenment.
- Chakra can be recovered through Deep Meditation and Brotherhood skills.
- The Master Gauge is earned after reaching Level 60 with the Masterful Blitz skill. The true essence of the Master Gauge is awakened when using Perfect Balance.
- After performing Perfect Balance, using certain weaponskills will grant the player Beast Chakra.
- Using Bootshine will grant Opa-Opa Chakra, the Rockbreaker skill will give Coeurl Chakra, and Dragon Kick will drop Raptor Chakra.
- Having different Beast Chakra types available will let the player cast Masterful Blitz, an overpowered skill that grants the Monk the ability to do a ridiculous amount of damage, using either Elixir Field, Celestial Revolution, Rising Phoenix, or even Phantom Rush.
- With a recast time of only 2.5 seconds, you can easily set up a damage rotation strategy with this move, so long as you have Beast Chakra available.
- To unlock the Monk Job, you'll have to be a Level 30 Pugilist and complete the quest, "Return of the Holyfist." After this, complete the "Brother from Another Mother," quest to receive the Monk Job stone.
To achieve DPS nirvana, here are two guides on building a Monk build:
https://www.icy-veins.com/ffxiv/monk-pve-dps-gear-best-in-slot
https://www.thebalanceffxiv.com/jobs/melee/monk/leveling-guide/
DPS Power Score: 90/100
#4: The Machinist Job

When it goes from bad to worse, just air out the room with the Machinst's big arsenal.
Boom, headshot. Swords are outdated and magic is complicated, so why not go with the next best option by popping a cap in a few raid bosses as a Machinist? With this Job, you’ll never feel safer than with your favorite gun at your side (and a few sweet mechanical turrets).
Fast-paced combat from a distance best describes how the Machinist Job is meant to be played. From executing quick raid buffs to having multiple devices on their side, the Machinist Job requires flexibility to fully maximize its high DPS capabilities. Make sure that you keep your best skills at the ready and look out for your own MP/Gauges periodically for full efficiency.
Hard-hitting weaponskills such as the Drill, Air Anchor, and Chain Saw will be needed in your Machinist build, as these moves require a clean rotation in-between cooldowns. There are two Machinist Gauges, the Heat Gauge and Battery Gauge. These meters are similar to the Red Mages' Black and White Mana Gauges, requiring both to be stacked for killer movesets.
- The Heat Gauge automatically charges based on weaponskill combos executed by a Machinist, as well as casting Barrel Stabilizer.
- With enough Heat, Machinists can power themselves up with Hypercharge to gain access to Heat Blast, a heavy attack that also reduces cooldowns on other weaponskills.
- The Battery Gauge charges from certain moves being used, such as Heated Clean Shot, Air Anchor, and Chain Saw.
- With enough charges on the Battery Gauge, Machinists can summon their Automaton Queen to wreak havoc on their foes.
- The Automaton Queen can clear enemies out in a flash while protecting the Machinist on the battlefield.
- Before their time is up, the Automaton Queen delivers two extreme attacks called Pile Bunker and Crowned Collider. After those skills, the Queen becomes deactivated.
- The Rook Autoturret can also be used when the Battery Gauge is above 50.
- Players can upgrade their Rook Autoturret with Rook Overdrive and Rook Overload, combining status effects and attacks above 160 potency.
- The Machinist can call upon guaranteed Critical Hits with Reassemble and can use Tactician to reduce the amount of damage taken from enemies for the whole Party.
- To unlock the Machinist Job, one must be at least Level 50 as a Disciple of Magic or War Job, as well as have the Heavensward DLC expansion. Upon completing the "Savior of Skysteel," quest, players will be awarded the Machinist Job stone.
Here are two guides to help build an accurate Machinist Job build:
https://www.icy-veins.com/ffxiv/machinist-pve-dps-gear-best-in-slot
https://www.thebalanceffxiv.com/jobs/ranged/machinist/leveling-guide/
DPS Power Score: 90/100
#3: The Reaper Job
Where else can your enemies go when you become the personification of Death itself?
Ever wanted to have your enemies experience the "Game Over" screen forever? With the Reaper Job equipped, you'll send off thousands of foolish foes to the spirit realm with a huge scythe and wielding Voidsent power. As a Melee DPS Job, you'll be focused on fast-paced combat with multiple burst windows ending with an explosive finishing move.
Your primary goal should be using your weaponskills and abilities to generate enough stacks for your two main Reaper Gauges: Soul and Shroud. A Reaper's rotation strategy is built upon implementing buffs while waiting for weaponskills to cool down. Be generous with your area-of-effect healing field with Arcane Crest and power up your Party with Arcane Circle.
A powerful Reaper takes notice of their Soul and Shroud gauges. Soul contributes to powerful versions of your basic weaponskills, ranging their attack potency values between 300-500. Shroud levels the playing field with area-of-effect attacks that harm multiple foes at once with moves like Gibbet Gallows, or Plentiful Harvest. Keep building up your Shroud to reach your highest Gauge as a Reaper, the Death Gauge at Level 80.
- The Death Gauge is conceived once a Reaper has over 50 Shroud points. Activating Enshroud makes the Death Gauge appear with a set of blue and purple orbs.
- Once the Death Gauge is active, Reapers enter a state of power called Enshroud, allowing them new abilities consumed with Lemure (blue) orbs and Void (purple) orbs.
- Lemure Orbs are automatically generated upon calling in the Death Gauge. These blue orbs are used for moves such as Void Reaping, Cross Reaping, and Grim Reaping.
- Using a move that spends Lemure Orbs generates one Void Orb. These purple orbs are then spent on powerful abilities like Lemure's Slice and Lemure's Scythe, acting as great attacks against multiple enemies.
- Communio, a Lemure Orb move, is the strongest Reaper skill that's valued at around 1,110 attack potency for one enemy. It also deals 60% of the original damage to surrounding enemies.
- Using Communio instantly brings a Reaper out of the Enshrouded effect, meaning you'll have to build up the Shroud meter to re-enter the effect.
- The Reaper Job is a highly mobile class with skills like Hell's Egress and Hell's Ingress, which moves the Reaper 15 yalms forward or backward.
- Reapers can also teleport around the battlefield with Hellgates by casting Regress.
- As a Reaper, you can summon an avatar with Gluttony that deals damage to a target and surrounding enemies. Its attack potency is valued at 500.
- To unlock the Reaper, one has to be at least Level 70 as a Disciple of Magic or War, as well as own the Endwalker DLC expansion. Complete the quest" The Killer Instinct," to be rewarded with the Reaper Job stone.
To become a great agent of Death, here are two guides on building a Reaper Job:
https://www.icy-veins.com/ffxiv/reaper-pve-dps-gear-best-in-slot
https://www.thebalanceffxiv.com/jobs/melee/reaper/leveling-guide/
DPS Power Score: 91/100
#2: The Black Mage Job

The strongest Caster job this side of Eorzea.
This isn’t your average black magic user, so put away those broomsticks (unless it's part of your Halloween costume)! As one of the most powerful Caster-Ranged DPS roles in the 6.3 update, the Black Mage Job demands only the best magic players to wield them properly. Soon enough, you'll be casting more destruction than a bull in a China shop.
The Black Mage Job is famous for its destructive spells, as well as its tendency to be utterly selfish with its magic. As a hard-hitting magic job, the Black Mage has no support skills or recovery spells to help their Party or themselves. So, if you're truly dedicated to being nothing but a damage dealer, then the Black Mage is for you; just hope that you have a strong support system in your Party to administer buffs.
Your main elements consist of fire, ice, and lightning spells. The rotations of spell usage are simple enough in the beginning, but it can become a challenge for newbies who try to master this class right off the bat. As a Black Mage, be prepared to burn through your MP pool, especially if you're under the Astral Fire effect.
- Black Mages use the Elemental Gauge to display info about how powerful their current effects are, their time duration, and track their resources for powerful moves.
- All of your spells revolve around the Black Mage's Elemental Gauge. Fire spells are tracked with the orange Astral Fire, while ice is controlled with blue crystals of Umbral Ice.
- Astral Fire is gained whenever a fire spell is cast. A full Astral Fire meter upgrades the attacking potency of all fire spells.
- Umbral Ice recharges after every casted ice spell. At max capacity, the Umbral Ice meter upgrades the attacking potency of all ice spells.
- Umbral Hearts (unlocked at Level 58) are shown as dark blue ticks on the bottom of the Elemental Gauge. These are given when using powerful ice spells and make fire spells cost less MP to cast.
- Polyglot is unlocked at Level 70, which are shown as purple diamonds under the Astral Fire meter. This stack is spent on Foul and Xenoglossy, the third and second strongest spells that a Black Mage can cast.
- Level 90 unleashes the most powerful spell known among Black Mages, the extreme Paradox spell.
- Paradox can only be cast once all of the meters on your Elemental Gauge are maxed out (Three of everything: Astral Fire, Umbral Ice, Umbral Hearts, and Polyglot).
- The Paradox spell is valued at 500 attack potency, refreshes the duration of the Astral Fire and Umbral Ice meters, and makes spells cost no MP for 15 seconds.
- Unlocking the Black Mage Job requires you to complete three quests, these being, "Facing your Demons," and "Slyph-Management." Then, complete the quest, "Taking the Black" to receive the Black Mage Job stone.
Here are two guides to setup your ultimate Black Mage build:
https://www.icy-veins.com/ffxiv/black-mage-pve-dps-gear-best-in-slot
https://www.thebalanceffxiv.com/jobs/casters/black-mage/leveling-guide/
DPS Power Score: 92/100
#1: The Samurai Job
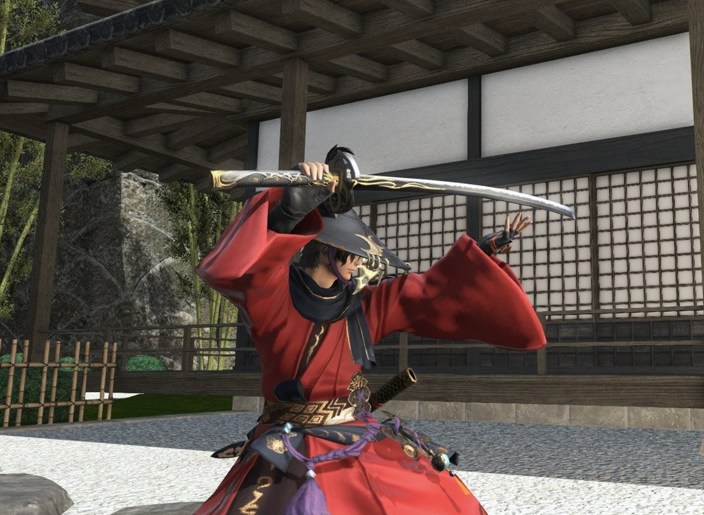
The leaders are strong, the dedicated train, and the trained become leaders.
"Honor may not win power, but it wins respect. And respect earns power." -Ishida Mitsunari. In the 6.3 version of Final Fantasy XIV: Endwalker, the Samurai Job takes the prize as the highest DPS Job available. As a katana-wielding warrior, you'll embark on a path of pure carnage and learn the essence of building up Sen and Kenki for unmatched combo attacks.
The Samurai is the highest Melee DPS Job in the 6.3 version of Final Fantasy XIV, thus, it has the best combos in terms of single-target damage and area-of-effect style combat. The power for phenomenal damage comes with the price of lacking any party skills or raid buffs. Just like the Black Mage Job, the Samurai Job is built for those who hunger for pure damage over support roles.
At its core, the Samurai’s foundation comes from their Strength stat which is in rotation among their three basic combos. In the span of 120 seconds, the Samurai can deal substantial damage in quick bursts between cooldowns, which calls for coordination on the player's behalf during these attack windows. This role should only be taken by a player who understands raid rules and acknowledges their Party Members' functions during a fight.
- The Samurai is a Melee DPS Job, so their attacks involve slicing and dicing foes with a katana using weaponskills. Strength is an important stat for this class.
- The Samurai Class operates with three Gauges, this being the Sen Gauge, Kenki Gauge, and Meditation Gauge.
- The Sen Gauge shows three amounts of Sen in the form of three tokens: Setsu, Getsu, and Ka.
- Sen is used on Iaijutsu, a weaponskill whose attack changes based on the amount of available Sen. Skills like Yukikiza, Gekko, and Oka work together as combos for high DPS values.
- A maxed-out Sen Gauge allows a Samurai to perform Midare Setsugekka, a powerhouse of a move with a 640 Critical Hit potency.
- The second gauge, Kenki, can only charge on successful combo finishers or casting Third Eye. At Level 62, acquiring the Kenki Mastery II trait lets all weaponskills recharge Kenki.
- A majority of Kenki abilities include mobility improvement with quick attacks for maximum coverage.
- The Meditation Gauge unlocks after Level 70 with the Shoha ability. This gauge fills up through Iaijutsu, Meditate, and the Ogi Namikiri skills.
- Acquiring stacks for the Meditation Gauge grants Samurais the power to destroy single targets with the Shoha attack or annihilate groups of foes with Shoha II.
- The Samurai Class is unlocked through the Stormblood DLC expansion, requiring players to be Level 50 as a Disciple of War or Magic job. Complete the quest, "The Way of the Samurai" to be rewarded with the Samurai Job stone.
In your quest for honor and high DPS, here are two guides for building the Samurai Job:
https://www.icy-veins.com/ffxiv/samurai-pve-dps-gear-best-in-slot
https://www.thebalanceffxiv.com/jobs/melee/samurai/leveling-guide/
DPS Power Score: 95/100
Have fun out there decimating foes in the land of Eorzea.
You May Also Be Interested In:
Share this Article:

- Log in or register to post comments


![[Top 10] Elden Ring Best Beginner Builds That Are Powerful](https://www.gamersdecide.com/sites/default/files/styles/308x185-scale-crop--more-top-stories/public/xtra_4.jpg "[Top 10] Elden Ring Best Beginner Builds That Are Powerful")


![[Top 5] Elden Ring Best Claw Builds That Are Powerful](https://www.gamersdecide.com/sites/default/files/styles/308x185-scale-crop--more-top-stories/public/extra_5_7.jpg "[Top 5] Elden Ring Best Claw Builds That Are Powerful")


")