Show your enemies the error of their ways.
White is one of five different colors you can invoke in Magic: The Gathering. Since the days of Savannah Lion and Wrath of God, it has always found a home with strategies on both ends of the spectrum. Here are 10 decks in MTG Arena that highlight the versatility of this color.
10. Azorius Auras (Historic)

Curious obsession shows the way to victory.
Azorius Auras is a Historic deck that casts various auras on one creature to grow it into a huge threat. Your card drawing auras help you find more auras and spells to keep your creature safe. Kor Spiritdancer does double duty in this deck because it's a threat and source of card draw at the same time.
What's good about this deck:
- It can become unstoppable in only a couple of turns. You have a very high chance of winning if your opponent has a slow start.
- Aggro decks won't be able to race once you have a huge Lifelink and Vigilance creature that you can protect.
- Playing All That Glitters on one of your creatures can give it enough power to knock out your opponent in one attack if they're not careful.
How to play this deck effectively:
- Your best hand consists of several auras, a creature you can cast it on, and a way to protect that creature.
- Mulligan away hands that have no creatures or have too many lands. Having an early creature is critical, and the deck works fine with two lands in the early game.
- Play Curious Obsession or Staggering Insight on one of your creatures early. The cards you get from it will snowball into a huge advantage later.
- Always keep at least one card in hand and mana open to make your opponent respect a possible protection spell even if you don’t have one.
- Save All That Glitters until you have a way to protect your creature unless you’re against decks that have no way to remove them like Mono-Red.
Cards:
Deck
4 Mist-Cloaked Herald
3 Alseid of Life's Bounty
3 Selfless Savior
4 Kor Spiritdancer
2 Hushbringer
4 Arcane Flight
4 Curious Obsession
4 Sentinel's Eyes
4 All That Glitters
4 Staggering Insight
4 Karametra's Blessing
4 Hallowed Fountain
4 Glacial Fortress
1 Castle Ardenvale
7 Plains
4 Island
9. Mono-White Aggro
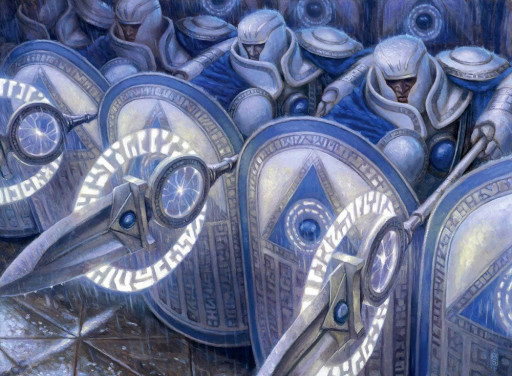
This formation can defend even against mass removal.
Mono-White Aggro aims to flood the board with small creatures as fast as possible. Once you have enough creatures, you can multiply your damage output by using effects that power up your entire team. You also have several cards that protect your creatures against mass removal.
What's good about this deck:
- It can play out its hand very fast, so games can end in a couple of turns if the opponent has a slow start.
- If your opponent manages to put up several blockers, you have plenty of ways to power up your team and break the stalemate.
- Against decks that have a lot of removal spells, Castle Ardenvale gives you a repeatable source of creatures that’s difficult to remove.
How to play this deck effectively:
- Your ideal hand should have several one-mana creatures and a way to give a permanent bonus like Glorious Anthem or Venerated Loxodon.
- Mulligan away hands that you can’t play out in the first four turns. With that said, it’s better to keep a slower six-card hand than mulligan again because going down to five is too much.
- If you have Seasoned Hallowblade, keep some lands in your hand to discard for its ability. You only need three mana to cast all your spells and four lands total including Castle Ardenvale.
- It’s worth taking a turn off attacking to convoke Venerated Loxodon. Making your creatures bigger will result in more damage over time.
- Against control decks, save your Unbreakable Formation to counter mass removal instead of casting it on your turn for damage.
Cards:
Deck
4 Stonecoil Serpent
4 Garrison Cat
4 Giant Killer
4 Hunted Witness
4 Selfless Savior
4 Seasoned Hallowblade
4 Venerated Loxodon
4 Glorious Anthem
4 Raise the Alarm
3 Unbreakable Formation
4 Castle Ardenvale
17 Plains
8. Mardu Knights

This veteran inspires not only his troops but also the next generation.
Mardu Knights is a tribal deck using all the best knights white, black and red has to offer. Many of your creatures grant bonuses exclusive to Knights and the effects increase the more copies you have. Protection spells make sure that you have a way to secure your board against single or mass removal.
What's good about this deck:
- The core cards of the deck are from Throne of Eldraine. This means you can invest wildcards into this deck and not have to worry about losing them in the upcoming rotation.
- Your protection spells and the threat of Embercleave guarantee that you come out ahead during creature combat.
- Smitten Swordmaster gives you a way to win outside of combat even if your opponent manages to stop you from attacking.
How to play this deck effectively:
- Your best hand consists of a one-mana knight, a Worthy Knight, and a couple of other knights or a protection spell.
- Mulligan away hands that have too many lands or non-creature spells. A hand without a one-mana creature is passable if you’re on the play.
- Getting Worthy Knight or Stormfist Crusader down early lets you maximize the card advantage you get from them.
- Blacklance Paragon’s ability lets you kill large attackers/blockers by surprise. This works even better when used in combination with First Strike/Double Strike.
- When you equip Embercleave to a creature with Deathtouch, you can assign only one point of damage to a blocker and let the rest Trample to the opponent.
Cards:
Deck
4 Fervent Champion
4 Knight of the Ebon Legion
4 Venerable Knight
4 Worthy Knight
4 Inspiring Veteran
3 Corpse Knight
3 Smitten Swordmaster
2 Blacklance Paragon
2 Stormfist Crusader
3 Embercleave
4 Fight as One
2 Unbreakable Formation
4 Tournament Grounds
4 Blood Crypt
4 Godless Shrine
4 Sacred Foundry
3 Plains
2 Swamp
7. Orzhov Yorion

Yorion soars through the clouds before going down to use his ability.
Orzhov Yorion uses permanents with Enters the Battlefield abilities that get you extra value. You have cards that provide discard, removal, card draw, or life gain depending on what's needed. On later turns, you can use these permanents to fuel Doom Foretold or reuse them using Yorion, Sky Nomad.
What's good about this deck:
- You have no problem taking on aggressive decks. Mass removal and life gain help you survive into the late game where they will run out of resources eventually.
- The sheer Yorion provides can overpower other value-oriented decks. Even control decks that fail to counter it will be in danger of losing the war of attrition.
- Your two-mana rats will force your opponent to make difficult decisions on what to discard or exile. They can’t afford to sandbag their best cards because they risk losing them.
How to play this deck effectively:
- Your best hand consists of a two-mana rat, Treacherous Blessing, and Doom Foretold. Mulligan away hands that don’t have early plays.
- Make sure you have several permanents you can sacrifice before playing Doom Foretold. You'll gain a huge advantage if you manage to keep it on the battlefield for a couple of turns.
- You can trigger an Enter the Battlefield loop that nets you value each time using Charming Prince and Yorion. Use the Prince's ability to exile Yorion, then during the end step, use Yorion to exile the Prince and all your other permanents.
- Playing Treacherous Blessing when facing aggressive decks is a double-edged sword. Make sure you have a plan to get rid of it immediately so you don't end up killing yourself.
- Kaya, Orzhov Usurper's minus one ability can get rid of creatures that cost zero mana as well. This is relevant for exiling token creatures like the ones created by Shark Typhoon.
Cards:
Companion
1 Yorion, Sky Nomad
Deck
4 Burglar Rat
4 Yarok's Fenlurker
4 Charming Prince
3 Yorion, Sky Nomad
4 Omen of the Sun
3 Glass Casket
4 Treacherous Blessing
4 Oath of Kaya
4 Doom Foretold
3 Elspeth Conquers Death
2 Kaya, Orzhov Usurper
1 Elspeth, Sun's Nemesis
4 Kaya's Wrath
4 Indatha Triome
4 Temple of Silence
4 Godless Shrine
4 Fabled Passage
3 Castle Locthwain
1 Castle Ardenvale
9 Swamp
7 Plains
Sideboard
1 Yorion, Sky Nomad
6. Boros Cycling

Feed this fox cycling cards and it'll grow really fast!
Boros Cycling contains almost the same cards you'll find in a typical Ikoria draft deck. You have creatures or spells that care about cycling and the rest of the deck are cycling cards. Lurrus of the Dream-Den is a free companion that can bring back your creatures from the graveyard.
What's good about this deck:
- It’s very cheap to build. If you don’t use Lurrus and replace Sacred Foundry with tap lands, the deck has zero rares but is more or less the same.
- This deck is very consistent because cycling lets you draw cards to find what you need.
- Your creatures generate a lot of value as the game goes go longer. One point of damage/life or an extra token adds up into a big advantage as you find more copies.
How to play this deck effectively:
- Your best hand consists of Flourishing Fox and a couple of your two-mana payoff creatures.
- Mulligan away hands that have no creatures or have too many lands. Playing a creature early is vital and you only need two lands to operate during the early game.
- Avoid trading off creatures when facing opposing aggro decks if possible. Your creatures’ abilities give you more value compared to trading with their creature.
- Go for Blood should be last in the order of cards you can cycle. In certain matchups, you may want to cast it to kill an opponent’s valuable creature.
- Save Zenith Flare for the very late game. The longer you wait, the more potential it has to do up to double-digit damage.
Cards:
Companion
1 Lurrus of the Dream-Den
Deck
4 Flourishing Fox
4 Valiant Rescuer
4 Drannith Healer
4 Drannith Stinger
4 Go for Blood
4 Zenith Flare
4 Footfall Crater
4 Startling Development
4 Memory Leak
4 Frostveil Ambush
4 Boon of the Wish-Giver
4 Sacred Foundry
6 Plains
6 Mountain
5. Mardu Winota

Winota lost her arm facing these creatures, but now she fights by their side.
Mardu Winota uses its namesake card to get a huge board advantage after attacking with non-Humans. All your early-game cards create a couple of bodies to maximize Winota's triggers. In case you don't draw her, you also have other cards that power up your creatures for a go-wide strategy.
What's good about this deck:
- You’re almost unbeatable if you manage to get off several triggers from Winota. The various humans you can grab give your board protection from mass removal or replacement bodies.
- Bant Ramp and Temur Reclamation’s demise brought out other midrange decks that had a bad matchup against those two. You can prey on these slow decks and get easy wins.
- Unlike other builds, you can still play like a regular aggro deck if you don’t draw Winota. There's no danger of getting cards stuck in your hand because the mana curve stops at four.
How to play this deck effectively:
- Your best hand consists of several cards that create non-Humans, or other payoff cards like Venerated Loxodon or Judith, the Scourge Diva.
- It’s critical to have some number of cards that create non-Humans in your opening hand. Keeping a hand without a payoff is okay as long as you have good mana because that sets you up to draw the payoff later.
- Only use Selfless Savior to protect important creatures like Winota or Judith. If they use their removal at Selfless Savior, sacrifice it still to give another creature Indestructible.
- Always use Woe Strider’s sacrifice ability whenever one of your creatures dies outside of combat. You don’t have a lot of ways to draw cards, so scrying into your good cards is very important.
- When playing against decks with mass removal, sometimes it's better to go all-in. It’s better to force them to have it than hold back and let them find one for sure.
Cards:
Deck
4 Selfless Savior
1 Knight of the Ebon Legion
4 Lazotep Reaver
2 Kitesail Freebooter
1 General's Enforcer
3 Woe Strider
3 Judith, the Scourge Diva
1 Tajic, Legion's Edge
4 Basri's Lieutenant
4 Winota, Joiner of Forces
4 Venerated Loxodon
4 Raise the Alarm
4 Savai Triome
4 Blood Crypt
4 Godless Shrine
4 Sacred Foundry
2 Fabled Passage
1 Temple of Silence
1 Temple of Triumph
1 Castle Embereth
2 Plains
1 Swamp
1 Mountain
4. Jeskai Control

Narset would fit perfectly in the world of Avatar: The Last Airbender.
Jeskai Control is a tap-out strategy that uses powerful non-creature spells to answer your opponent's threats. Your planeswalkers provide card draw or removal, and your enchantments have game-swinging effects. Once your opponent is out of resources, you can win with style using your planeswalkers' ultimates.
What's good about this deck:
- You have no problem taking on aggressive decks. Mass removal and life gain help you survive into the later turns where your planeswalkers can take over the game.
- Your payoff cards give you an edge against other control decks. Chandra, Awakened Inferno and Shark Typhoon are both huge threats that your opponent can’t stop with counters.
- Fae of Wishes lets you access a sideboard filled with powerful, narrow answers that you otherwise wouldn’t have in Best-of-One.
How to play this deck effectively:
- Your best hand consists of early defensive spells, a Narset planeswalker, and at least three lands.
- Mulligan away hands that have too many cards with high casting cost and contain little to no early game spells.
- Don’t hesitate to cast your late-game cards like Fae of Wishes or Shark Typhoon early against aggressive decks. You should focus on surviving into the late game rather than maximizing value.
- When you use Elspeth Conquers Death, make sure you have something in the graveyard to bring back. It’s okay to let your creature or planeswalkers die on purpose if you know they can’t get rid of enchantments.
- The sideboard provided is set up to handle a wide variety of decks. Make sure to change it based on the decks you're having trouble with.
Cards:
Deck
2 Fae of Wishes
4 Bonecrusher Giant
4 Narset, Parter of Veils
4 Narset of the Ancient Way
2 Chandra, Awakened Inferno
2 Ugin, the Spirit Dragon
2 The Birth of Meletis
4 Elspeth Conquers Death
4 Shark Typhoon
4 Deafening Clarion
2 Warrant // Warden
4 Raugrin Triome
4 Hallowed Fountain
4 Sacred Foundry
4 Steam Vents
4 Interplanar Beacon
3 Temple of Epiphany
3 Plains
Sideboard
4 Dovin's Veto
1 Grafdigger's Cage
1 Glass Casket
1 Ugin, the Spirit Dragon
1 Finale of Revelation
1 Mass Manipulation
1 Shatter the Sky
1 Time Wipe
1 Inspired Ultimatum
1 Light of Hope
1 Disdainful Stroke
1 Heliod's Intervention
3. Lurrus Auras

Beware of faeries that hoard auras instead of treasure.
Lurrus Auras aims to cast several auras on one creature to grow it into a huge threat. One-mana protection spells keep your creature safe while you keep hitting your opponent with it. Lurrus of the Dream-Den comes in as a companion to help you recast creatures or auras from your graveyard.
What's good about this deck:
- It's excellent at punishing opponents with slow starts. Stacking auras on your creature can make unstoppable in only a couple of turns.
- Playing All That Glitters on one of your creatures can give it enough power to knock out your opponent in one attack if they’re not careful.
- Lifelink and Vigilance combined on one creature backed with protection spells will make it impossible for aggro decks to race you.
How to play this deck effectively:
- Your best hand consists of several auras, a creature you can cast it on, and a way to protect that creature.
- Mulligan away hands that have no creatures or too many lands. Having an early creature as a target for auras is critical, and you only need two lands to cast most of your spells.
- Always keep at least one card in hand and mana open to make your opponent respect a possible protection spell even if you don’t have it.
- Don’t forget to use Gingerbrute’s ability to become unblockable if you need to get past your opponent's sacrificial blockers.
- Save All That Glitters until you have a way to protect your creature unless you’re against decks that have no way to remove them like Mono-Red.
Cards:
Companion
1 Lurrus of the Dream-Den
Deck
4 Gingerbrute
4 Healer's Hawk
4 Alseid of Life's Bounty
4 Glaring Aegis
4 Sentinel's Eyes
4 Solid Footing
4 Sentinel's Mark
4 All That Glitters
4 Gods Willing
4 Karametra's Blessing
1 Castle Ardenvale
19 Plains
2. Azorius Birds

Any flying creature under this bird’s wings become stronger.
Azorius Birds is a fast, aggressive deck playing the most efficient flying creatures available. You have counterspells and removal to stop your opponent’s threats and get rid of any potential blockers. There's also a couple of cards that power up all your creatures so you can close out games even faster.
What's good about this deck:
- You don’t have to worry about getting into a stalemate. Except for the mirror match, most decks have few no creatures that can block fliers.
- Rally of Wings ends a game on the spot by letting you ambush your opponent's attackers or hit for massive damage with one attack.
- None of Mythics or Rares are essential for the deck to work, so budget players are free to replace them with cheaper alternatives.
How to play this deck effectively:
- Your best hand consists of several cheap flying creatures, Empyrean Eagle/Rally of Wings, and Lofty Denial.
- Mulligan away hands that don’t have early game creatures. Playing several fliers during the first few turns is essential for you to win.
- Play your Watcher of the Spheres early. This gives you a discount on your other fliers and lets you deal more damage by getting +1/+1 from all the creatures you cast afterward.
- Only use Lofty Denial for things that can stop you from attacking like big flying creatures or mass removal.
- Save Rally of Wings for a lethal attack unless you’re predicting that your opponent will play mass removal on their next turn.
Cards:
Deck
4 Healer's Hawk
4 Faerie Miscreant
4 Spectral Sailor
4 Watcher of the Spheres
4 Empyrean Eagle
4 Brazen Borrower
4 Hanged Executioner
4 Rally of Wings
4 Lofty Denial
2 Mystic Subdual
4 Temple of Enlightenment
4 Hallowed Fountain
7 Plains
7 Island
1. Mono-White Lifegain

Heliod only joins the action after you’ve given him enough devotion.
Mono-White Lifegain uses Heliod, Sun-Crowned's ability to grow Lifelink attackers after each combat. You then have a couple of creatures you can sacrifice to protect your best threats. Lurrus of the Dream-Den lets you bring back those protection creatures while also being a Lifelink attacker.
What's good about this deck:
- It has a great matchup against other aggressive decks. Because you also gain life while you attack, they have to inflict at least twice as much damage to you to keep pace.
- Protection creatures guarantee that you come out ahead during creature combat. It also makes your threats very resilient to removal.
- Your creatures have cheap mana costs so you can play them before control decks have enough mana for counterspells. Castle Ardenvale also gives you an uncounterable source of creatures that's difficult to remove.
How to play this deck effectively:
- Your best hand consists of a one-mana creature, Ajani's Pridemate, Heliod, and a protection creature.
- Lead with Healer’s Hawk instead of your other one-mana creatures because the opponent is less likely to have a blocker for it on Turn 2.
- Play your Ajani’s Pridemate early so it has the best chance to grow into a huge threat. The same principle applies to your Lifelink creatures if you already have Heliod on the board.
- Always keep mana open to activate Alseid of Life’s Bounty at any time. This makes it difficult for your opponent to line up their removal against your creatures.
- When you get several triggers from Heliod, distribute them depending on the type of removal you expect. Spread it around against target removal or put it on a creature you can protect if they have mass removal.
Cards:
Deck
4 Healer's Hawk
4 Alseid of Life's Bounty
3 Selfless Savior
3 Speaker of the Heavens
4 Ajani's Pridemate
4 Daxos, Blessed by the Sun
4 Heliod, Sun-Crowned
3 Linden, the Steadfast Queen
2 Lurrus of the Dream-Den
2 Ajani, Strength of the Pride
4 Glass Casket
3 Castle Ardenvale
20 Plains
You may also be interested in:
- The 10 Best MTG: Arena Decks
- MTG Arena Guide, Tips and Tricks
- Best Ways to Get Wildcards in MTG Arena
- [Top 7] MTG Arena Best Artifact Decks That Wreck Hard!
- [TOP 5] MTG Arena Best Control Decks
- [Top 10] MTG Arena Best Historic Decks That Wreck Hard!
- MTG Arena Best Packs To Buy – A Guide for Beginners and Intermediate Players
- MTG Arena: Best Ways to Get Cards
- Top 15 Best MTG Arena Mythic Rares
- MTG Arena Ranking System Explained
- The Best Singleton Decks in MTG Arena
- [Top 5] Best MTG Arena Aggro Decks
- [Top 5] MTG Arena Best Angel Decks
- [Top 10] MTG Arena Best White Decks
- [Top 10] MTG Arena Best Black Decks

