Home
Home PC Game Trailers
 News
News Menu
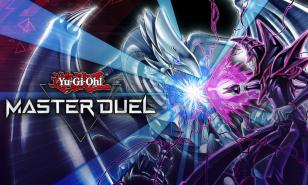
Menu[Top 10] Yu-Gi-Oh Master Duel Best Decks (For The Current Meta)
Updated: 05 Aug 2023 9:39 am
Playtime is over! The Bystials are here to shake up the game.
 BY: Vinicius Storck
The Bystials are here! For a long time, Tearlaments dominated the upper ranks of Yu-Gi-Oh! Master Duel’s ladder and tournaments. But with the release of these new cards, the former Tier 0 deck was knocked down a peg or two. It’s still very powerful, but most other competitive decks can be strengthened with these and other new cards to stand a fighting chance from now. Keep on reading to find out what decks are best for competing in the current metagame!
You’d best be warned, though: most of the top meta decks right now were released in selection packs, which only last for a limited time in Master Duel. So, unless the packs are rereleased or these cards move to permanent secret packs (hey, it happened to Branded!), these cards will cost heavy amounts of UR and SR crystals to craft. Not to mention the added need for gems to get the new Bystials if you want to build the optimal version of your deck.
But if you’ve been steadily saving resources throughout your time playing Master Duel, or you want to be ready for when these deck types hit the Secret Packs, then don’t despair! By reading this guide you’ll find out each deck’s strengths and quirks. Then, when the time is right, you can pounce on the deck you’ve chosen to build!
Here are the top 10 best decks in the current Yu-Gi-Oh! Master Duel metagame:
10. Naturia Runick
Your opponent wants to play? Well how about NO? That's Naturia Runick for you.
Naturia and Runicks are two archetypes that, together, will make your opponent want to flip the virtual table in frustration! The Naturia are EARTH attributes forms of forest life that limit your opponent’s summoning or effect activations, while Runicks are magical artifacts that forgo the Battle Phase and use Quick-Play Spells to deck the opponent out. Used effectively, you’ll create an infuriating control strategy that leaves them immobile while their deck slowly runs out.
Naturia will be your dominant, more meta-contending archetype in this deck. Naturia Mole Cricket, your starter, tributes itself to Special Summon Naturia Camelia from the deck, which can then mill any selected Naturia card. If you pick the trap Naturia Sacred Tree, its Graveyard effect lets you add any Naturia card from the deck to the hand.
Naturia Blessing is an important Spell Card; with it, you can either Special Summon a Naturia from the hand or Graveyard, or go into Synchro and Fusion plays. With this card and enough monsters on the field, you can go into some very painful non-once per turn stuns.
Naturia Sunflower can tribute itself and one monster to negate an opponent’s monster effect activation; but Naturia Camellia can change its cost to being mill 2 cards from your deck instead, allowing you to use this effect several times in a turn. Similarly, the Synchro Monster Naturia Beast mills the top 2 cards of your deck to negate any of your opponent’s Spell activations, and the Synchro Naturia Barkion can banish 2 cards from the grave to negate any of their Trap activations! Just two of these monsters can make it difficult for them to turn the tide around.
The Runick cards have the goal of stalling and protecting your monsters as much as possible, until you canbuild enough field presence to halt your opponent’s strategies and even deck them out in the process.
Any one of the Runick Quick-Play Spells can Special Summon a monster from the Extra Deck. Your best target is Hugin the Runick Wings, which can protect your other monsters from being destroyed by card effects and can search out its Field Spell, Runick Fountain. Fountain then allows you to activate any Runick Quick-Play Spell on your opponent’s turn.
The down side of the Quick-Plays is that they all lock you out of your next Battle Phase, but in return, they can all banish three or four cards from the top of your opponent’s deck. In addition, Runick Freezing Curses will negate one of their Effect Monsters, and Runick Destruction will destroy one of their Spells or Traps. The best part is that, once per turn, Fountain can put up to 3 of these Spells back into the deck in order to draw the same number of cards, potentially letting you repeat this combo infinitely!
Naturia Runicks excel at:
- The ultimate stall plays. The deck is slow to start, and its core cards aren’t high attackers, but you have ways to stop all your opponent’s activations multiple times per turn, lots of protection for the important monsters, and a very achievable way to deck your opponent out!
- Going into powerful non-archetypal Synchro summons. If you want to go on the offensive side, Naturia monsters make it easy to summon many other Synchro Monsters. You can go into the classic Baronne de Fleur or Swordsoul Supreme Sovereign - Chengying to have more removal options.
- Falling back on useful generic Level 4 Xyz monsters. If you’re in a tough spot, you can use Number 41: Bagooska the Terribly Tired Tapir to stop all monster effects for a turn or two, Abyss Dweller to prevent Graveyard effects, or Evilswarm Exciton Knight to wipe the entire field.
Use Naturia Runicks if…
- You don’t feel like letting your opponent play the game. Naturia Runicks is the epitome of what Yu-Gi-Oh! players mean when they say the modern game feels like Solitaire. The deadly trio of Naturia Sunflower, Beast, and Barkion will leave them with barely anything they can do, while the Runick spells will chip away at their field and deck, even on their turn.
- You want to have access to the superior draw engine. No other archetype has an effect that allows you to draw 3 extra cards on both players' turns! For a card game that considers Pot of Greed to be too powerful, it’s incredible that you can use this draw engine while running out your opponent’s resources.
- You want a taste of the series of cards that elevated Tearlaments to Tier 0 status. With Naturia Camellia and Naturia Beast, you’ll be milling a lot of cards off the top of your deck. This makes the Ishizu cards a good tech option, as they can accelerate your opponent’s deck out and deal with any problematic Graveyard effects.
Naturia Runick Cards:
Main Deck:
- Naturia Mole Cricket (x3)
- Naturia Camellia (x3)
- Naturia Sunflower (x1)
- Maxx “C” (x3)
- Ash Blossom & Joyous Spring (x3)
- Keldo the Sacred Protector (x1)
- Mudora the Sword Oracle (x1)
- Naturia Blessing (x3)
- Naturia Sacred Tree (x3)
- Runick Fountain (x2)
- Runick Flashing Fire (x3)
- Runick Destruction (x3)
- Runick Freezing Curses (x3)
- Runick Golden Droplet (x1)
- Runick Dispelling (x1)
- Runick Smiting Storm (x1)
- Runick Slumber (x1)
- Called by the Grave (x2)
- Triple Tactics Talent (x1)
- Evenly Matched (x1)
Extra Deck:
- Naturia Beast (x1)
- Naturia Barkion (x1)
- Hugin the Runick Wings (x2)
- Geri the Runick Fangs (x2)
- Munin the Runick Wings (x1)
- Baronne de Fleur (x1)
- Coral Dragon (x1)
- Swordsoul Supreme Sovereign - Chengying (x1)
- Stardust Charge Warrior (x1)
- Number 41: Bagoska the Terribly Tired Tapir (x1)
- Abyss Dweller (x1)
- Evilswarm Exciton Knight (x1)
9. Labrynth
The Lovely Labrynth of the Silver Castle has prepared many booby traps for her guests tonight.
The modern-day versions of the stun decks of old, Labrynth decks will constantly throw in an out-of-archetype Trap card at you to disrupt your plays, then recur them with their monsters to gain card advantage. Its biggest enabler is its boss monster, Lovely Labrynth of the Silver Castle, which can recover a Normal Trap from the Graveyard each turn and Set it. The kicker: with her on the field, your opponent can’t respond to your Normal Traps, and when they remove a monster from the field, you can destroy a card from their hand or field!
The SR monsters, Arianna the Labrynth Servant and Ariane the Labrynth Servant, can search another Labrynth card from the deck, and discard a Trap to Special Summon a Level 4 or lower Fiend from the deck, respectively. When either one of them is in play and your Normal Trap removes a card from the field, you can draw one card, and then either Special Summon a Fiend monster or Set a Spell/Trap. The N monsters, Labrynth Chandraglier and Labrynth Storbie Torbie, can discard themselves as a Quick Effect to Set a Spell or Trap from the deck, and they both have ways to recycle themselves.
Labrynth Labyrinth, the archetype’s Field Spell, allows you to Special Summon a Fiend monster from your Graveyard whenever you activate a non-Labrynth Normal Trap card, and if you activate Welcome Labrynth, you can also destroy one monster on the field.
Speaking of which, Welcome Labrynth is this deck’s signature Trap Card. It Special Summons a Labrynth monster from the deck at the cost of locking you into Fiends, and you can Set it from your Graveyard on a different turn if another one of your Traps removes a monster. So if you have two of these in play, you can loop them so that you always get an extra monster on every turn!
A perfect card to add to this deck is Lord of the Heavenly Prison, a monster that provides protection to your backrow cards–which are the big playmakers of your strategy. You can reveal this card in your hand on your turn, and then any Set card on the field becomes invulnerable to destruction, until the end of your opponent’s turn. And, whenever a Set card is activated, you can Special Summon this 3000 Attack and Defense Point monster, and even Set another Spell or Trap from the deck if it had been revealed already.
The name of the game with this deck is to build your resources while preventing your opponent from setting up their field. Labrynth combos are relatively slow, but they can recycle your Trap cards easily for multiple uses. Combine this archetype with menacing staple traps–Compulsory Evacuation Device and Deck Devastation Virus, to name a couple–and you can inch your way to victory!
Labrynth excels at:
- Retrieving and recycling your traps. This is the single thing that Labrynths do that make Traps viable in a competitive setting. You have a great way to search out cards like Infinite Impermanence or Evenly Matched (and to use them again once they’ve gone to the Graveyard), cards which can sometimes win you the game on their own.
- Offering extenders and protection for your backrow. As you can see, this deck relies entirely on Traps, and a little bit on Spells, to pull the game in your favor. This is why it’s vital to protect these cards with Lord of the Heavenly Prison, or boost their effects through Lovely Labrynth or Labrynth Archfiend, a monster that gains 400 Attack points for every Trap card in the Graveyard!
- Playing under Maxx “C” and using powerful draw spells. Labrynths are great at using Maxx “C”’s own strength against it. Because your Extra Deck is not as necessary here, and because you barely have any need to Special Summon on your turn, you have access to both Pot of Extravagance and Pot of Duality, and you can end with just 1 or a few monsters on board, leaving your backrow to pick up the slack.
Choose Labrynth if…
- You hate Jinzo and want to make Trap cards viable again. Since Traps are considered too slow nowadays, barely anyone plays Trap removals or floodgates in their deck. So you can use Labrynths to fix Traps’ weakness and to play destructive cards like Red Reboot, not to mention playing them again, turn after turn
- You want to be able to use powerful Extra Deck Graveyard effects. Because Extra Decks are kind of a leftover consideration for this deck, you can play cards like Pot of Extravagance to send them to the grave for extra cards. Knowing you have this play, you can stack your Extra Deck with Elder Entity N’Tss, Fossil Warrior Skull Night, and Wind Pegasus @Ignister, which can destroy or (in Ignister’s case) bounce an opponent’s card.
- You want a surefire way to activate your Normal Traps. Since these are the cards to swing the game in your favor, it’s important to make sure they don’t get interrupted. Lord of the Heavenly Prison can do that on his own, but you also have Lovely’s effect to prevent activations in response to your Normal Traps!
Labrynth Cards
Main Deck:
- Lovely Labrynth of the Silver Castle (x2)
- Lady Labrynth of the Silver Castle (x1)
- Arianna the Labrynth Servant (x3)
- Ariane the Labrynth Servant (x1)
- Labrynth Chandraglier (x2)
- Labrynth Stovie Torbie (x2)
- Labrynth Cooclock (x1)
- Labrynth Archfiend (x1)
- Lord of the Heavenly Prison (x3)
- The Winged Dragon of Ra - Sphere Mode
- Labrynth Labyrinth (x2)
- Labrynth Welcome (x3)
- Pot of Extravagance (x2)
- Pot of Duality (x2)
- Torrential Tribute (x2)
- Compulsory Evacuation Device (x2)
- Deck Devastation Virus (x1)
- Solemn Judgment (x2)
- Solemn Strike (x2)
- Infinite Impermanence (x2)
- Evenly Matched (x2)
- Skill Drain (x1)
- Trap Trick (x2)
Extra Deck:
- Elder Entity N’Tss (x2)
- Fossil Warrior Skull Knight (x1)
- Wind Pegasus @Ignister (x2)
- Fossil Machine Skull Wagon (x1)
- Divine Arsenal AA-Zeus - Sky Thunder (x1)
- Abyss Dweller (x1)
- Number 41: Bagooska the Terribly Tired Tapir (x1)
- Linkuriboh (x1)
- Dharc the Dark Charmer, Gloomy (x1)
- Knightmare Phoenix (x1)
- Knightmare Unicorn (x1)
- Apollousa, Bow of the Goddess (x1)
- Underworld Goddess of the Closed world (x1)
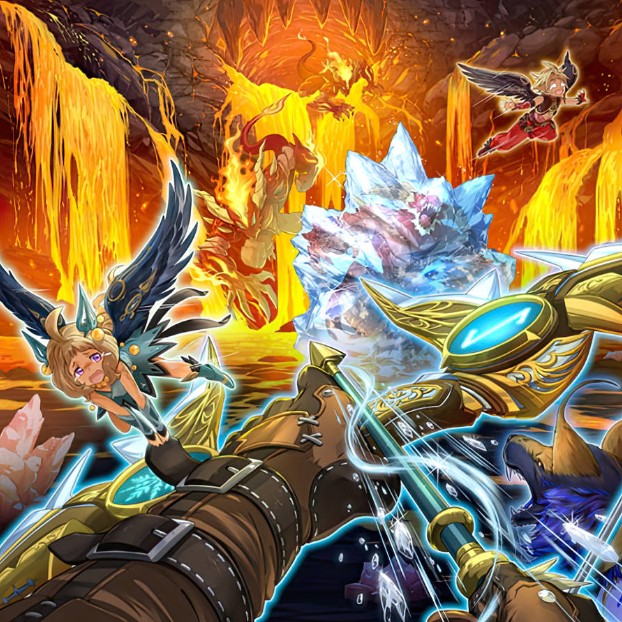
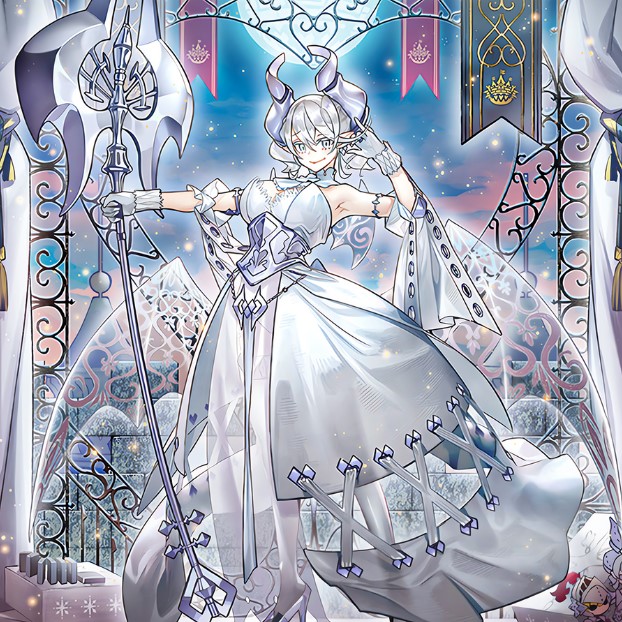
8. Rikka Sunavalon

Some things must be sacrificed for beauty, and Teardrop the Rikka Queen thanks your adversary for paying the price.
People say that snowflakes are a unique expression of nature’s beauty, and that’s what Rikkas are all about. These WATER Plant-type monsters are all adorned with different depictions of fashion, and all of them hold an umbrella in the shape of a snowflake. They can Tribute themselves to offer beneficial effects, and Xyz Summon into worthy threats for your opponents.
Rikka Petal is a great starter for this archetype, as it can search out any Rikka monster from your deck when it’s summoned, and it returns to your hand at the end of your opponent’s turn. Most of your other Main Deck Rikkas can be Special Summoned from the hand by Tributing one monster, and will gain extra effects on the field–like Mudan the Rikka Fairy, who looks for a Rikka Spell/Trap in the deck, or Snowdrop the Rikka Fairy, who can equalize the Levels of all your Plant monsters for a turn.
What seems like a modest strategy for building up your field presence becomes a lot more threatening when you activate the deck’s Field Spell, Rikka Konkon. With his card in play, you can now Tribute your opponent’s monsters instead of your own to activate your Rikkas’ effects! So now you’ll be chipping away at their board as you build up your forces.
The Rikka strategy is also complemented by the Sunavalon cards, EARTH Plants that can flood the field and Link Climb into stronger monsters. If you’re able to put the Level 1 Normal Monster Sunseed Genius Loci onto the field (there are plenty of cards to access it), you can Link Summon the Link-1 Sunavalon Dryas, which will retrieve Sunvine Sowing, a Spell Card that Special Summons a Sunseed monster from your deck. Summon Sunseed Twin, and you’ll be able to revive Genius Loci for more Link plays!
Your deck’s endgame will usually consist of imposing Plant-type Xyz monsters. The Rank 4 Rikka Queen Strenna can recover a Rikka card or Plant monster from the Graveyard, and, when Tributed, Special Summons a Rank 5 or higher Plant Xyz Monster from the Extra Deck or grave! A great target for this is Sacred Tree Beast, Hyperyton, a 2600 Attack-Point monster that attaches cards from the Graveyard as material and then detaches them to negate opponent’s cards of that same type (Monster, Spell, or Trap).
With both Snowdrop and all the monsters you can summon through the Sunavalon engine, you’ll probably also have room to summon the Rank-8 Teardrop the Rikka Queen. She can Tribute any monster on the field as a Quick Effect, and it gains 200 Attack Points whenever a monster is Tributed. At 2800 starting Attack Points, it can easily find a way to attack over most enemy boss monsters.
Rikka Sunavalon excels at:
- Synergizing with a huge amount of Plant-type monsters. Most Plants have great swarming effects, such as Lonefire Blossom, which can Tribute any of your Plants, even itself, to summon another one from the deck. Use it, and you can quickly access your starters, Sunavalon Genius Loci and Rikka Petal!
- Giving your opponent’s combos a tough time with Rikkas. Tributing monsters is an action that can’t be responded to, so Konkon and Teardrop’s Tributing effects are a lot more threatening than typical destruction-based ones. Besides that, you also have a negate in the form of Rikka Princess and the opportunity to steal their monsters with the trap Rikka Sheet.
- Ensuring you always have bodies on the field with Sunavalons. Even if Genius Loci isn’t in your hand, you can fetch it directly from the deck with Lonefire Blossom or the spells One for One and Unexpected Dai. And once you Link Summon with Loci, it’s pretty easy to climb into Aromaseraphy Jasmine, a Link-2 monster that Tributes a monster to Special Summon any other Plant to your field, and can even search out another one to add to your hand!
Choose Rikka Sunavalon if…
- You want to create deadly combos using both Xyz and Link monsters. The Sunavalons create many openings for Link Climbing, and can easily go into Predaplant Verte Anaconda if you wanted to add Fusion Summoning into the mix. And though you’re usually locked into Plants, there’s always a chance you can Xyz Summon Divine Arsenal AA-Zeus when you need a field nuke!
- You’re looking for clever ways to gain card advantage on your opponent. Most competitive decks have ways to prevent their monsters from being destroyed or even targeted; but Tributing their monsters through your Rikka combos leaves them with no room to respond. And any of the many cards that steal your opponent’s resources, like the Link-2 Sunavalon Thrasher whenever it destroys a monster in battle, will give you a +2 in card advantage at once!
- You’d like a deck that can pair well with other Plant archetypes. Rikkas and Sunavalons pair well with Aromages (Plants who activate special effects when gaining Life Points) and Therion “Lily” Borea, a Plant that can use the Field Spell Therion Discolosseum to access Therion “King” Regulus, a 2800 Attack Point omni-negate.
Rikka Sunavalon Deck:
Main Deck:
- Rikka Princess (x3)
- Rikka Petal (x3)
- Mudan the Rikka Fairy (x2)
- Primula the Rikka Fairy (x2)
- Snowdrop the Rikka Fairy (x1)
- Sunseed Genius Loci (x3)
- Sunseed Twin (x1)
- Lonefire Blossom (x1)
- Maxx “C” (x3)
- Ash Blossom & Joyous Spring (x3)
- Rikka Konkon (x3)
- Rikka Glamour (x3)
- Rikka Sheet (x1)
- Sunvine Sowing (x2)
- Unexpected Dai (x3)
- One for One (x1)
- Called by the Grave (x2)
- Infinite Impermanence (x2)
- Crossout Designator (x1)
Extra Deck:
- Teardrop the Rikka Queen (x1)
- Rikka Queen Strenna (x2)
- Sunavalon Dryas (x3)
- Sunavalon Melias (x1)
- Sunvine Healer (x2)
- Sunvine Thrasher (x1)
- Sacred Tree Beast, Hyperyton
- Aromaseraphy Jasmine (x2)
- Sylvan Dancepcione (x1)
- Benghalancer the Resurgent (x1)
7. Floowandereeze

WIth the Floowandereeze, you'll be summoning two birds (or more) with one map!
Ready to fly around the world? This archetype’s cards tell the story of three bright-eyed birds, the Floowandereeze, as they adventure throughout the globe during their migration cycle. Just like birds in real life, your Floowandereeze will constantly migrate from your hand, to the field, to the banished zone, and back again, allowing you to rack up effects and card advantage each time you do so.
What makes Floowandereeze distinct from other archetypes is that they operate entirely on Normal and Tribute Summoning. That doesn’t mean they can’t combo off, though. Every monster grants you an extra Normal Summon when played, allowing you to quickly swarm the field like a flock of birds flying together to the same destination.
Not to mention, whenever they would leave the field, they’re banished instead–and when you Normal Summon a monster, they return from the banished zone to your hand! After a few rounds of this you’ll be able to quickly out-resource your opponent and stop them in their tracks.
Your best starter monster is Floowandereeze & Robina, who lets you search for any Level 4 or under Winged-Beast and add it to your hand. A good target for this is Floowandereeze & Eglen, who searches out a Level 7 or higher Winged-Beast, like Floowandereeze & Empen, the archetype’s boss monster which will lock your opponent out of activating the effects of Attack-position Special Summoned monsters.
Your backrow cards can also strengthen your Normal Summoning chains. The Field Spell Floowandereeze and the Magnificent Map grants you an extra Normal Summon, both on your turn, and whenever your opponent Normal Summons a monster. Floowandereeze and the Unexplored Winds can use your opponent’s monsters as materials whenever you Tribute Summon a Level 7 or higher monster, and Floowandereeze and the Dreaming Town will let you start another combo on their turn.
Lastly, many people use this deck’s incredible searching abilities and lack of Special Summoning to bring out other Winged-Beast monsters with powerful effects. These can include negating a monster effect with Mist Valley Apex Avian; removing 2 of your opponent’s field monsters and one in their grave with Raiza the Storm Monarch; or, before its ban, locking them out of Special Summons with Barrier Statue of the Stormwinds.
Floowandereeze excels at…
- Dodging many common floodgates. The single strongest card in the game, Maxx “C”, lets you draw a card whenever your opponent Special Summons, but since this deck relies on Normal Summoning, it’ll be a dead card in their hands! You can also dodge Graveyard killers like Dimensional Fissure and Necrovalley, seeing as your birds like to be banished anyways.
- Quickly swarming the field. The top decks in Master Duel all have the potential to quickly summon powerful monsters, and with Floowandereeze you can fill your field through a single combo chain. There are also many ways to get to your combo starters, such as the spell Floowandereeze and the Advent of Adventure, which banishes a Winged-Beast from your hand or field to search out any Floowandereeze monster or their Field Spell.
- Stopping their opponent in their tracks. Any monster you summon off of Eglen will disrupt your opponent’s plays. There’s a particularly devastating combo with Avian and Winds: Avian returns to the hand to negate an opponent’s monster, and if you have Map or Town on the field, you can eventually summon it again, Tributing another of your opponent’s monsters in the process!
Play Floowandereeze if…
- You hate being stopped by the most common handtraps. Floowandereeze is still vulnerable to Ash Blossom & Joyous Spring, but will be unaffected by other staples like Maxx “C” and Dimension Shifter. Best of all, with how strong your engine is, you have plenty of space to include these in your deck to use against your opponent!
- You want plenty of consistency options. If you don’t have a starter in your opening hand, Magnificent Map allows you to get one by reloading your hand or by banishing a low-level Floowandereeze; and because of the archetype’s banish effects, you’ll then be able to chainblock the effects of whichever monster you Normal Summon. If you’re playing second, you can start your combo with Floowandereeze & Stri instead, which will banish a card from either Graveyard as it’s Normal Summoned.
- You don’t want to rely on your Extra Deck to win. The basic Floowandereeze combo is enough to counter many meta archetype’s game plans on its own, and will be invulnerable to lockdown cards like Tearlaments Rulkallos, El Shaddoll Winda, and Knightmare Corruptor Iblee. It also gives you the option of running powerful draw cards like Pot of Prosperity and Pot of Duality, since not Special Summoning and banishing Extra Deck cards won’t harm your game plan in any way.
Floowandereeze Cards
Main Deck:
- Floowandereeze & Empen (x1)
- Floowandereeze & Robina (x3)
- Floowandereeze & Eglen (x3)
- Floowandereeze & Stri (x1)
- Floowandereeze & Toccan (x1)
- Mist Valley Apex Avian (x1)
- Raiza the Mega Monarch (x1)
- Maxx “C” (x3)
- Dimension Shifter (x2)
- D.D. Crow (x1)
- Floowandereeze and the Magnificent Map (x1)
- Floowandereeze and the Advent of Adventure (x3)
- Floowandereeze and the Unexplored Winds (x1)
- Floowandereeze and the Dreaming Town (x1)
- Pot of Prosperity (x3)
- Pot of Duality (x2)
- Pot of Extravagance (x1)
- Gold Sarcophagus (x1)
- Jack-In-The-Hand (x1)
- Dimensional Fissure (x3)
- Book of Moon (x3)
- Called by the Grave (x2)
- Harpie’s Feather Storm (x1)
Extra Deck:
- Simorgh, Bird of Sovereignty (x1)
- Apollousa, Bow of the Goddess (x1)
- Tri-Brigade Shuraig the Ominous Omen (x1)
- Tri-Brigade Ferrijit the Barren Blossom (x1)
- Divine Arsenal AA-Zeus - Sky Thunder(x1)
- Accesscode Talker (x1)
- Underworld Goddess of the Closed World (x1)
- Knightmare Unicorn (x1)
- Lyrilusc - Assembled Nightingale (x1)
- Lyrilusc - Recital Starling (x1)
- Downered Magician (x1)
- Knightmare Phoenix (x1)
- Wynn the Wind Charmer, Verdant (x1)
- Kikinagashi Fucho (x1)
- Codebreaker Virus Swordsman (x1)
6. Exosisters
In the name of the moon, they'll punish you! The Exosisters won't tolerate those who fool around with the dead.
As modern decks become more and more reliant on using the Graveyard, the Exosisters become the perfect archetype of choice to counter their strategies. These nuns use magical powers to become powerful exorcists whenever your opponent won’t allow their monsters to rest in peace. They lock players out of effects and Special Summoning from the Graveyard, proving themselves deadly to decks like Tearlaments and HEROs.
The Main Deck Exosisters all have a trigger effect to Xyz Summon an Exosister from the Extra Deck just by themselves if your opponent moves a card out of the Graveyard. They’re also pretty good at bringing themselves out as a team: Exosister Stella can Special Summon another Exosister from the hand; Exosister Ellis can be Special Summoned if you have an Exosister on the field; and both Exosister Sophia and Exosister Irene will let you draw cards as long as you have more sisters in your field or hand.
The Exosisters also like to work in pairs, so if you manage to get both Stella and Ellis or both Sophia and Irene on the field, you can gain an extra 800 Life Points. And with the Quick-Play Spell Exosister Pax or the Trap Exosister Vadis, you have additional paths for summoning your pairs straight from the deck.
It’s all over for your opponent once you manage to bring out your mighty Xyz Monsters. None of them can be destroyed by the effects of monsters Special Summoned from the Graveyard and they gain powerful effects the turn they were summoned with other Exosisters as material. Mikailis will banish a card on your opponent’s field or in their grave; Kaspitele will lock out Special Summoning from the grave; Gibrine will negate an opponent’s monster effect; and Asophiel prevents card effects from activating in the Graveyard.
If you time your cards right, you can stop most decks in their tracks! Nullifying the Graveyard prevents many combo extensions, and then you can use your Xyz monsters’ other effects to gain more resources and slowly pick apart your opponent’s board. Mikailis and Kaspitele search out other Exosister cards, Gibrine increases all their Attack points by 800, and Asophiel returns a monster to your opponent’s hand each turn!
Exosisters excel at:
- Hitting many meta decks where it hurts most: the Graveyard. By locking them out of Graveyard effects and Special Summoning, discards suddenly become a huge cost, and their options run out once they’re left with no searches or monsters to summon.
- Swarming the field with Xyz monsters. They’re already pretty good at bringing out their Main Deck monsters, but what makes them unique is their potential to Xyz Summon monsters with just 1 Exosister as material. And if your opponent isn’t a graveyard defiler, no worries; the Spell Card Exosister Arment will force this special Xyz Summon effect on their turn, giving you more options for controlling the game.
- A searchable Prohibition-like effect. Exosister Carpedivem is already an excellent support card, giving your Exosisters protection from the targeted effects of monsters Special Summoned from the Graveyard and letting them destroy Spells and Traps when battling. But the cherry on top is its last effect: when you Xyz Summon an Exosister monster, you can declare any card name, and you can negate that card’s effects for the entire turn, even if it hasn’t been played yet!
Choose Exosisters if…
- You want to deprive your opponent of one of their biggest resources for plays. Except for stranger decks like Floowandereeze and Runicks, most decks will use the Graveyard as a way to extend combos and recur their cards. And as the game speeds up in the future, that just means your Exosisters will be stopping a larger number of plays with their lockout strategies!
- If you want to preempt your opponent’s handtraps or crucial combo cards before they get a chance to be played. As long as you know a deck’s strategies well enough, and you’re able to quickly play Carpedivem, you can get rid of annoying cards well in advance. Imagine cutting off their Maxx “C”, stopping their Kitkallos, or preventing their Branded Fusion!
Exosisters Deck
Main Deck:
- Exosister Martha (x3)
- Exosister Elis (x3)
- Exosister Stella (x3)
- Exosister Sophia (x2)
- Exosister Irene (x1)
- Maxx “C” (x3)
- Ash Blossom & Joyous Spring (x3)
- Dimension Shifter (x2)
- Exosister Pax (x3)
- Exosister Vadis (x2)
- Exosister Carpedivem (x1)
- Exosister Arment (x1)
- Exosister Returnia (x2)
- Pot of Prosperity (x1)
- Called by the Grave (x2)
- Crossout Designator (x1)
- Triple Tactics Talent (x1)
- Infinite Impermanence (x3)
- Evenly Matched (x3)
Extra Deck:
- Exosisters Magnifica (x2)
- Exosister Mikailis (x3)
- Exosister Kaspitell (x2)
- Exosister Asophiel (x1)
- Exosister Gibrine (x1)
- Divine Arsenal AA-ZEUS - Sky Thunder (x1)
- Accesscode Talker (x1)
- Selene, Queen of the Master Magicians (x1)
- Number 41: Bagooska the Terribly Tired Tapir (x1)
- Dharc, the Dark Charmer, Gloomy (x1)
- Lyna, the Light Charmer, Lustrous (x1)
5. Swordsoul Tenyi
The Swordsoul and the Tenyi both use secret arts to manipulate spiritual energy in battle.
Swordsoul is one deck that has been all over the top ranks since the beginning, being present at Master Duel’s launch and doing well even back then. These Wyrm warriors are part-dragon and derive inspiration from Chinese legends. With mesmerizing swords that channel their own spirits, they aim to quickly, and efficiently, Synchro Summon hordes of monsters.
A Swordsoul deck is focused entirely on this Extra Deck mechanic, and, to that end, they each have the ability to Special Summon Level 4 Tuner Tokens. With Swordsoul Mo Ye, Swordsoul Longyuan, and the other Main Deck Swordsouls being able to create their own tuners, the deck space that could have been occupied by those tuners can be filled with other support instead.
Some Swordsoul monsters banish your own cards to activate their effects, and others have searcher effects that activate when they’re banished or sent to the Graveyard. When you get to your Synchro Monsters, the Swordsoul can then use their banishing power against your opponents. Focus on summoning Swordsoul Supreme Sovereign - Chengying; he banishes a card from their field, and also their graveyard!
Swordsoul excels at:
- Rapidly Synchro Summoning with fewer summons. Unlike other Synchro-based decks, Swordsoul doesn’t need to include tuners in its own deck, since the main deck monsters create their own tuner tokens on the field. This guarantees your Synchro plays and gives you room to play a complementary engine, like the Tenyi.
- Harnessing the power of banishing. Most decks can recycle cards in the Graveyard very easily; but it’s much harder to recover a banished card. Swordsoul cards, though, can banish themselves from the Graveyard for extra effects, and some of your boss monsters–like Chengying and Draco Berserker of Tenyi–will banish your opponent’s cards, leaving them in a situation they can’t recover from.
- Raising up multiple, near-unstoppable defenses. Baronne de Fleur and Swordsoul Grandmaster - Chixiao both negate monster effects, while Yang Zing dragons can remove your opponent’s monsters from the field. And with this deck’s engines, you could even have all these Synchro Monsters on the field simultaneously!
Choose Swordsoul if…
- You’re a fan of Chinese mythology and history. This deck contains three archetypes all inspired by Chinese warriors, dragons, and spiritual practices. They synergize amazingly with each other.
- You’d like to use Synchro Summoning above all else to conquer your opponent’s decks. This deck turbos out Synchro monsters like no other, making it easy to get to staples like Baronne de Fleur and Chaos Ruler.
- You want a way of dealing with threats that makes recovery almost impossible. Most decks, with the exception of ones like Dragon Link and Floowandereeze, will have a hard time retrieving banished cards. The true test is being able to finish your combos, because once your Synchro legion comes out, your opponents will be desperate for options!
Swordsoul Cards
Main Deck:
- Incredible Ecclesia, the Virtuous (x3)
- Swordsoul of Mo Ye (x3)
- Swordsoul Strategist Longyuan (x2)
- Swordsoul of Taia (x2)
- Tenyi Spirit - Ashuna (x3)
- Tenyi Spirit - Adhara (x2)
- Tenyi Spirit - Vishuda (x2)
- Tenyi Spirit - Shthana (x1)
- Bystial Druiswurm (x1)
- Bystial Magnamhut (x1)
- Maxx “C”(x3)
- Ash Blossom & Joyous Spring (x3)
- Effect Veiler (x1)
- Archnemeses Protos (x1)
- Destrudo the Lost Dragon’s Frisson (x1)
- Swordsoul Emergence (x3)
- Swordsoul Blackout (x1)
- Heavenly Dragon Circle (x2)
- Triple Tactics Talent (x1)
- Called by the Grave (x1)
- Pot of Desires (x3)
Extra Deck:
- Swordsoul Supreme Sovereign - Chengying (x1)
- Swordsoul Grandmaster Chixiao (x2)
- Swordsoul Sinister Sovereign - Qixing Longyuan (x1)
- Draco Berserker of the Tenyi (x1)
- Shaman of the Tenyi (x1)
- Monk of the Tenyi (x2)
- Baxia, Brightness of the Yang Zing (x1)
- Yazi, Evil of the Yang Zing (x1)
- Chaofeng, Phantom of the Yang Zing (x1)
- Baronne de Fleur (x1)
- Chaos Ruler, the Chaotic Magical Dragon (x1)
- Adamancipator Risen - Dragite (x1)
- Crimson Blader (x1)
4. Dragon Link
If you're opponent is still awake by the end of your Dragon Link combo, then Borrelend Dragon is sure to put them to rest.
Dragons–especially LIGHT and DARK dragons–are among the most popular, powerful, and versatile monsters in Yu-Gi-Oh! Beginning in the Link era, a number of archetypes were released that could synergize together to unleash many of these fearsome creatures at once. Initially these were the Rokket and Borrel archetypes, but now the new Bystial monsters have given this deck a resurgence, allowing it to compete with the modern-day metagame.
Dragon Link can be a very complicated deck, with many combo lines and a pretty hefty gem cost to build it. In general you first want to Link Summon Striker Dragon with a Main Deck Rokket monster (usually a Rokket Tracer searched with the spell Quick Launch). Starliege Seyfert is also a good Normal Summon, since it sets up your Graveyard to search out Black Dragon Collapserpent or White Dragon Wyverburster (they can Special Summon themselves by banishing a LIGHT or DARK monster from the Graveyard, and when one goes to the grave it searches out the other). Cards like Dragon Ravine, Absorouter Dragon, and Chaos Space can increase the amount of bodies you can put on the field by sending dragons from the deck to the Graveyard, Special Summoning more Rokkets, or searching for more LIGHT or DARK monsters.
When you get into your Link Monster extenders is when you can really accrue card advantage with this deck. Dragunity Knight Romulus searches out Dragon Ravine as a backup combo starter, and Dharc, the Dark Charmer, Gloomy lets you steal a monster from your opponent’s grave, and Hieratic Seal of the Heavenly Spheres can bounce an opponent’s card while you Special Summon a dragon from the hand or deck. Quadborrel Dragon and Dillingerous Dragon can be used together to revive your Rokket monsters for more Extra Deck plays.
But your greatest extender is the Link-1 Guardragon Pisty. With it, you can Special Summon a dragon that is banished or in your Graveyard to a zone that 2 or more Link Monsters point to. You can use it together with Striker Dragon and Dharc or Romulus to really combo far.
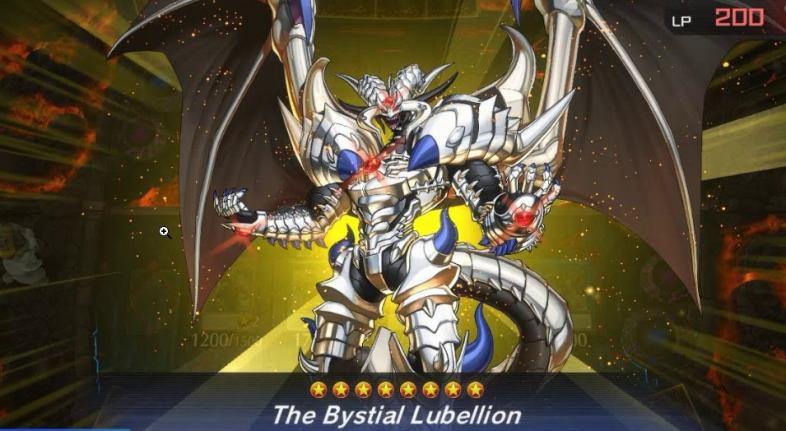
The Bystials breathe new life into this deck since they can be easily searched out with your dragon support cards. Most of them Special Summon themselves, even on the opponent’s turn, by banishing a LIGHT or DARK monster from either Graveyard, and then can then set up additional search or removal effects. The Bystial Lubellion, in particular, can search out your other Bystials or their support cards: the Branded Regained spell and the Branded Beast trap.
This deck also gives you many options for Special Summoning boss monsters. You have generic options like Chaos Ruler and Baronne de Fleur that can give you more resources and disrupt your opponent. Then you can use Rokket Tracer to revive Chaos Ruler and Synchro Summon Hot Red Dragon Archfiend Abyss, an absolute powerhouse that can even negate monsters that have been chainblocked and revive a Tuner monster.
There is the absolutely terrifying Borreload Savage Dragon, a Synchro monster that can be made with Tracer and any Level 4 monster, which gains omni-negate counters equal to the Link Rating of the monster you choose to equip it with.
And then, if you manage to gather 5 Link Materials on the field, you can summon Borrelend Dragon, an indestructible, untargetable 3500 Attack Point monster that can attack all your opponent’s monsters at once, aside from negating the effects of any monster you choose and reviving a Rokket monster. Oh, and have we mentioned? This last effect is unable to be responded to.
Dragon Link excels at:
- A near limitless potential for combo extension. Cards like Hieratic Seal of the Heavenly Spheres and Striker Dragon net you card advantage as you Special Summon more monsters. Then you have Chaos Space and Branded Regained, which return your banished Dragons to the deck for an extra draw.
- Teching in Chaos monsters. These DARK and LIGHT monsters can be Special Summoned by banishing a DARK or LIGHT monster from the Graveyard, and typically come with powerful effects. Chaos Dragon Levianeer, for example, can either destroy two cards your opponent controls or randomly shuffle a card from their hand into their deck.
- Recurring your resources. Rokkets are excellent at reviving themselves from the Graveyard, with cards like the Field Spell Boot Sector Launch and Rokket Recharger. You also have cards like Chaos Emperor, the Dragon of Armageddon and Guardragon Pisty that can recycle your banished Dragons.
Choose Dragon Link if…
- You really love Dragons. Except for handtraps and Fairy Tail - Snow, this deck is practically only made up of dragons from multiple archetypes. You can probably even find a way to tech in your favorite dragon monsters.
- You’d like to play classic Dragon archetypes like Red-Eyes and Thunder Dragons. Red-Eyes Darkness Metal Dragon is a wonderful extender for this deck, enabling an extra Special Summon for a Dragon, and Thunder Dragons all activate effects when banished. If you manage to summon Thunder Dragon Colossus, that’s one other tough boss for your opponent to defeat.
- You’d like to invest for the long game. Dragon Links were meta before, are meta now, and will most likely be meta again in the future. Dragons are most people’s favorite monster type, and Konami loves releasing powerful Dragon monsters, so there will always be new ways of using this deck’s strategies.
Dragon Link Cards
Main Deck:
- Chaos Dragon Levianeer (x1)
- Chaos Emperor, the Dragon of Armageddon (x1)
- The Bystial Lubellion (x3)
- Bystial Druiswurm (x1)
- Bystial Magnamhut (x1)
- Bystial Saronir (x3)
- Bystial Baldraike (x1)
- Starliege Seyfert (x3)
- Rokket Tracer (x2)
- Rokket Synchron (x1)
- Rokket Recharger (x1)
- Absorouter Dragon (x1)
- Noctovision Dragon (x1)
- Destrudo the Lost Dragon’s Frisson (x1)
- Black Dragon Collapserpent(x1)
- White Dragon Wyverburster (x1)
- Maxx “C” (x3)
- Ash Blossom & Joyous Spring (x3)
- Chaos Space (x3)
- Boot Sector Launch (x1)
- Quick Launch (x3)
- Dragon Ravine (x1)
- Branded Regained (x1)
- Branded Beast (x1)
- Foolish Burial (x1)
Extra Deck:
- Borrelend Dragon (x1)
- Borreload Savage Dragon (x1)
- Hot Red Dragon Archfiend Abyss (x1)
- Chaos Ruler (x1)
- Guardragon Pisty (x1)
- Hieratic Seal of the Heavenly Spheres (x1)
- Striker Dragon (x1)
- Dragunity Knight - Romulus (x1)
- Triple Burst Dragon (x1)
- Dillingerous Dragon (x1)
- Accesscode Talker (x1)
- Baronne De Fleur (x1)
- I:P Masquerena (x1)
- Knightmare Unicorn (x1)
- Dharc the Dark Charmer, Gloomy (x1)
3. Branded Despia

Albaz and Aluber unite—not quite willingly—to brand their enemies with the scars of defeat.
At number 3 on the list, we have Branded, a Fusion-based deck that has been solidly crushing most contenders for over a year. This deck revolves around the Fallen of Albaz, a mysterious boy with the ability to transform into many dragons. Through his effect, or that of the spell Branded Fusion, you can fuse him and other dragons from the deck to bring out your mighty Fusion dragons.
Normally, you’ll be using Albaz to bring out Lubellion, the Searing Dragon, which has the ability to shuffle itself and monsters in the grave to Fusion Summon another monster. This will certainly be Mirrorjade, the Iceblade Dragon, a behemoth that can banish an opponent’s monster by sending another Fusion from the Extra Deck to the Graveyard. With 3000 Attack points, Mirrorjade is a tough beast to beat–but if your opponent manages to do so, it will destroy all of their special summoned monsters at the end of the turn!
The optimal version of this deck is supplemented by the Despians, corrupted versions of the Dogmatika hunting Albaz. Aluber the Jester of Despia can also search for a Branded spell, and, if in the Graveyard, can revive itself and negate a monster’s effects simultaneously.
If, instead of searching for Branded Fusion, you decide to search Branded in Red or Despia, Theater of the Branded, you’ll be able to summon the powerful Despian fusions. Despian Quaeritis can potentially reduce all other non-Fusion monster’s attack points to 0, and Despian Proskenion can even steal Extra Deck monsters in your opponent’s grave!
The Branded cards can all be found in the Alba Abyss secret pack. The Despia cards will have to be crafted, but the only UR Despians are Quaeritis and the less necessary Masquerade the Blazing Dragon.
Branded Despia excels at:
- Summoning extremely powerful Fusion monsters. Your Branded and Despian boss monsters can quickly rid the field of any threats, and Masquerade forces your opponent to pay 600 Life Points to activate any effects. You can also choose to summon Guardian Chimera, which will simultaneously draw you cards and destroy your opponent’s cards!
- Filling the field with Fusion monsters. With these archetypes, you don’t need to gather Fusion materials in your hand or field before fusing. Fallen of Albaz, if summoned, can use your opponent’s monsters to fuse, and Branded Fusion will fuse directly from the deck.
- Generating card advantage. Main deck Despians, such as Despian Tragedy and Ad Libitum of Despia, will search for extra cards for you after they’ve been used for other effects. The Branded Opening and Branded Lost spells will do the same thing, and even protect you Fusion monsters too.
Choose Branded Despia if…
- You want to unlock the true power of Fusion monsters. The Branded and Despian Fusion monsters are among the strongest there are in the game currently, and most of them have effects that activate when they leave the field too. As soon as you get one on the field, you can start a non-stop onslaught of Dragons and Fiends that replace themselves as soon as they’re dealt with.
- You’d like to strengthen a weaker Fusion-based deck. The Branded cards can start so many 1-card combos that they can be combined with other archetypes without weakening your plays. Even a more rogue deck like Dark Magician can benefit from teching them in!
- You’re fully committed to reaching the top. Branded Despia has been at Tier-1 status in the past, and even now, with Tearlaments and Sprights in the game, the deck is still a top contender in the Diamond and Master ranks. And their potential will still rise as the new Bystial monsters are released.
Branded Despia Cards:
Main Deck:
- Fallen of Albaz (x2)
- Aluber the Jester of Despia (x2)
- Blazing Cartesia the Virtuous (x2)
- The Bystial Lubellion (x2)
- Albion the Shrouded Dragon (x1)
- Bystial Saronir (x2)
- Bystial Magnamhut (x1)
- Bystial Druiswurm (x1)
- Bystial Baldrake (x1)
- Despian Tragedy (x1)
- Ad Libitum of Despia (x1)
- Dramaturge of Despia (x1)
- Springans Kitt (x1)
- Tri-Brigade Mercourier (x2)
- Maxx “C” (x3)
- Ash Blossom & Joyous Spring (x2)
- Branded Fusion (x2)
- Branded Opening (x2)
- Branded Regained (x1)
- Branded in Red (x1)
- Branded in White (x1)
- Branded Lost (x1)
- Branded Retribution (x1)
- Branded Banishment (x1)
- Despia, Theater of the Branded (x1)
- Super Polymerization (x1)
- Fusion Deployment (x2)
- Crossout Designator (x1)
Extra Deck:
- Alba-Lenatus the Abyss Dragon (x1)
- Despian Quaeritis (x1)
- Despian Proskenion (x1)
- Albion the Branded Dragon (x2)
- Mirrorjade the Icejade Dragon (x2)
- Lubellion the Searing Dragon (x1)
- Granguignol the Dusk Dragon (x1)
- Rindbrumm the Striking Dragon (x1)
- Brigrand the Glory Dragon (x1)
- Guardian Chimera (x1)
- Predaplant Dragostapelia (x1)
- Garura, Wings of Resonant Life (x1)
- Mudragon of the Swamp (x1)
2. Sprights
These electrifying little creatures combine forces to wreak havoc from the sky!
This powerful Level 2 engine will shock your opponent’s into submission! The Sprights are the personification of real life atmospheric discharges, and, just like how electricity accumulates in the clouds, these can easily attract other Level 2 monsters and work together to use their effects. Their effects also work in conjunction with Rank 2 and Link-2 monsters; in fact, oftentimes using an Extra Deck monster will let your Sprights use additional effects.
Your Main Deck Sprights can be colored red or blue, like actual lightning. The blue ones, such as Spright Blue and Spright Jet, search out your other Spright cards, and the red ones, like Spright Red and Spright Carrot, let you tribute a monster to negate your opponent’s effects. All of them can be Special Summoned if you control a Level 2/Rank 2/Link 2 monster.
The two popular Extra Deck Sprights, Gigantic Spright and Spright Elf, are what push this deck into competitive territory. Gigantic will Special Summon a Level 2 monster from anywhere in your Deck, and will lock both players out of Special Summoning non-Level 2 monsters. Spright Elf, on the other hand, will revive a Level/Rank/Link 2 monster while protecting the monsters it points to from targeted card effects. These cards are so useful that they even see use in non-Spright decks!
The archetype also has useful support cards, like Spright Starters, which lets you Emergency Teleport a Spright from deck to field, and Spright Sprind, which will Foolish Burial a Level 2 monster from deck to Graveyard.
There are some tech cards, like Spright Pixies and Spright Gamma Burst, that can give your monsters the extra punch they need to defeat your opponent’s board. But more often than not you’ll be going into more powerful generic Extra Deck monsters while using Elf and your red Sprights to disrupt their plays.
In particular, you can end your combo by summoning the Link-2 I:P Masquerena. Then on your opponent’s turn, when there are no more Level 2/Rank 2/Link 2 summoning restrictions, you can use Masquerena’s Quick Effect to Link Summon and provide protection to a staple card like Knightmare Unicorn, which shuffles any card back into the deck. If you have the resources for it, you can even choose to summon Mekk-Knight Crusadia Avramax, a 3000 Attack Point untargetable monster that gains even more Attack when battling a Special Summoned monster!
Sprights excel at…
- Quickly dumping a lot of low-level monsters onto the field. The basic Spright cards can quickly put a lot of bodies onto the field, and, with cards like Spright Starter, can even function under handtraps. You can even use the blue Sprights to search out other extenders like Deep Sea Diva or Swap Frog, to bring out other monsters from the deck or send them to the Graveyard.
- Creating many electrical hazards for your opponent. Spright Red can tribute another Level/Rank/Link 2 monster to negate one of their monster effects, while Spright Carrot will tribute another Level/Rank/Link 2 to negate their Spell or Trap effect. Spright Elf will provide your monsters with protection, and you have convenient options to go into the board-wiping Zeus (through Gigantic Spright) or (if using Deep Sea Diva) the card-negating Baronne de Fleur!
- Being a support engine to other decks. The engine is small and useful enough that it can be easily splashed into other tiered decks. Tearlaments, for example, can use Gigantic to directly summon their Level 2 Tearlaments Merrli from the deck, and use Elf to provide protection to their boss monsters.
Choose Sprights if…
- You want to play a lot of powerful Extra Deck staples. Through I:P Masquerena you can still easily Link Summon boss monsters like Accesscode Talker and Underworld Goddess of the Closed World. You also have access to Rank 2s like Sky Cavalry Centaurea, which bounces a monster after battle, or Onibimaru Soul Sweeper, which can banish a monster or even shuffle it into the deck!
- You want a flexible engine that can support other decks. As a fast and small engine with disruption enablers, this archetype is a wise investment if you want to strengthen your other decks. Even if Sprights as a deck drops out of the top contenders, many of their cards should still see a lot of use in other meta and rogue decks, like Runicks and Tri-Brigades.
- You want a deck that can continue competing in Ranked for a long time. Decks like Branded and Tearlaments steal the spotlight so hard that they run the risk of receiving heavy hits by the banlist. Sprights, on the other hand, have been in the metagame for quite a while, and, even with a few cards becoming Semi-Limited, still remain very playable.
Spright Cards
Main Deck:
- Spright Blue (x2)
- Spright Red (x2)
- Spright Jet (x3)
- Spright Carrot (x1)
- Spright Pixies (x1)
- Swap Frog (x3)
- Ronintoadin (x1)
- Deep Sea Diva (x3)
- Yamatako Orochi (x1)
- Bystial Druiswurm (x1)
- Bystial Magnamhut (x1)
- Bystial Baldrake (x1)
- Maxx “C” (x3)
- Ash Blossom & Joyous Spring (x3)
- Wind-up Kitten (x1)
- Soul Scissors (x1)
- Spright Starter (x2)
- Spright Smashers (x1)
- Spright Gamma Burst (x1)
- Spright Double Cross (x1)
- Called by the Grave (x2)
- Infinite Impermanence (x2)
- Crossout Designator (x1)
- Triple Tactics Talent (x1)
Extra Deck:
- Gigantic Spright (x2)
- Spright Elf (x2)
- Spright Sprind (x1)
- Mekk-Knight Crusadia Avramax (x1)
- Underworld Goddess of the Closed World (x1)
- Divine Arsenal AA-ZEUS - Sky Thunder (x1)
- Baronne de Fleur (x1)
- I:P Masquerena (x1)
- Knightmare Unicorn (x1)
- Downered Magician (x1)
- Onibimaru Soul Sweeper (x1)
- Sky Cavalry Centaurea (x1)
- Number 2: Ninja Shadow Mosquito (x1)
1. Tearlaments

That's it, the game is over. If you're at the point where you can summon Tearlaments Rulkallos, the other player might as well surrender.
There’s no contest about it: Tearlaments are the absolute strongest deck in Master Duel, at least until Kashtira arrives. While the recent influx of the Bystials might have dropped this archetype from Tier 0 status, the sheer strength of these monsters’ milling and extending effects have warped the entire game around them. Most players see themselves forced to run Graveyard-locking cards like Dimension Shifter and Macro Cosmos to stand a chance against these tragic mermaids.
Almost every Main Deck Tearlament monster can send the top 3 cards of your deck to the Graveyard on summon, and, if they’re sent to the Graveyard by another card effect, can Fusion Summon by shuffling cards into your deck. You should note that this Fusion happens whether the Tearlament was sent from the hand, field, or deck to the Graveyard, and the monsters you use as material can be from either one of those places too.
The only exception to the above is the usurper of the Tearlament throne, Tearlaments Reinoheart, who instead sends a specific monster from the deck to the Graveyard on summon, and can revive himself in exchange for another Tearlament in your hand. This actually makes him a great starter card, as you can always guarantee a Fusion Summon with him on the field.
Out of your Fusion Monsters, Tearlaments Kitkallos is a terrific extender, and so she is almost always your first Fusion target. When summoned, the leader of the Tearlaments will add a Tearlament card from your deck to the hand or send it to the Graveyard. And, when Kitkallos is sent to the grave, she can mill an extra 5 cards.
The boss monsters are Tearlaments Kaleido-Heart, the upgraded form of Reinoheart, and Tearlaments Rulkallos, the upgraded form of Kitkallos. They both have 3000 Attack Points, and can Special Summon themselves if sent to the Graveyard. But Kaleido-Heart will shuffle an opponent’s card straight into the deck, while Rulkallos prevents them from activating a Special Summon effect.
The monsters themselves already seem pretty powerful, but even this archetype’s backrow is tough to deal with! The Field Spell, Primeval Planet Perlereino, searches out any Tearlament monster, and destroys a card whenever a Tearlament is shuffled back into the deck, while Tearlaments Scream mills 3 cards when a monster is summoned. The traps–Tearlaments Sulliek, Cryme, and Metanoise–will send one of your monsters to the grave to either negate an opponent’s monster effect, negate any effect activation, or flip their monster facedown, respectively.
It should be noted that all three of these cards send your monster to the Graveyard as an effect, not as a cost. So any one of your Tearlaments can begin a Fusion Summon through your Traps. And, if that wasn’t enough already, the Traps also add a Tearlaments monster from your deck, banished zone, or Graveyard to your hand when they’re sent to the grave by an effect.
So you have a giant mill engine, with every card enabling a Fusion Summon or search when in the Graveyard, along with great boss monsters, and disruption that extends your combo. It’s no wonder that Tearlaments rule among the battlefield!
Tearlaments excel at:
- Everything? Almost, but especially at synergizing with the Ishizu cards. These monsters–the retrained forms of Keldo, Agido, Mudora, and Kelbek–can mill cards from both players’ decks or shuffle cards from both graves into the decks. This dramatically increases the potential of your combos while getting rid of potentially troublesome opponent’s cards while even giving them the risk of decking out.
- Playing around Maxx “C”. Yes, even sidestepping Yu-Gi-Oh’s most broken card. Tearlaments can play on both players’ turns, and even has its own handtrap, Tearlaments Havnis; so they can just Special Summon once for Kitkallos and their board will likely not be any weaker at all.
- Counterattacking destruction effects. With every archetypal card having a Graveyard effect, it may in fact be better for your opponent to not interrupt your combos at all. If they can’t bounce or banish your cards, they’ll just be enabling your Fusion Summons, giving you card advantage, or, in the case of destroying Kaleido-Heart, getting their cards shuffled back into their deck!
Choose Tearlaments if:
- You want to be #1! On release, this deck’s power level was indisputably higher than that of all other archetypes when combined with the Ishizu cards. Even now, they still do well in the TCG and OCG where Kitkallos is banned and the Ishizus are limited.
- You want to play interesting, chess-like mirror matches. Maybe the only silver lining of the most recent Tier 0 era were the exciting games you can play if you piloted Tears against another Tear deck. With so many combo options and the ability to play on both turns, these mirror matches became a test of patience and of knowing when exactly was the best time to use your effects.
- You’re unfazed by the fact that every deck in the metagame is built to fight against you. Because of the destructive power of Tearlaments, any other successful deck is either a deck designed to punish Graveyard effects (like Exosisters), to floodgate monster effects (like Floowandereeze), or to use Graveyard-negating tech cards like Crow, Fissure, Shifter, and Macro Cosmos. If being the target of everyone’s scorn puts a smile on your face, then go right ahead!
Tearlaments Cards
Main Deck:
- Tearlaments Reinoheart (x3)
- Tearlaments Scheiren (x2)
- Tearlaments Merrli (x2)
- Tearlaments Havis (x2)
- Keldo the Sacred Protector (x1)
- Mudora the Sword Oracle (x1)
- Kelbek the Ancient Vanguard (x2)
- Agido the Ancient Sentinel (x1)
- Bystial Druiswurm (x1)
- Bystial Magnamhut (x1)
- Bystial Baldrake (x1)
- Maxx “C” (x3)
- Ash Blossom & Joyous Spring (x3)
- Fairy Tail - Snow (x1)
- Primeval Planet Perlereino (x1)
- Tearlaments Scream (x3)
- Tearlaments Sulliek (x2)
- Tearlaments Cryme (x1)
- Tearlaments Heartbeat (x1)
- Super Polymerization (x1)
- Called by the Grave (x2)
- Triple Tactics Talent (x2)
- Foolish Burial (x1)
- Foolish Burial Goods (x1)
- Reinforcement of the Army (x1)
You may also be interested in:
Share this Article:

- Log in or register to post comments