HELLDIVERS 2 has had quite a memorable launch, with a peak concurrent player count of almost half a million players. If you’re one of them, you could probably use some tips and strategies to deal with the insurmountable hordes of terminids and automatons. After all, the political elite of Super Earth seem to treat Helldivers as relatively expendable.
These tips will allow you to keep fighting for democracy with only negligible loss of limbs. In addition, you’ll be able to begin unlocking new weapons, stratagems, and ship modules as fast as possible so you can contribute to the united war effort. If you care about maintaining the prosperity of Super Earth, read on!
1. Stay mobile
Although it might be easier said than done, the best way to deal with damage is to simply avoid it in the first place. One way of doing this is simply by moving around as much as possible.
- In the earlier and easier difficulties, there are fewer area-of-effect abilities to look out for, and most enemies can only attack you when in melee range.
- You’ll be able to save your stims for emergency situations when you’re pinned down.
- The most dangerous stratagems are unlocked later in the game. This is the case even when considering friendly fire, t
- As your skills develop, you will be able to call in stratagems while still staying in motion.
2. Don’t waste ammo
Unlike many more arcade-style shooters like Call of Duty, the leftover ammo in your magazine in HELLDIVERS 2 is lost. In addition, you cannot consolidate magazines, as in BattleBit Remastered. For this reason, you need to treat your limited magazines with some frugality.
- Don’t reload just because you’ve only used one or two shots; instead, try to maximize how much ammo in a magazine is used before reloading.
- Ammo boxes refill all ammo types. Try to use all ammo types—i.e., your main weapon, secondary weapon, and support weapon ammo—somewhat evenly to maximize how much you get with each pickup.
3. Pick up the items you drop
When your Helldiver dies, they drop three things:
- Your weapons;
- Your backpack;
- Your samples.
What’s not on this list is stims and grenades. This is worth considering for a number of reasons:
- You can use deaths and reinforcements as a way to restock on stims and grenades before clearing a nest.
- If your stratagems are ready, you can leave your old gear behind without downside.
- Efficient use of resources requires never dying with available stims and grenades.
- By picking up your teammate’s primary weapons they don’t need, you can use weapons you haven’t unlocked yet.
4. Use your minimap
Your minimap contains a lot of useful information, including the location of enemy nests. The specific location of points of interest and some tactical objectives will be hidden behind fog of war at first. However, their location can be revealed in two ways:
- By walking within range of them.
- By successfully completing a satellite dish tactical objective.
Your minimap can also show where your dropped items are, which is especially important if you’ve dropped a large amount of samples.
5. One operation is three missions
In order to unlock higher difficulties, you need to complete a full operation at a given difficulty. That means three full missions.
If you fail one of the missions, then you fail the entire operation.
The number of warbonds you receive increases as you complete each mission in an operation. For example, at Hard difficulty, the first, second, and third missions give four, six, and eight warbond medals as rewards, respectively.
For these reasons, you should focus on doing the harder and longer missions first, so the stakes are lowest if you don’t succeed.
6. Maximize free grenades by combining Engineering Kit armor and the Hellpod Space Optimization booster
By themselves, both Engineering Kit armor and the Hellpod Space Optimization booster provide you with +2 grenades on spawn—one by increasing your max and starting grenades by two, the other by making you spawn with max grenades instead of half.
- This is somewhat anti-synergistic, because it makes half of the Engineering Kit armor redundant.
- Despite this, landing with six grenades is a great way to make an impact on a losing battle.
- This many grenades allows you to destroy any outpost you encounter without waiting for stratagems.

7. Use your stims to recover stamina
While the stim healing effect is ongoing, your stamina is set to full and cannot be reduced. That means sprinting and diving is “free” in terms of stamina cost while using a stim.
- You can leave your health at 75–90% when finishing an encounter, and wait to use your stim until you’re next out of stamina.
- You cannot use a stim for stamina only; you must be missing some amount of health.
8. There is a cap on Requisition points
Once you’ve been playing a while and have unlocked all the stratagems that appeal to you most, it can be easy to let your Requisition points pile up. However, there’s a maximum of 50,000 points that you can have at one time.
Even if you’ve unlocked the stratagems you want to use most, continue unlocking the rest so that points don’t go to waste.
9. Some weapons can destroy bug hives
This is one factor among many that makes terminid missions relatively easier compared to automaton missions. By using an Autocannon or Grenade Launcher to destroy bug hives instead of grenades or stratagems, you’re able to redirect the resource cost to ammunition.
- This could be especially useful in operations that have the Orbital Fluctuations operation modifier, which increases stratagem cooldown by 50%.
- Ammunition can be found at almost every point of interest, while grenades can only be found at a few.
- This also allows you to combine the stratagem slots you might usually dedicate to nest destruction and support weapons separately, providing you with another slot to use for anti-infantry or turrets.
10. The mortar turret has a minimum range
As you might already be aware, friendly fire is a ubiquitous phenomenon in HELLDIVERS 2. You will constantly be ducking from friendly bullets and apologizing for throwing strikes too close to your comrades. One popular stratagem, the mortar turret, is notorious for this. However, its positive qualities render it a compelling choice despite the danger it presents to allies.
- Avoid the friendly fire from mortar turrets by sticking close to them.
- This way, you can focus on defending the turret from powerful enemies like Brood Commanders or Stalkers while allowing it to have a maximal impact on packs of enemies elsewhere.
- Uncoordinated usage of mortar turrets can lead to huge casualties on VIP extraction missions.
11. Consider changing weapons depending on environmental conditions
In Intense Heat conditions, weapon heat buildup is sped up. On icy planets in Extreme Cold conditions, heat buildup is delayed while rate of fire is reduced.
- This means the LAS-5 Scythe is more powerful on some operations—i.e., those on icy planets—than others. The same is true of the LAS-98 Laser Cannon, which similarly uses a heat mechanic.
- Weapons that don’t use a heat mechanic, such as the popular SG-225 Breaker, won’t suffer any negative effects from hot conditions, but will lose damage per second from icy conditions.
- This factor should be balanced against the needs of the mission—that is, what enemies you’ll be facing—as well as your individual proficiencies with different weapons.
12. Sidearms can be fired without slowing down
You will often find yourself, for totally non-cowardly reasons, in the position where you’ll want to fire at the aliens chasing behind you while running. If you’re using a typical weapon, this will slow you down dramatically, rendering you vulnerable to faster enemies like terminid Hunters or Stalkers. There is a strict maneuverability cost to firing your weapon.
Sidearms can be fired without nearly as dramatic of a maneuverability cost. If you aim down sights, you will be slowed. Firing from the hip, however, leaves you virtually unaffected.
- This is true for both the P-2 Peacemaker pistol and the P-19 Redeemer auto pistol, and presumably also the P-4 Senator revolver.
13. Super credits from warbonds
Want to pay-to-win? The basic warbond, Helldivers Mobilize!, has 750 super credits available—the first five pages have 100 each, and the following five have 50 each. The premium warbond, Steeled Veterans, has a further 300 available—100 per page for three pages.
Frugal Helldivers will end up with 1050 super credits if they’ve purchased the premium warbond, which is enough to purchase the next premium warbond (assuming it will also cost 1000 super credits).

14. Super credits for free
Super credits can be found without purchasing them in the store, albeit at a much slower rate. Don’t give these game devs any more of your money! Don’t you know they’re nerds?
- The points of interest that require you to salute to open a chest have a chance to contain super credits.
- The points of interest that require two players to press two different switches to open a vault door can also contain super credits.
- Discussions on Reddit indicate that one could expect to get something like 200–400 super credits or more in a longer session by relying on these methods.
15. The superstore has a rotating stock
Items in the superstore are only available for a limited time. After that, they’re replaced by two more matching sets of helmets and armor. If you only picked up one piece and ran out of time to collect the other, don’t worry—the stock is rotating and the items will return.
As of right now, one could expect to see the same item after a week at most. However, as new armor and helmets are added to the game, it might take more time for the item you’re looking for to rotate back in.
16. Diving can mitigate explosive damage
Beyond just the comical ragdoll physics and quick maneuvering, diving can also help mitigate damage from explosives and explosions. It seems that it’s as simple as a blanket reduction in damage while in a diving state, which was also the case in the original HELLDIVERS.
- Don’t get carried away and step on a grenade just to impress your buddies, though.
17. Change your keymappings for more complex movement possibilities
For keyboard users, certain complex maneuvers—such as throwing grenades or using stims while diving—can be somewhat difficult to time. Changing your binding for either diving or the other actions, such as to a mouse button, can make achieving those edge-case movements a bit easier. Controller users should consider letting one of their fellow fraternity members show them more advanced movement tech if they’re struggling.
- This is particularly valuable when being chased by large swarms of enemies—if you simply turn and throw a grenade, you risk killing yourself with it if an enemy jumps in front of you.

18. Avoid redundant stratagems
Finding yourself stuck in a terminid hive without any explosives for the tunnels is a frustrating experience because you can end up having to wait for a resupply, which, given poor planetary environmental conditions, might take several minutes. Time is a resource, and you want to minimize waiting around while maximizing completing objectives. When seconds count, resupplies could be minutes away.
- For example, having two turrets might make point defense easier and more entertaining, but you’ll be wasting time in between those moments struggling through patrols and drops.
- Having a diverse array of stratagems will allow you to deal with a diverse array of situations.
- You cannot use two stratagems that both utilize your backpack slot at the same time. You will be able to call them both down, but not wear them both.
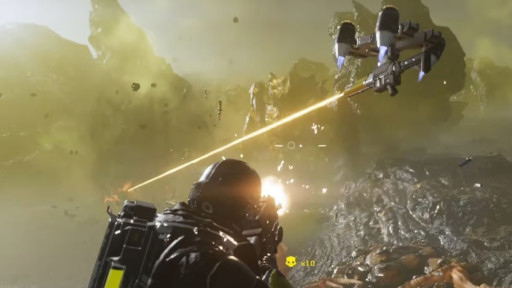
19. Automaton dropships can be shot down
It can feel overwhelming to see automaton dropship after dropship come in while trying to free VIPs. It feels like these disgusting robots just won’t leave us alone, sometimes! However, unlike the bug tunnel breaches that “deliver” terminids, the dropships can be shot down.
- You’ll need to use either the eat-17 Expendable Anti-Tank or the GR-8 Recoilless Rifle, as nothing else will be able to penetrate the heavy armor of the dropship in time.
- Aim for one of the dropship’s thruster engines.
- Coordinating with teammates will make this easy work.
20. Adjust rate of fire, fire mode, and flashlight
You ever just fiddle around with your guns? Although it’s not immediately obvious, you can change your firing mode, rate of fire, or whether your flashlight is active by holding the reload button, ‘R’ by default.
- This is particularly relevant for weapons with extreme rates of fire, like the LMG.
- This is also how to use the “dangerous” mode on the Railgun.
21. Mines are buried deeper in snow
It goes without saying that you want to avoid mines. They are already a dangerous variety of stratagem to deploy. Much like every other type of stratagem, they do not discriminate between friend and foe. However, on icy planets with thick snow covering the ground, they become even more difficult to see.
- Consider bringing a different area denial stratagem, such as an Eagle Napalm Strike or Tesla Tower.
22. Some weapons are easier to friendly fire than others
Part of the HELLDIVERS 2 experience is killing, and being killed by, your teammates (before the Ministry of Truth covers it up, Manchurian Candidate style). While most weapons have to be, accidentally or otherwise, pointed at an ally before they can do friendly fire damage, other weapons do not. Even guns that do not do area of effect damage can do friendly fire damage.
- The ARC-3 Arc Thrower, in particular, has the potential to kill your allies quickly and easily due to its chain lightning effect.
- Imagine a 45 degree cone pointing outwards in front of you. Try to keep allies outside of that cone unless strictly necessary.
23. Limb damage matters
In HELLDIVERS 2, limbs can be damaged separately from the rest of the body. This is true for both Helldivers and the aliens they face. If, for some reason, you want your arms to get broken, consider positioning them between enemies and the rest of your body.
- For Helldivers, broken arms lead to high recoil and poor accuracy, while damaged legs mean you can’t sprint.
- Simply using a stim will heal all of your damaged limbs.
- Some enemies, such as terminid Chargers or automaton Berserkers and Devastators, can be slowed or disabled by targeting their legs.
- Other enemies, like Hulks, can be disarmed by targeting their arms. This is especially useful for dealing with Flame Hulks, who can easily wipe your entire squad otherwise.
24. Maximize every resource available to you
Some of these alien scum are pretty difficult, and dealing with higher difficulties requires that very little go to waste. For example, you’ll typically require far more ammo and grenades, without necessarily being provided with more by the map.
- As stated above, time is a resource. If you have very few reinforcements left, consider using more time to allow your stratagems to fully recharge before entering a confrontation.
- Inventory slots are resources. At a minimum, you should have something utilizing both your support weapon slot and your backpack slot.
25. Keep moving
Do you want to spread democracy or not? If you want to spread it faster, you need to keep moving. Consider this: you can get tied down by dropship after dropship and end up wasting your entire time doing nothing but killing the waves of aliens that keep crashing against you. However, you do not get any rewards for simply killing aliens.
- You only get rewards for completing objectives, extracting, and having time leftover. You can get just as much experience, Requisition, and warbond medals without killing a single enemy.
- If you feel yourself getting tied down by fighting, reposition so you are between the enemies and your objective. Allow the enemies to push you towards your objective rather than away from it.
You may also be interested in:
[Guide] Fallout 76 Tips and Tricks (25 Best Tips)
