This tip guide is aimed at new and returning players to the game. When Fallout 76 first launched in 2018, it was a much much different game than it is in 2024 at the time of this article (February 24, 2024). It is incredibly more forgiving, and the ‘survival’ aspects of it have largely dropped to the wayside. With that in mind, here are some suggestions for you!
1. Fallout 1st
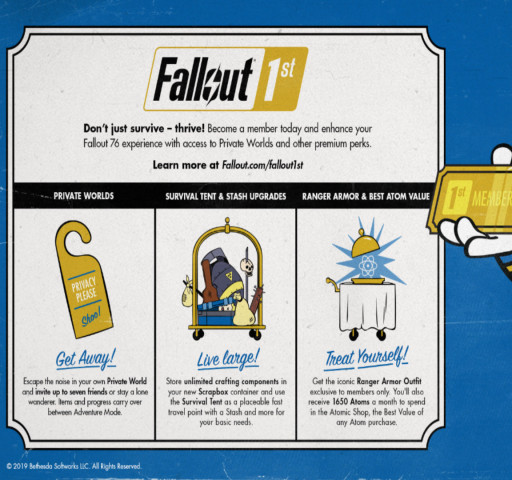
Generally I'm loathe to recommend a subscription service, but I play 76 daily for an hour or two at a time. It helps me have more fun and less stress, and that's what I want a game to do.
I hesitate putting this one on the list because it is a paid subscription service. Generally speaking, Fallout 76 only requires you to purchase the base game to be able to play and do absolutely everything in the world. However, Bethesda does have a few key features locked behind a paywall.
I want to be completely clear: it is not necessary to buy FO1st. I played for the better part of two years before I caved and picked it up. Now, I can’t imagine playing without it. I’m also not getting a cut if you decide to get it or not; this isn’t a sales pitch.Unlimited scrapbox size (see entry 23) means you can scavenge your heart out.- Monthly atoms(the ‘paid’ currency) means you’re not pulling out your credit card when you see some new ‘thing’ in the shop
- If you plan on playing 76 on a regular basis, and you can afford it, get it.
2. Check the Atom Shop Daily
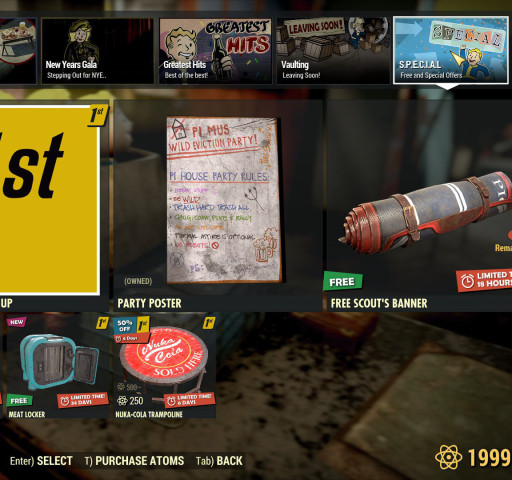
The atom shop: where you can find freebies and an excuse to open your wallet alike.
The Atom Shop is where you can buy certain items with “atoms,” or the game’s equivalent of real-world currency. While you can earn atoms from completing in-game tasks and they are a reward for the scoreboard, you won’t earn enough to shop in the atom shop without putting real-world money down.The good news is that 99% of the items in the atom shop are cosmetic and none of them are ‘required’ to play the game. That said…
- You can get daily freebies that rotate throughout the week/month
- These freebies include free caps, free Legendary Script, free Carry Weight Boosters (my favorite) and other items
- No muss no fuss. Daily free stuff is daily free stuff. It’s worth taking a few seconds to look at when you log in.
3. Know the Stash Box Differences
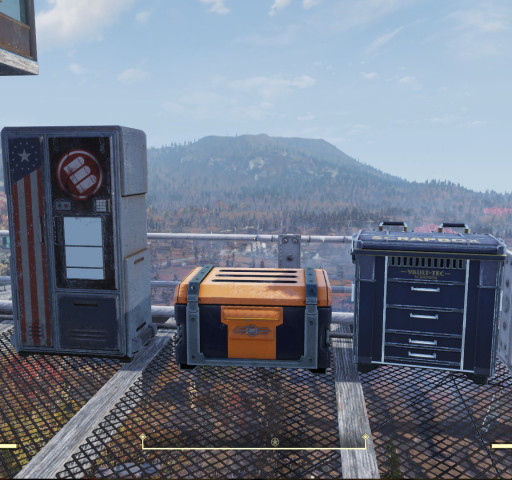
In order left to right: Ammo Locker, Stash Box, Scrap Box.
You’ve got piles of stuff, so what the heck are you supposed to do with it? Store it! BUT WHERE?! Where’s a safe place to hang my stuff? There are four primary locations you can store your gear, but they are each a little different.A “stash box” can be found at any train station, you can build dozens of different variants of them in your C.A.M.P., and you can find them semi-randomly in the world. Stash boxes can hold anything from food to ammo to junk to weapons and armor. This is your go-to place.
- Stash Boxes of any type are all linked to YOUR account. It doesn’t matter where you find it; putting an item in your stash at your C.A.M.P. means you can access it at the Whitesprings Station or even in another player’s shelter.
- There is a weight limit of 1200 lbs - and that’s the BASE item weight, not the weight that you may see on the item itself (which happens when you have perk cards that reduce weapon/armor/ammo/junk/chem weight)).
- Scrapboxes can only store junk items, and are only available if you are a Fallout 1st subscriber. However, they have no weight limit and if you cancel your FO1st membership, you can still get items OUT of the box (you just can’t put new ones in).
- Scrapboxes can sometimes be picked up during “Free FO1st” weekends where Bethesda tries to tempt you into getting a subscription.
- The Ammo Box does the same thing as the Scrapbox - only just for ammo. Much like Scrapboxes, it requires a FO76 subscription, and if your subscription lapses, you can only withdraw items and not store them.
- If you don’t want to get a FO76 sub, and you’re willing to spend extra time, the “ammo converter” that can be found in the atom shop will allow you to swap out unused rounds for other types you may need. It’s a boring, slow process though.
- You can get a few other things that store items, too - like a Brewing Station, Refrigerators, and the like - but their use is very limited.
4. Know your Ammo Differences
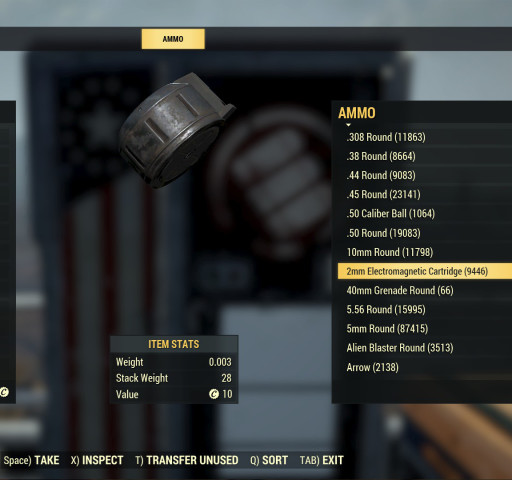
It looks like a hockey puck. It hits like DOOM.
Guns. Bullets. GUNS. BULLETS. They’re EVERYWHERE! You picked up a game that’s based off of a nuclear apocalypse; what did you expect? And it’s in America, so really, WHAT DID YOU EXPECT?!You will find ammo in nearly every box, every crate, and on every corpse. Now, I don’t want to know why a radrat is carrying around a clip of 10mm shells, and I really don’t want to ask why the lockers in the high schools are filled with shotgun shells, but you will find ammo everywhere you look. It’s just not all weighed the same, and that can be a problem.
- Ammo comes in three flavors: ballistic, energy, and explosive.
- Ballistic ammo is what you need for ‘normal’ weapons; these are your shotgun shells, your crates of 5mm, your .42 cal, railway spikes, and the like.
- Explosive ammo includes missiles, 40mm grenades, and mini-nukes.
- Energy ammo includes fusion cells, plasma cores, 2mm EC ammo, and even the Fusion Cores that power Power Armor.
- Ammo is HEAVY, but you can get effects on your armor that reduce the weight
- Those armor effects also stack with three different perk cards - Bandolier (ballistic), Batteries Included (energy), and Ordnance Express (explosive).
5. Loot. Everything.
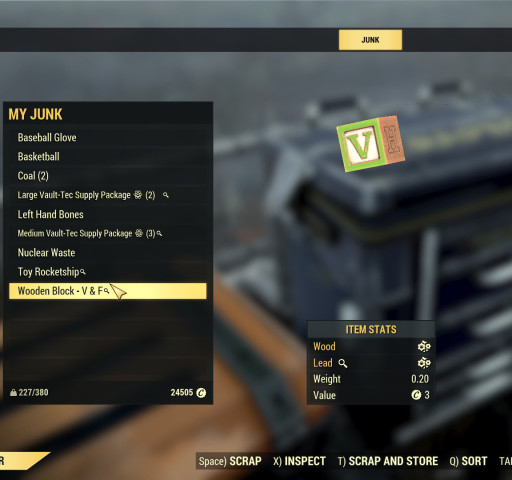
Need lead for bullets? Check out children’s toys! I'M NOT KIDDING.
Fallout 76 is a game built on scavenging for materials. A lot of daily quests or Scoreboard items will require you to craft bulk items, scrap items, repair armor, repair weapons, make ammo - all of which requires scrap components found in the world. Some you’ll have a use for; some you won’t.
- The ‘Scrapper’ perk card increases the amount of materials you gain every time you scrap junk.
- Any workbench (except cooking stations) can scrap or break down weapons, armor, and junk.
- Some types of scrap are harder to come across than others, so try to remember where you find certain things. The Sylvie and Sons Logging Camp beside the Sons of Dane Compound has wood piles galore and you can find ballistic fibers at US Army bases and the lower level of Fort Defiance.
- Other locations of note: the top floor of the building with scaffolding next to the Abandoned Bog Town has a ton of concrete (used for a lot of C.A.M.P. items), and the Lighthouse has souvenirs loaded with copper (used for power connectorsand energy ammo). Fiber Optics are a little harder to track down, so consider checking out some of the robot factories and science hubs.
- You can always flag resources you need! Open a recipe, mark the item, and if a piece of junk has it, it’ll show as a magnifying glass when you approach the scrap.
6. Weight is an Issue - Plan Accordingly.
Food is surprisingly easy to find in the hellscape that is West Virginia.
You’re living in a post-apocalyptic wasteland. The emotional toll aside and not considering the general psychological impact, stuff’s heavy, yo. Every time you venture out of your shelter you’re walking into the remnants of the last World War to be fought with nuclear weapons, but there’s still plenty of fighting to go around.You’re up against an army of people, creatures, and robots that don’t like each other - and very few of them like you. So you better prepare to carry the weight of the world on your shoulders, because defeating the Scorched and carving out a place in the wasteland is going to mean you’re carrying more provisions than you know what to do with.
- Being overweight prevents you from using fast travel or running. It can ruin a play session in a hurry if you can’t get it under control.
- This is a game that rewards you for stealing everything that isn’t nailed down. But again, it gets heavy. Fast.
- Consider quality of life perks or armor mods that reduce your weight of stimpacks and chems (like Traveling Pharmacy).
- As you explore, you can learn a few modifications for your backpack but you’ll have to do some quests for the Pioneer Scouts to earn badges that can be later traded in for those plans - look around Grafton Dam (or the Swarm of Suitors event) for the main Scout area.
- Strength directly impacts your carry weight.
- Every weapon type has a perk that will make them lighter and easier to carry.
- Armor perks and perk cards don’t always stack with weight reduction, so be sure to play around.
- In case of an emergency, booze will grant a few points of STR, and the Carry Weight Booster will also give you a short-term bonus (I always keep a stockpile on me just for this reason).
7. Need space? Need caps? BULK UP!
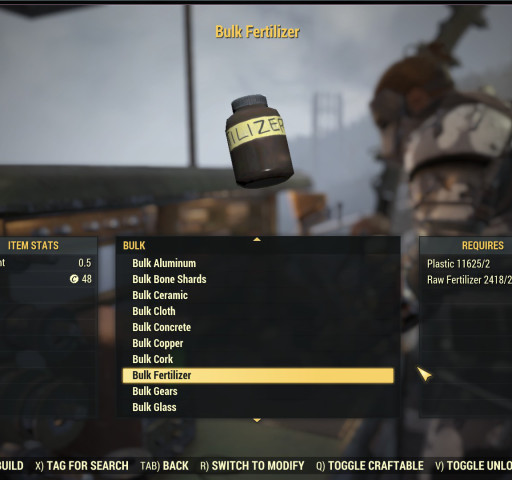
Hidden tip: check out Morgantown High School for excess plastic to bulk up your loot…
‘Bulking’ your scrap items is a great way to recover lost room in your stash box or to sell otherwise unsellable junk items to a vendor.It’s quick, it’s easy; at a cost of 2pcs of plastic per, you can take chunks of your inventory and ‘wrap’ them into one piece with overall reduced weight that can be broken down later.
- This is the only way to sell certain types of scrap to NPC vendors (such as steel) for caps.
- You can also use this concept to solve some Scoreboard headaches (see later in the guide!).
8. A pacifist? In THIS economy?
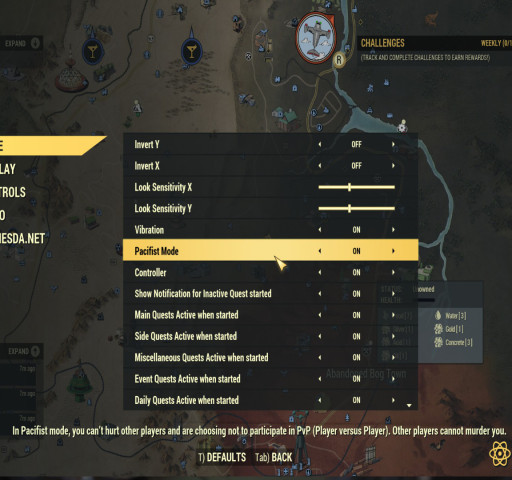
PVP is usually fun. In Fallout? Not so much. Turn it off and save yourself a headache.
When 76 launched, it was supposed to be a bit harder than your average game. The idea of fighting other players for loot while working with them in temporary alliances to defeat huge monsters was supposed to be part of the charm.And then it wasn’t.
- Pacifist mode prevents you from doing accidental damage to other players when you shoot them. And you’ll shoot them on a regular basis.
- If you don’t have pacifist on, your initial attacks won’t hurt them - but they’ll be able to shoot back at you (and then the game’s PVP rules apply).
- Turning on pacifist mode keeps you from being at the mercy of people who are intentionally trying to grief or just don’t care where their bullets land.
- It also keeps you from getting your backside turned into an omelet the first time you play around with a Tesla Rifle.
- Players can still hurt you though - trap items in camps, a nuke going off on your head (an actual nuke, not a mini-nuke), and if you happen to try to claim a workshop, PVP rules are automatically invoked.
- By and large, just turn it on. It’s in the option menu. F076 is a Player-Vs-Environment game with a half-baked Player-Vs-Player system in it that is inherently unfair in 99% of circumstances.
- That said, there IS a penalty system in the game. Breaking into “locked” containers or doors at other PLAYER C.A.M.P.s and attacking other players unprovoked without pacifist on can cause you to be “wanted.” At that point, you can be killed without penalty, you can’t see where other players are, and everyone can see where YOU are.
- Becoming wanted usually just happens by accident. If you want to get it over with quickly, go sit at a popular rail station until someone kills you for the game’s only PVP achievement.
9. Weapon/Armor Durability
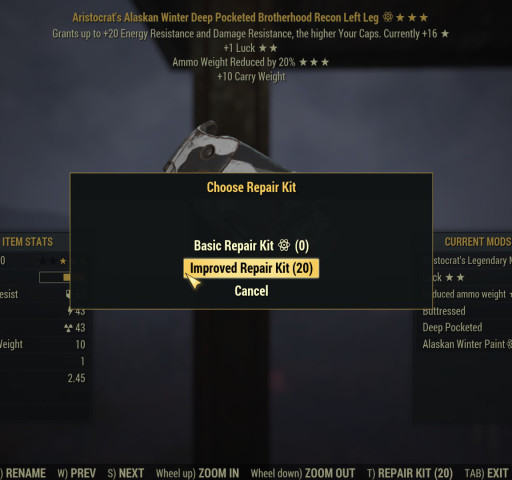
When your gear breaks, YOU break.
Durability is one of the few survival-type mechanics left in Fo76. In the early part of the game, it’s maddening; in the later parts, it’s usually just an inconvenience. However, it’s also part of the weekly and sometimes daily challenges.- Weapon durability decreases the more you fire a weapon. When it gets low, you’ll see a red gun icon at the bottom of your screen. Continue using it, and it’ll break and instantly auto-unequip.
- Armor and Power Armor durability does the same, only it breaks after you’ve been hit X number of times.
- Some perk cards will allow you to gain extra durability when you craft or modify your weapons/armor. Equip them, because the longer you can wear or use something without it breaking…
- Fix it Good and Weapon Artisan will allow you to double the durability of a repaired item. They’re your friends, once you can get the cards.
- You’ll routinely receive ‘repair kits’ and ‘advanced repair kits’ as rewards. If you’re in the field and can’t get out of an encounter easily, you can always use one on the spot if you must. Bring up your hotkey wheel and select the item in question. Inspect/repair, then repair, and select which kit you want to use. You’re back in the fight!
10. Currencies of the Wasteland
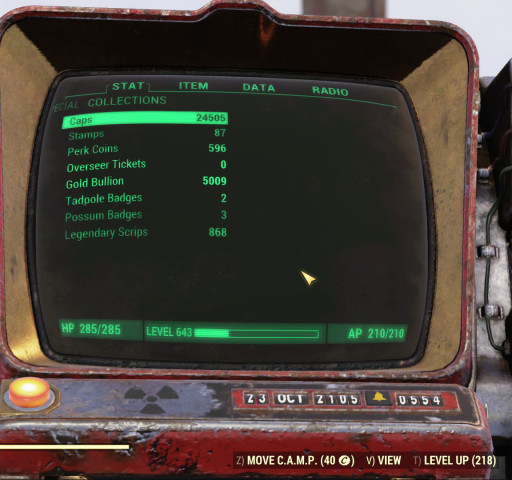
With nuclear war comes a decentralized economy.
You’ll find out in a hurry that a number of special items are behind their own unique currencies. It’s a Catch-22 situation; if Bethesda doesn’t flag ‘new’ equipment with ‘new’ requirements, older players can instantly grab it up, leaving newer players in the cold. However, it can make it harder on younger players to catch up because there’s so much grinding to be done.Caps are the default currency in the game; NPC and player vendors both sell items for caps, and there’s a max you can hold at any given time. NPC vendors can only offer up to 1400 caps a day (except for the monthly-ish ‘Caps a Plenty’ weekends when that’s doubled). You’ll need a steady supply of them to buy plans, buy special items, and trade with other players.
Legendary Script is the second most common. You need this to buy a variety of items from Purveyor Murmrgh at The Rusty Pick. You can exchange unneeded legendary weapons and armor at any of the giant yellow ‘Legendary Exchange’ vendors at rail stations up to a max of 500 script a day (with special event exceptions).
Gold Bullion can be earned at any point of the game, but you won’t unlock the majority of the vendors that can accept it until you complete the main questline for the Secret Service. You will want to hoard this as you begin your adventures - high-grade weapons and armor like Secret Service, Gauss Weapons, and the Plasma Caster are all unlocked via GB.
As an aside, you’ll rarely earn GB directly. Instead, you’ll likely come across Treasury Notes awarded for completing Public Events - these can be exchanged at The Foundation, The Crater, or Vault 79 for bullion.
- You can also visit Smiley at The Wayward to buy GB once a week with caps.
Tadpole and Possum Badges are used for a very specific set of item plans - notably, backpack mods. To earn these, you’ll need to pay a visit to the scout camp in the middle of the map near Grafton Steel and a good bit directly south of Wavy Willards. If you check your challenges menu, you’ll (eventually) find a list of weird tasks to do to earn these badges for yourself.
- Once you get the mod of choice you're after, there's next to nothing that these are useful for.
- The side-challenges can be a little fun, but ultimately, completely pointless.
Finally, you have Stamps - a relatively new invention in 76. Stamps are rewarded almost exclusively from Expeditions, which are endgame-level instanced dungeons that can be solo’d or done with a group.
- These stamps can be traded with Giuseppe at The Whitespring Refuge for armor, C.A.M.P. plans, outfits, and weapons.
- Stamps are the only way to unlock special weapons like the Auto Axe or the Union Power Armor (if you didn’t get it when it first came out).
- As of 12/31/23, this is the current end-game grind.
- To earn stamps the absolute quickest way possible as of 12/31/23, learn how to do “The Greatest Race” expedition - you can nab up to 20 in a run for a reward, and you can do it in a little less than fifteen minutes at a time.
11. Explore! CONSTANTLY!
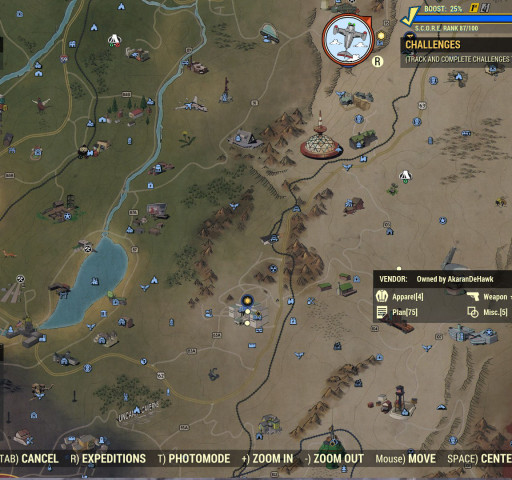
All told, it’s a big world out there - and this area is just part of it.
When I’m not trudging through the wastelands of Appalachia, I am… trudging through the wastelands of Appalachia. As an actual born-and-bred West Virginia resident, I’ll be honest and tell you that our state doesn’t get a lot of love - which is sad, because it is wild, and it is wonderful. We have fewer Deathclaws, but our roads are about on-par with what you’ll see ingame.WV is a huge place to explore on foot with an unbelievable number of secrets to find. Check your compass often and every time you see a grayed out or unfilled location on your compass, that means you haven’t found a new spot.
- You can get new locations on your map by climbing Lookout Towers and peering over the edge of the rails.
- The same can happen if you inspect various maps you’ll see scattered across the world.
- Once you’ve visited a location, you can always ‘fast travel’ there in exchange for caps.
- Locations are more or less static. Sometimes the game is updated with changes that may remove a spot or make a modification to it, but that’s not very often.
- Every location on the map is a public location, and if someone has recently run through it, you may find it more devoid of life than normal. Spawns repop about every 20-30 minutes.
12. Your C.A.M.P. is Important…
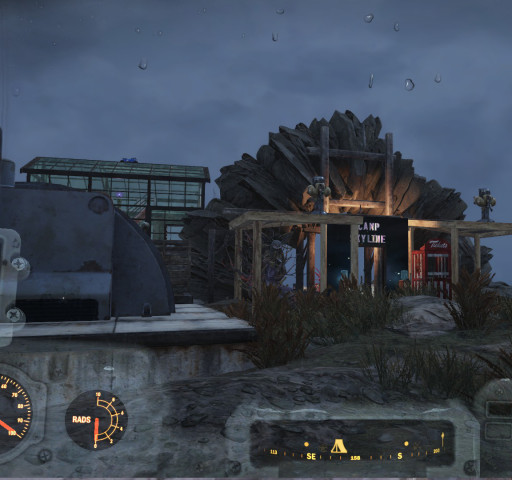
Building your camp around natural features can result in some interesting builds.
Your C.A.M.P. isn’t just where you go to make your armor and weapons. It’s where you can take a few seconds and live in relative peace. Yes, you will get attacked by random wastelanders and you may have to repair a few walls, but it’s a small price to pay. More importantly, you can do a few things at your C.A.M.P. that you can’t do anywhere else.
- Once you learn a basic bed plan you can get the ‘well rested’ boost by sleeping (briefly) in your base.
- You can build Shelters at your C.A.M.P. (unlocked via interacting with a ‘Shelter’ poster in a train station) which are the only 100% safe zones in the game.
- There are certain items that can be placed at your C.A.M.P. that are absolutely invaluable!
- Keep your eyes peeled for the Sympt-o-Matic plan from Daily Ops or on player vendors. This device cures you of any disease you have… instantly!
- You can place C.A.M.P. allies at your base, too. Look for them under the ‘Allies’ build menu. Some are unlockable, some are bought, some are rewards. A handful even give long-term quest paths, while others can give you short-term boosts to EXP, Strength, or ammo weight.
- Another plan to hunt for: Decontamination Showers and Water Purifiers (or Vintage Water Coolers) to first cure your rads and then harvest Purified Water.
- Your C.A.M.P. is also where you can place your player vendor machine to sell some of the excess items you’ve earned in your travels.
- Your base can be as basic as you want or as grandiose as you can design, and you can build more than one once you unlock the extra slots (but sadly, it takes atoms to unlock all of them).
- C.A.M.P.s are long-term; they exist as long as you want them to. Workshops, however, are temporary constructs you have to claim, defend, and build every time you decide you want one. In all honesty, Workshops don’t have much of a point by the end of 2023 - your C.A.M.P. is where you need to focus your building efforts.
- Your Collectron can also gather important things for you - certain versions can help you grab Nuka Cola, and the Santatron can collect holiday gifts for you around the Christmas season!
13. …But Don’t Forget to Eat.
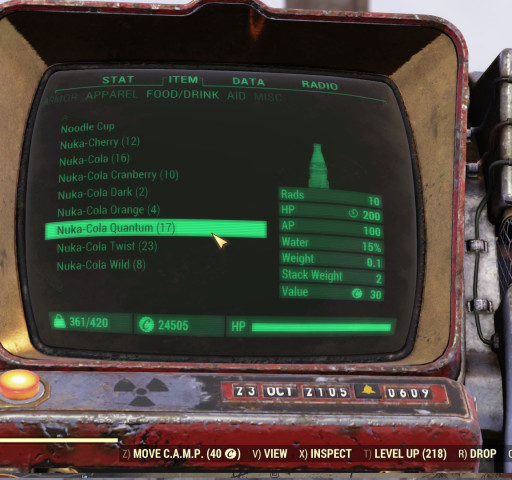
Nuka-Cola: the thirst zapper!
Staying well-fed and well-hydrated in Fallout 76 used to be mandatory, with heavy penalties applied if you weren’t. In the last few years, that’s changed; now you only gain bonuses from munching down the stuff you find in the wasteland. Food generally comes in three forms: pre-war (such as canned dog food, salisbury steaks, and noodle cups); raw food items (such as generic glowing meat and firecracker berries), and cooked (made at a cooking station with a recipe).- While you’ll occasionally get a challenge to eat canned dog food or pre-war food, you are much better off cooking your meals.
- There are a lot of recipes to learn, but the vast majority are incredibly common - and nearly every meat you find automatically grants you the knowledge to turn it into a cooked variant.
- Dirty Water is your friend… kinda. You need ‘boiled water’ for soup and tea, and it takes 2 dirty water to craft into 1 boiled water. Make sure you have your Super Duper perk card equipped!
- Wood is another friend. The good news is that you’ll find ample sources of it in the wild.
- Cook everything. There’s no need for you to eat raw food of any kind. It’ll cut down on the rads you ingest and lower the chance of you getting a disease.
- Most ‘prepared’ food gives you stat bonuses - Deathclaw Steaks grant strength bonuses, firecracker berry tea gives you a +25% crit damage bonus, and Brain Bombs give you a significant INT boost.
- One of my favorite meals? Cranberry Cobbler, made from 1 cranberry and 1 wood. This cobbler (not a pie) grants you an extra 5% EXP boost for about half an hour. Couple it with Brain Bombs or Brain Fungus Soup for a tidy, simple bonus.
- Alcoholic drinks can also give a STR bonus, but at the cost of INT; and Nuka Cola has various buffs across a wide variety of drinks.
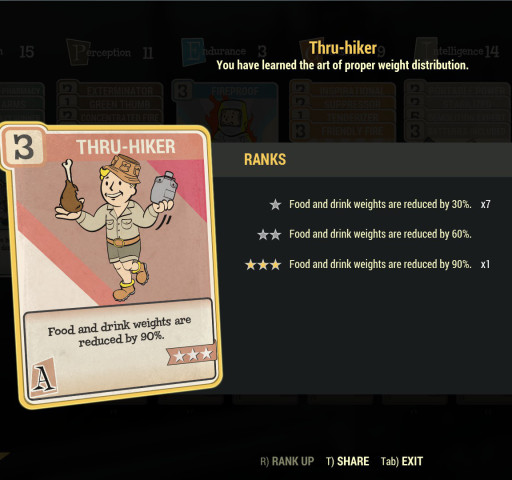
- Food can weigh you down. Look into the Grocer’s backpack mod, and the Thru Hiker perk.
14. Dying Isn’t a Big Deal
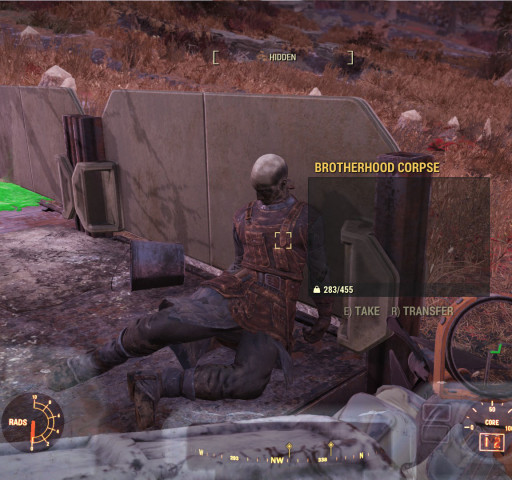
Okay, for this guy it was a big deal. Ouch.
I said what I said. This is a game that does not heavily penalize you on death anymore. However, there’s a couple things about it you should know.- Your armor takes a hit. But you also just died wearing it. It seems fair.
- Any ‘junk’ items you had on you will become available for free loot for anyone that finds your corpse. Sometimes people will harvest it, sometimes no. It’s impossible for players to tell if you died from a Mega Sloth or if you just dropped some junk unless they see you go down with their own eyes. Generally, if it’s on the ground, it’s free game - so unload your junk on a regular basis.
- If you die during an ‘event,’ your corpse is unlootable by anyone except for you.
- When you die, you’ll see a skull and crossbones on your map telling you where.
- Dying will slow you down. If you die repeatedly, your respawn timer will get longer and longer, which can be problematic in timed events or Daily Ops.
- It happens to the best of us. Don’t panic.
- Make sure you visit your stash box often just to keep the risk of losing precious junk to a minimum.
- Some players have “trap” C.A.M.P.s designed to kill you (even with pacifist on). So let me reiterate: empty your bags before traveling.
15. You’re Living in a Wasteland - So Grow That Extra Arm!
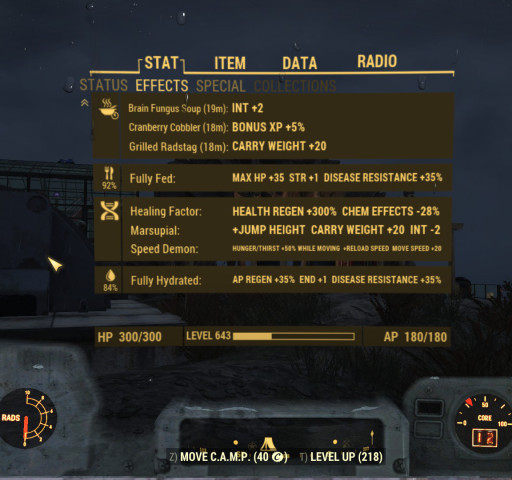
I only roll with three, but I know people that have many, many more.
At some point in your career as a post-Vault explorer, you’re going to mutate. Mutations are a big part of the game (so much so that there are some items that grant a bonus depending on how many mutations you have) and can change your playstyle drastically. You’ll want one or two for sure, but which ones?- Exposure to radiation can cause mutations at random, complete with positive and negative effects.
- You can also pick which mutation you want by consuming ‘Serums’ that are player-crafted recipes.
- You can have more than one mutation at any given time. I personally have three.
- The perk card “Starched Genes” at rank 2 keeps your mutations from being cured by RadAway or decon showers - leaving them part of your character as long as the card is equipped.
- The Class Freak perk card reduces the negative effects from your mutations significantly.
- Want to experiment with them? Try Speed Demon, which increases your movement speed and reload times while only impacting your hunger/thirst.
- Or Marsupial, which - while it does decrease your INT and lowers your exp gain - allows you to jump HIGH without the use of a jet pack!
- You can learn Serums from the Enclave Vendor at the Whitesprings near the endgame, but be warned: those plans are 20,000 caps each.
16. The Endgame Starts Early
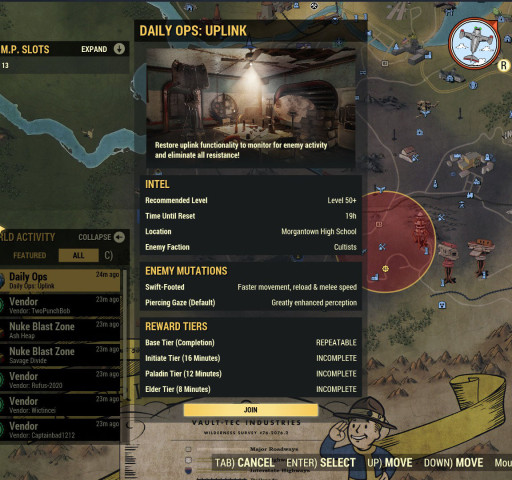
Almost everything in the late game has a recommended level of 50. I can’t make an argument that the endgame starts later than that.
Compared to other games, the Fallout 76 endgame arrives once you hit level 50 - with some exceptions limited to level 100. After that? The sky - and the wasteland - is the limit. No enemy in the game (as of 12/31/23) has a level higher than 100, and combat is generally scaled to that concept. As you level up, you’ll find that levels are really just a number - with the exception of unlocking all of your Legendary Perks at max. Combat, scavenging, and everything else stays at the same difficulty curve.- Weapons and armor are level capped at a crafting limit of 50 for everything (or very close to it).
- By 50, you should have a build strong enough to survive fighting the main bosses in the game.
- You’ll still have a lot of work to do - you’ll need to unlock your Legendary Perks by getting up to level 300+, you’ll need to start converting your Legendary Script into better weapons and armor, and you’ll need to farm Treasury Notes, Stamps, and more. But in this regard, you’re just grinding the gameplay, and you’re not seeing changes in terms of enemy strength or unlockable regions.
- Just don’t panic if you hit 50 and go, “That’s it? I unlocked the map?” because now you can semi-sorta relax and just… explore!
17. Like Power Armor? Consider a Matching Set.
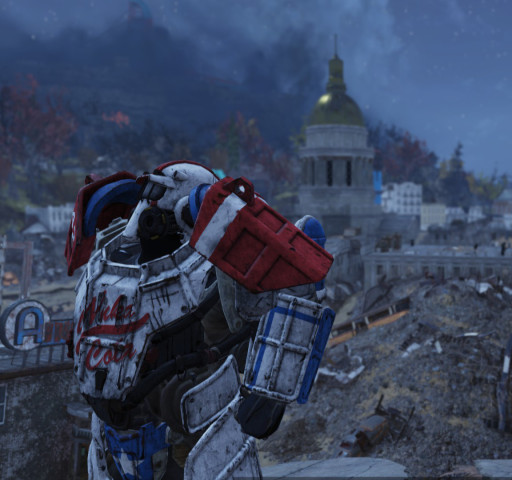
The golden dome of the Charleston Capitol Building… and the red, white, and blue of Nuka Cola.
While not for everyone, Power Armor is my personal favorite loadout in 76, and it’s mostly because a few different types of armor offer some major special effects once you have on a complete and matching suit.- Excavator Armor, which you can get around level 30, allows you to mine double the amount of resources you’d otherwise find from metal deposits in the game. It can be handy if you’re starting out-ish, plus, if you buy the plans for Calibrated Legs, you gain a major boost to your carry weight capacity
- The Hellcat Power Armor reduces your incoming ballistic damage by 12% once you have a full set equipped. As an extra bonus, this calculation resolves before the game considers any other damage resistance or mitigation effects you may have.
- The Union Power Armor will not only grant +75 carry weight (which offsets the weight of the armor itself) but also completely mitigates ALL poison damage - meaning you are 100% resistant to poison hazards! This is a HUGE help for certain events and mutations you’ll run across.
18. Ultracite
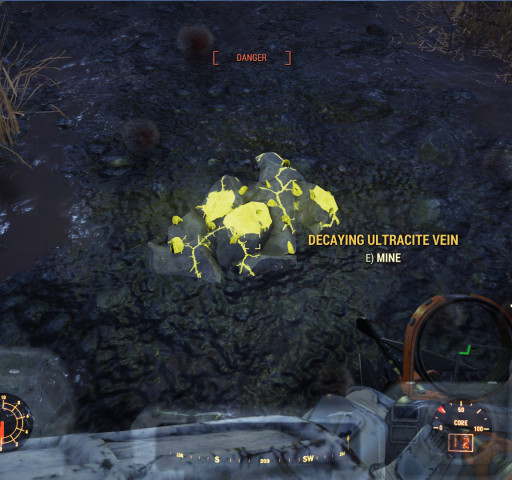
That danger notice is no joke. Ultracite Veins are almost entirely found near Fissure sites, complete with Scorchbeasts and their viral minions.
Speaking of ammo, there’s one type that is a boost above the rest. Ultracite ammo becomes available in the end game once you get near the very end of the main quest - but it’s not easy to come by (at first). Ultracite ammo requires a weapon to have the ‘prime receiver’ mod attached, which you mostly earn in the endgame. From there, they require different types of Stable Flux, which is it’s own crafting recipe.- Flux is irritating. To make 1 piece of stable flux, you need to have 1 glowing mass, 1 hardened mass,1 high radiation fluid AND 10 raw flux.
- Raw flux spawns on freshly-irradiated plant life and varies from plant to plant
- The other materials are uncommon drops from irradiated enemies
- What irradiates an enemy or a plant? A nuke. You’ll have to scavenge through nuke zones to farm the materials for every piece of stable flux you want.
- On the upside, getting contextual ammo from drops is easier than it ever has been. You can keep a pretty steady stockpile of MOST ammo types just by using the weapon.
- The downside is that weapons like the Ultracite Gauss Minigun chew through so much ammo that you’ll probably still end up crafting it.
- You can find stable flux on player vendors on occasion (and the same for high-rad fluids, glowing mass, and hardened mass).
- The DPS you get from Ultracite is pretty good, and since you’ll encounter more Scorched than anything else by volume, it’s a very valid choice if you can handle routine farming runs.
19. Double Mutation Daily Ops/Mutated Events
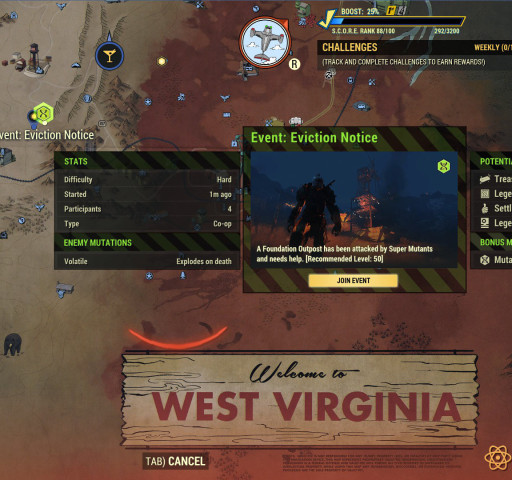
“Volatile” mutations (and Scorchbeast attacks) are why I recommend always using the ‘Dense’ chest mod for both Power Armor and regular. You lose the ability to have a jetpack in regular armor but you also aren’t picking your ribs up out of the garden when something goes ‘boom.’
You’re all grown up, you’re out on your own, and you’re grinding away in the wasteland like the happy-go-lucky vault dweller you are. By now you’ve probably run a few Daily Ops, but you’re a little confused about ‘Double Mutation’ events. Let me crack open your Pip-Boy and give you a little S.P.E.C.I.A.L. education.- Double Mutation Daily Ops are slightly harder versions of the Daily Ops you’ve come to know and love (or loathe).
- The bad guys inside have been granted two mutations instead of just one for an extra challenge.
- However, you also get double rewards - including extra chances at rare plans that you may not otherwise have.
- DMDOs cycle usually every other week.
- On the weeks between (with the exception of a few special game-wide events), Mutated Events will run at the top of the hour every hour. These events are the same ones you’ve come to know and love (like Line in the Sand, Guided Meditation, Uranium Fever, or Lode Bearing) except the wastelanders fighting you are going to have one of the mutations you’d otherwise normally see in Daily Ops.
- Daily Ops are a place to find plans you honestly need to play the game to its full potential (like the Sympt-O-Matic) and Mutated Events can reward you with special Mutated Party Packs that have rare plans inside them.
- Mutated Events are absolutely worth doing, and if you’re lacking Daily Ops plans, you may want to consider doing a few Double Mutation DOs.
20. Special Scorched Events + Treasure Hunters
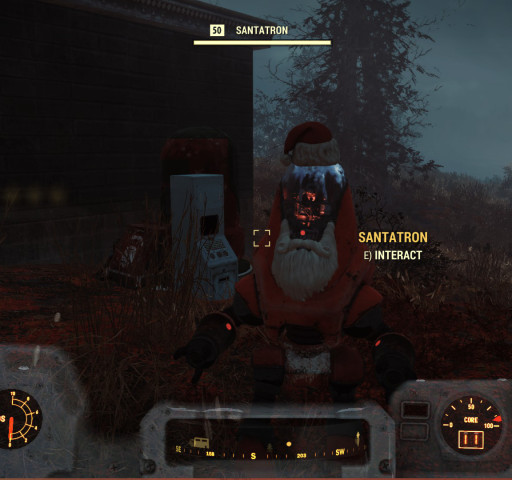
Santatron! He has quite a lot to say about your place on the naughty list…
If there’s one thing that the wasteland does right, it’s allowing for seasonal events that give us a steady rotation of ‘things to do.’ There are three that cater towards a special type of ‘traveling farm’ though, and Bethesda has signaled they may come around a little more often.- The Spooky Scorched event takes place around October every year. During this event, random Scorched will spawn as Legendary monsters while wearing assorted Halloween-themed costumes. Kill them and get treat bags that may have legendary items, plans, and other goodies.
- Holiday Scorched do the same thing - instead of Halloween costumes, they’ll have on Christmas attire. Drop them and get Holiday Gifts!
- The seasonal Scorched only spawn in outdoor locations.
- However, they spawn in ANY location ANY normal Scorched spawn can happen! They’ll even spawn from nuclear blasts at Fissure Site Prime, the event Distant Thunder, A Line in the Sand, and others.
- For Holiday Scorched, you can also set down a Santatron Collectron station to farm plans at your C.A.M.P. or workshops!
- The Mole Miner Treasure Hunters follow the same concept, except they are random through the entire outdoor world and aren’t limited to just Mole Miner locations.
- All three spawn types will have special noises associated with them to give you an audible clue that they’re nearby - Mole Miners will have a radio/radar signal, Holiday Scorched will jingle, and Spooky Scorched will sound like a bad Halloween sound fx tape.
- You can also buy wrapping paper or gift pails from NPC vendors during their respective events. These can then be crafted at a tinkerer’s bench for even more gifts for you to unwrap!
21. ‘Tis the Season to be Seasonal!
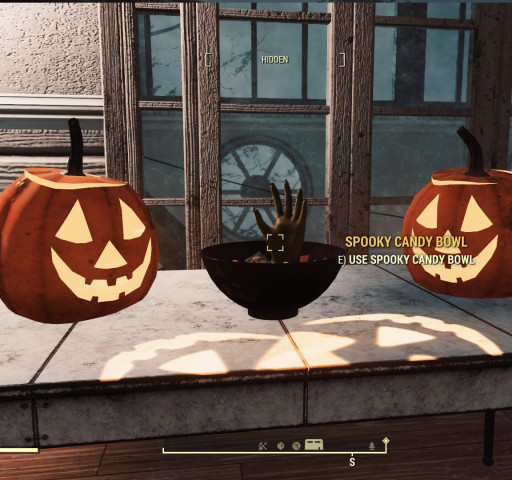
Like giving away candy? Every October, you’ll have more than a few opportunities.
Like the three minor events above (which aren’t really so minor, they’re just not ‘intense and active,’ you’ll find a few more seasonal events that run at various parts of the year. These events have their own set of seasonal plans, special bosses, and bonuses. All three of these events will take place hourly and come with some warning on the Bethesda official social channels and Facebook groups so you can plan accordingly.- The Mothman Equinox will spawn random cultists in the world with gifts of their own to steal, as well as an hourly three-part multi-person event that transforms Point Pleasant into a twisted, drug-fueled haze of violence and gore.
- As a note, the real-world counterpart to this - the Mothman Festival every September in Point Pleasant - is a much more family-friendly affair (with significantly less mothman ‘dust’). (Author note: I personally do fundraising there annually as a Ghost-busting cosplayer!)
- Meat Week usually lasts for two, and is sponsored by the super-friendly Super Mutant Graham. You’ll be tasked with doing the Primal Cuts event for special meat items, and then you’ll get to help Graham create the biggest bestest BBQ in all of Appalachia!
- When the Aliens arrive, you need to get out the big guns. Every hour for a couple weeks at a time, angry aliens will drop from the sky with the intention of sucking your brain waves into their ships for fuel. It’s… weird… even by Fallout standards. But, it’s when you’ll get to learn some special weapon plans - like the Alien Disintegrator!
- Fasnacht Day and the & Fasnacht Parade is another fun event (that also has a correlation to a real-life WV event!) that drops a host of collectable masks, recipes, and other goodies.
22. Master Infiltrator is Your Friend
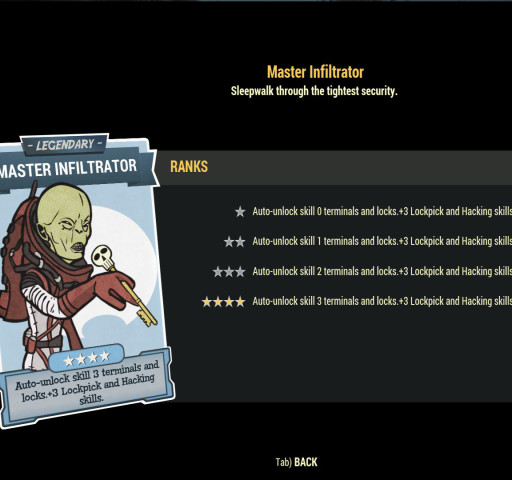
Locks are an integral part of the game. Do yourself a favor and make them pointless.
This is a late-game bit of advice, but it’s a sound one. Once you gain access to Legendary Perks, consider Master Infiltrator as one of your first two (the other being Ammo Factory).- Big perk, great function: rank 1 will auto-pick level 1 locks and level 1 terminals. Rank 2 and rank 3 does the same thing for the higher level locks… and you don’t fail.
- It also removes the need to have the appropriate lockpick or hacking perk card equipped. No more pausing to switch out cards or skipping locked safes; have MI equipped and done. You’ll free up as many as six perk cards with one skill!
- The downside? Some players (myself included) lock parts of our camp (such as resource generators and Collectrons). This perk doesn’t distinguish between NPC locks and player locks - and picking a player lock is a crime that can get you a wanted level.
- This is purely a quality of life perk that removes two minigames from the gameplay experience. For me, it’s worth giving up on potential DPS or extra perks. For you, it may not be.
23. Two Shot Weapons? I Was Told There Would Be No Math.
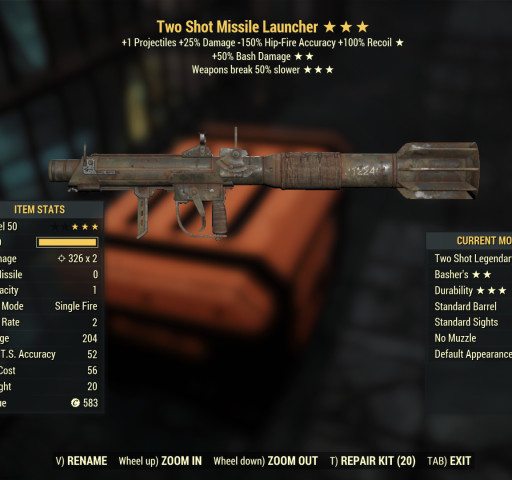
I honestly don’t feel like this makes any sense, but it’s the apocalypse, so…
Sorry to drop this one on you but here’s one game mechanic that doesn’t quite make sense to me. It’s something you need to consider when you’re checking your damage output and min/maxing some of your builds.QUICK NOTE:
The Two Shot Legendary Effect has gone through multiple changes since launch. When I wrote this, I wrote this with the best understanding I had at the time. It may or may not change by the time you read it. I apologize if it eventually becomes outdated!
- The “Two Shot” legendary perk sounds like it should give you two rounds that do the same damage - so 2x damage, right?
- Wrong! You get one shot at regular damage and another shot at between 25 and 50% of that.
- This is still a DPS boost; assuming both rounds hit, you are dealing more damage per shot than a weapon at base strength (all other things equal).
- But that’s if all things are equal - and they aren’t. Your second shot (and sometimes your first) doesn’t always hit, because Two Shot weapons have lower accuracy than others.
- There is a ton of math that goes into this but let me summarize it: on normal ballistic weapons, two shot is not your friend. You can do more damage with effects like Anti-Armor (if you’re facing a bad guy with a high armor rate) or even quad (by reducing the time you have to reload).
- There’s an exception to this rule: explosive weapons, or weapons with an explosive effect. This includes the Nuka-Launcher (!), the Hellstorm Rocket Launcher, or the Gauss Shotgun.
- Explosive damage is calculated differently; the shell doesn’t cause the bulk of the damage, the explosion does. If you land a pair of grenades at someone’s feet, they’re going to blow up rather nicely.
- One more thing: damage is damage, but how fast are you killing bad guys?
- (Example, not hard numbers) Two shots from a Gunther's Big Iron may kill a Scorched Annihilator, but there's significant reload and fire delay between bullets. By the same token, it may take five direct hits from a Gauss Minigun - but you can down three scorched in the same timeframe. Don't just consider damage BOOSTS, consider speed boosts - like Quad, which quadruples the ammo in your clip, saving you reload time... and thus, allows you to kill creatures faster.
In summary: A two-shot rifle is nice, but an anti-armor one is probably better. An anti-armor grenade launcher is great, but a two shot one solves your crowd control problems entirely.
24. Who’s Da Boss?
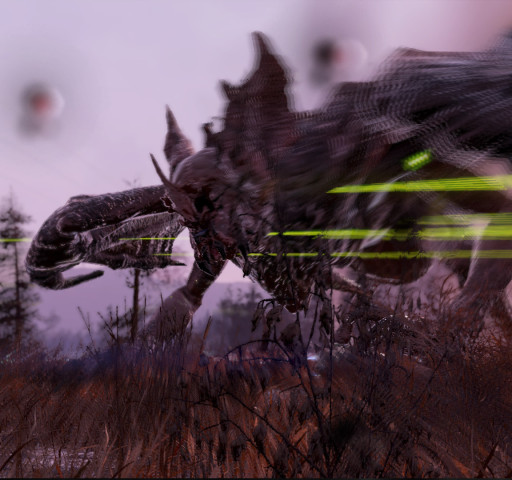
The Scorchbeast Queen is not photogenic.
Fallout is mostly a game of hordes and farming - but there are a few major end-game bosses that need to be taken down. Three of the four only spawn when someone fires a nuke at certain parts of the map, but the fourth can be triggered by anyone with 2,000 caps to spare.- Encryptid is the end encounter of the Lying Lowe questline. To start it, check out any of the Sheepsquatch posters in any of the train stations. Once you get to the end, buy an Assaultatron Recall Board from any NPC train station vendor and turn it into a Recall keycard at a Tinkerer’s workbench.
- From there, go to the Pylon Ambush site. Activate the recall system and a horde of robots will spawn until the Imposter Sheepsquatch arrives.
- This is an easy way to get ‘kill a Legendary Enemy’ and “kill 10 robots” tasks completed.
- Earle Williams is the next big bad - and he’s a bullet sponge. Fire a nuke at the Monongah Mine area to trigger this one. Once the nuke goes off, Earle will wake up and the quest A Colossal Problem will start.
- This event is one big boss with an ending slew of wendigos that’ll stun you and try to ruin your day. Keep the trash cleared and unleash hell on the big guy until he goes down - then run away fast!
- The Ultracite Titan is a fun fight and it isn’t even that tough. Drop a nuke to the west of the Nuka World carnival, and get ready to fight a giant naked mole rat… and mole miners.
- The key to this event is just using melee weapons to destroy the Ultracite Shards that pop up. Until they’re destroyed, it won’t take any damage.
- Last but not least is the Scorchbeast Queen (SBQ). It’s reasonably safe to say that she’s spawned more than any of the others - she’s easy to kill, she spawns hordes of various types of scorched (including animals!), you can get a lot of legendary items from her, and it irritates the Prime Fissure/Cranberry Bog area to make it easy to farm large quantities of flux.
- The only thing to note on the SBQ is that the longer she’s alive, the more scorched will spawn. It makes it a nice boost to anyone trying to farm holiday drops.
25. Time to Play the Game!
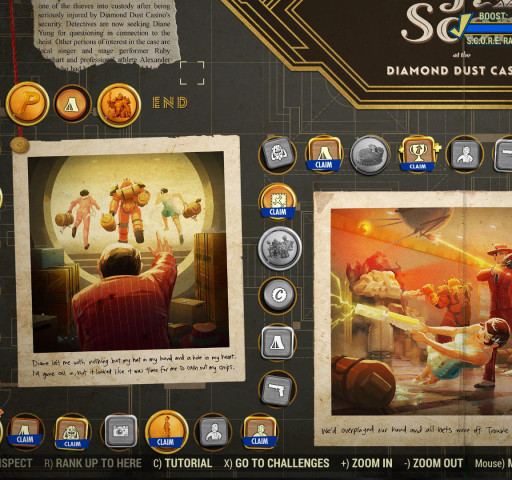
Meet the Scoreboard - the driving force that asks you to log in nearly every day to beat it. Do it right and you can clear it in a month; exploit it and you can have it done in a week.
This is almost an article in and of itself and I struggled with having it be the first tip or the very last. Let me start with the basics on what the scoreboard is and what you can get from it. The seasonal scoreboard is the daily grind for a lot of players, and for good reason!The seasonal scoreboard is updated every 3-4 months with a new ‘season.’ Each board has new and different rewards plus a treasure trove of supplemental goodies. Sometimes you’ll find these rewards months (or years) later in the Atom Shop, so it’s worth your while to play through.
- Common rewards include things like supply boxes, gold bullion, legendary scrip, carry weight boosters, and more.
- Other rewards include season-specific armor and weapon paints, C.A.M.P. items of various levels of usefulness (the current season has a Company Tea machine that creates AP regenerating tea… for free!), and boosts that help you progress along the board.
- Every Tuesday at noon EST, you’ll receive ‘weekly’ challenges. Every day at noon EST, you’ll receive new ‘daily’ challenges. Completing these challenges rewards points that go towards your scoreboard level. You can claim your rewards as you earn them, or all at once.
- There are regular (monthly or so) events that will grant “double score,” which will boost the point reward you get for each challenge.
- You’re given two free ‘re-rolls’ every day that can be used on weekly or daily challenges. Don’t want to go hunt down a bobblehead? Re-reoll it. Don’t feel like capturing three workshops? Re-roll it!
- You can also buy additional re-rolls, but you shouldn’t need to.
- Playing intelligently can cut down the amount of time it takes to beat these every day. Need to complete an event AND cripple two Super Mutant Heads? Check and see if a Super Mutant Horde or Eviction Notice event pops up. Need to kill a legendary? Go spawn Encryptid, or hunt down a Holiday Scorched!
- Once you hit level 100 on the board, you can continue to complete daily and weekly challenges for generic item rewards (like atoms, supply packages, nuclear keycards, and more).
- Until you complete the board, you’ll gain 100 SCORE points every 10,000 exp you earn. Make the most of this! Use all of your EXP buffs from food and perk cards (like Cranberry Cobbler and Inspirational) and then hit quick Expeditions like The Greatest Race with a four-person group at 4x EXP bonus and gain a slew of experience and score - fast!
- On occasion, you’ll get a 25% score booster that lasts for 24 hrs that can be used whenever you want. My suggestion? Wait until the weekly challenges refresh, and play much later in the day than you normally would. Pop the boost, then play the next day at the regular time. Get it done right and you’ll overlap two day’s worth of daily challenges for the boost to work on!
Find these tips helpful? Want to get more out of your wasteland experience? Check out one of these guides below!
[Top 10] Fallout 76 Best Weapons in the Game
[Top 5] Fallout 76 Best Builds in the Game with Legendary Effects
