Home
Home PC Game Trailers
 News
News Menu
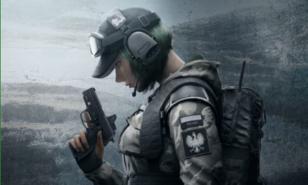
MenuThe 25 Best Rainbow 6 Siege Settings That Gets You More Kills
Updated: 24 Dec 2019 2:46 am

"One Shot; One Kill, Baby!"
 BY: M M
What Are The Best Settings in Rainbow Six Siege?
Here are 25 settings that can help you get more kills and play like a pro.
25. Enable FPS Counter
Enabling the FPS (Frames Per Second) Counter will allow you to see how fast your game is running. It will help you know what you need to do to make your game run faster, or just to make sure your game is running as it should.
If you’re playing on PC, simply go to settings, go into the gameplay tab, and you will see an option that says, “Display Game Info”. Enable this to see the FPS counter.
This will help you get ready to improve your game’s framerate or if in a game, will help you prepare for the momentary framerate drop.
24. Brightness Up
This seems like a pretty simple setting to fix but it can be life or death on any map at night, or in dark hallways. A lot of players don’t take advantage of this and end up dying because of it.
Go into game settings, go to display, and then turn the brightness up to wherever you feel is best. I personally recommend 65.
Now you will see the enemy first and won’t be caught off-guard by someone hiding in the shadows.
23. Screen Hertz
Depending on your monitor and computer, you will be running a different refresh rate measured in Hertz. The higher the Hertz the better, but it only works if your FPS is higher than the refresh rate.
After checking what your FPS usually is, go to settings, then the display tab, and you will see “Refresh Rate”. After optimizing your FPS (which we will get to soon), you will want to set this to a number just below your average frame rate.
Now your game will not have any FPS drops which result in a weird skipping of the screen. Nobody wants that.
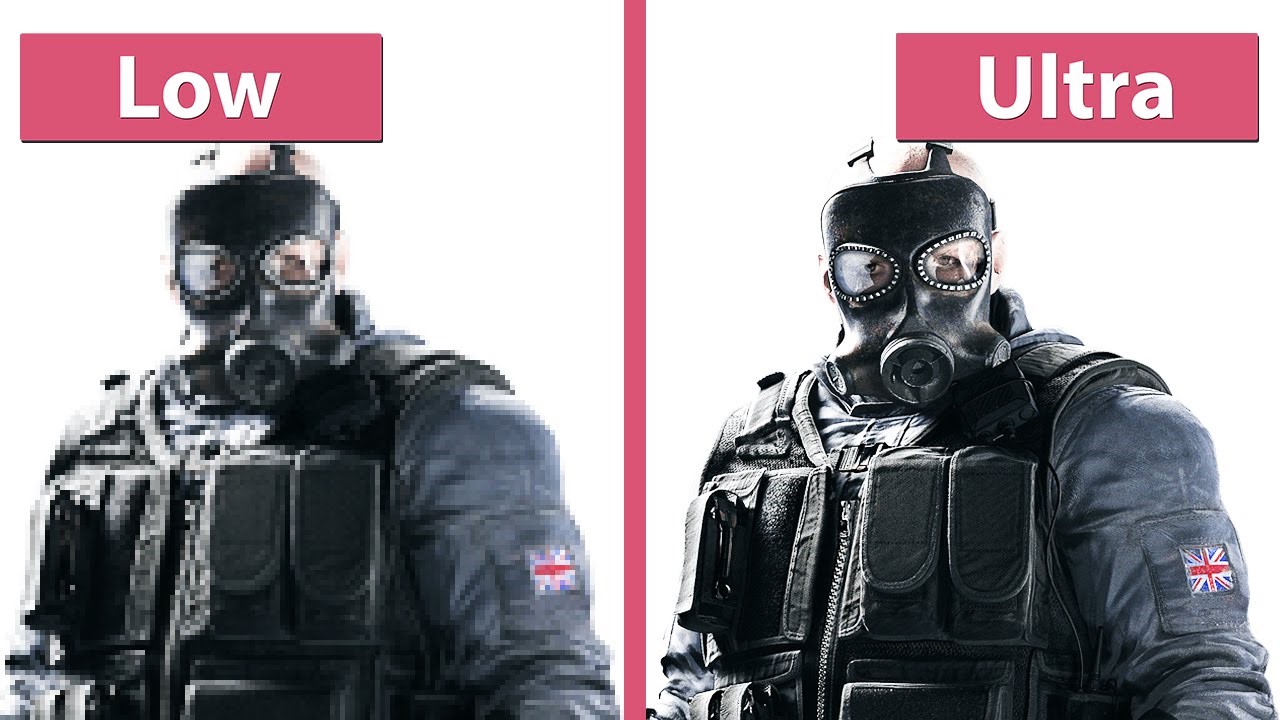
22. Texture Quality
This is pretty self-explanatory; it changes how grainy the game looks. Depending on how powerful your PC is, this setting will help the game look better and allow you to see more small details, like someone’s head peeking out a window halfway across the map.
Go to settings, and then to graphics, and it will be titled “Texture Quality”. If you have a low-end processor, keep it low, and it will help your FPS stay reasonable. But if you aren’t worried about FPS and have a more powerful GPU, then go ahead and put it to medium or high.
Now you will be able to see Caveira’s head edging around the corner at you from down the hallway. Headshot!
21. Texture Filtering
Texture filtering is the key to getting the edge in long-range encounters. In Siege, the higher your texture filtering, the better you can see things far away. Bonus? It barely costs any frames per second.
Go to Settings, the Graphics tab, and find Texture Filtering. It can go all the way up to x16, and as long as your computer isn’t slower than your grandma, it can handle it just fine.
Now when you try to spawn kill, you’ll actually be able to see if you’re shooting an enemy or a tree.
Never again be one pixel away from owning a match again!
20. Anti-Aliasing
This is a setting that a lot of people miss, yet it can be very important. Just like with texture quality, this helps you see better, but it is more of a fine-tuning. It can help avoid “pixel stairs”, where you can see the individual pixels and how not straight they are.
When you go to graphics settings again, you will see that Anti-Aliasing has five options and that below it is also “Render Scaling” and “T-AA Sharpness”. If you have a great PC and never have to worry about lagging, you can leave the Anti-Aliasing off and turn the other options all the way up. If you don’t put it at T-AA, I recommend that you never use FXAA. T-AAx2 and T-AAx4 are both great, but they are a little overkill and don’t change much. If your processor has plenty of FPS, you can use T-AAx2 (it’s a little better), but you won’t notice much.
This will be helping you to see lines more clearly, giving you a better picture in the whole game.
19. Field of View
Your field of view can be really important, and this setting comes down to preference. It works like zooming in; the higher the setting, the more you will see, but the farther away and smaller things will seem.
Go to settings, display, and find Field of View, and change it to whatever you’d like. Most pros use between 80 and 85.
This will help you find the sweet spot of vision, and see more than the default settings allow.
18. Aspect Ratio
The screen ratio changes how you see into the world of Siege, and it affects your field of view. It is up to you which setting you’d like to use, but it’s good to know which is which.
Going to Display in the game settings, you will see the option Aspect Ratio. The two settings are 21:9 and 4:3. 21:9 will give you a wider field of view, allowing you to see more on your sides, but 4:3 will make it easier to see enemies. Most pro players play with 4:3, but it’s up to you.
This will help define your field of vision to your liking.
(NOTE: This will affect your mouse speed and horizontal sensitivity)
17. V-SYNC
Now this is one that a lot of people disagree on whether you should use it or not. V-SYNC helps to avoid screen tearing and lagging too much, but it also leads to its own lag.
If you ask any pro, they will say that they have this turned off. That’s because they have top of the line computers that don’t need it: a lot of elitists will tell you the same thing. So if you have a great processor and don’t ever have frame skipping or screen tearing, then don’t ever worry about this. But if you experience these things a lot, then you might want to try it out. It usually completely stops them. However, this sometimes can cause the input to be a frame behind, meaning that what you see is happening one frame sooner. Ultimately, this doesn’t affect much at all; just comes down to a hundredth of a second, but don’t use V-SYNC if that matters to you. To turn it on, go to Settings, Display, and click on V-SYNC.
This will stop any screen tearing or regular lags for you, with a slight trade of frame timing.
16. Shading
If you are an experienced PC gamer, you will know that shading is essentially an FPS killer. If you have a powerful PC, don’t worry about this, but if you are scrambling for extra frames, this will help a lot.
Go to Settings, click the Graphics tab, and find the Shading slider. Set it to low.
The only thing it will change visibly is how bright or dark certain things are, so you’re just going to get a huge FPS boost.
15. Night Mode
This is a cool sound setting that a lot of people don’t know about. Turning it on will make loud sounds like gunshots and grenades quieter and leave more room to hear footsteps and other smaller sounds.
To enable this, go to Settings, then Audio, and find Night Mode.
Now you’ll be able to hear the clip exchange mid-firefight, and Fuze placing a charge on the ceiling. Every noise counts.
14. Mouse Acceleration
Mouse acceleration is something that you really don’t want in any first-person shooter. If you’re slowly turning, wait a second and then what?!! Now you’re turning fast. Pretty simple concept, but it can be a real pain if you haven’t turned it off yet.
This can’t be done in the game, so go to your Desktop, search for Mouse Settings in the Windows Search bar, go to Additional Mouse Options, Pointer Options and uncheck Enhance pointer precision.
This will help perfect your aim. When doing a quick 180 to headshot the enemy shooting at you, it is a lot harder if your mouse is accelerating. Now it will move only as much as your hand moves.
13. Sensitivity
Another one that seems really simple, a lot of people don’t master their sensitivity. This choice is truly up to you, as some people play better with low sensitivity while others play better with high.
Go to Settings, Controls, and find Sensitivity. Change it to whatever you’d like. Just spend a couple of hours finding the right one, and then stick with it!
Mastering your sensitivity will help you land every shot, which means way more kills.
12. Gadget Deployment
Gadget deployment settings might seem like a preference, but it’s one that can either save your life or doom you. In normal gadget deployment, once you start, it can’t be stopped. If you select Advanced, it will let you interrupt deployments, which is crucial if you start getting shot right when you start it.
Go to Settings, Controls, and find Gadget Deployment. Switch it to Advanced.
Now when Ash rushes objective right at the beginning of the round while you’re putting up your last reinforcement, you can cancel and take her down.
11. Aim
Aiming can either be set to hold or toggle. When put to hold, it will help you move faster in combat and it just feels more natural.
Go back to Settings, Controls, and make sure aim is set to Hold.
You’ll find that aiming is a lot faster and you’ll be checking corners at high speeds.
10. Lean
If you’ve played Siege for even an hour, you’ve found that leaning is one of the most important tools that Siege gives you. Switching Lean to toggle will free up your finger when trying to quickly peak corners, and it will make lean switching a lot smoother and more effective.
Go to Settings, Controls, find Lean and set it to toggle.
Now you won’t have to hold down your Lean key just to watch a doorway.
9. Aim Down Sights
This is the sensitivity you have while aiming down your sights. You’ll spend most of your game looking through the crosshairs or scope of your gun, so finding the right sensitivity for this is just as important as your normal sensitivity.
Go to Settings, Controls, and find the ADS slider. It is measured as a percentage of your normal sensitivity. Just mess around with it and find what works best for you.
This is going to make the difference between a quick flick to get a headshot, and, if up to high, completely missing your target.
8. Reflection Quality
If you want your game to look super beautiful, reflection quality will give the game the final touch to looking real. However, this does not affect your gaming at all, except to kill your framerate.
To lower the reflection quality, go to Settings, Graphics, and turn the slider as low as you’d like.
This will help you get the extra couple frames per second.
7. Ambient Occlusion
Ambient Occlusion is another complex graphics setting that helps the game look a little better, but takes up a lot of framerate. It affects how much light shines off certain surfaces, so if that’s your thing, keep it on.
Go to Settings, Graphics, and find Ambient Occlusion. Turn it off.
This will help your game run even faster.
6. Lens Effect
Lens effect will give you the option to see bloom and lens flare. These can be pretty and realistic but can harm your online play.
To turn Lens Effect off, go to Settings, Graphics, and toggle it to off.
This will not only make opponents easier to see, but it will also give you the extra FPS boost.
5. LOD Quality
LOD Quality does not affect your gameplay except slightly through FPS. All it does is make the environment look really pretty, so if you want a beautiful game, keep this on.
To turn down, go to Settings, Graphics, and turn the LOD Quality down to whatever you need. Medium or Low usually works well. Keeping this on won’t take away too many frames, so you can keep it on if you’d like. It will help you notice small details.
Starting to get tired of little FPS tweaks? Just remember that this is going to keep optimizing your game.
4. Overclocking
If you have a newer CPU and/or CPU, you can overclock them to optimize your experience. Overclocking will give you huge performance boosts, so you can have more room for customization and help everything run smoothly.
Overclocking is done with additional software, so go find a good one like ASUS GPU Tweak or Intel Extreme Tuning, download it, and follow all the prompts. Overclocking should be explained in the application.
On older or less powerful computers, this won’t help much, but on a newer, faster CPU or GPU, it will help you maximize all your settings while still running at 144 FPS.
3. Sound Configuration
Keeping sound on Stereo will make the game sound exactly how Ubisoft intended it to. Some headsets allow you to alter this, and some computers do too.
To make sure your sound is still set to Stereo, go to your Audio Settings within your headset settings and find where it allows you to change it. If it doesn’t let you change it, you don’t have to worry about it.
Now your headset won’t be altering the sound and noises you need to hear.
2. Map Settings
Map settings allow you to choose what maps you play. If you’re playing casual, go ahead and turn off all the maps that are in Ranked rotation.
Go to Settings, Gameplay, and Maps. Disable all the maps that aren’t in rotation to give you the most time on the maps that matter.
You’ll be able to master the important maps faster and be ready for Platinum rank.
1. Game Mode Settings
Game mode settings, like map settings, allow you to choose what game modes you play. If you want to go pro, turning off Hostage and Secure Area will help you master all the necessary maps on Bomb (the mode all pros play).
Go to Settings, Gameplay, and find Game Modes. Deselect all the modes you don’t want to play on.
Now you won’t have to worry about Fuzing the hostage.
Share this Article:
- Log in or register to post comments


")