 Home
Home PC Game Trailers
 News
News Menu
Menu[Top 15] Rainbow 6 Siege Best Graphics Settings That Give You An Advantage
Updated: 04 Dec 2021 7:38 pm

One of the reasons why ultra-settings is kinda dumb
 BY: Kristoffer A. A.
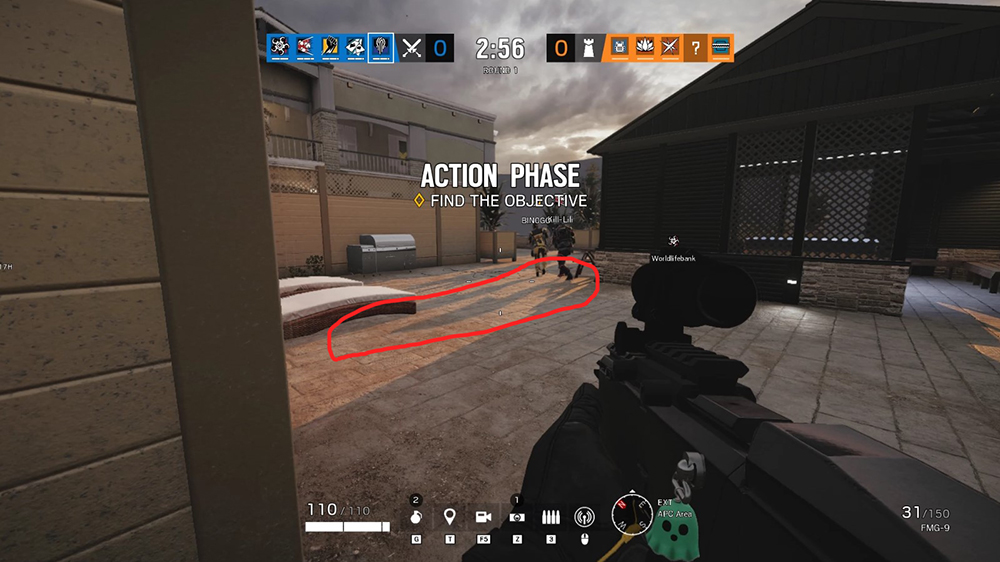
Graphics settings in Siege play a major role in the game. Oftentimes, your graphic settings can mean the difference between a kill or being killed. It also directly affects your frame rate, and the less frame rate you have, the more disadvantaged you’re going to be. And just like in the above image, it can directly affect whether your vision will be distracted by other things in the environment.
Note that for these tests, we will be using ultra settings as control and will be adjusting each graphic setting to really see what makes it different and if it can give us any advantage.
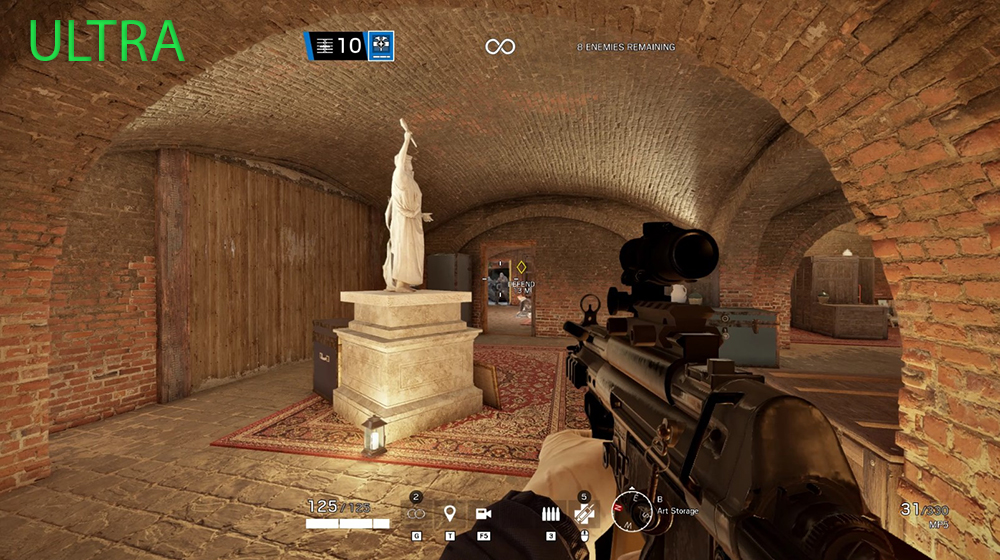
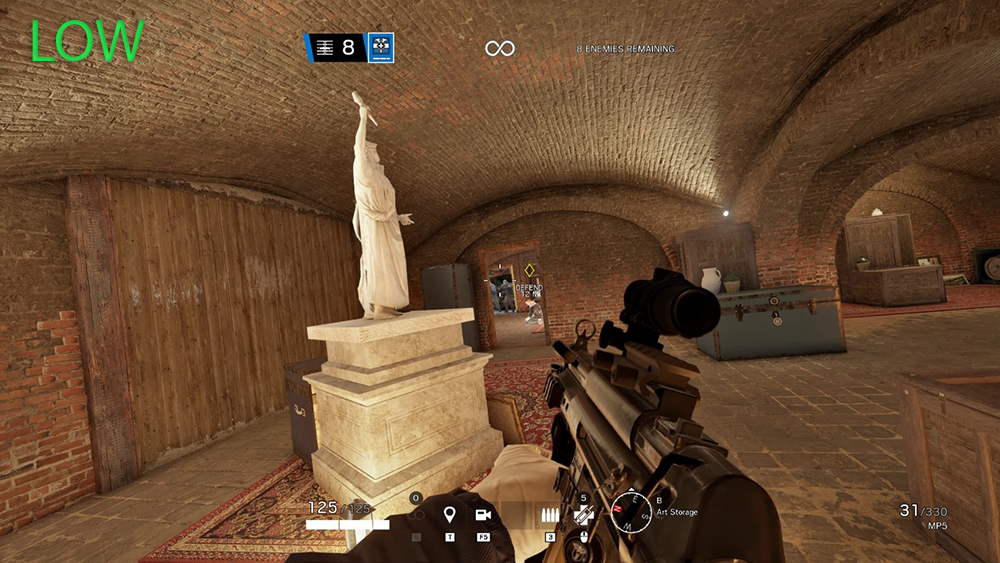
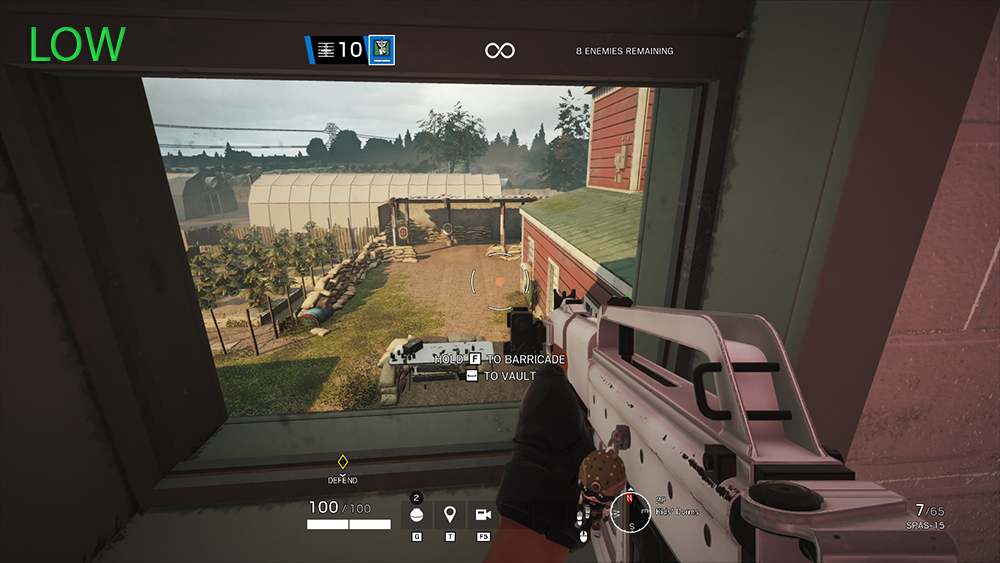
15. Texture Quality
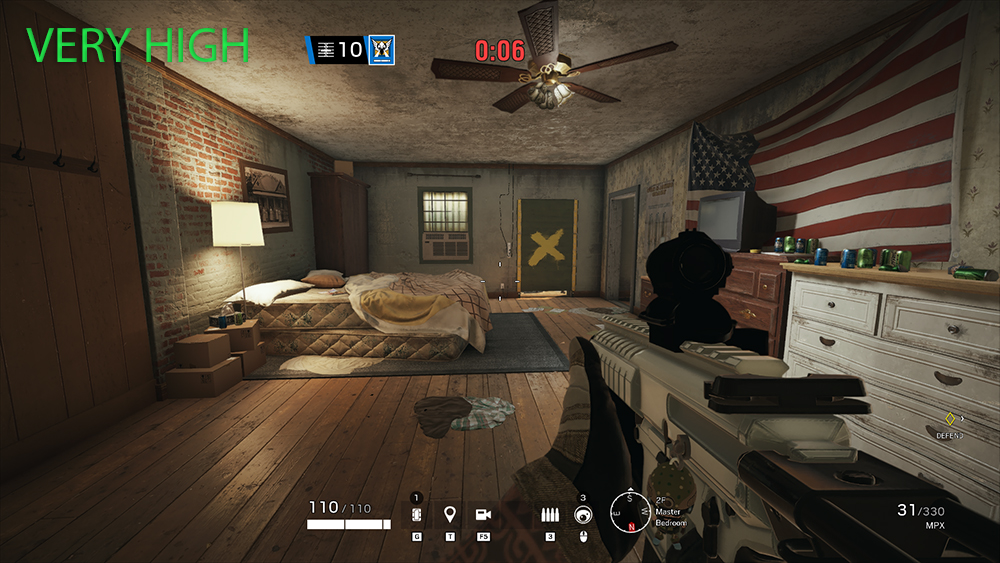
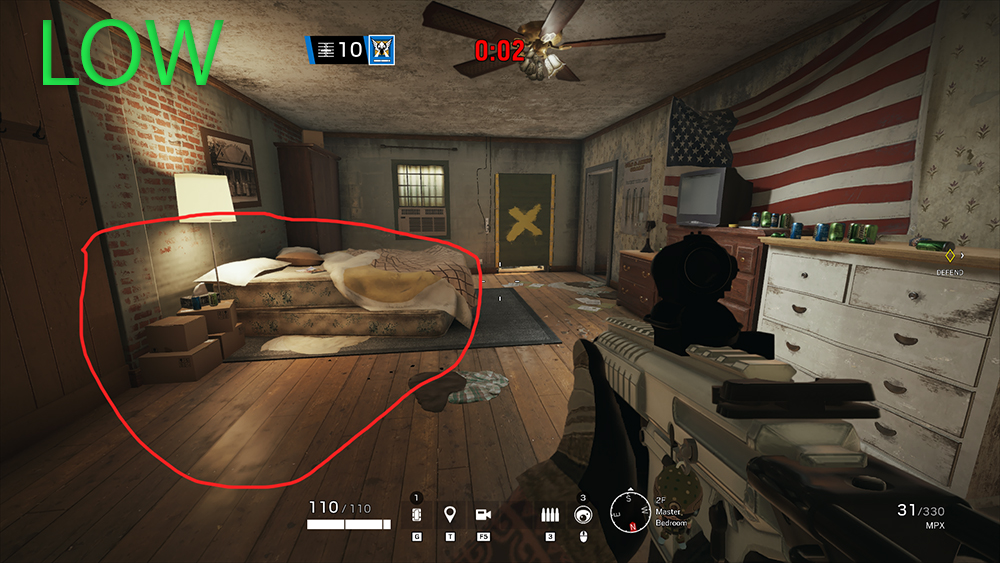
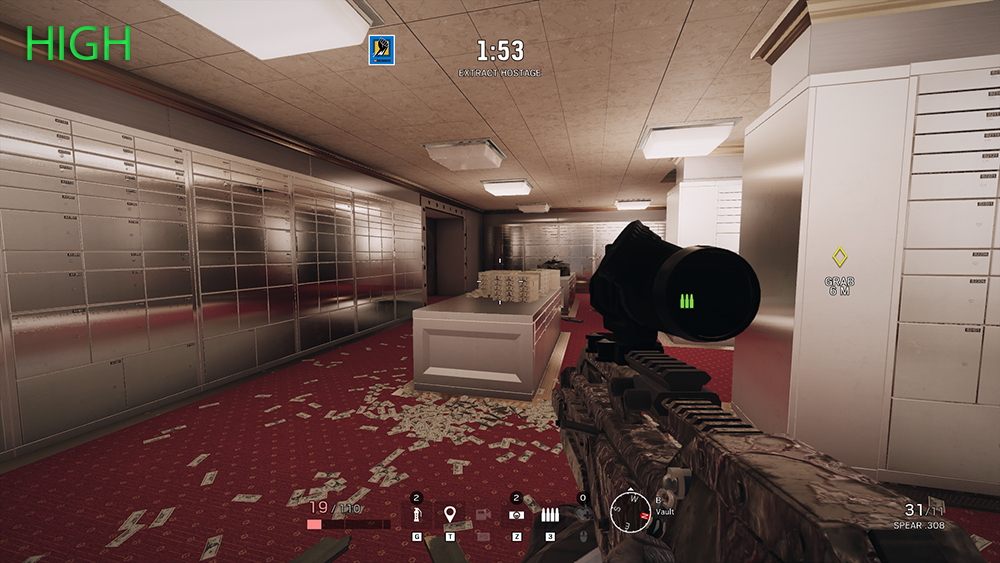
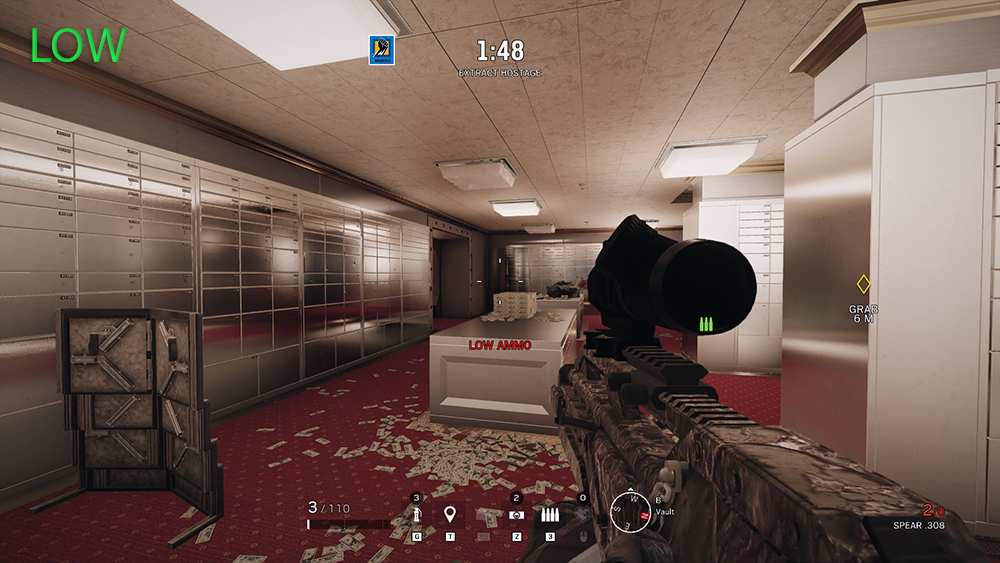
High texture quality is one of the biggest FPS sinks in Siege and it really only adds miniscule unimportant details on the map. Details that can actually just distract you from the enemy, and in some cases, even help them blend to the surroundings. As you can see in the examples above, very high settings even added darker areas where the enemy could have blended nicely and affected your reaction time. For this setting we recommend low.
Advantages:
- Clearer visual of enemies
- Minimizes details that can help enemies blend to the surroundings
- Lesser distractions
How to Apply:
- From the main menu, click the gear icon on the right corner of the screen
- Go to Graphics
- Click Texture Quality and set it to low
14. Texture Filtering
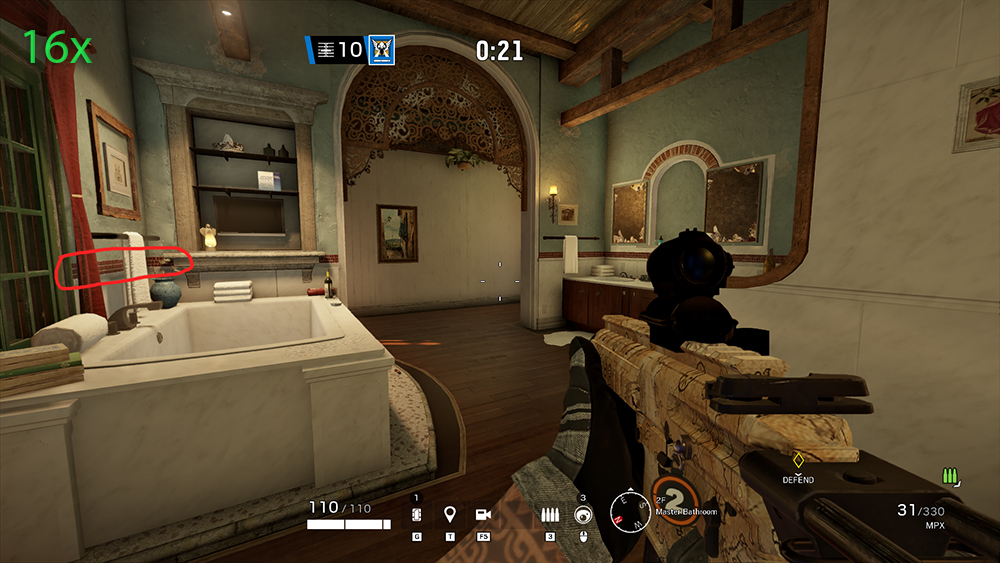
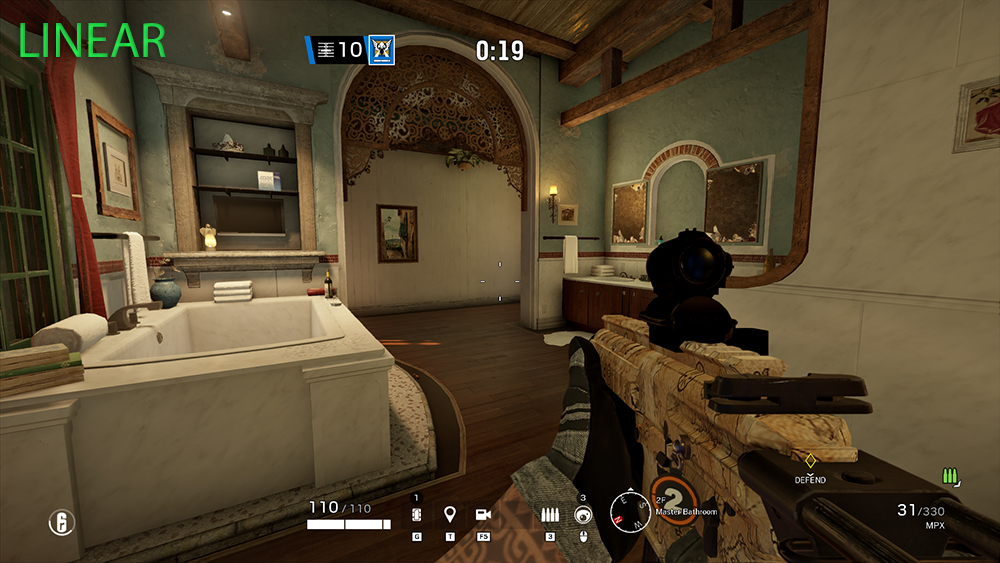
Same with texture quality, anisotropic filter in Siege only adds very tiny details that you won’t even notice unless you look for them hard. They’re unimportant and you will not notice them while the game is going on and your adrenaline is pumping looking for enemies. It’s best to choose linear settings on this one and benefit from the added frame rates.
Advantages:
- More frame rates
- Less distractions
- Less chance of enemies blending with other environment details
How to Apply:
- From the main menu, click the gear icon on the right corner of the screen
- Go to Graphics
- Click Texture Filtering and set it to Linear
13. LOD Quality
This is a highly debatable setting. Some claim that when you set it to low, enemies will look more triangular or uglier so it’ll be harder to recognize them the further you are, but that is not the case on the tests that I ran. I didn’t really see any difference with how the enemies look so for this setting, I recommend you to turn it to low or medium at least, and take advantage of the added frame rate, because in Siege, every frame rate, no matter how low, counts.
Advantages:
- More frame rates
How to Apply:
- From the main menu, click the gear icon on the right corner of the screen
- Go to Graphics
- Click LOD Quality and set it to low or medium
12. Shading Quality
This is one of those settings where I saw absolutely no difference between each option. I ran tests and even searched for outside sources but other sources also say they found no difference. So, you might as well just put it on low just to be sure that you’ll get some additional FPS.
Advantages:
- Additional FPS
How to Apply:
- From the main menu, click the gear icon on the right corner of the screen
- Go to Graphics
- Click Shading Quality and set it to low
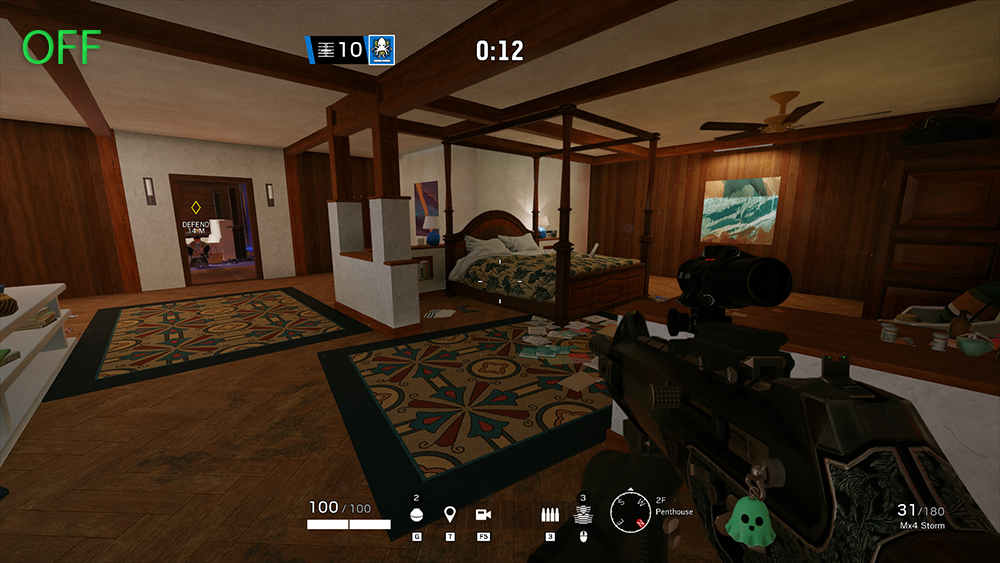
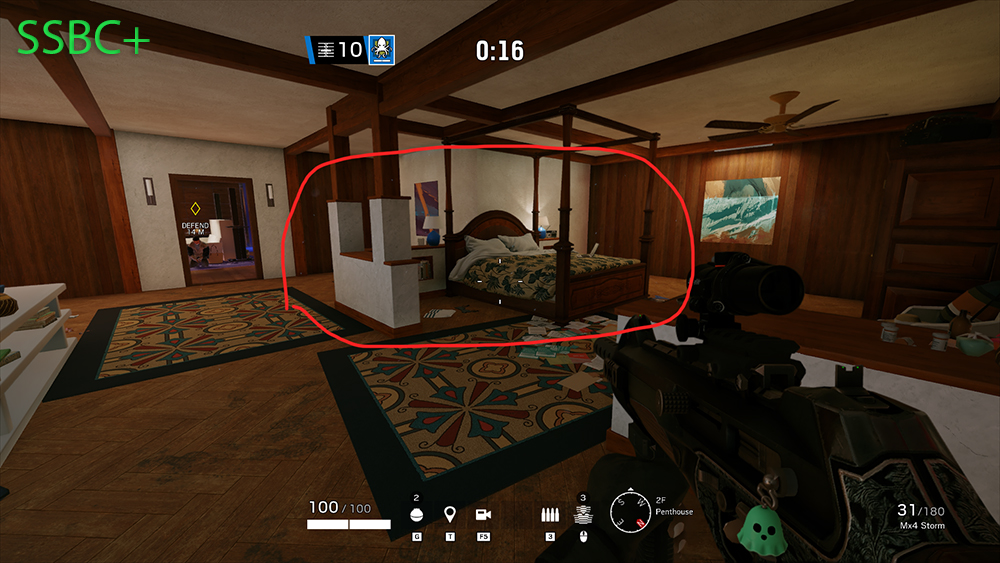
11. Shadow Quality
Higher shadow settings will always be a performance sink in any game, but since Siege isn’t a single-player game like Cyberpunk 2077 or The Witcher 3 where you have the time to admire the beauty of the surroundings and the shadow quality, it is recommended to just set this medium. Not on low, because the low option will only produce static shadows, and seeing the shadows of playable characters, like the ones inside the red circle in the above picture, can be very helpful sometimes when it comes to detecting enemies.
Advantages:
- More frame rates
- You’ll still be able to see enemies approaching by seeing their shadows
How to Apply:
- From the main menu, click the gear icon on the right corner of the screen
- Go to Graphics
- Click Shadow Quality and set it to low
10. Reflection Quality
This is another setting where after several tests and looking up outside sources, I found no difference between each option. So, my recommendation is to just set it low and benefit from any added performance. Even if it does add something different in some other areas, reflections won’t give you any advantage in a highly competitive shooter game like Siege.
Advantages:
- Added frame rates
- Less distraction
How to Apply:
- From the main menu, click the gear icon on the right corner of the screen
- Go to Graphics
- Click Shadow Quality and set it to low
9. VFX Quality
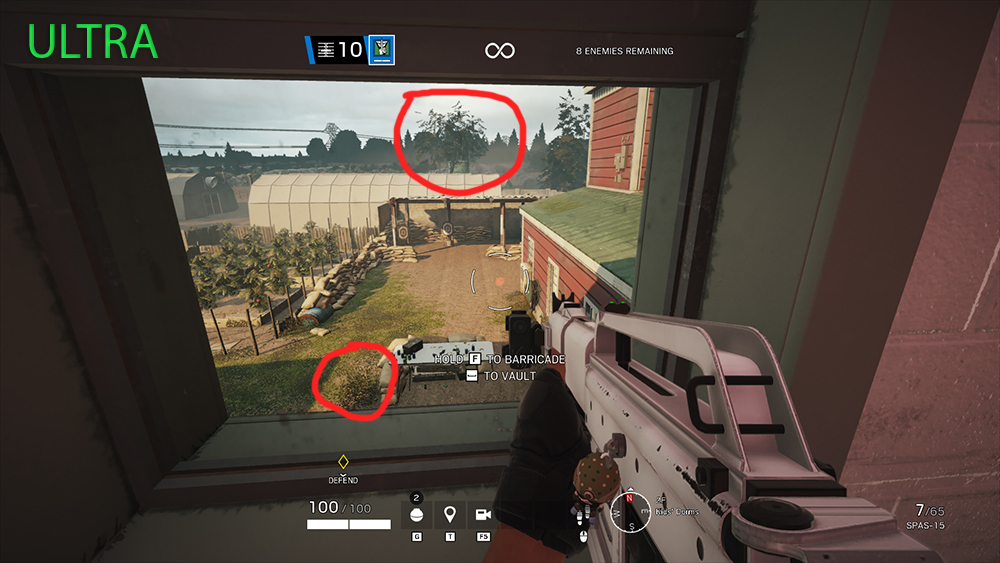
As you can see from the pictures, ultra-settings on the VFX Quality can make some trees or bushes appear denser, and this might aid your enemies when you’re trying to spawn kill them. In a competitive shooter like Siege, less particles and details in the surroundings, the better. I recall that when I was a newbie, there were so many times when I accidentally shot a moving particle in the air just because I thought it was an enemy. So, keep this setting to low.
Advantages:
- Additional frame rate
- Less distraction
How to Apply:
- From the main menu, click the gear icon on the right corner of the screen
- Go to Graphics
- Click VFX Quality and set it to low
8. Ambient Occlusion
Putting ambient occlusion to SSBC or SSBC+ will result in deeper and richer shadows, making the surroundings a bit darker, and this may just make it more difficult for you to spot your enemies, so for this setting, we recommend turning it off. It will increase your frame rate since ambient occlusion is quite heavy on performance, and it will make it easier for you to see your enemies.
Advantages:
- Brighter corners
- Easier to spot enemies
- More frame rates
How to Apply:
- From the main menu, click the gear icon on the right corner of the screen
- Go to Graphics
- Click Ambient Occlusion and turn it off
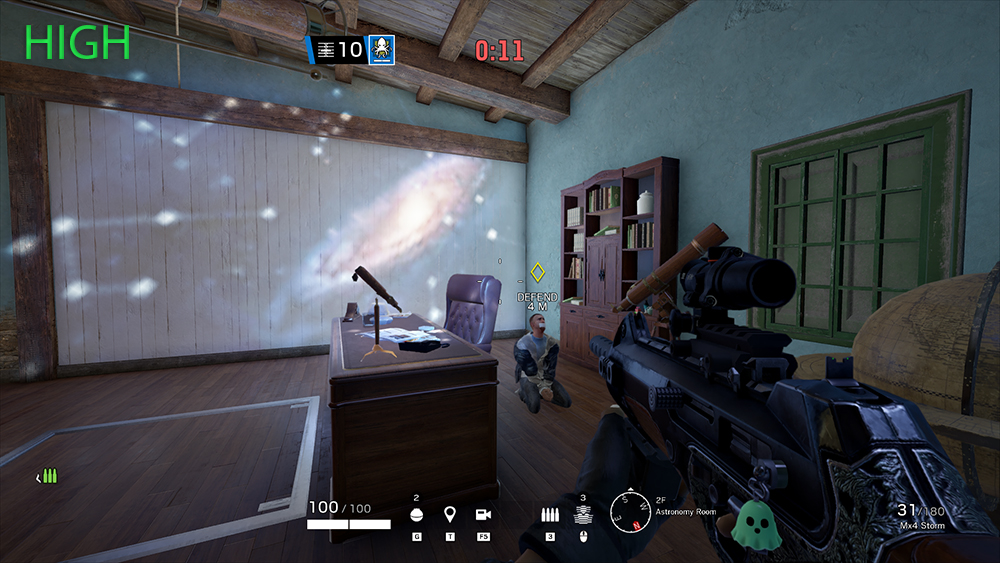
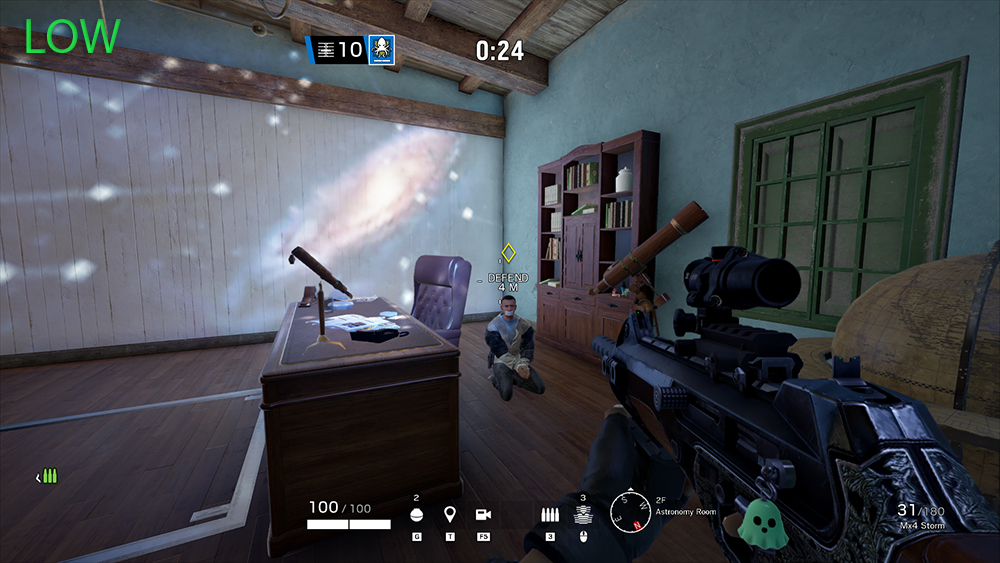
7. Lens Effects
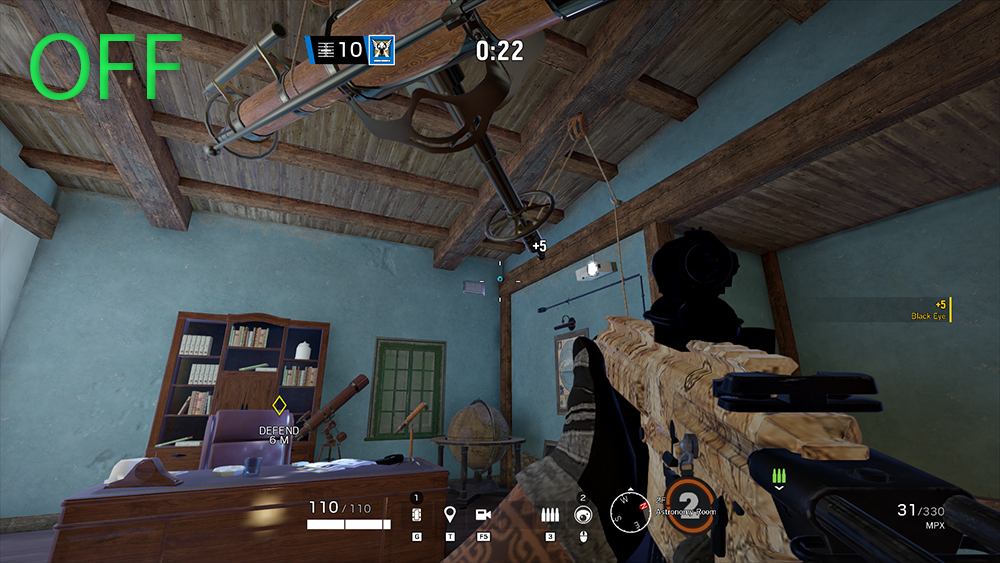

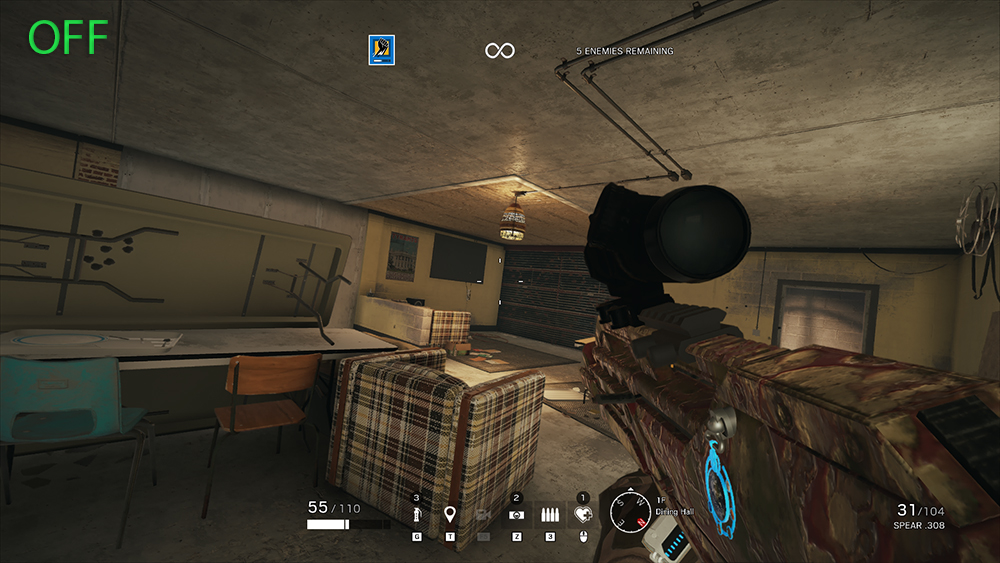
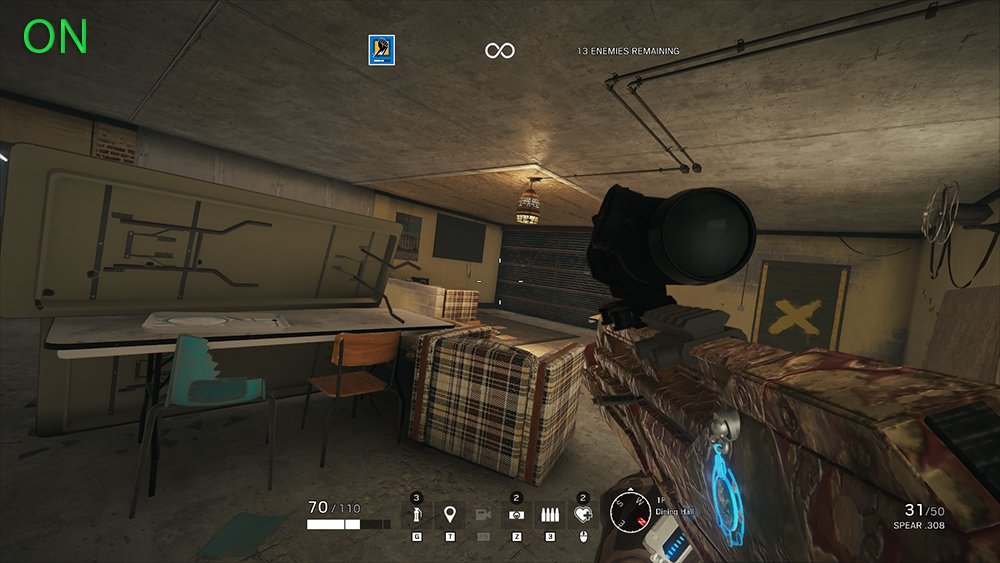
This setting just adds useless and distracting lighting to the environment which can even negatively affect your gameplay. Just look at these pictures. In both example #1 and #2, you’ll be able to see Valkyrie’s cam clearly whether Lens Effects are off or on, and turning it on only intensifies other lighting in the area such as the projector lights. Turning it on may just distract you or even hinder you from your enemies clearly. Besides, if you wanna show off your platinum charm, it’ll be hella distracting when Lens Effects are on. Turn this setting off.
Advantages:
- Less distraction
- Clearer view
- More frame rates
How to Apply:
- From the main menu, click the gear icon on the right corner of the screen
- Go to Graphics
- Click Lens Effects and turn it off
6. Zoom-in Depth of Field

You don’t need to spend system resources for some unneeded blur on your weapon details. Plus, it looks better when it’s off. So, for this setting, I recommend to just turn it off and enjoy a bit of added frame rate, and better visuals.
Advantages:
- Better visuals
- More frame rates
How to Apply:
- From the main menu, click the gear icon on the right corner of the screen
- Go to Graphics
- Click Zoom-in depth of Field and turn it off
5. Anti-Aliasing
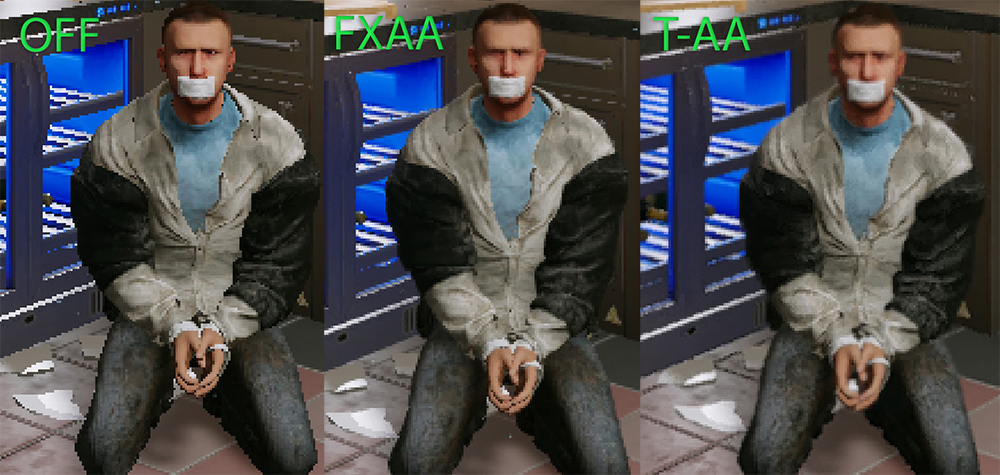
Another setting that is heavy on performance, but with this, I recommend not to turn it off, because turning it off will result in uglier enemy sprites which may be harder to see from long distance. FXAA looks a bit smoother than T-AA but FXAA takes up a lot of video memory, so for balancing performance and clearer visuals, I recommend choosing the T-AA option. Don’t even try T-AA-2x or T-AA-4x because they’ll eat up a lot of FPS.
Advantages:
- More frame rates
- Clearer visuals
How to Apply:
- From the main menu, click the gear icon on the right corner of the screen
- Go to Graphics
- Click Anti-Aliasing and set it to T-AA
4. Render Scaling
Increasing this setting in layman’s terms is basically supplementing your resolution and anti-aliasing. Higher settings will provide smoother images but keep it at 50 because higher ones take up a lot of video memory and frame rate which is not worth it since your priority in Siege should be performance and not how beautiful the graphics is.
Advantages:
- Balance between performance and visuals
How to Apply:
- From the main menu, click the gear icon on the right corner of the screen
- Go to Graphics
- Click Render Scaling and keep it at 50
3. T-AA Sharpness
Another setting which you should just keep to 50. Higher values will result in sharper images but uglier, and this may just be a disadvantage to you when it comes to spotting enemies. The same can be said with lower values since the image of enemies won’t be that clear.
Advantages:
- Better visuals
- Easier to see enemies
How to Apply:
- From the main menu, click the gear icon on the right corner of the screen
- Go to Graphics
- Click TAA Sharpness and keep it at 50
2. VSync
In-game description says that it eliminates tearing, but not really. Besides, most modern monitors have their own kind of VSync anyway so there’s no need to use VSync. Turn it off so that it won’t risk causing any input lag.
Advantages:
- More frame rates
- Less risk of random input lag
How to Apply:
- From the main menu, click the gear icon on the right corner of the screen
- Go to Display
- Click VSync and turn it off
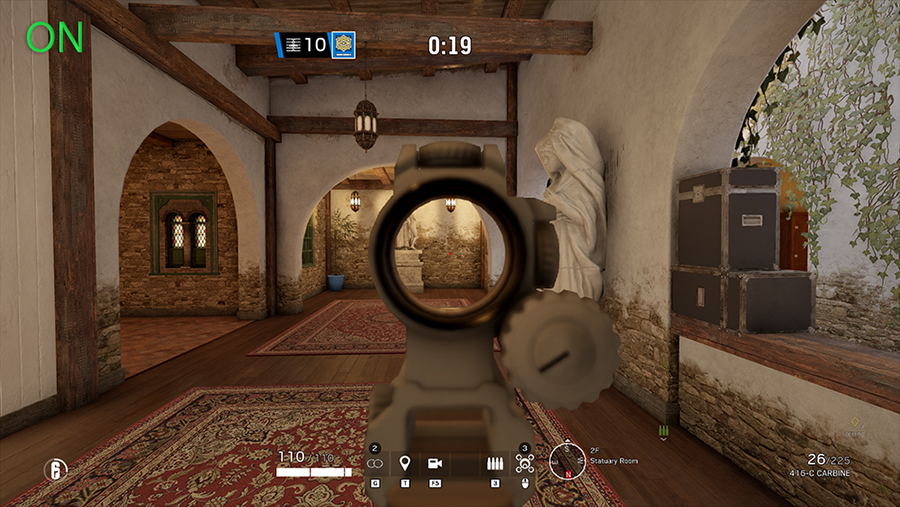
1. Field of View
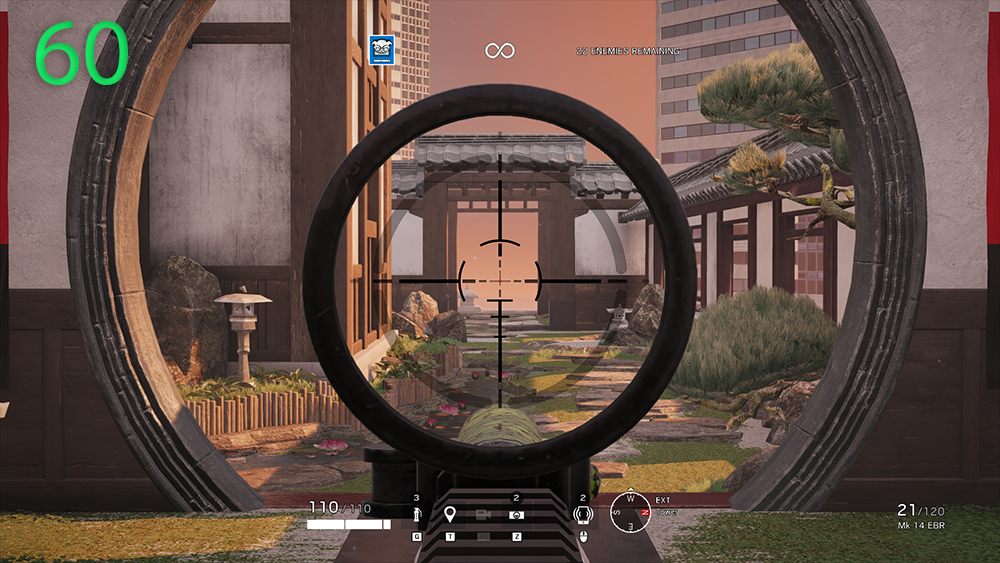

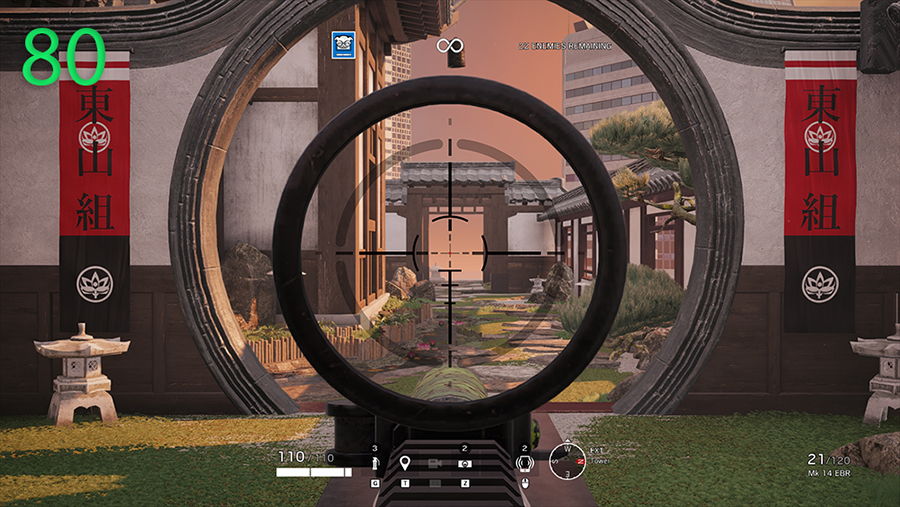
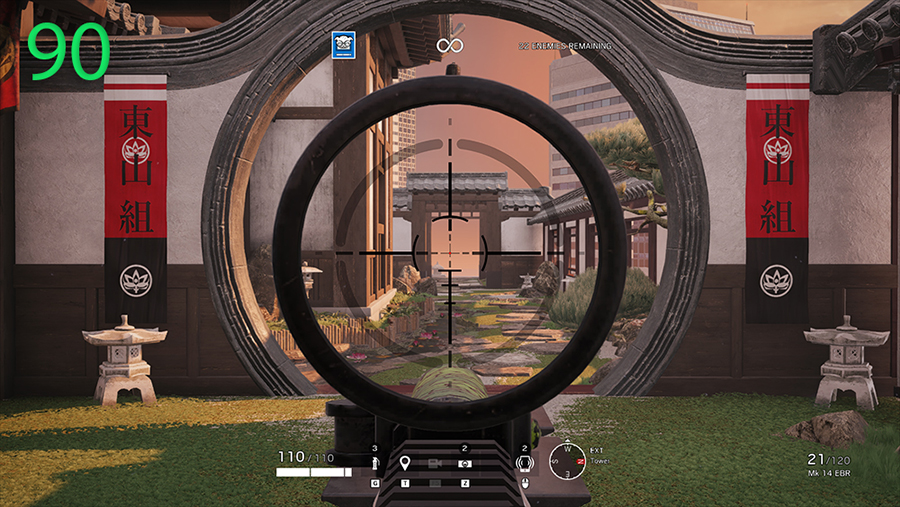
As you can see from the examples above, higher values of Field of View will result in a wider, well, field of view. While it may sound like the highest value is the obvious best choice because it widens your peripheral view, look at the pictures again and see that higher values will make the front view appear further. So, for FOV settings, I recommend 75. This provides a great balance between side view and front view benefits. It’s also not as taxing to system performance as the higher values.
Advantages:
- More frame rates
- Balance between side and front view benefits
How to Apply:
- From the main menu, click the gear icon on the right corner of the screen
- Go to Display
- Click Field of View and set it to 75
Attention operator, please be advised. There is a new directive from Six. Read up on these related articles, and prepare for deployment:
You May Also Be Interested In:
- Rainbow 6 Siege Tier List 2021 [Rainbow 6 Siege Best Operators]
- [Top 10] Rainbow 6 Siege Best Weapons
- [Top 7] Rainbow 6 Siege Best Attackers
- Rainbow 6 Siege Attachment Guide (R6 Best Attachments For Every Weapon)
- [Top 25] Best R6 Settings That Give You An Advantage
- [Top 15] Rainbow 6 Siege Best Graphic Settings
- Rainbow 6 Siege Best Weapon Attachments
- Rainbow 6 Siege Best Operators 2021
- [Top 7] Rainbow 6 Siege Best Defenders
- Rainbow 6 Siege Roles Explained And How To Play Each One
- [Top 10] Rainbow 6 Siege Best Players
- [Top 5] Rainbow 6 Siege Best Nomad Loadouts
- [Top 5] Rainbow 6 Siege Best Jackal Loadouts
- [Top 5] Rainbow 6 Siege Best Glaz Loadouts: From Worst to Best
- [Top 5] Rainbow 6 Siege Best Finka Loadouts
- [Top 5] Rainbow 6 Siege Best Lion Loadouts
- [Top 5] Rainbow 6 Siege Best Castle Loadouts
- [Top 5] Rainbow 6 Siege Best Dokkaebi Loadouts
Share this Article:

- Log in or register to post comments


