Home
Home PC Game Trailers
 News
News Menu
MenuThe 25 Best Escape from Tarkov Settings That Gets You More Kills!
Updated: 11 Oct 2022 3:23 pm

Scavengers will go from dangerous menace to insignificant threat if you follow this list.
 BY: Mats Paasche
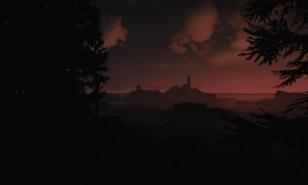
Escape From Tarkov Settings That Give You An Edge
Escape from Tarkov can be a daunting and frustrating experience if you’re new to the game or first person shooters in general. But it might not be all down to player skill and experience, many professional level players have several tricks they use to make their lives on the streets of Tarkov a little easier. If you’re getting frustrated with being shot seemingly out of nowhere, or finding it hard to hit your enemies, this list/guide is for you!
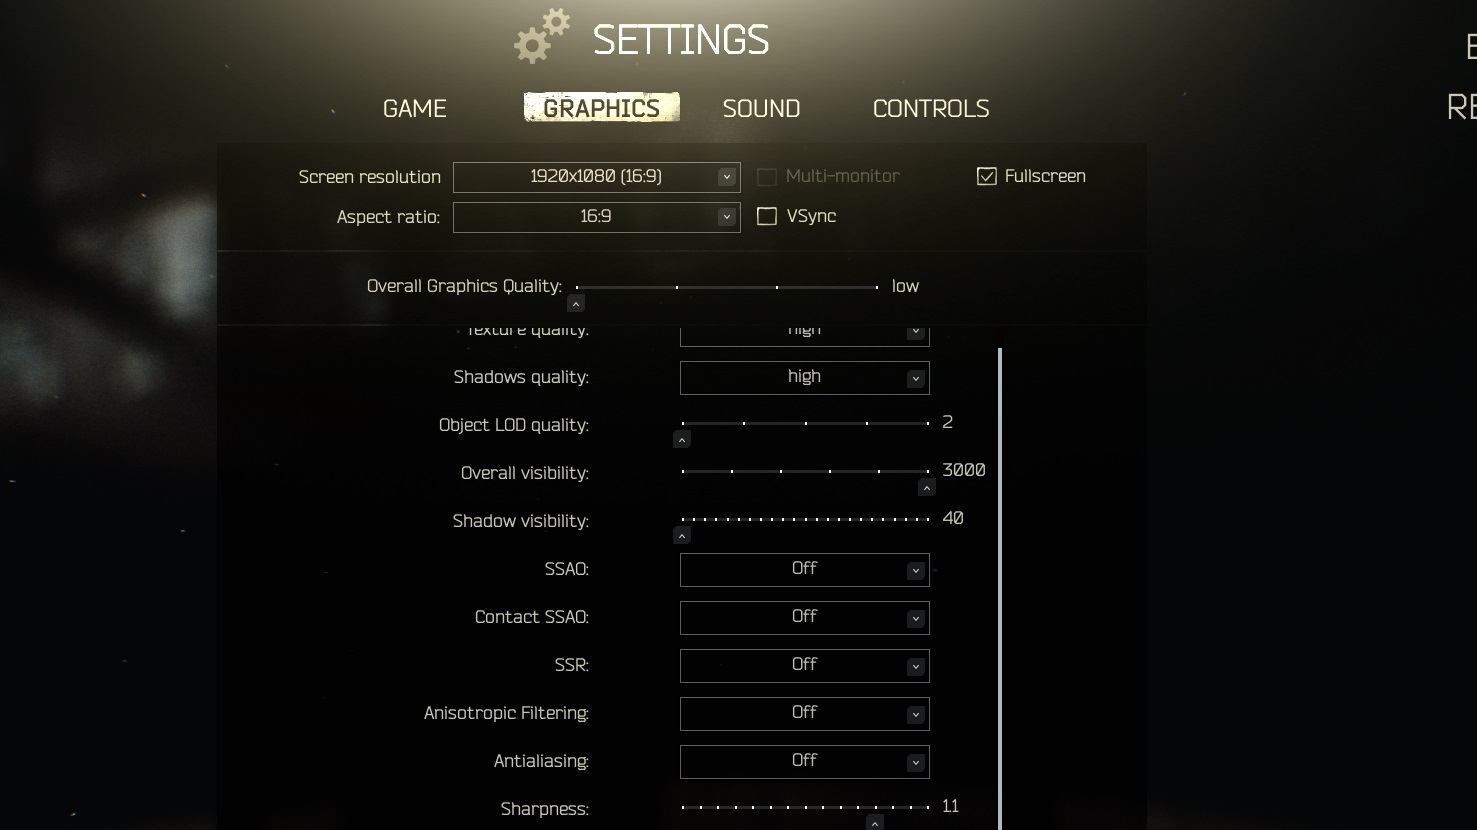
The settings window for graphical settings is easy enough to navigate, but there are no tooltips for what each setting does, that's what this list is for.
25. Set your resolution
Let’s get the no-brainer out of the way first. Set your resolution to the same as your maximum/native monitor resolution. You could go lower of course, you’d want to do this either if your rig (mostly your graphics card) isn’t strong enough to handle the game, or because you prefer the more zoomed in look. However, if it’s kills you want, go ahead and put this value to as high as your rig can handle.
Given that we’ll use pretty low settings otherwise; if you follow the rest of the points of this list, you should have no problem pushing your resolution up to 1920x1080 at the very least. In Escape from Tarkov it’s all about spotting your enemy before he pots you, and you won’t do that with zero peripheral vision. While you’re at it, also use the monitors’ native aspect ratio (typically 16:9), if you have an “ultrawide” screen this is even better.
24. Adjust your Field of View
If you’re very hard of seeing, leaving the field of view (FOV) setting to the default 50 can be tempting, as everything appears much bigger and zoomed in, so it’s easier to see enemies in the distance. But while it can provide a slight advantage in long range engagements, the disadvantage such a limited FOV gives in medium and close-range firefights is too great. Setting this to 75 means you’ll be able to spot enemies sooner as you’ll have a wider-cone of vision. You know what else comes in cones? Ice Cream; and who doesn’t love ice cream?
23. Set your texture quality to high
We’re going to be setting up our settings with the aim of creating as much contrast between the environment and enemy silhouettes as possible. With this goal in mind, set your texture quality to high.
What this will help achieve is an effect where the in the background of an enemy player has a smooth and nice texture, while the jagged outline of the player model stands out clear. It also looks nicer which doesn’t hurt. If you’re playing with very limited hardware you can set this to medium instead, but we wouldn’t recommend going any lower.
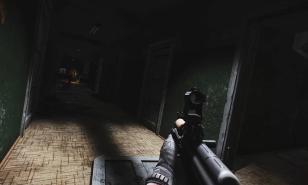
22. Adjust your shadow settings
Your shadow setting can make the difference between someone hiding in the darkness and shooting you in the back, to you popping their head off from across the field.
Some players have reported that setting their shadows to low makes them brighter and so it’s easier to see enemies hiding inside of them. However, we’re not sure if this was fixed in an update at some point, but in our testing the darkness of the shadows is unchanged by lowering it. What it does change however, is the quality and density of the shadow. On low and medium the shadows have harder lines and more pixel artifacts, which we want to avoid given our other settings. Set your shadows to high.
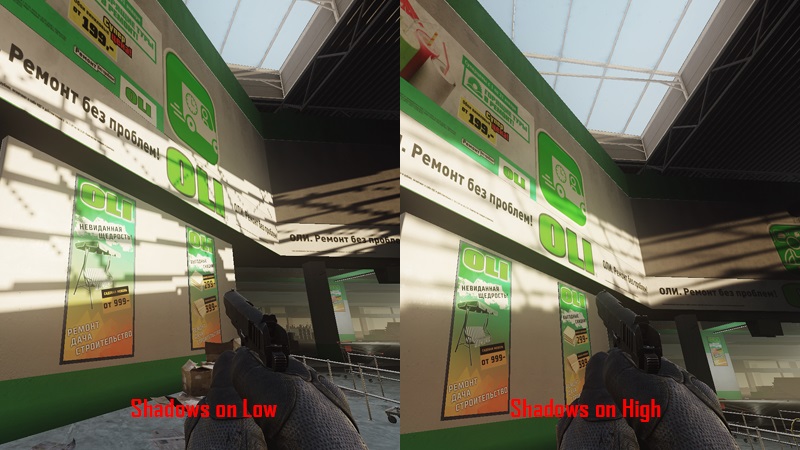
As you can see, the low quality shadows creates jagged and thicker lines, along with increased artifacting. Not so easy looking for movement in the shadows when everything is always moving.
21. Lower your Object LOD quality
This one is simple, decreasing your object LOD quality means that things like bushes and grass will become less dense the further away from them you are, meaning they’ll be easier to see through so you can spot players hiding in them. We can’t count how many times we’ve seen players hiding in the grass only because this slider was set to its lowest setting (2). You might notice once you aim down the iron sight or through a scope that grass or bushes suddenly appears, visually blocking the player, but in those cases just remember where you saw them and shoot there.
20. Lower your shadow visibility
Same as with the Object LOD quality, lowering the shadow visibility slider makes shadows disappear at longer ranges. If you set it to its lowest setting (40) the shadow will gradually disappear as you get about 40 meters away from where the shadow is cast. This, like the last setting is crucial for seeing people trying to hide at longer ranges and picking them off before they have a chance to ambush you. It’s such a powerful setting that lowering it can even feel a bit like cheating.
19. Turn off Antialiasing
It might be tempting to turn Antialiasing (or AA) on to make the game look better and get that “next gen” shine to it. But this can negatively affect your kill to death ratio.
Turning AA off means that enemy movement becomes more obvious when you’re sitting still and scanning the horizon, as the pixel artifacts that the player silhouettes make when moving are particularly eye-catching.
This in combination with the high shadow and texture quality should mean that even dark silhouettes should stand out against the background shadows since the shadows will be of a different quality than the player model.
18. Turn off Vsync
In general, Vsync should be avoided when playing any real-time game on PC, especially a competitive FPS. Vsync tries to match the frame-rate with your monitors refresh rate (measured in Hz). Most monitors have 60Hz, while some gaming-rate monitors will do 120Hz or 144Hz.
We’re going to be running Escape from Tarkov on mostly lower-end settings, so if you have one of these higher Hz monitors, chances are you have a rig that can handle the increased frame rate demand anyway. If it can’t, however, the Vsync setting will lower your framerate by almost half, to sync it with the monitor. So potentially instead of getting 50fps, you could be getting 30, which obviously isn’t something we’d want in chaotic firefights.
17. Screen space ambient occlusion (SSOA) should be off
So SSOA is one of those settings that won’t really impact your ability to kill too much, as the effect is very slight and usually won’t be the thing that makes the big impact. Essentially, it’s a way to darken shadows ever so slightly and change the way they appear in the world based on your perspective, it also darkens areas on the ground around grass and other foliage, making for a more natural and realistic look.
But of course, we’re here for kills, not to look at the beautiful scenery. Turning this off will also help with the performance and frame-rate if you have a lower-end graphics card. Same goes for Contact SSOA, turn it off, it’s the same thing, except based on dynamic light sources.
16. Turn Screen Space Reflections (SSR) off
This one is purely performance based. Turning SSR off should in theory reduce the amount of reflections seen in the environment and make everything appear less glossy. But Battlestate Games have, in their infinite wisdom, set most of their textures to either almost completely matt or super glossy in their engine, so the in-game effect of this setting is basically insignificant. Further decreasing its value is the fact that player reflections aren’t yet in the game (glossy objects only reflect the background environment, not players), so there is no tactical value to this setting; where you might see player reflections before the player himself. Turn it off for slightly increased performance.
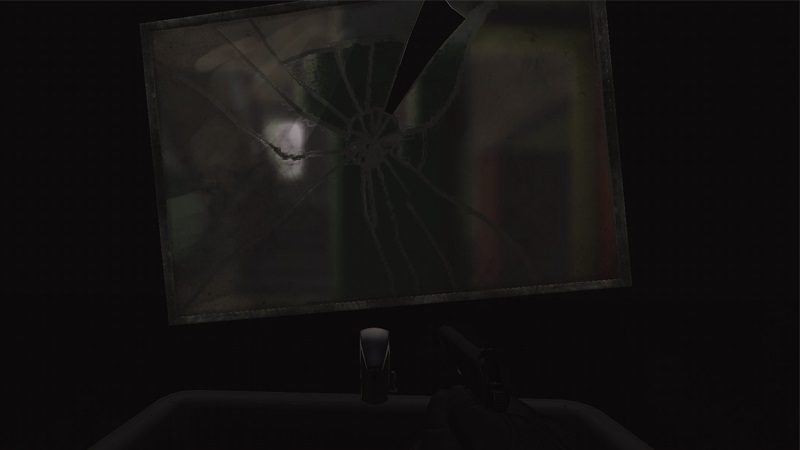
As you can see, despite having turned SSR on the mirror doesn't reflect your player, or more improtantly enemy players. There could be a guy behind me right now getting ready to hatchet my head of and I'd never know.
15. Check which Antistrophic Filtering you’d prefer
This one we’ll leave up to you, as it heavily depends on your rig. It doesn’t help or detract at all when it comes to seeing players in the environment, so it should be fine to leave on…provided you have the rig to run it without loosing FPS. If you’re playing on a budget gaming PC this can be a quick and easy way to re-coup some dearly needed frames. If you leave it on it will make textures look nicer at longer distances.
14. Sharpen your image
Lowering this slider can compensate a bit for your lack of Antialiasing if you really don’t like those jagged edges, however as we mentioned in point 19, those edges serve a purpose when it comes to spotting players at a distance, or in shadows. The default value is 0.7 which already softens the image quite a bit. We recommend increasing it to 1.1 to magnify the effect of not having any AA even more, but even if you lowered it to 0 flat it would still not completely compensate for the lack of AA. It doesn’t appear to effect performance much so play around with it a bit and find the balance you like.
13. Off with the Z-Blur
There’s really no reason to have this enabled, it would be easy to think this is just a vertical movement blur and in some ways it kind of is, but really it’s just a depth of field effect. However, if you followed our tip above and set your Field of View to 75, the effect of this will be limited, and the blurring caused (while minimal) isn’t going to help you spot enemy players. So, turn this one off and save some horsepower.
12. Chrom. Aberrations should definitely be off
This one is easy, turn it off. It adds a slight inline of light (or sheen) around objects that have light sources behind or surrounding them. This has the effect of making objects appear smaller than they sometimes are, or cause them to blend more in with the background light. It’s also a blurry effect, which should be avoided in the pursuit of image clarity. It looks good, but the less going on, on the screen at any given time, the easier it is for your brain to focus on the task at hand; killing people.
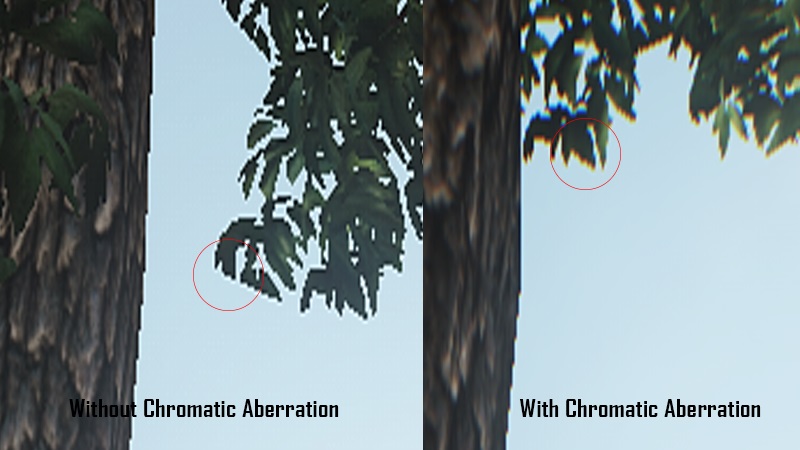
Take note of the slight RGP colouring on the edges if the leaves on the right side of the image, see how the left side is more pixelated, but also more crisp and clear? That's the look we're going for.
11. Noise isn’t nice
Turn it off, it’s a simple film grain effect that’s an overlaying filter. It’s debatable whether it adds anything to the graphical fidelity of the game, with some people swearing by it and others lamenting its existence. Regardless, one thing is undisputable, it will reduce the image clarity in your game and thus effecting your ability to see enemy players.
10. Check your key-bindings
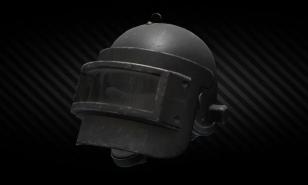
Obviously this one will be up to preference, but you should make sure your key-bindings are in comfortable positions that you’re used to from other games. One thing we recommend changing is the key for lowering and raising your helmet Visor, as it’s currently on N. If you have it available, definitely move this to one of your mouse side buttons. Running with the Visor down is generally not advisable as it can significantly reduce your visibility (depending on the equality of the visor), but you’ll want to bring it down as soon as a firefight is started or right before starting one; so having the keybinding easily accessible is crucial. It sucks to take an unlucky shot in the face from a random pistol Scav when a quick button press could’ve saved you. Also, take special note of the keys to smooth lean left and right (trust us, it’s a game changer), how to check your magazine, and how-to blind fire around corners and over cover.
9. Optimize your mouse sensitivity
Escape from Tarkov is a game where firefights can take place over ranges that vary from across several football fields, to inside a cramped hallway. Because of this it’s important to have a mouse sensitivity setting that enables you to aim accurately and quickly at all ranges.
Set your gaming-mouse DPI to as high as it can go (preferably at the very least 1000DPI). Then in the game’s controls option set your in-game sensitivity lower to compensate for the oversensitive speedy effect the high DPI gives. In our setup we’re using a mouse with a 6500DPI while we’ve got the sensitivity in-game set to 0.19 on both sliders (regular aiming and sighted aiming).
The idea behind maxing out your DPI and lowering your in-game sensitivity is to maintain the high degree of accuracy the gaming-mouse provides, while lowering the sensitivity in-game to a manageable level. This means that when you need to hit that moving headshot from 400 meters away, you’ll be able to pixel perfect track the target (with lower DPI the crosshairs would stutter across the screen). And at the same time if someone surprises you from around the corner, quick and broad movements will still let you move your crosshairs and turn around with lightning speed. It may take a bit getting used to, but once you do, you’ll be playing with the pros.
8. Maximize effects volume
There actually isn’t any in-game music when you’re in a raid in Escape from Tarkov, but none the less, go ahead and lower that music slider all the way down, you’ll find you’re tabbed out while in the menus a lot of the time, and the music doesn’t go away. Effects should obviously be at 100%, as listening for footsteps and other player actions is essential for survival.
Now we’re pretty much done with the in-game settings. However, there are several adjustments you can do to your setup outside of the game that will help you improve your K/D ratio.
7. Use a 7.1 surround sound headset
Continuing the theme of audio, this one is perhaps the most important of any of the recommendations we’ll give in this section of the list. Get a proper gaming centric surround sound headset! Like we’ve alluded to previously in point 8, hearing enemy footsteps and actions (such as looting, reloading, or using consumables) from around corners or inside of bushes is crucial to surviving and killing in Tarkov. Any headset you find when Googling “best gaming headsets” will usually do, but make sure they have good customer reviews and at least 5.1 surround (but preferably 7.1).
6. Use a 120Hz or 144Hz monitor
If you have the rig to make use of it, a 120Hz or 144Hz monitor could be a good investment (perhaps not to make sure your kids go to college, but who needs a happy family when you can have kills in Tarkov, right?). With the increased refresh rate hitting 120fps takes on a whole new meaning, the image becomes a lot smoother with less stuttering, and this can significantly improve your performance in chaotic gunfights.
5. Use a gaming mouse with high DPI
As we mentioned in point 9, using a mouse with a relatively high DPI can do wonders for your aim and ability to react and turn quickly in ambush situations. Luckily these days gamers are spoiled for choice when it comes to gaming mice, and there are a whole host of brands and niche designs to chose from. It’s not just about DPI though, you’ll also want something that suits your hand well (big or small, left or right). Another thing to pay attention to is the USB response rate (measured in Hz), this is basically how often the mouse reports back its position to the computer, meaning that if the value is low and you move the mouse too fast; the crosshairs will stutter across the screen.
4. Use a mechanical keyboard with Cherry MX switches (or better)
While we’re talking about accessories, gaming keyboards are often overlooked by FPS gamers as necessary investments for increasing their skill level, but this is a shame. Gaming keyboards have specialized switches that give you tactile feedback when the button is pressed, sort of like a slight bump with a clear “click” sound. These switches are only found in mechanical keyboards, and these days mostly in gaming centric keyboards (with all the RGB lighting that implies). Some manufacturers have recently started using optomechanical switches, which are even better than Cherry MX, but these usually come with a considerable price tag. Any mechanical gaming keyboard with Cherry MX switches will be fine for Tarkov and the responsiveness and tactile feedback will undoubtedly improve your performance.
3. Overclock your Graphics Card
If you have the cooling to handle it, overclocking your GPU can be a good way to increase your performance and FPS. If you’re already running at 120+ fps and have a 120Hz+ monitor, go ahead and leave your GPU alone, no reason to overclock. But if for example you have the monitor but are finding it hard to consistently hit 120fps, then overclocking can be just the thing you need. Take care to follow manufacturer instructions and use adequate cooling to compensate for the thermal load created by the overclocking, so that you don’t damage your card.
2. Overclock your CPU
Much like the GPU, overclocking your CPU can be a good way to get better performance out of the game. You wouldn’t think that Tarkov would be very CPU intensive, but as is the case with many beta state game releases, it isn’t always optimized fully. Same advice as in point number 8, make sure you follow the instructions of the manufacturer (Intel or AMD) and overlock safely. If you’ve got a standard closed loop water-cooling kit for your CPU, this usually means it’s safe to overclock to a certain extent.
1. Check which server you’re playing on
So last one is the easiest, and you can most likely ignore it, but it can be beneficial depending on where you’re based. In the Battlestate Games Launcher you can click the “change server” button, marked with a cogwheel icon to check which server you’re on. This shows what the average matchmaking time is on the server, which region it’s in, and what the ping is. Typically, this will be set to automatic and whichever server it selects will be the optimal one for you, but if you’re experiencing long matching times or high ping, it might be worth trying one of the other options on the list. For example, if you’re in the US and playing on the WashingtonDC server, but have long matchmaking wait times, switching to the NewYorkCity server won’t impact your ping greatly, and you’ll have a larger pool of players to match with.
We hope you’ve enjoyed this list of tips and tricks to optimize your settings in Escape from Tarkov, if you have any feedback or suggestions please leave them in the comments below.
You May Also Be Interested In:
Share this Article:

Image Gallery

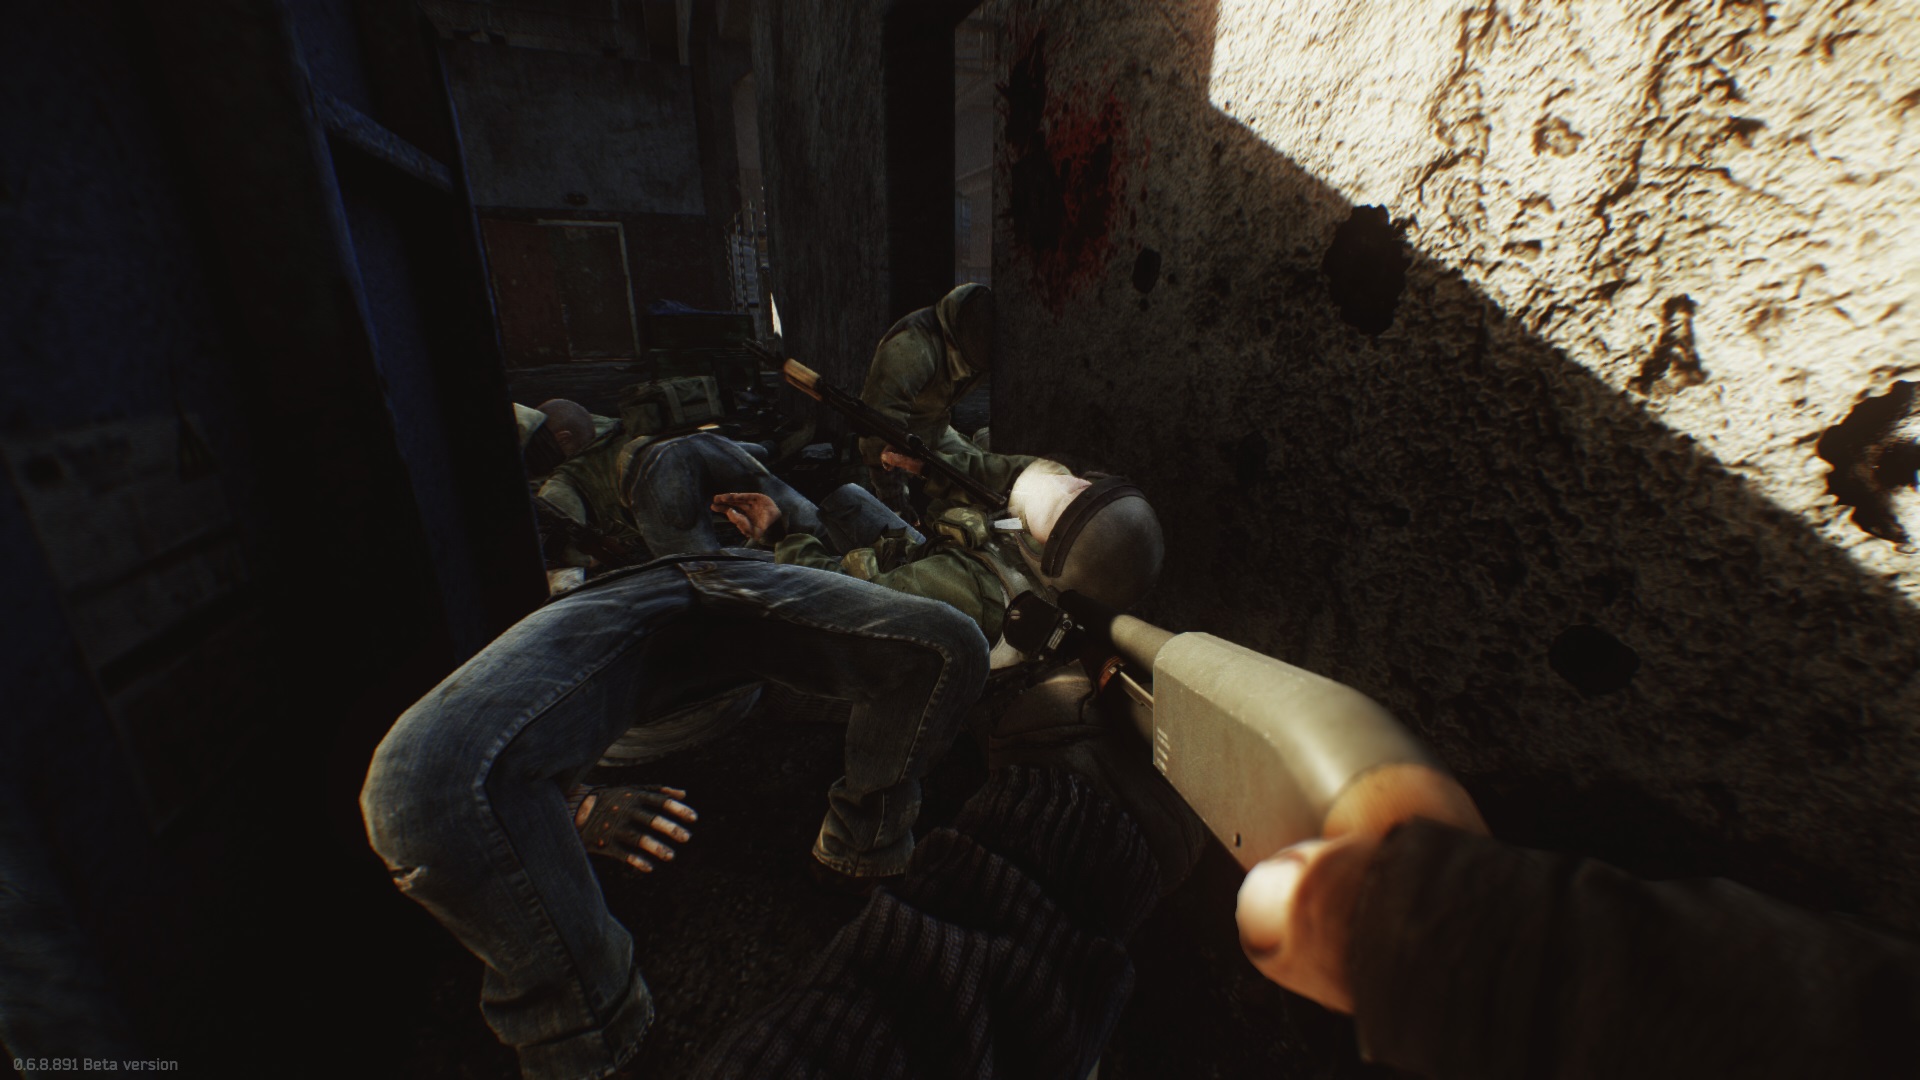

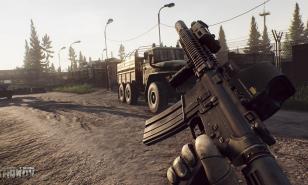
Customs Scav Spawn
Spawning as a Scav can mean you wont have a dust cover for your rifle, happy jamming!
- Log in or register to post comments